NVR/Adding IP Cameras to NVR: Difference between revisions
Techsupport (talk | contribs) |
Techsupport (talk | contribs) |
||
| Line 10: | Line 10: | ||
===Video Instructions=== | ===Video Instructions=== | ||
<youtube>https://www.youtube.com/watch?v= | <youtube>https://www.youtube.com/watch?v=27vfQa4GU4A</youtube> | ||
===Step by Step Instructions=== | ===Step by Step Instructions=== | ||
Latest revision as of 12:09, 17 December 2024
Adding IP Cameras to NVR
Description
This tutorial will go over how to add cameras to the NVR.
Prerequisites
- NVR and cameras
Video Instructions
Step by Step Instructions
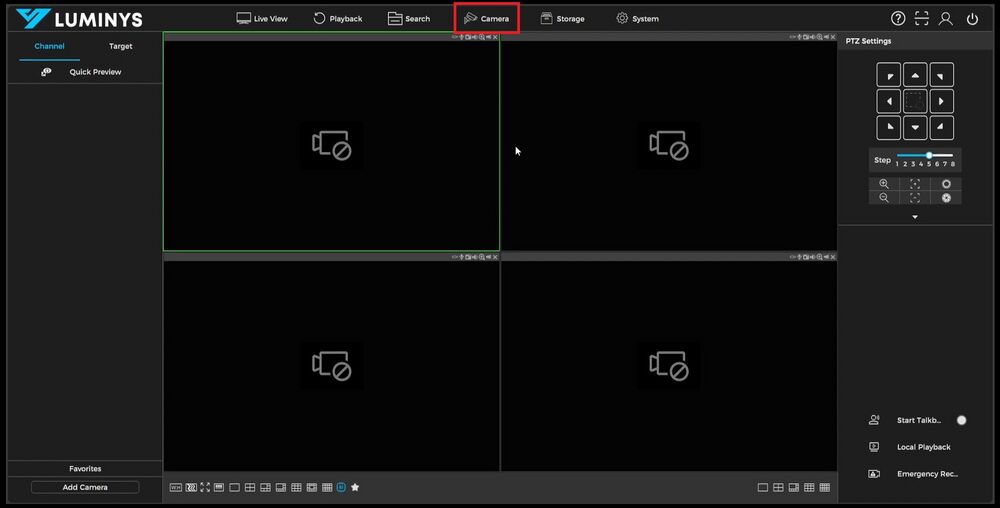
1. To begin, log into the Luminys NVR recorder. Once logged in, navigate to the **Camera** section located at the top of the interface.
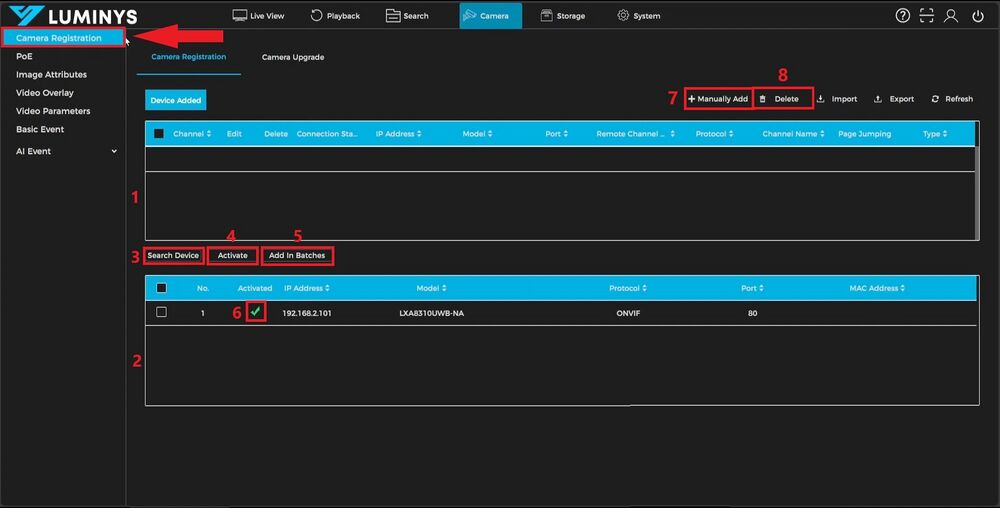
2. After navigating to the camera page, ensure the camera registration page is selected. Below is a chart explaining the various sections and options available.
| 1 | Added Camera section | This section will show the cameras that have already been added to the NVR. |
| 2 | Available Camera section | This section will show cameras that are on the network that can be added. |
| 3 | Search Device | This button will cause the NVR to scan the network for compatible cameras. |
| 4 | Activate | This button allows activation of Luminys cameras that are currently inactive. |
| 5 | Add in Batches | This button enables the selection of multiple cameras for bulk addition at once. |
| 6 | Activated section | A green check indicates the camera is already activated, while a red X means the camera has not been activated yet. |
| 7 | Manually Add | This button allows manual entry of the camera's information to add it to the recorder. |
| 8 | Delete | This button allows the deletion of cameras from the NVR in the top list. |
3. Multiple methods are available for adding cameras:
- To add a single camera, double-click the camera in the bottom list. This action uses the NVR's password to add the camera.
- For adding multiple cameras, check the boxes next to the desired cameras and click the (5) Add in Batches button.
- Alternatively, use the (7) Manually Add option to enter the camera details manually.
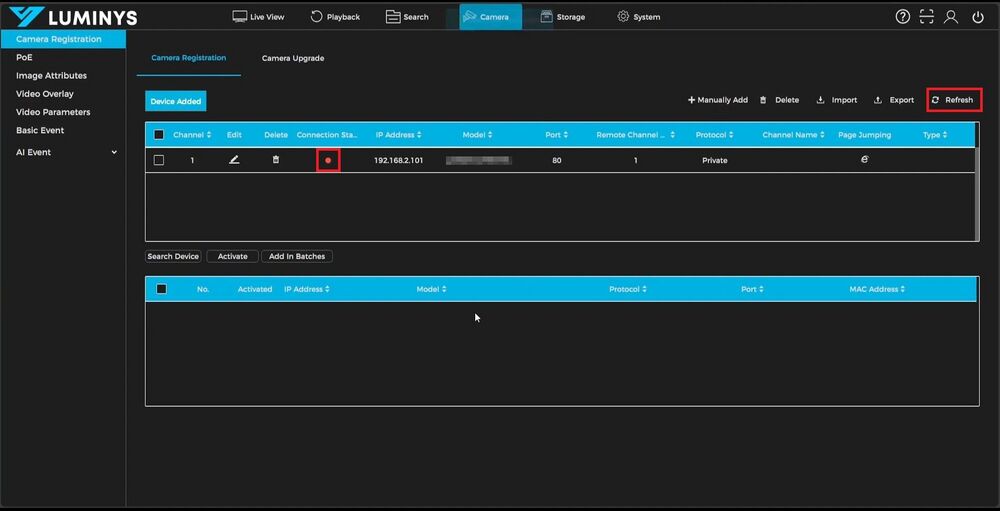
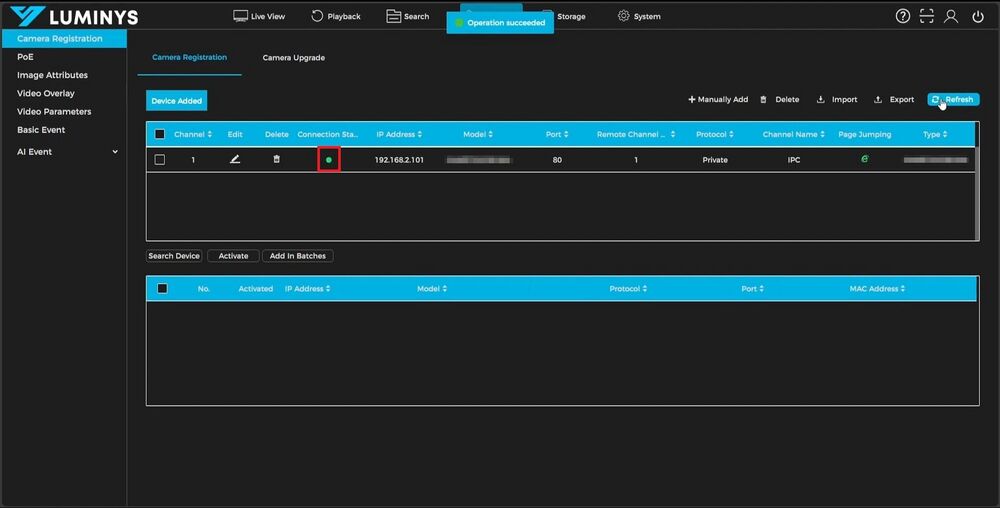
When a camera is first added, a red dot may appear, indicating it is not yet connected. Use the **Refresh** button in the top right to update the status and verify if the camera has connected successfully.
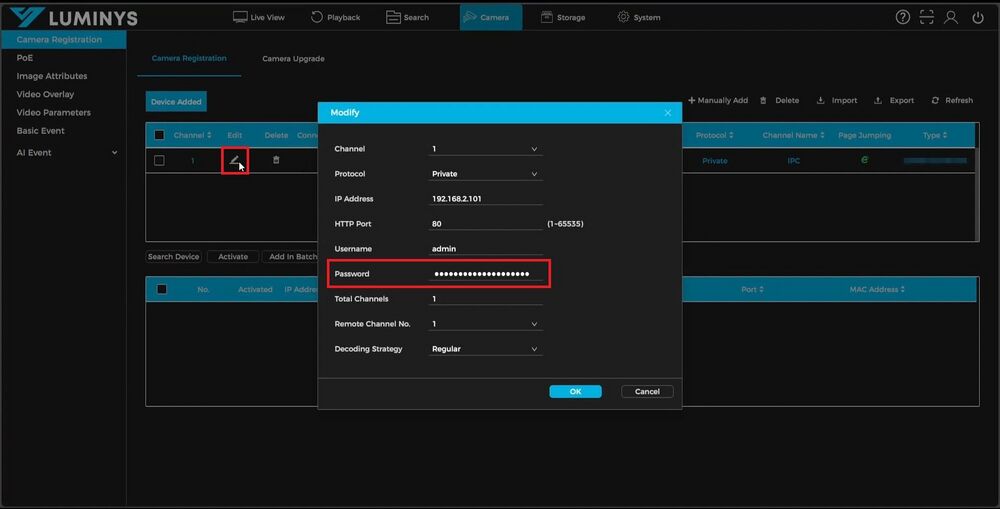
4. If a camera remains offline and displays a red dot, several factors might be causing this issue. The most common reason is an incorrect password, which often occurs when the camera's password differs from the NVR's password. To resolve this:
- Select the pencil icon next to the camera in question.
- Retype the correct password in the password field.
This should allow the camera to connect properly.
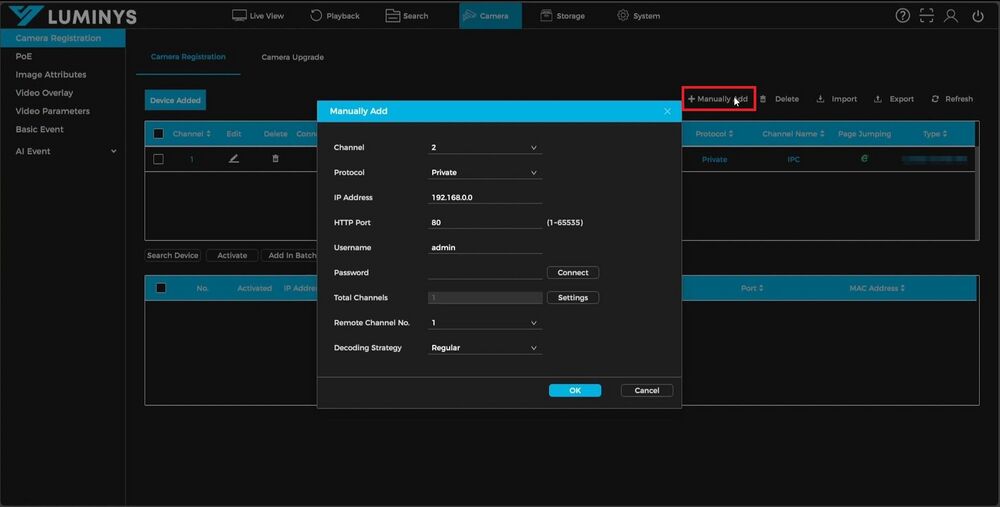
5. To manually add a camera to the NVR:
- Select the "Manually Add" button to open the configuration window.
- Fill out the following fields:
- Channel: Choose the channel number to assign the camera.
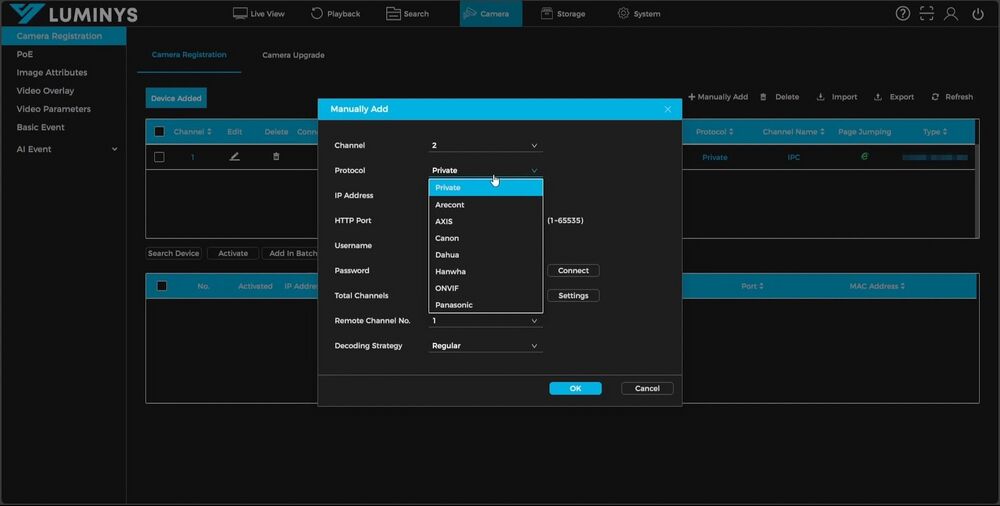
- Protocol: Select the communication protocol:
- Private: For Luminys-to-Luminys cameras.
- ONVIF: For ONVIF-compatible cameras.
- Third-party protocol: Select if the specific protocol for the camera is listed.
- IP Address: Enter the IP address of the camera.
- HTTP Port: Specify the HTTP port number.
- Username and Password: Input the login credentials for the camera.
- If connecting a multi-lens camera:
- Click "Connect" beside the password field.
- Use the "Settings" button next to Total Channels to choose the lenses to add.
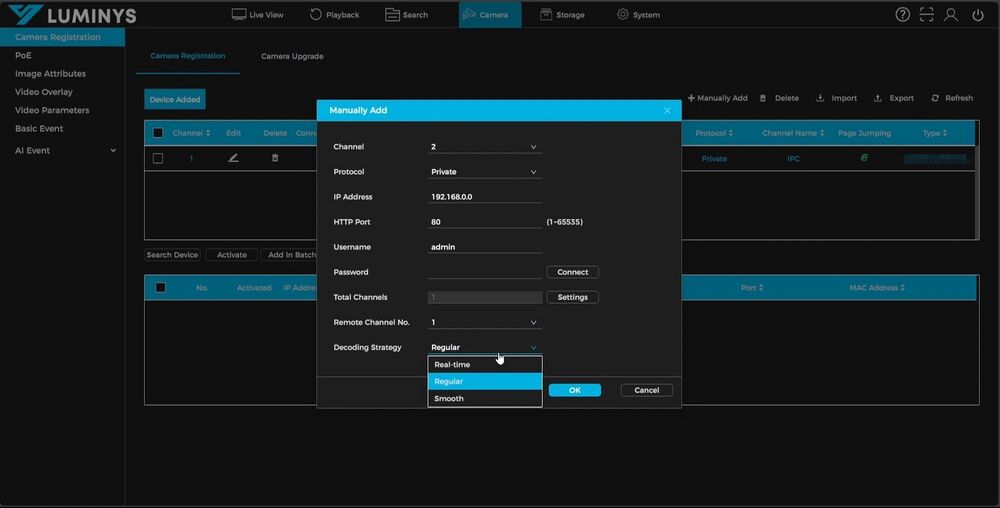
- Decoding Strategy: Select the appropriate strategy for processing the camera feed.
Complete the information and confirm to add the camera.

