Cameras/Tour Setup: Difference between revisions
Techsupport (talk | contribs) No edit summary |
Techsupport (talk | contribs) No edit summary |
||
| Line 22: | Line 22: | ||
[[File:Tour1.png|1000px|link=https://wiki.luminyscorp.com/images/3/37/Tour1.png]] | [[File:Tour1.png|1000px|link=https://wiki.luminyscorp.com/images/3/37/Tour1.png]] | ||
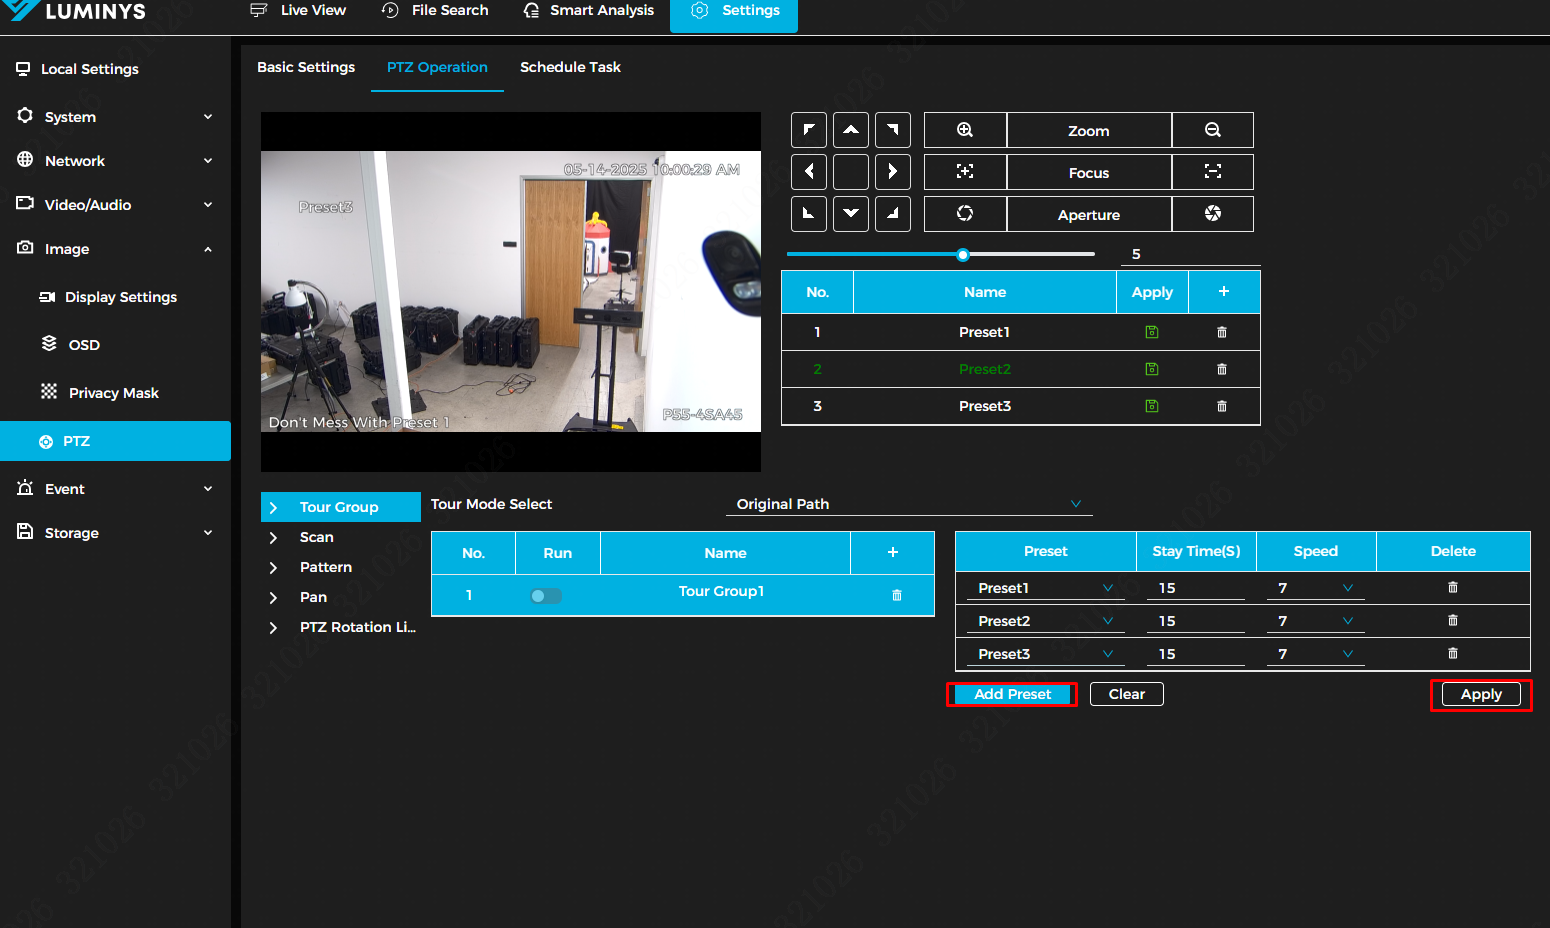
2. | 2. After clicking the + icon in the Tour Group configuration, you will be able to add presets to the tour group. You can adjust the duration and speed for each preset in the tour. Once all presets have been added, click Apply to complete the setup. | ||
[[File: | [[File:Tour2.png|1000px|link=https://wiki.luminyscorp.com/images/9/92/Tour2.png]] | ||
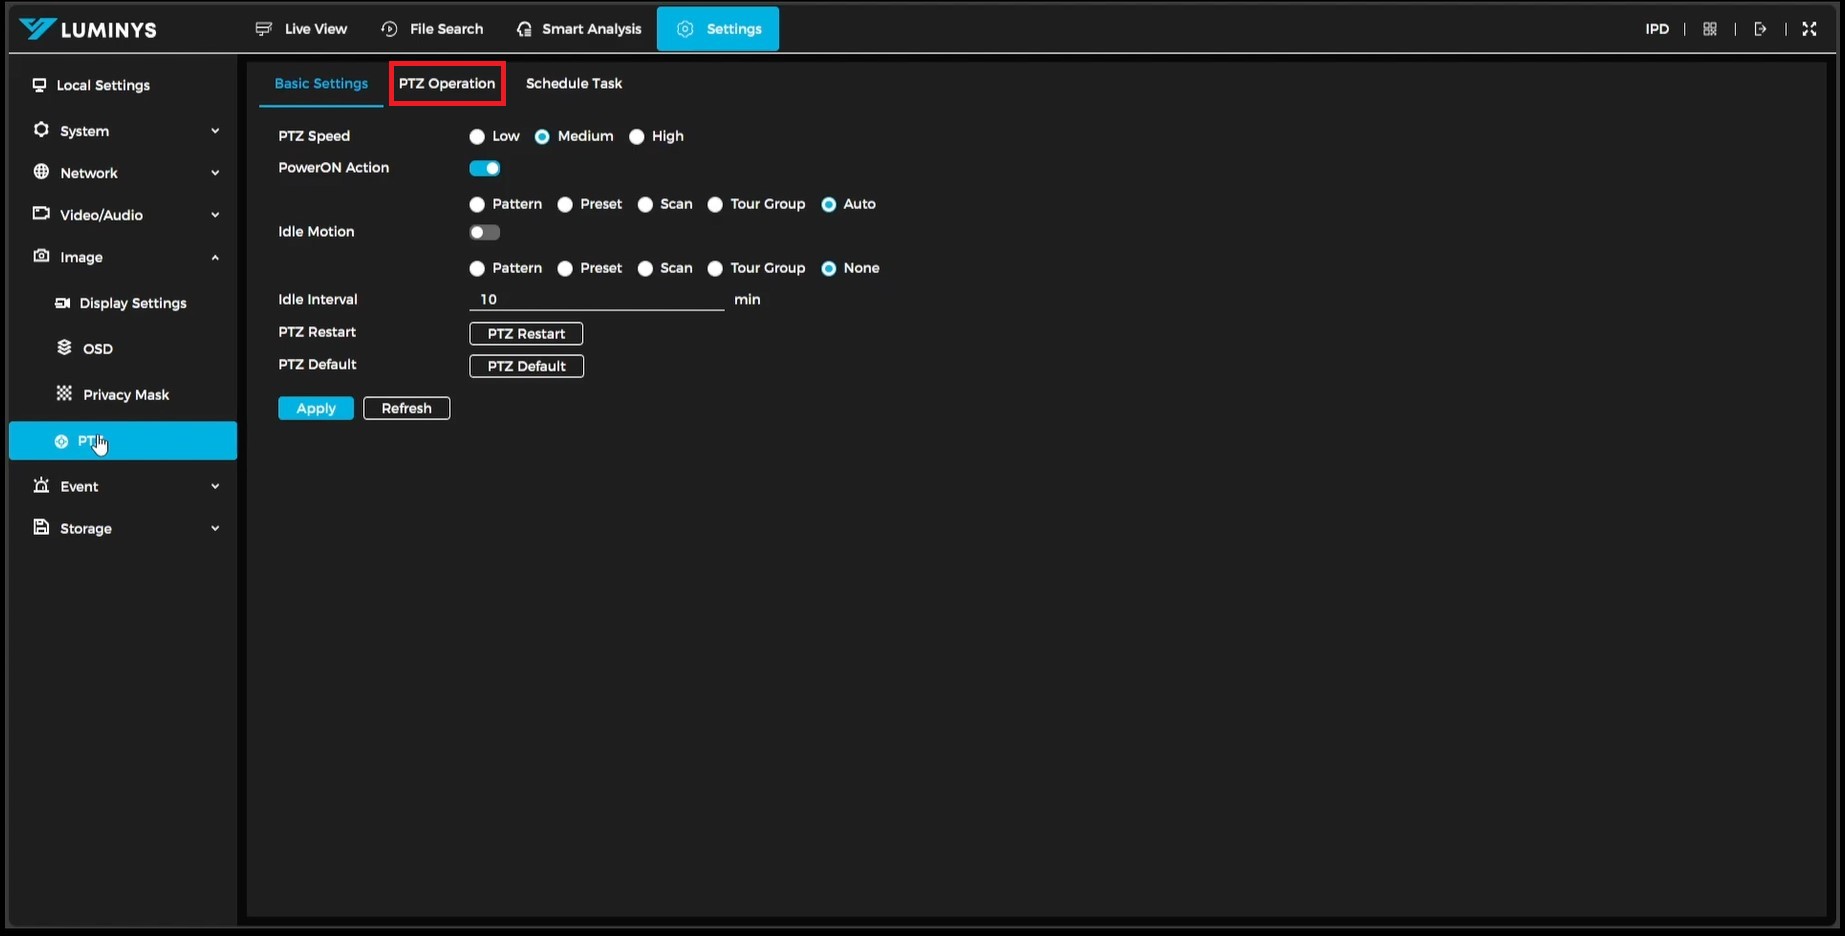
3. When the PTZ menu appears, select "PTZ Operation" on the right-hand side. | 3. When the PTZ menu appears, select "PTZ Operation" on the right-hand side. | ||
Revision as of 09:14, 14 May 2025

Setting Up PTZ Tour
Description
This tutorial will go over how to set Tours for PTZ cameras.
Prerequisites
- PTZ cameras powered on and connected to local network.
- PTZ cameras already have presets configured..
Video Instructions
Coming Soon
Step by Step Instructions
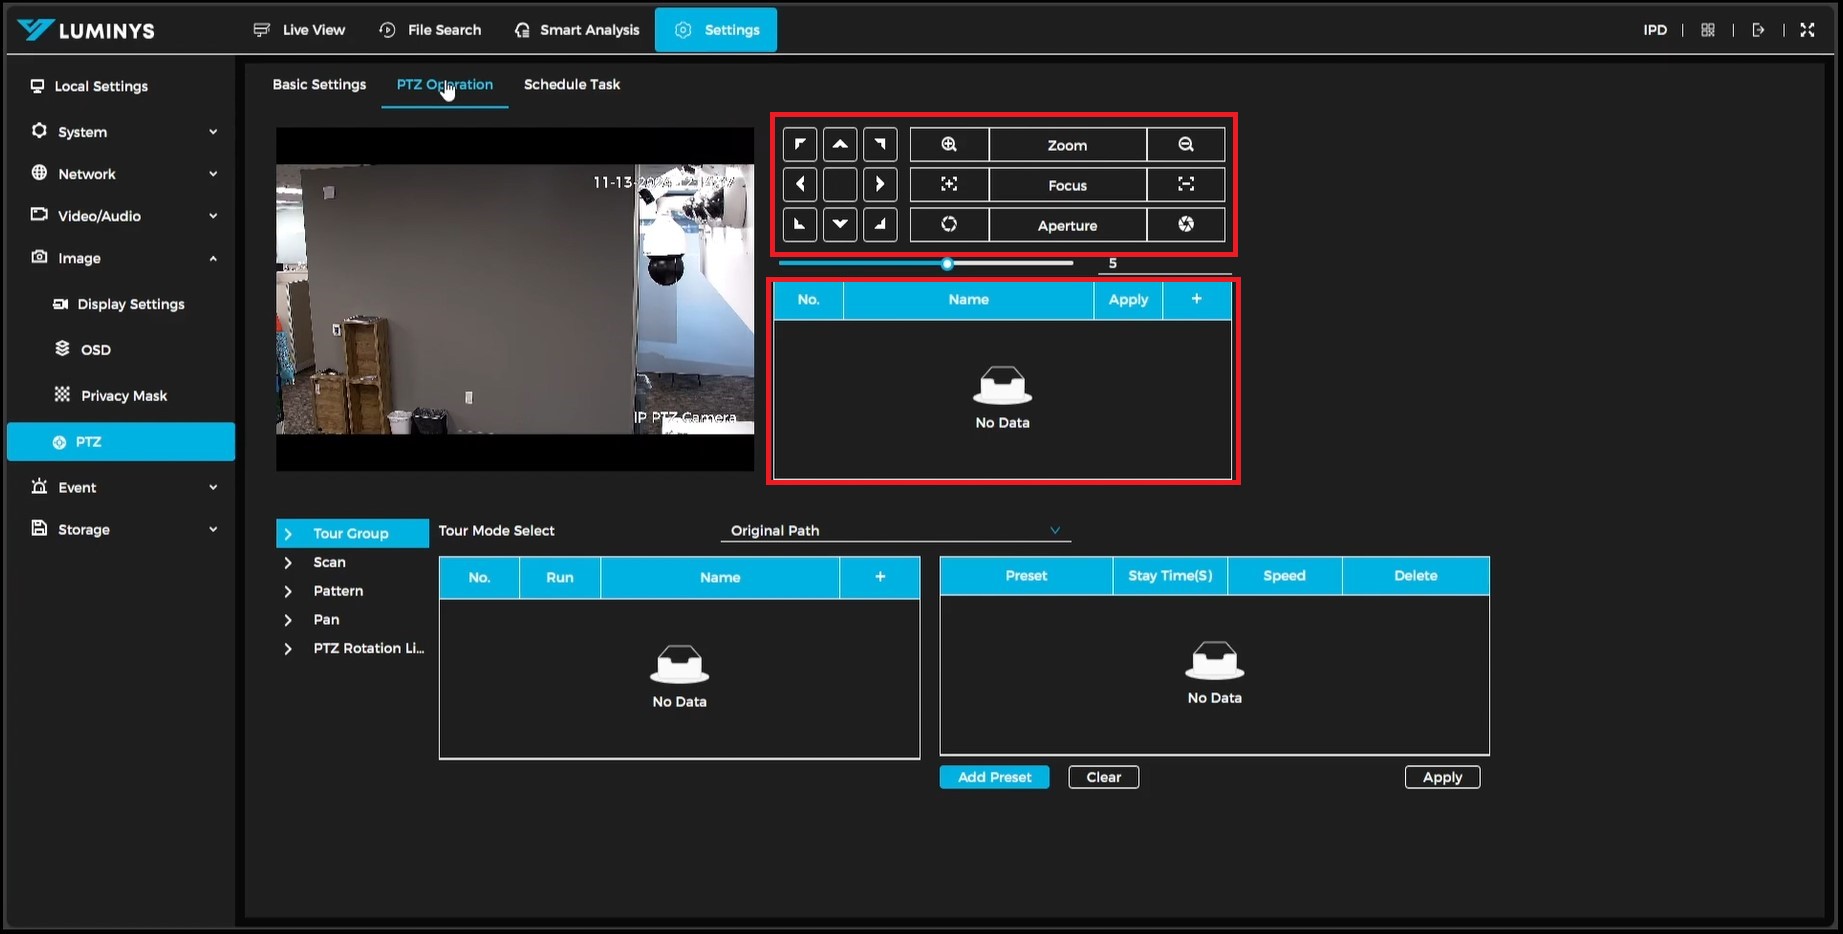
1. The first step is to open a web browser on the PC and navigate to the camera's IP address. Log in through the WebUI, and once logged in, click on the Setting tab in the top menu. Then, go to Image → PTZ.
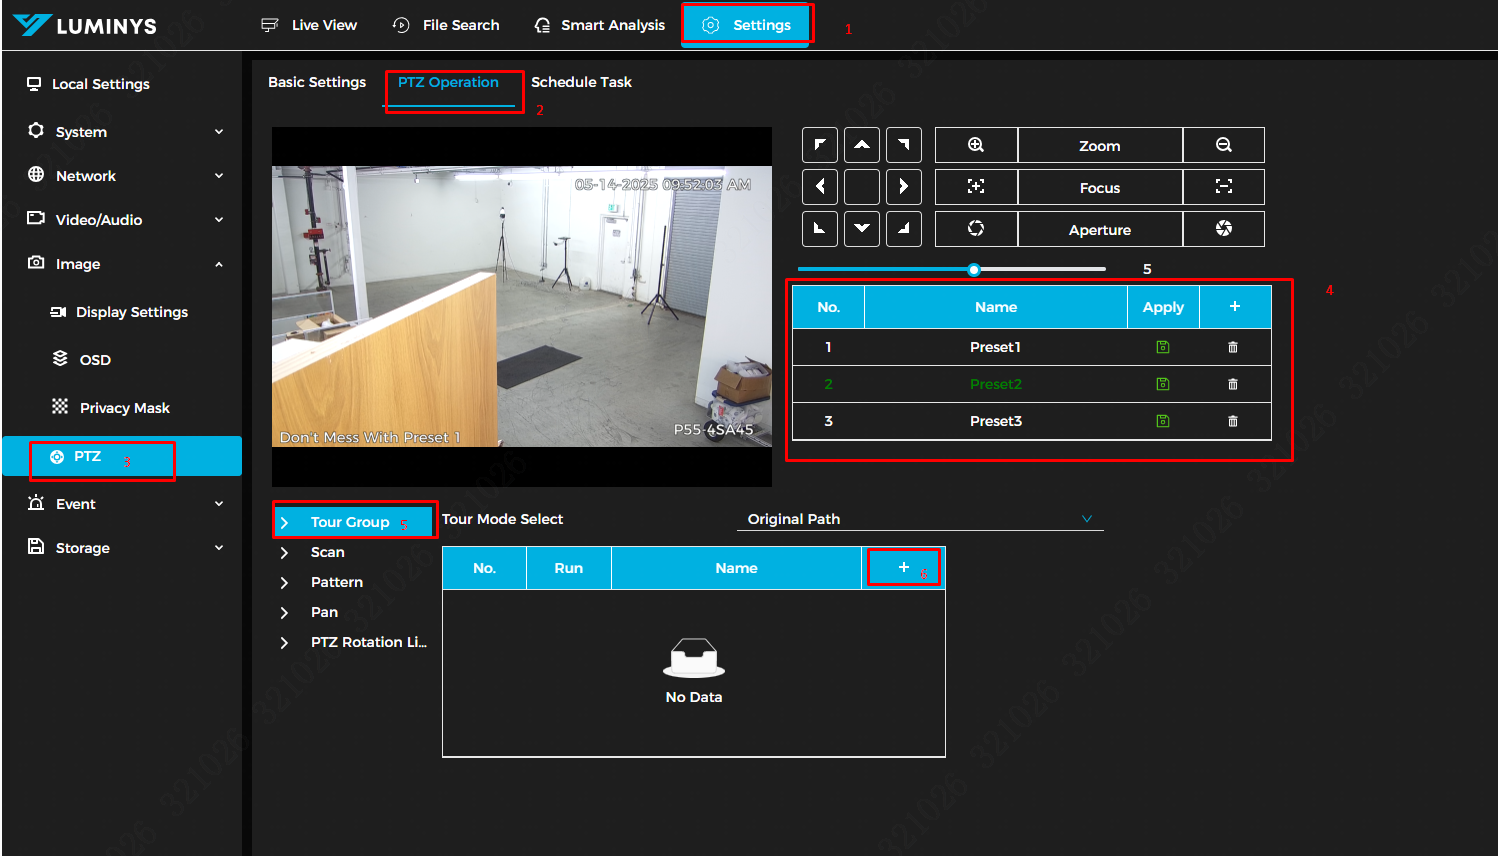
Once you're in the PTZ menu, click PTZ Operation at the top and ensure that presets are already configured. Now, click on Tour Group (Step 5 in the image below), then click the + icon to create a new tour group..
2. After clicking the + icon in the Tour Group configuration, you will be able to add presets to the tour group. You can adjust the duration and speed for each preset in the tour. Once all presets have been added, click Apply to complete the setup.
3. When the PTZ menu appears, select "PTZ Operation" on the right-hand side.
4. In the PTZ Operation menu, there are several options. Focus on the top middle option, which provides the standard PTZ controls for moving the PTZ and assigning views as presets. The box directly below the PTZ controls is used for creating the presets.
5. Position the PTZ to the desired view, then click the (+) button to save the preset.
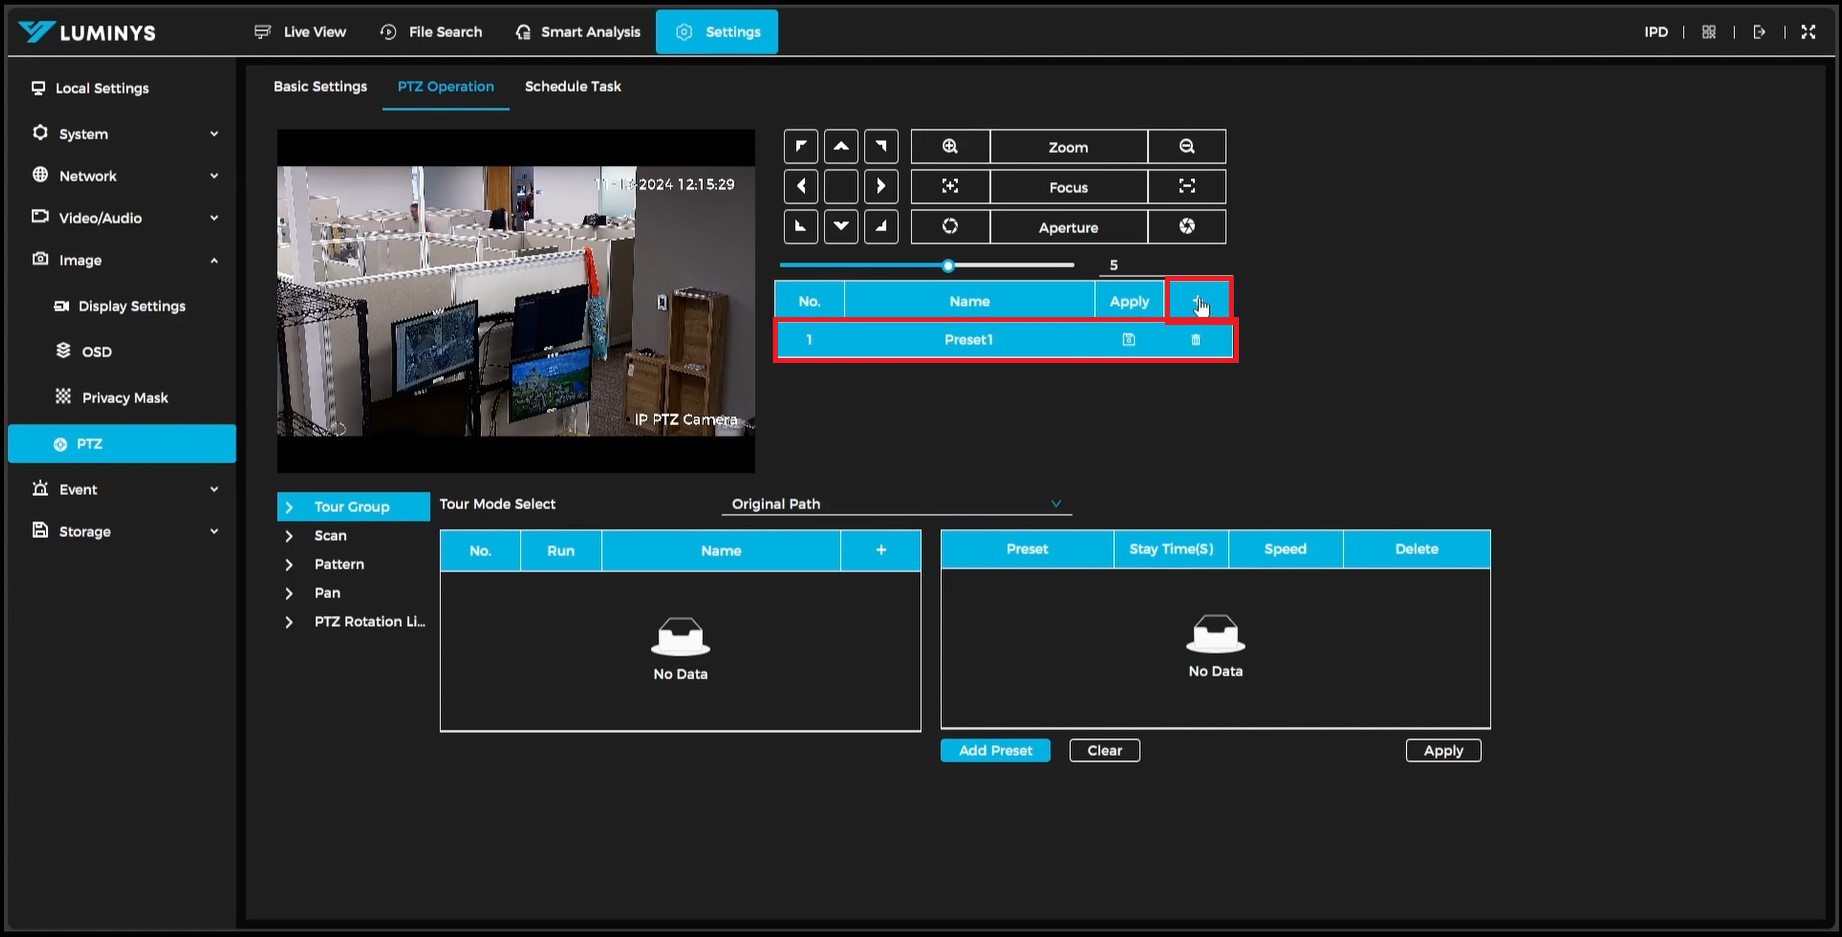
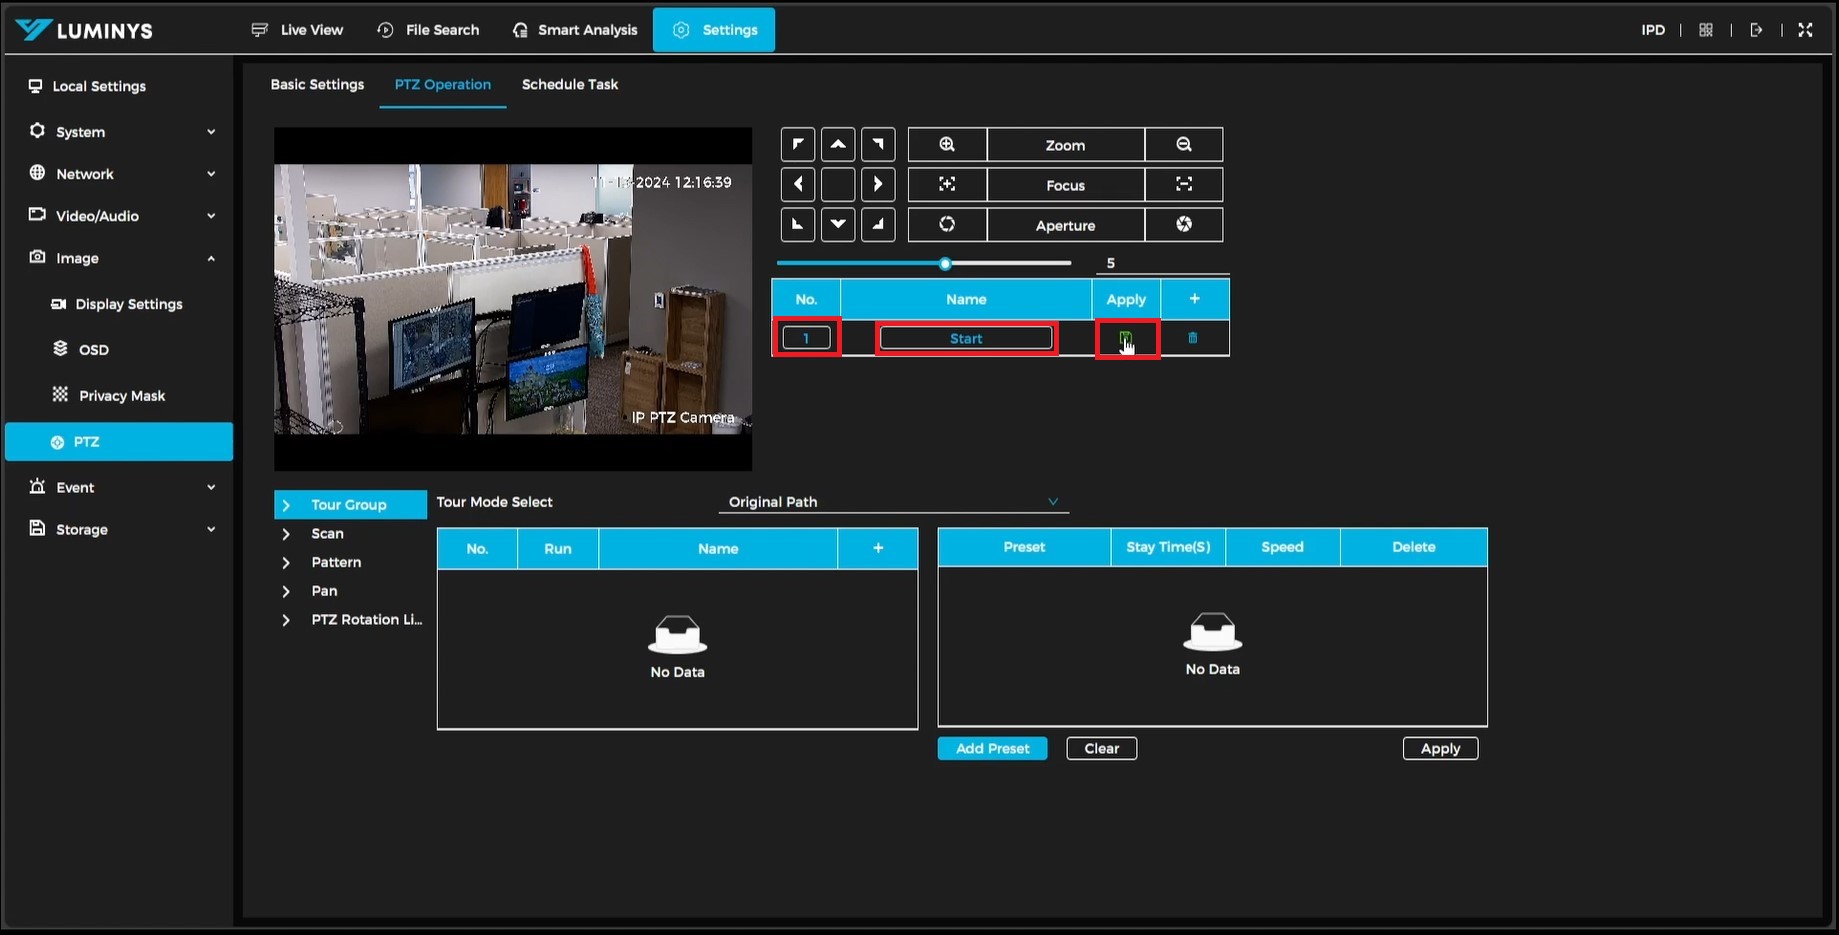
6. Before moving on to the next preset, change the preset "No." and rename it if needed. After making these adjustments, click the disk icon in the apply column to save the preset. The preset will not be saved until the apply button is clicked.
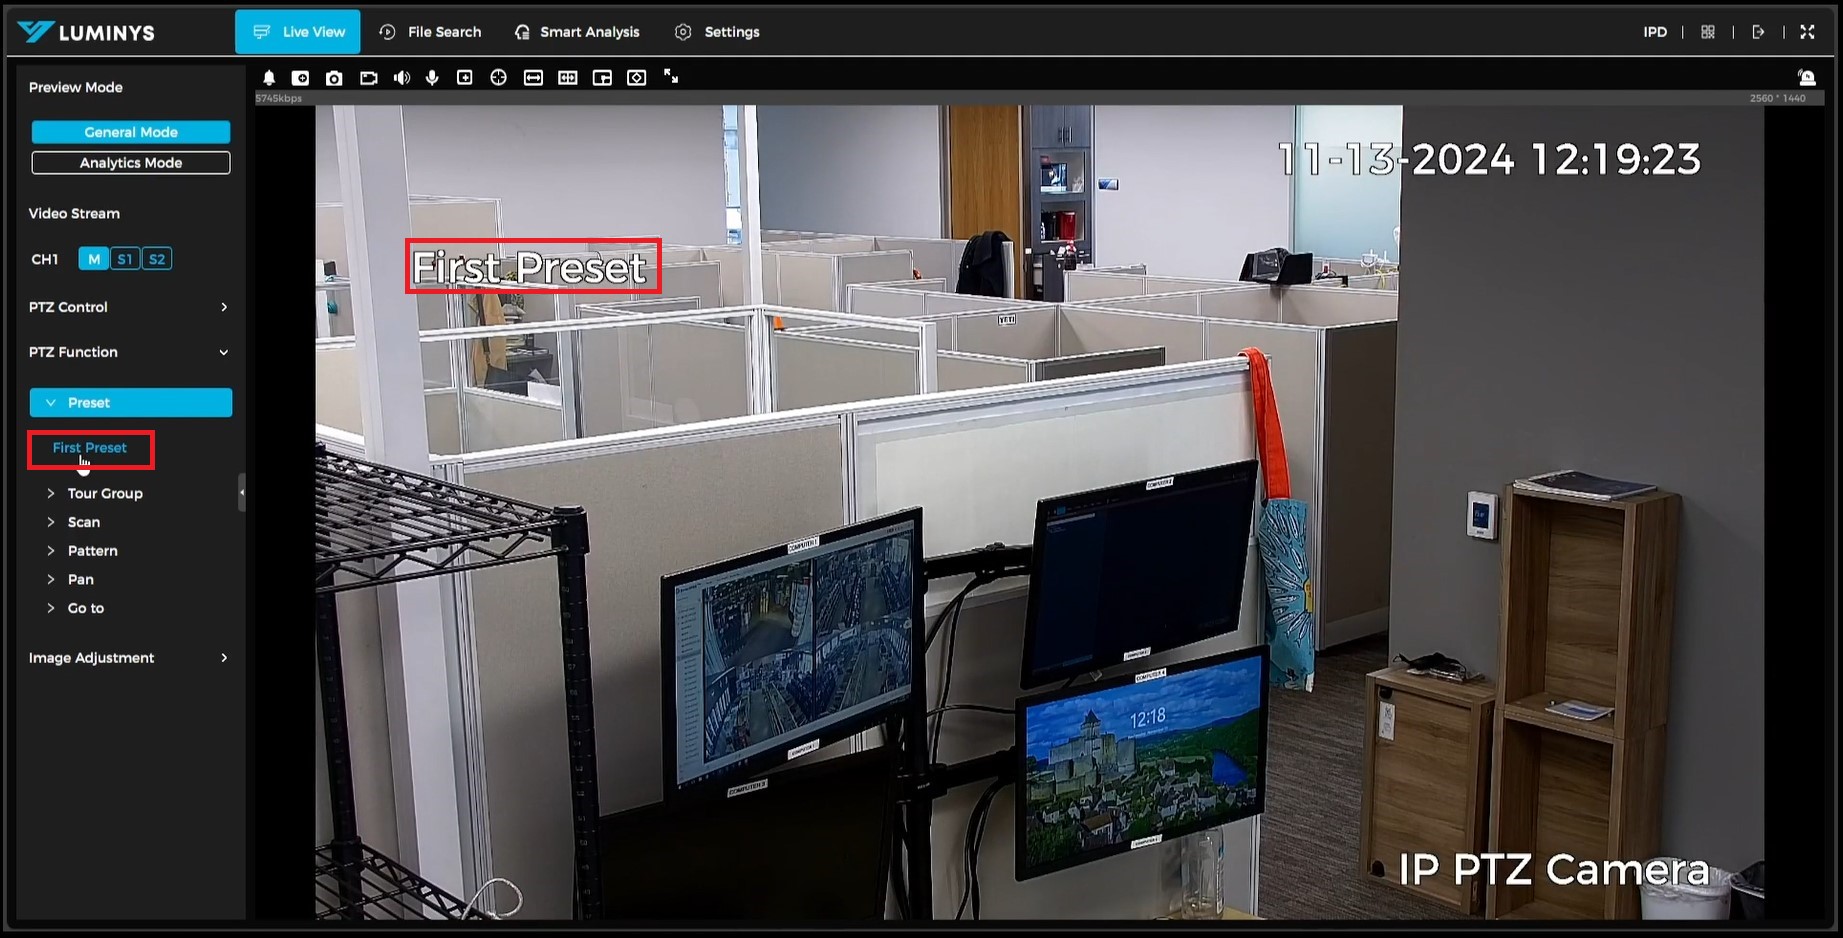
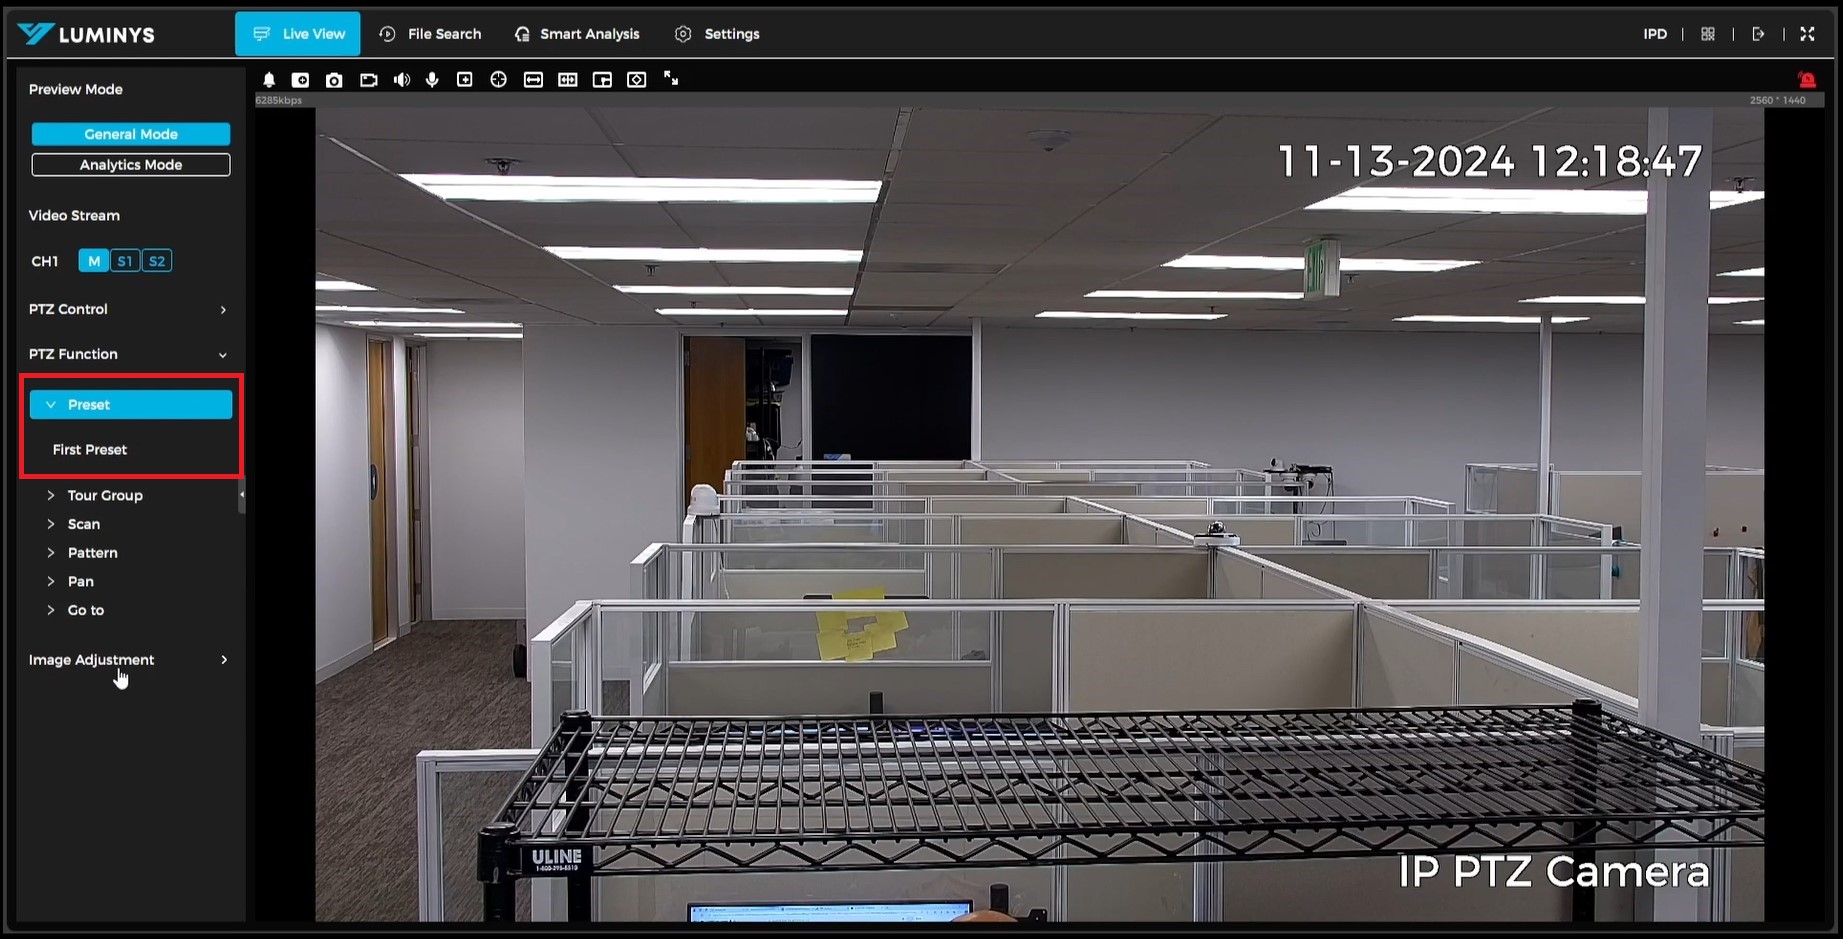
7. Once on the live view page, expand the "PTZ Function" menu to access the saved presets.
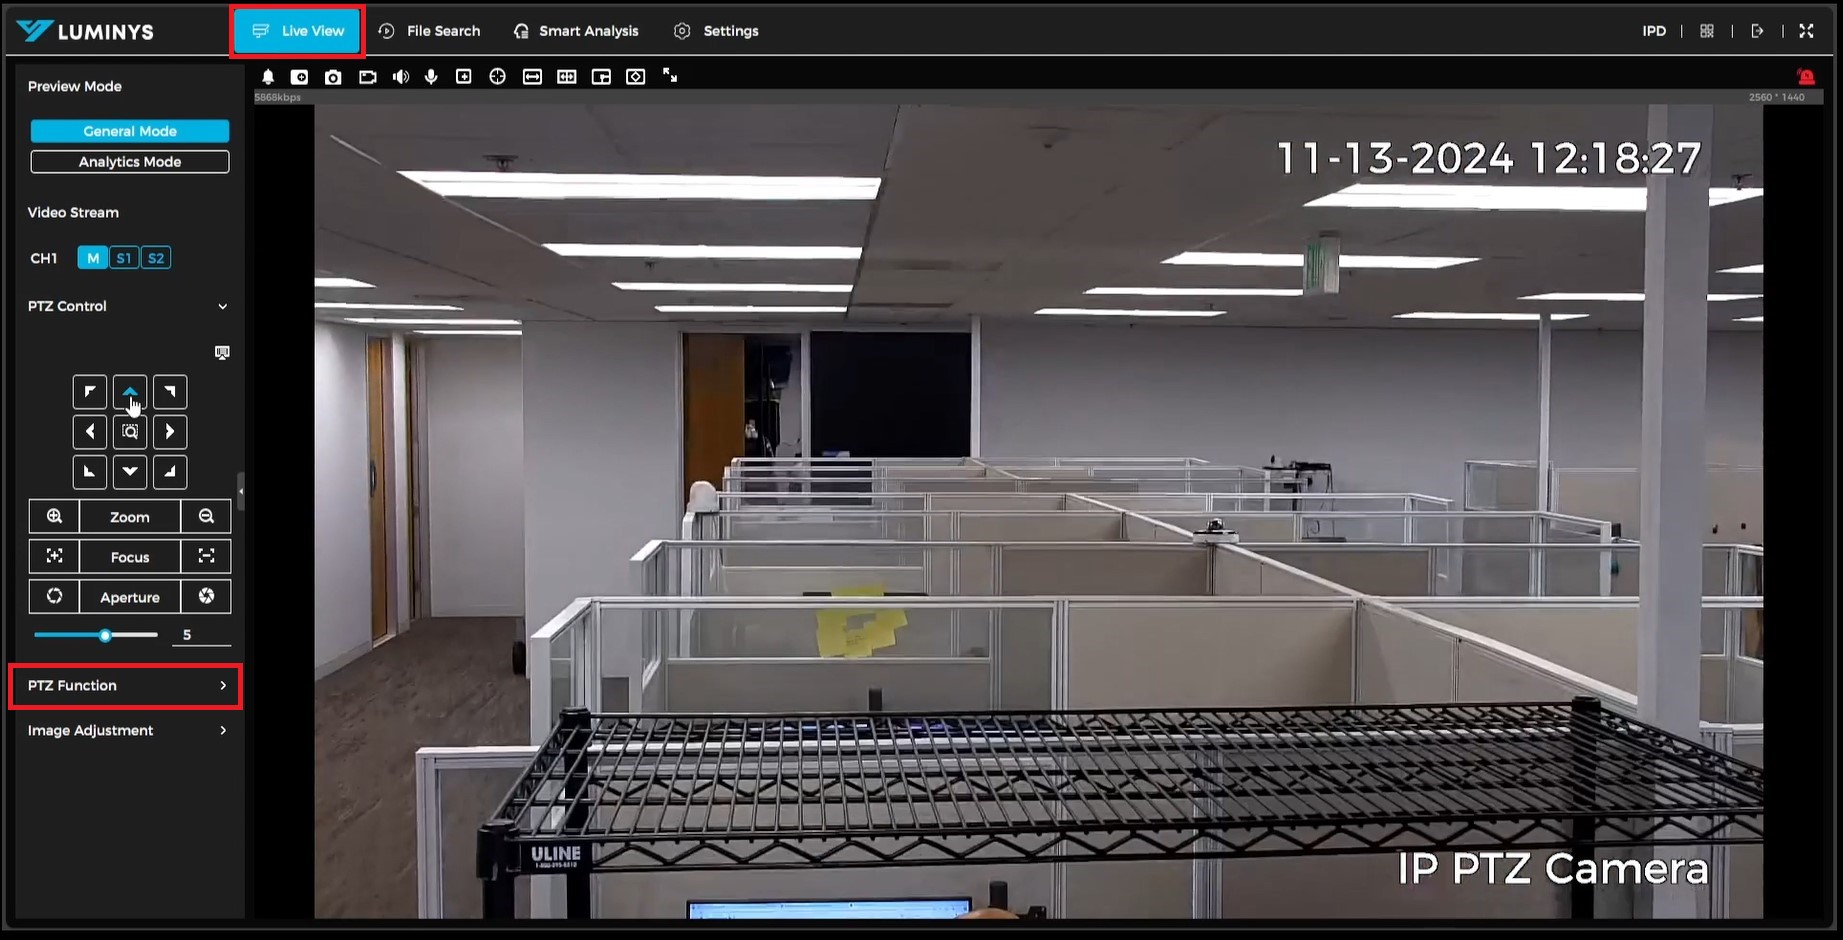
8. When the "PTZ Function" menu is expanded, expand the "Preset" menu to view the presets that have been created.
9. Click on the created preset, and the camera will automatically move to the specified preset position.