Cameras/Tour Setup: Difference between revisions
Techsupport (talk | contribs) Created page with "<div class="lm-banner">File:LuminysMainPageBanner2.png</div> = <div class="center">Setting Up PTZ Tour</div> = ===Description=== This tutorial will go over how to set Tours for PTZ cameras. ===Prerequisites=== * PTZ cameras powered on and connected to local network. ===Video Instructions=== <youtube>Coming Soon</youtube> ===Step by Step Instructions=== 1. The first step is to open a web browser on the PC and navigate to the camera's IP address. Log in through t..." |
Techsupport (talk | contribs) m Techsupport moved page PTZ/Tour Setup to Cameras/Tour Setup |
||
| (4 intermediate revisions by the same user not shown) | |||
| Line 8: | Line 8: | ||
===Prerequisites=== | ===Prerequisites=== | ||
* PTZ cameras powered on and connected to local network. | * PTZ cameras powered on and connected to local network. | ||
* PTZ cameras already have presets configured.. | |||
===Video Instructions=== | ===Video Instructions=== | ||
<youtube> | Coming Soon | ||
<!--<youtube>link</youtube>--> | |||
===Step by Step Instructions=== | ===Step by Step Instructions=== | ||
1. The first step is to open a web browser on the PC and navigate to the camera's IP address. Log in through the WebUI, and once logged in, | 1. The first step is to open a web browser on the PC and navigate to the camera's IP address. Log in through the WebUI, and once logged in, click on the Setting tab in the top menu. Then, go to Image → PTZ. | ||
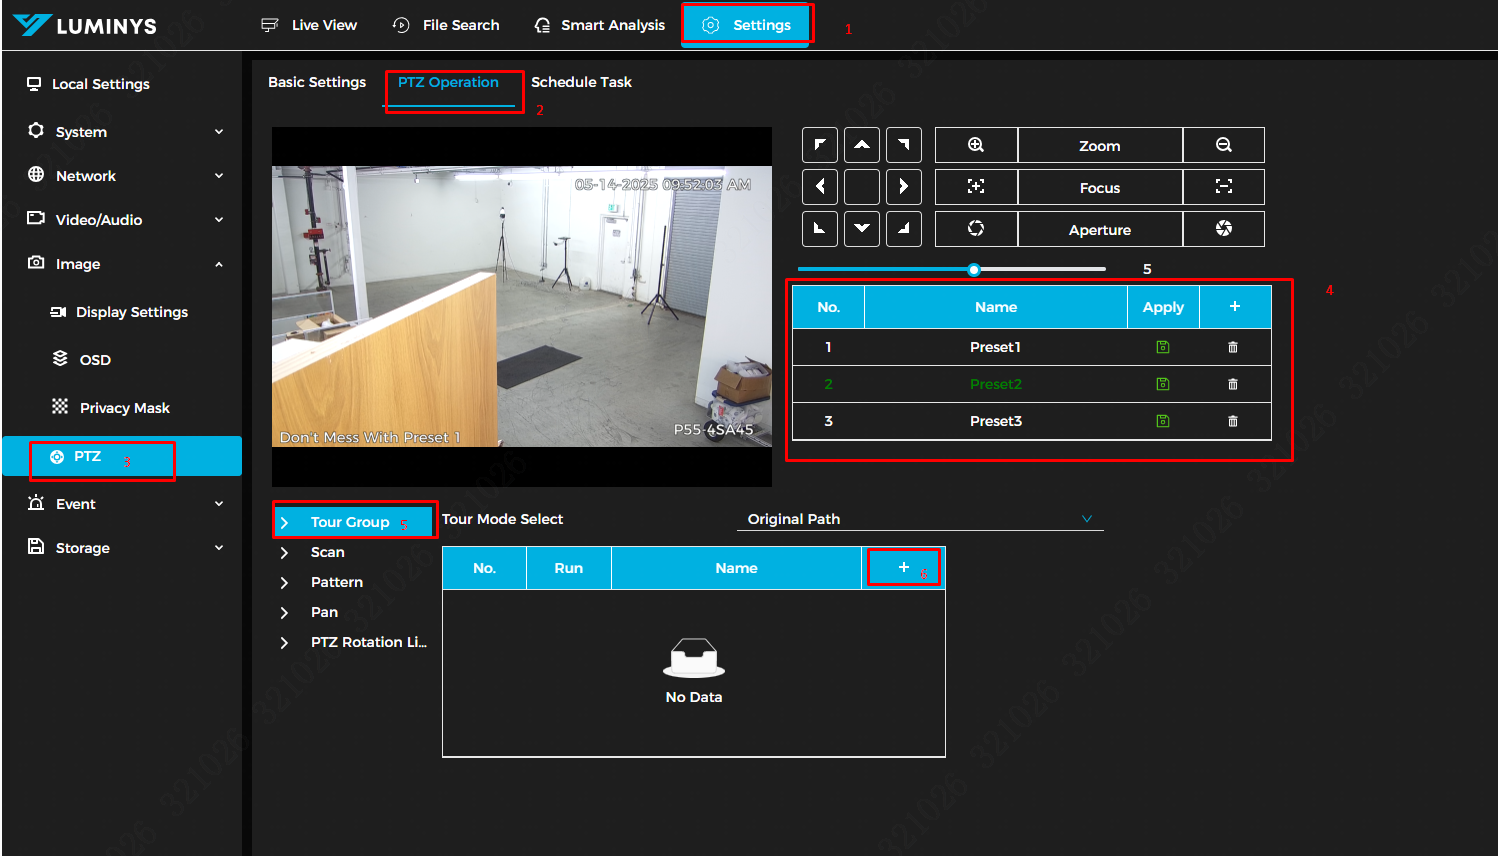
Once you're in the PTZ menu, click PTZ Operation at the top and ensure that presets are already configured. Now, click on Tour Group (Step 5 in the image below), then click the + icon to create a new tour group.. | |||
[[File:Tour1.png|1000px|link=https://wiki.luminyscorp.com/images/3/37/Tour1.png]] | |||
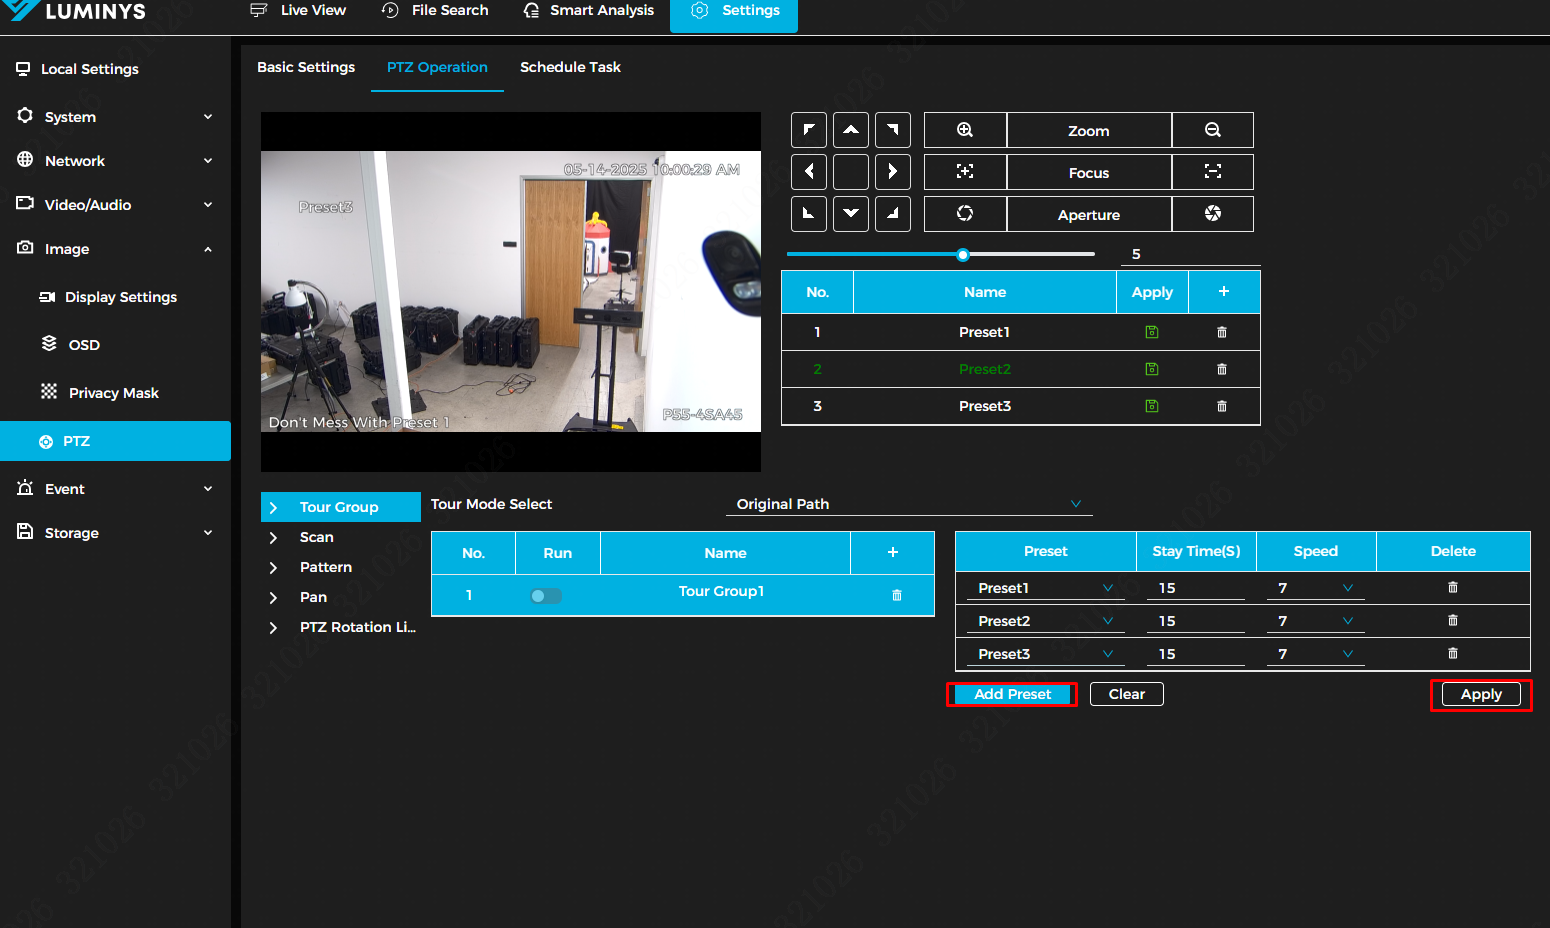
2. After clicking the + icon in the Tour Group configuration, you will be able to add presets to the tour group. You can adjust the duration and speed for each preset in the tour. Once all presets have been added, click Apply to complete the setup. | |||
[[File:Tour2.png|1000px|link=https://wiki.luminyscorp.com/images/9/92/Tour2.png]] | |||
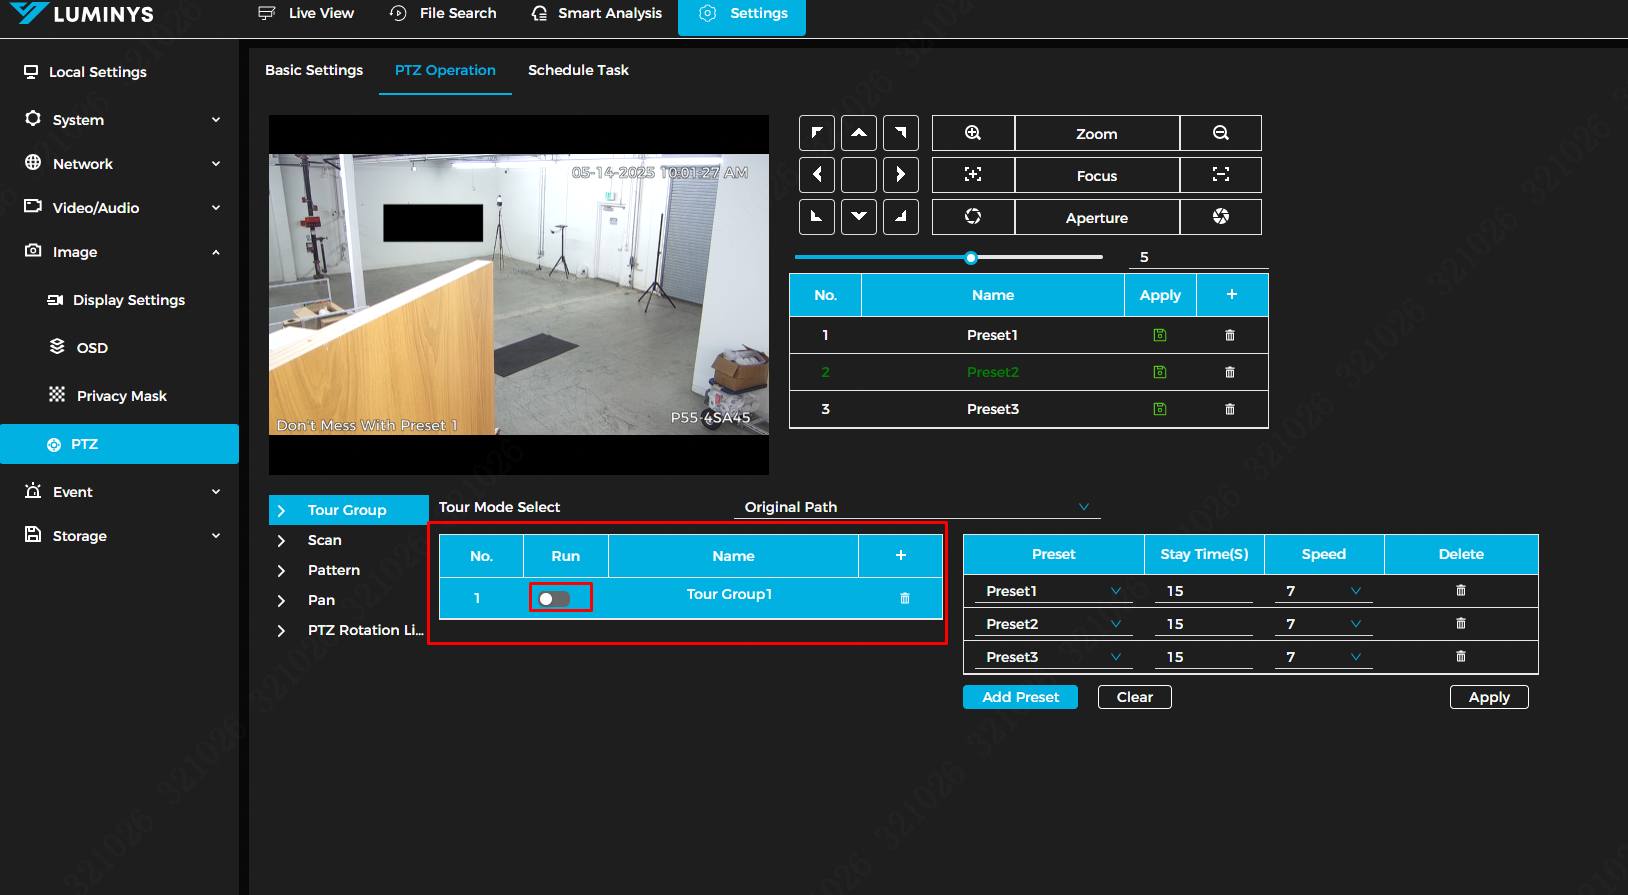
3. After adding the presets to the tour group, click Run to start the tour. The PTZ camera should now follow the preset pattern as configured. | |||
[[File:Tour3.png|1000px|link=https://wiki.luminyscorp.com/images/3/38/Tour3.png]] | |||
[[File: | |||
Latest revision as of 12:14, 15 August 2025

Setting Up PTZ Tour
Description
This tutorial will go over how to set Tours for PTZ cameras.
Prerequisites
- PTZ cameras powered on and connected to local network.
- PTZ cameras already have presets configured..
Video Instructions
Coming Soon
Step by Step Instructions
1. The first step is to open a web browser on the PC and navigate to the camera's IP address. Log in through the WebUI, and once logged in, click on the Setting tab in the top menu. Then, go to Image → PTZ.
Once you're in the PTZ menu, click PTZ Operation at the top and ensure that presets are already configured. Now, click on Tour Group (Step 5 in the image below), then click the + icon to create a new tour group..
2. After clicking the + icon in the Tour Group configuration, you will be able to add presets to the tour group. You can adjust the duration and speed for each preset in the tour. Once all presets have been added, click Apply to complete the setup.
3. After adding the presets to the tour group, click Run to start the tour. The PTZ camera should now follow the preset pattern as configured.