Cameras/LPR Blocklist and Allowlist Setup: Difference between revisions
Techsupport (talk | contribs) Created page with "= <div class="center">LPR Camera Blocklist and Allowlist Setup</div> = ===Description=== This tutorial will go over how to setup LPR camera blocklist and allowlist. ===Prerequisites=== * Access the webGUI of the LPR camera. ===Video Instructions=== <youtube>https://www.youtube.com/watch?v=zC1iCVPwXmQ&ab_channel=LuminysSystemsCorporation</youtube> ===Step by Step Instructions=== 1. Navigate to <span style=color:black;font-weight:bold>Setting > LPR > Vehicle Blocklist..." |
Techsupport (talk | contribs) m Techsupport moved page LPR/Blocklist and Allowlist Setup to Cameras/LPR Blocklist and Allowlist Setup without leaving a redirect |
(No difference)
| |
Latest revision as of 11:28, 15 August 2025
LPR Camera Blocklist and Allowlist Setup
Description
This tutorial will go over how to setup LPR camera blocklist and allowlist.
Prerequisites
- Access the webGUI of the LPR camera.
Video Instructions
Step by Step Instructions
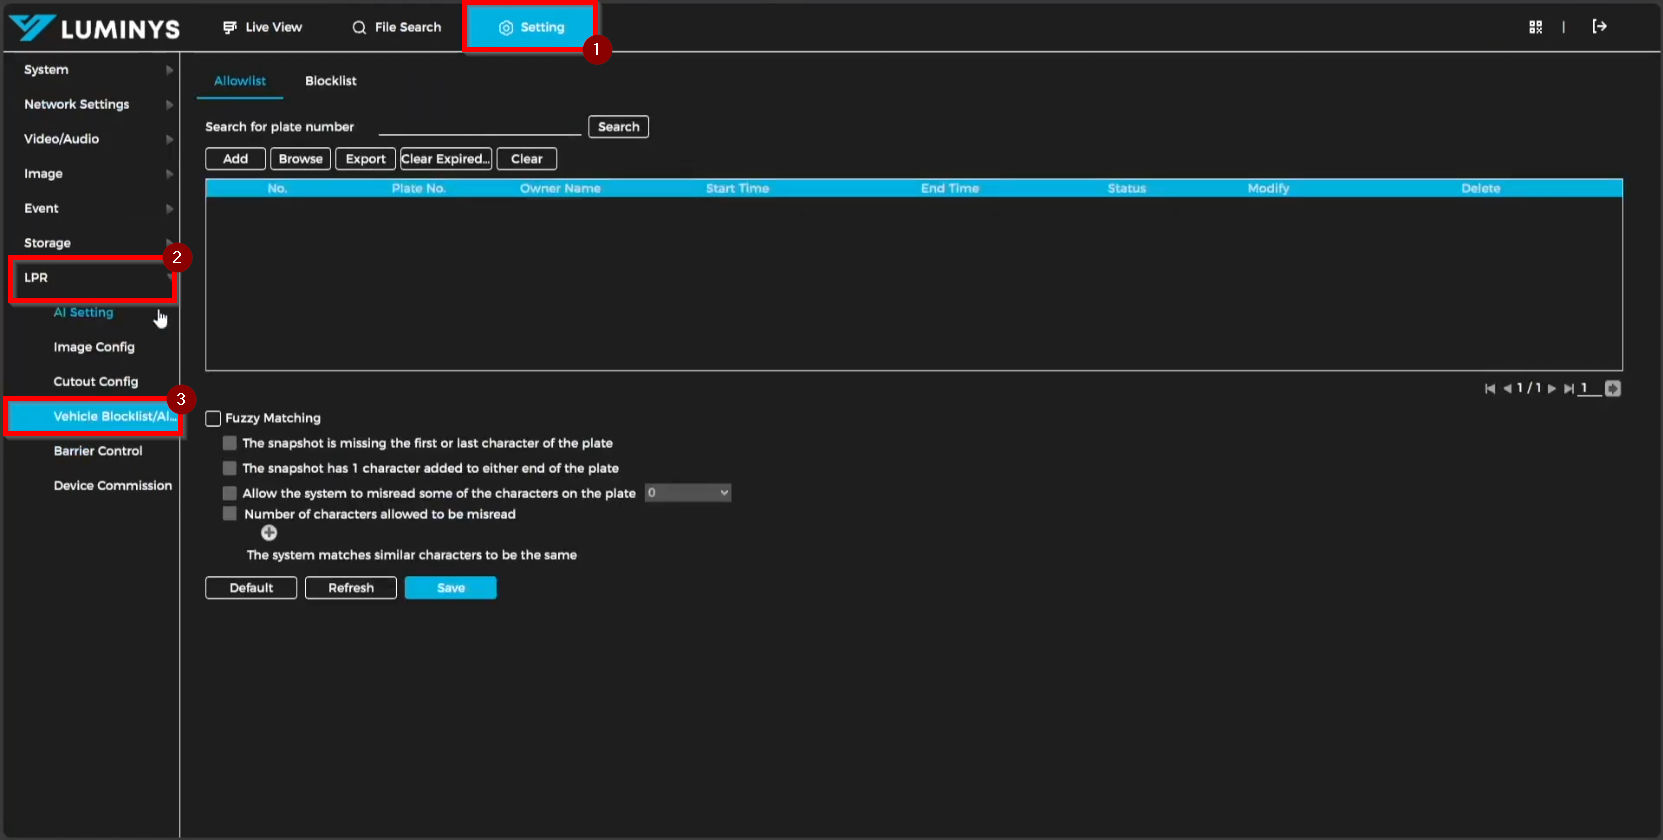
1. Navigate to Setting > LPR > Vehicle Blocklist/Allowlist to access the allowlist and blocklist configuration options.
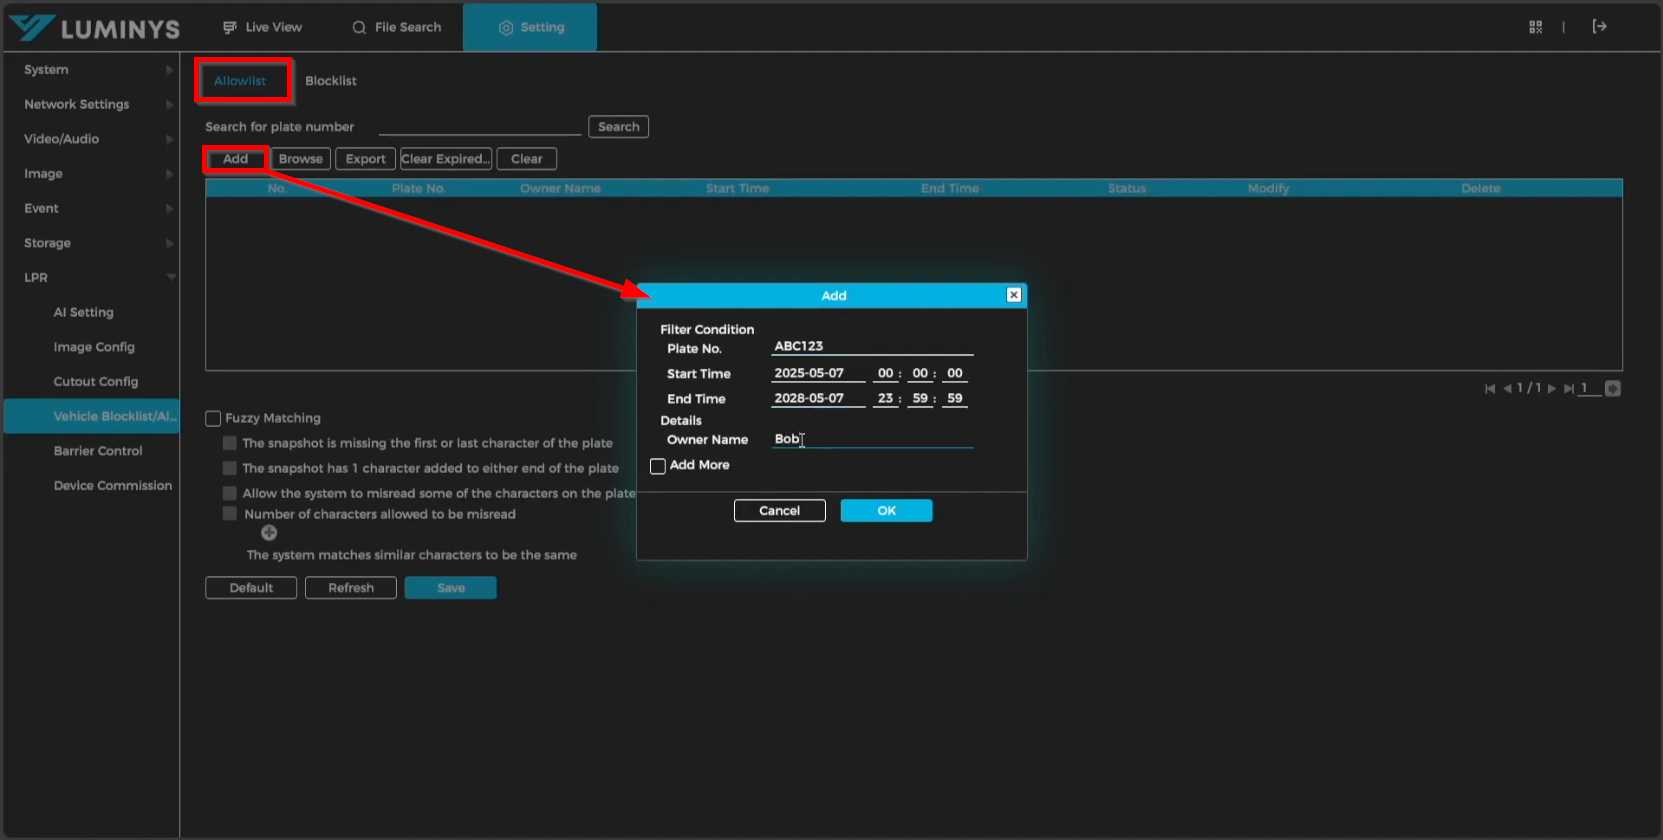
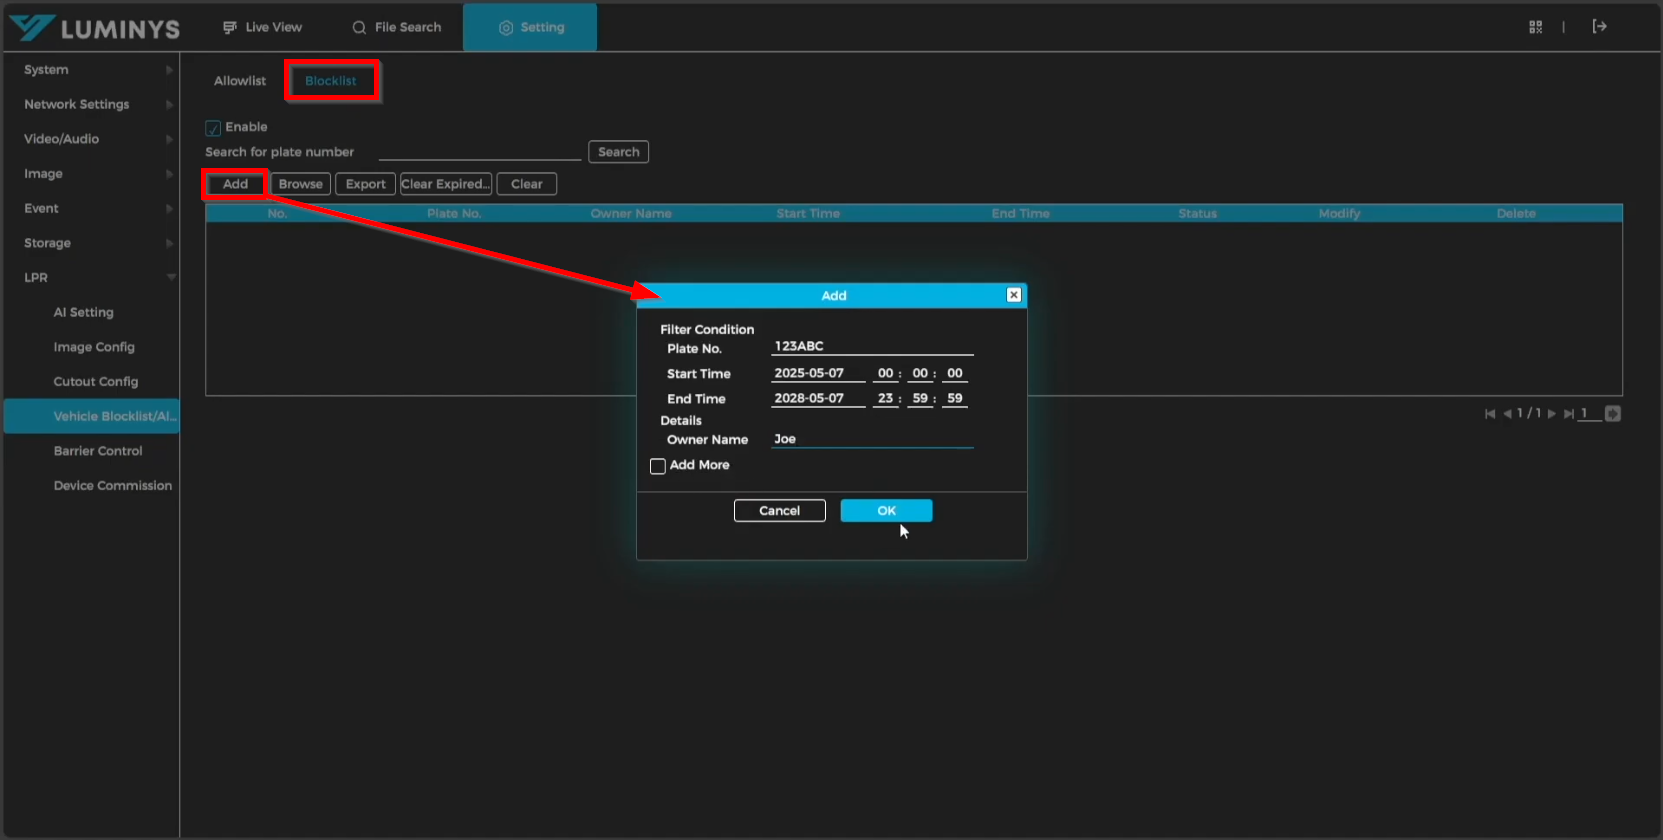
2. To add license plates to the allowlist, select Add. A pop-up window will appear, allowing entry of the Plate No., Start Time, End Time (expiration time), and Owner Name. To add multiple license plates consecutively, enable the Add More checkbox.
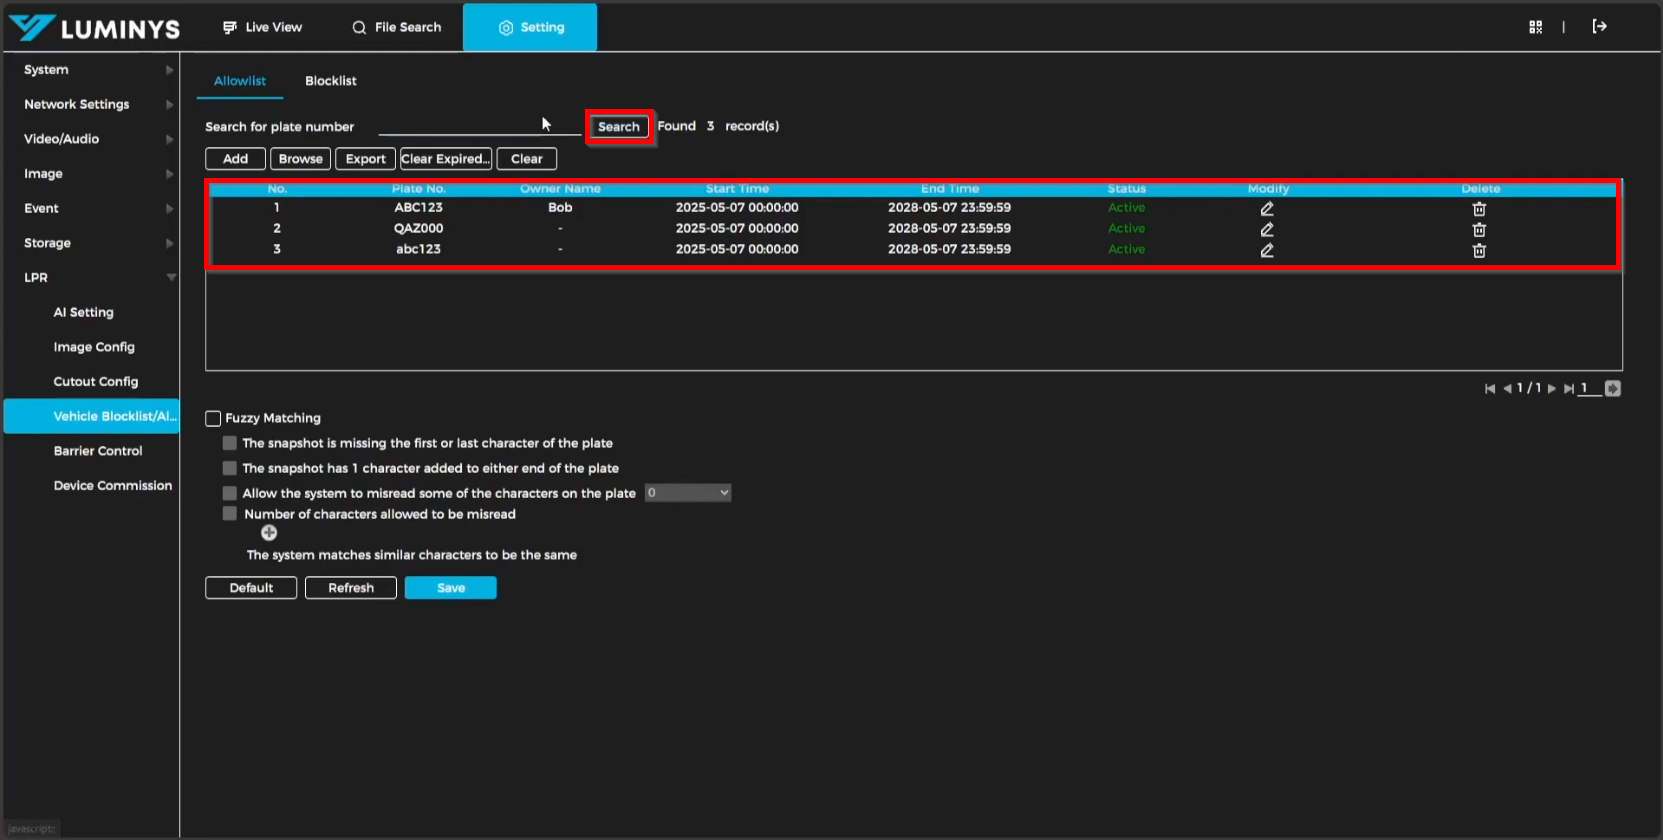
3. Select the Search button to display the complete list of vehicles included in the allowlist.
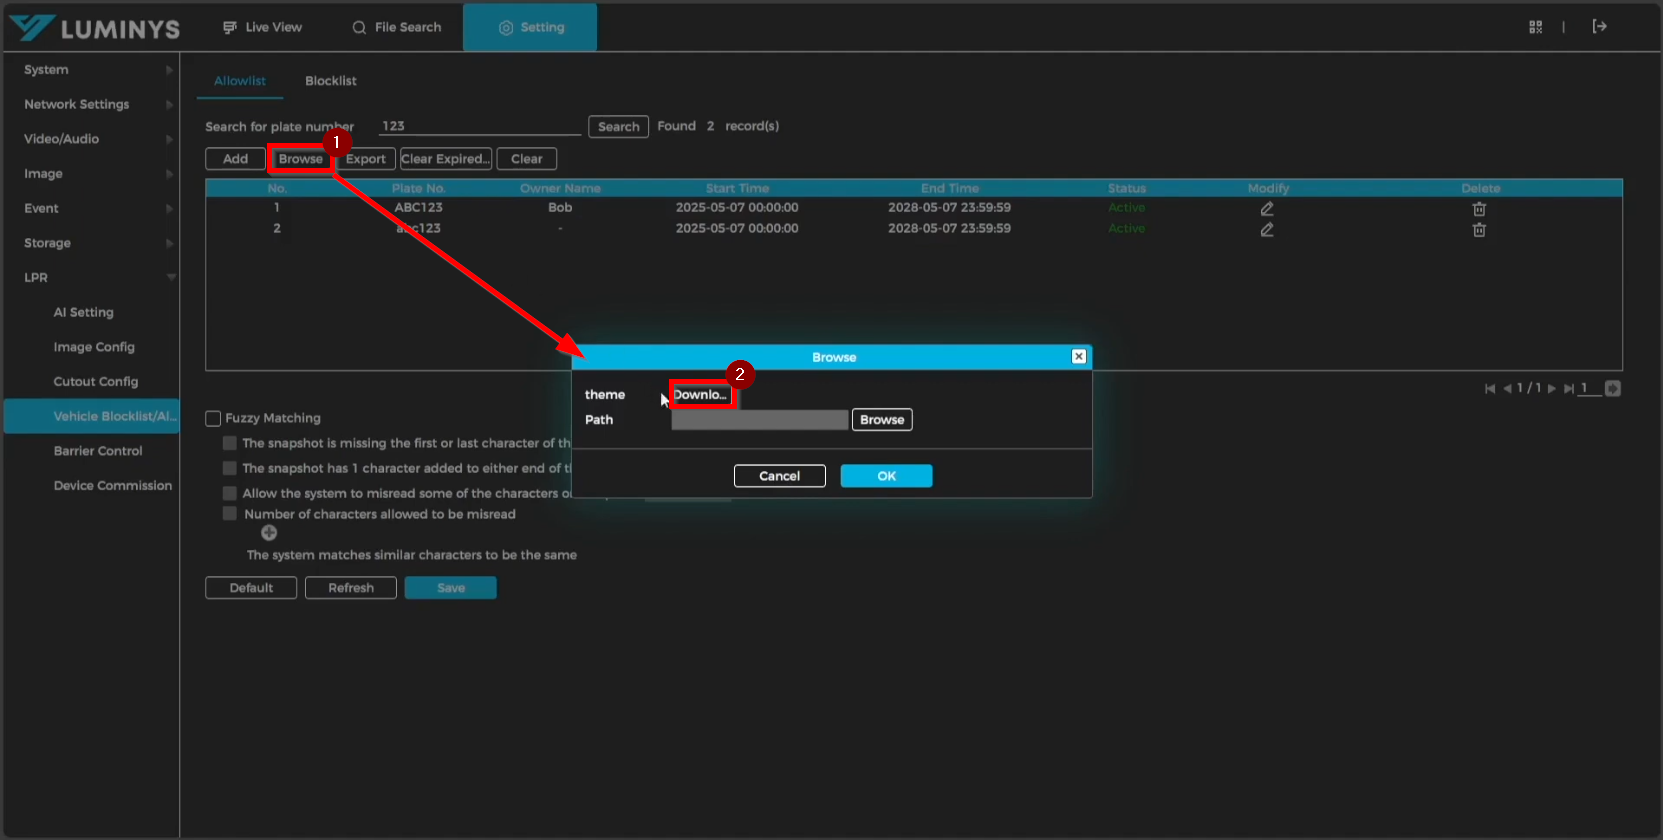
4. To download a sample Excel sheet for batch addition to the allowlist, select Browse > Download.
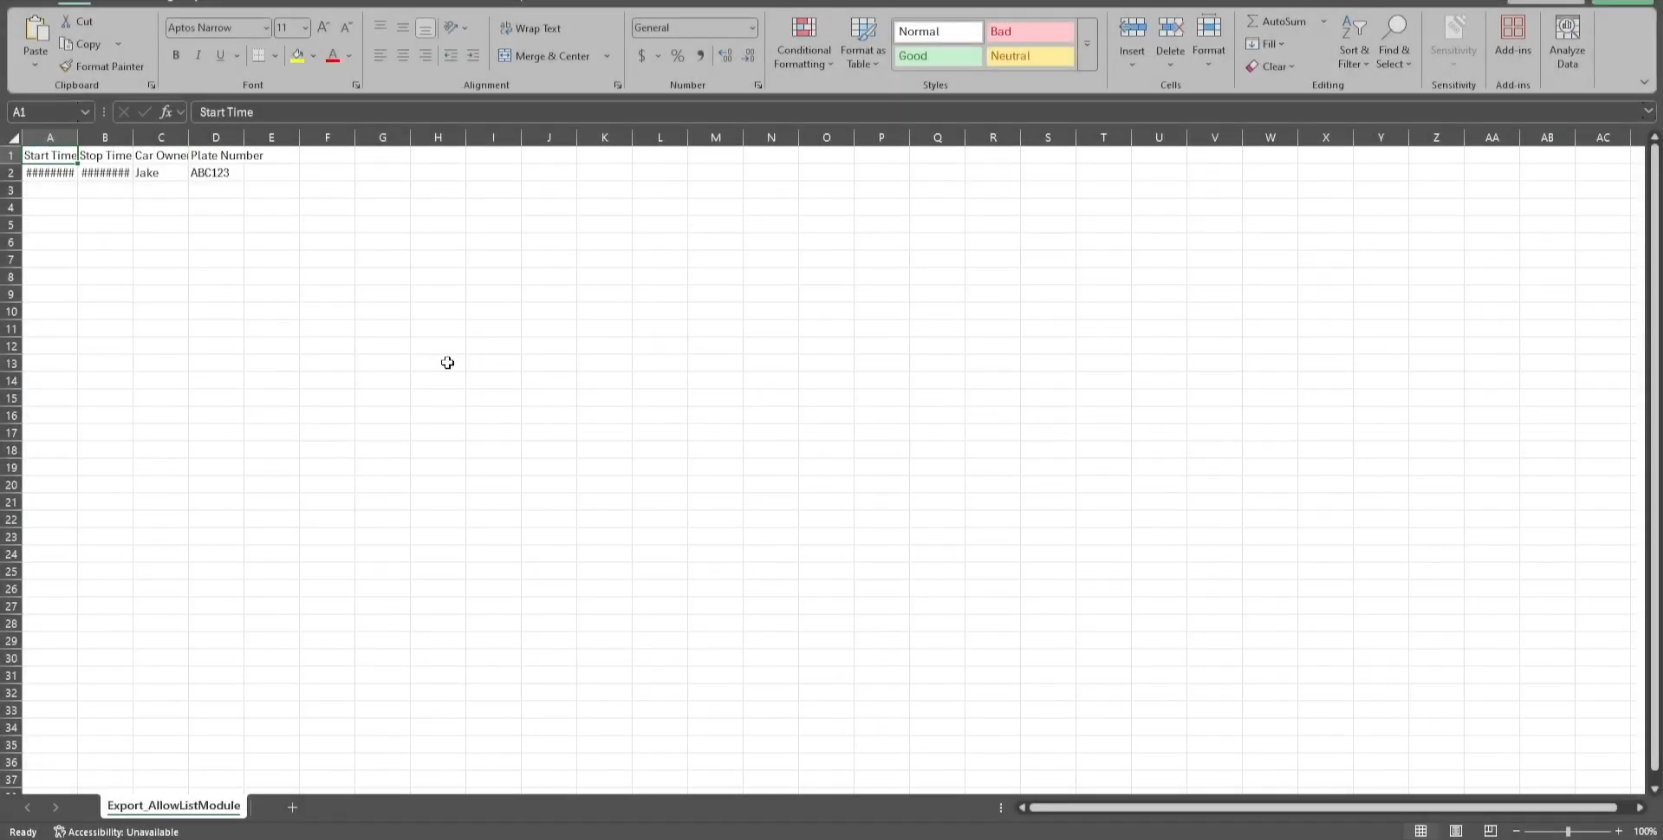
5. The sample Excel sheet provided allows for the addition of multiple license plates. Modify the Plate Number, Start Time, End Time, and Owner Name fields as needed.
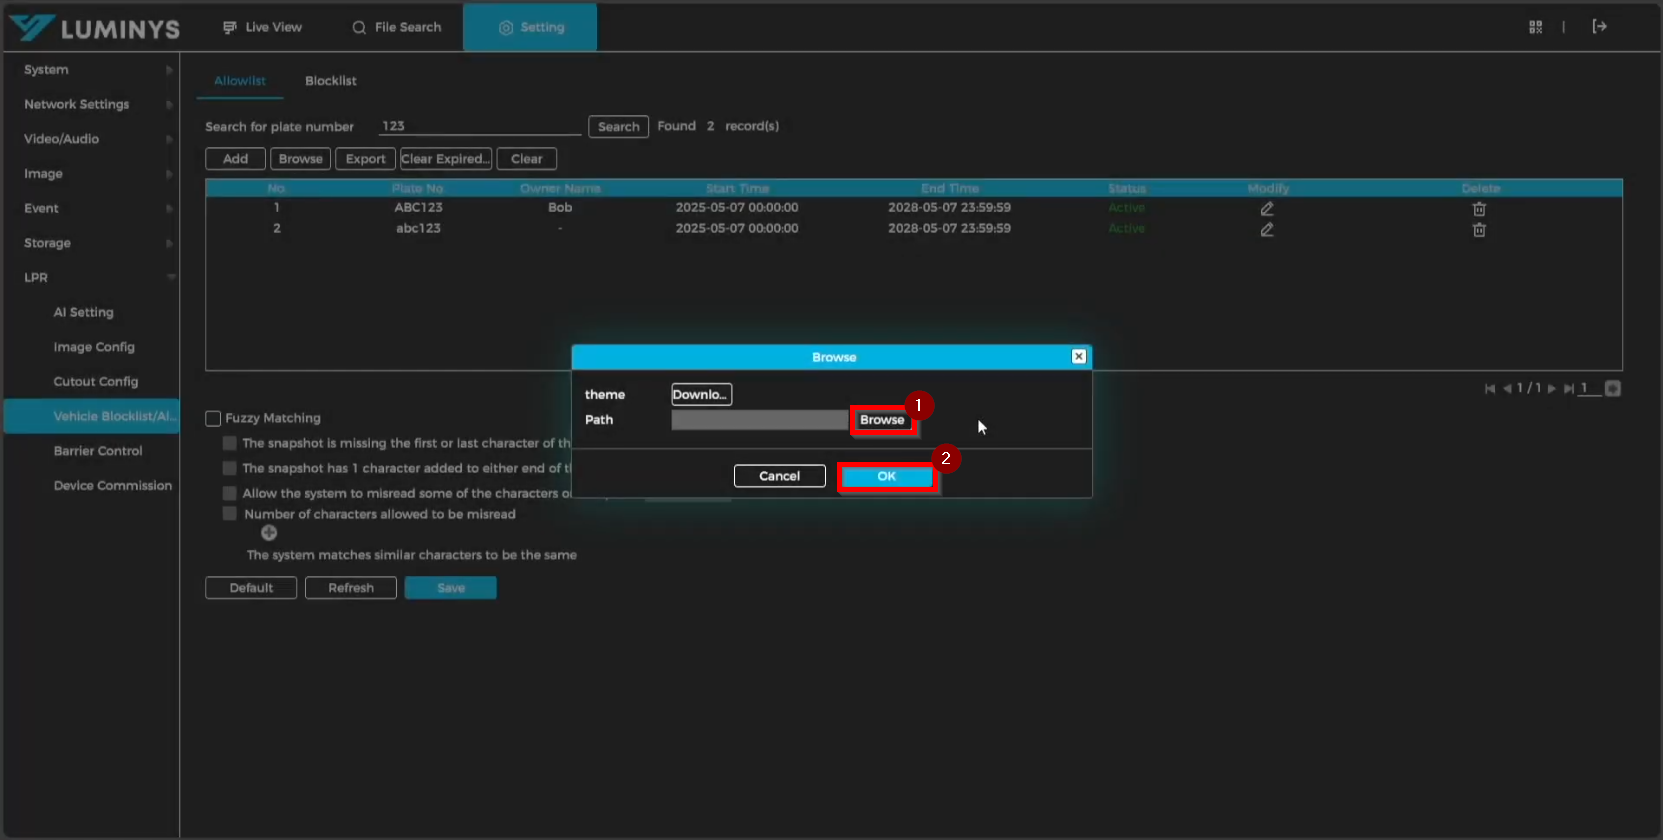
6. After completing the Excel sheet, upload it to the LPR camera by selecting Browse, navigating to the saved file, and clicking OK to finalize the upload process.
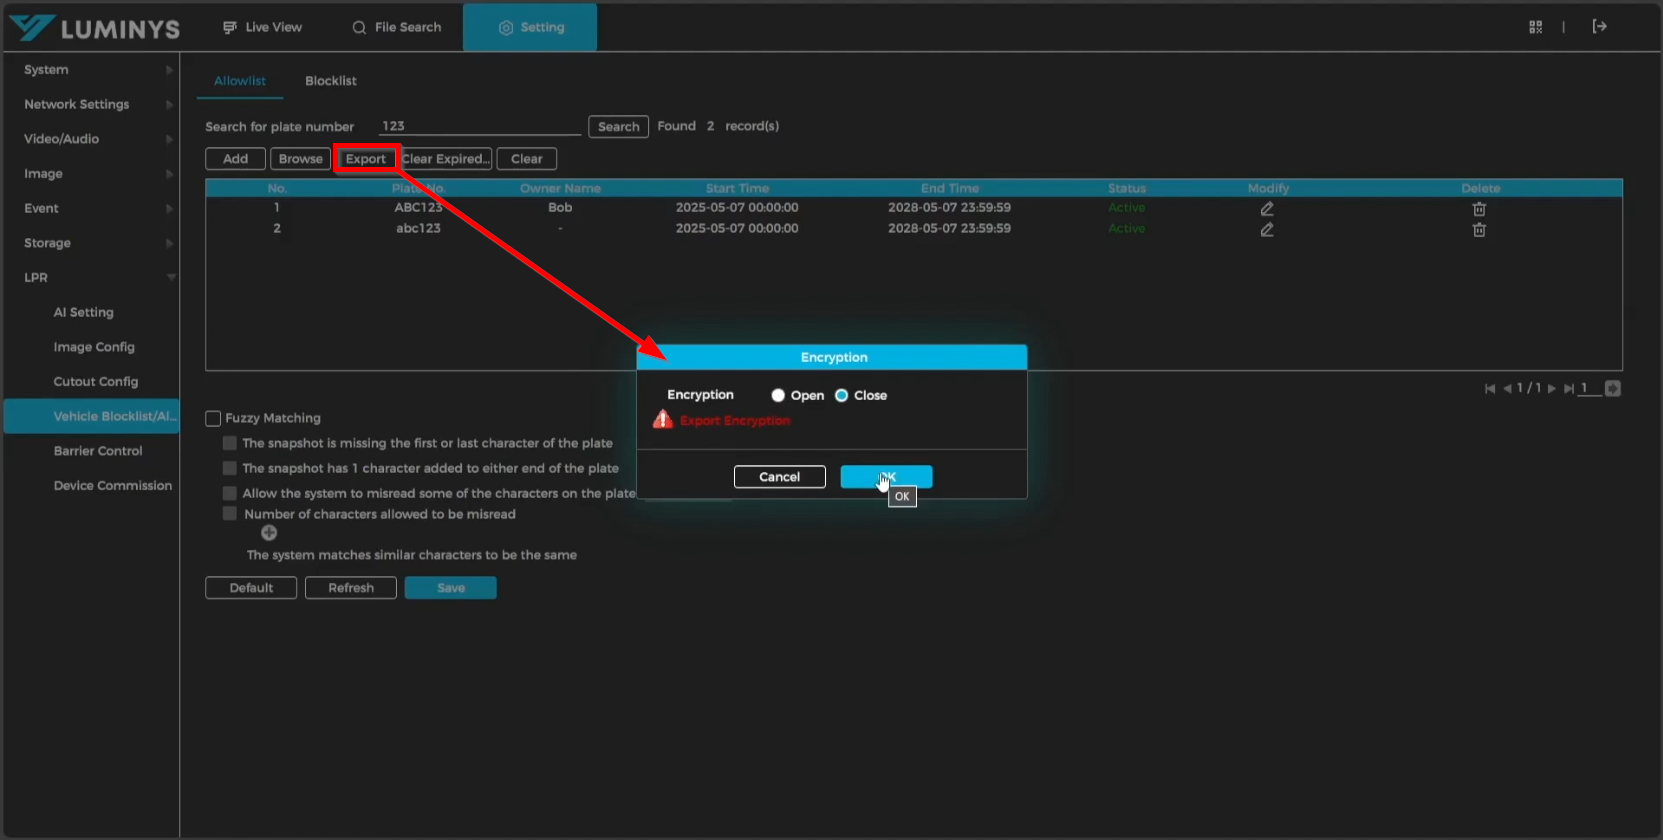
7. To export the current allowlist, use the Export option. This will download an Excel file containing all previously added license plates. File encryption can be enabled or disabled as desired during the export process.
8. To remove all expired vehicles from the allowlist, select the Clear Expired Data button.

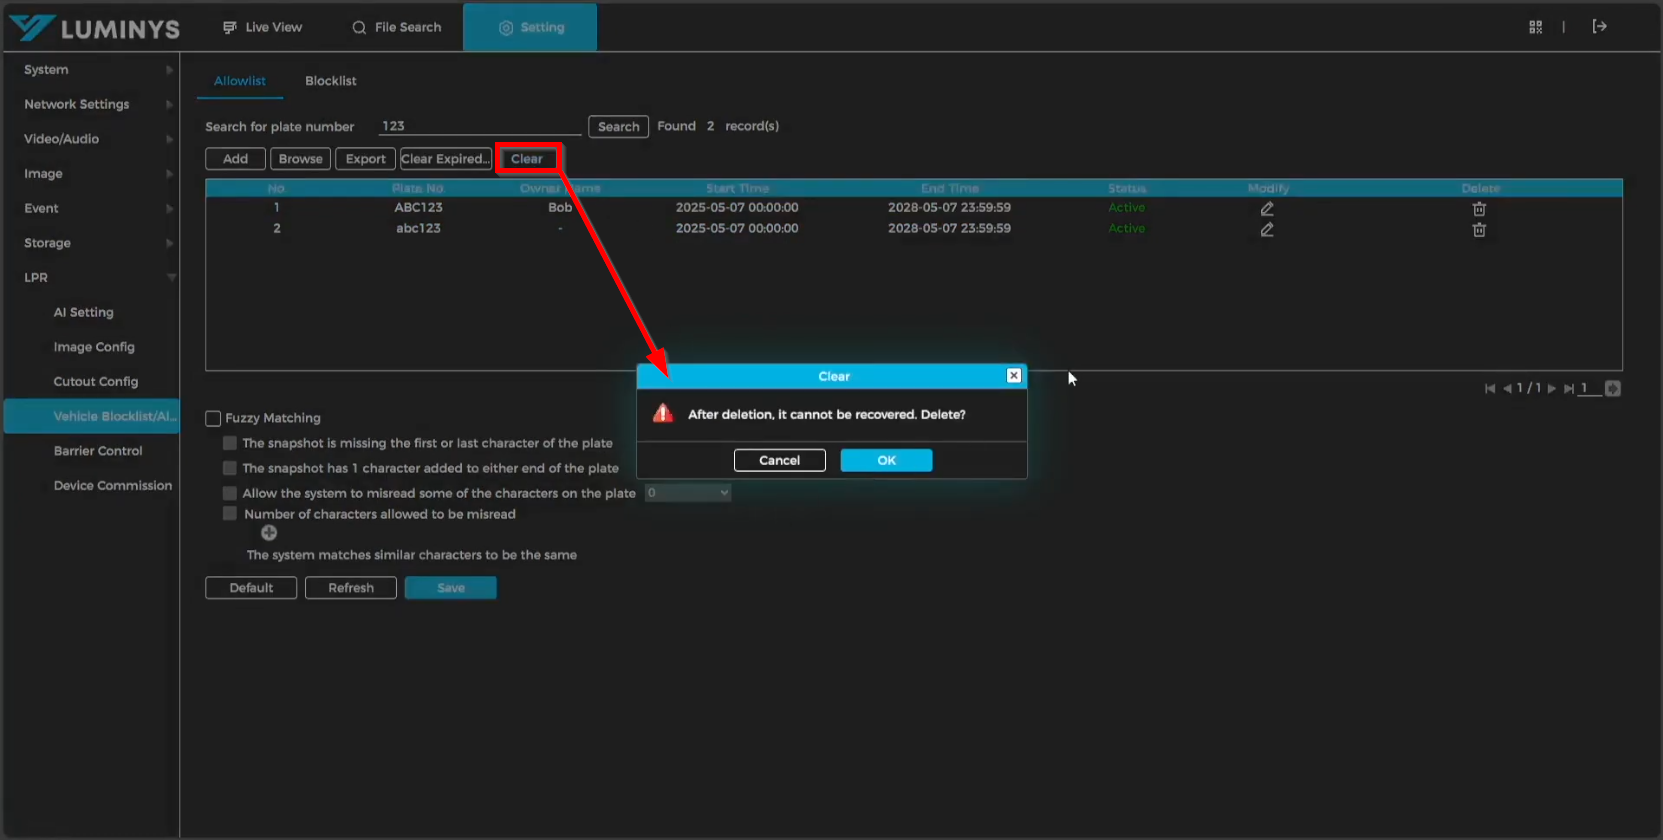
9. To delete all entries from the allowlist, select the Clear button.
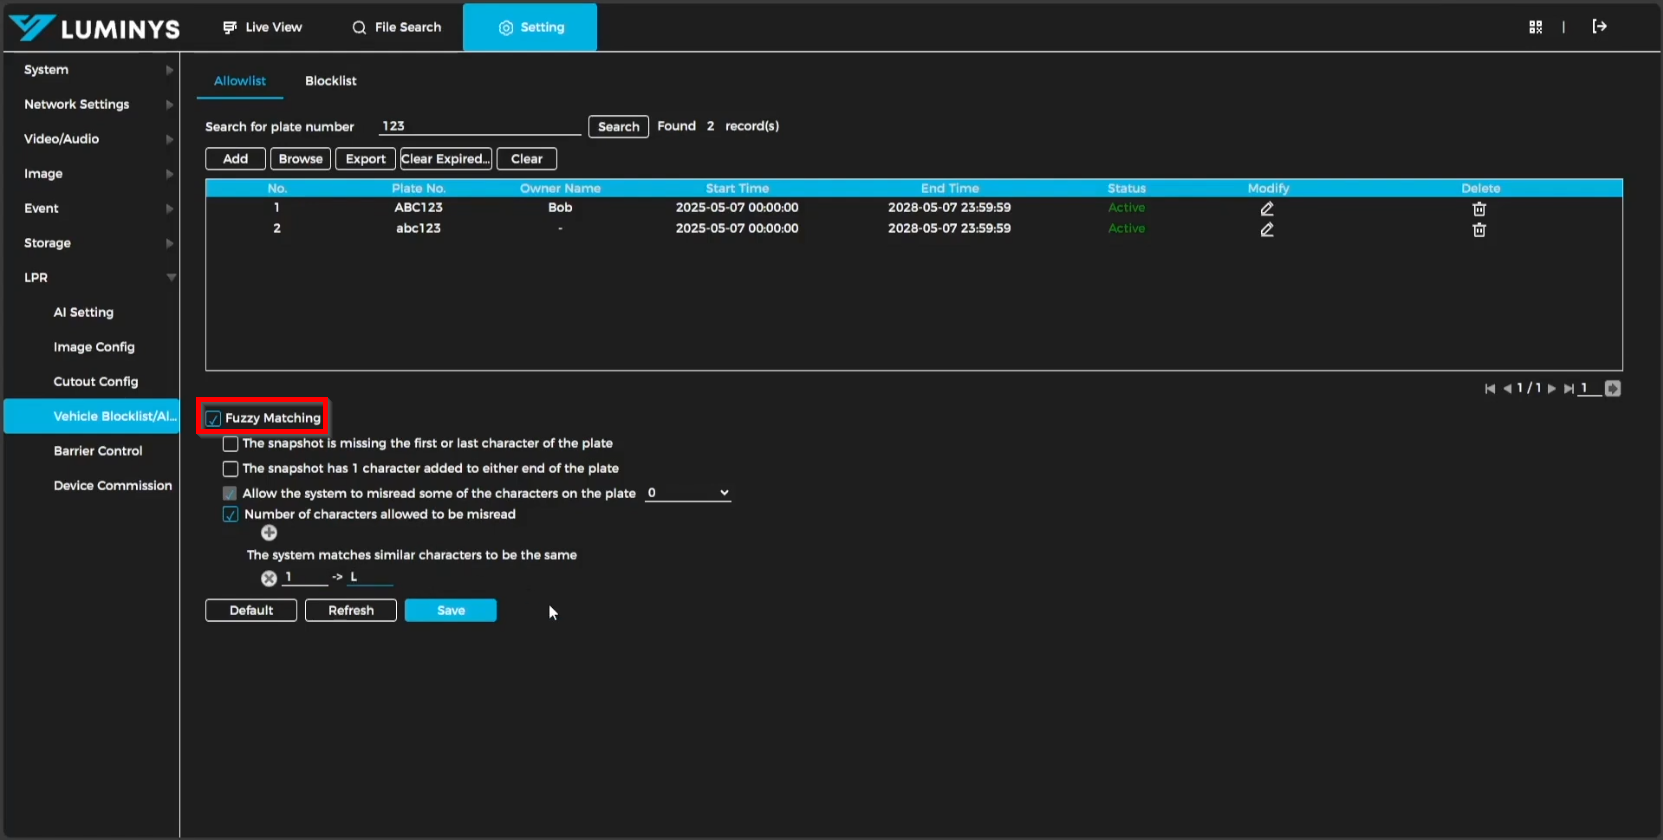
10. To enable fuzzy logic for the allowlist, select the Fuzzy Matching checkbox and configure the related options as needed.
11. The blocklist management follows the same procedure as the allowlist configuration.
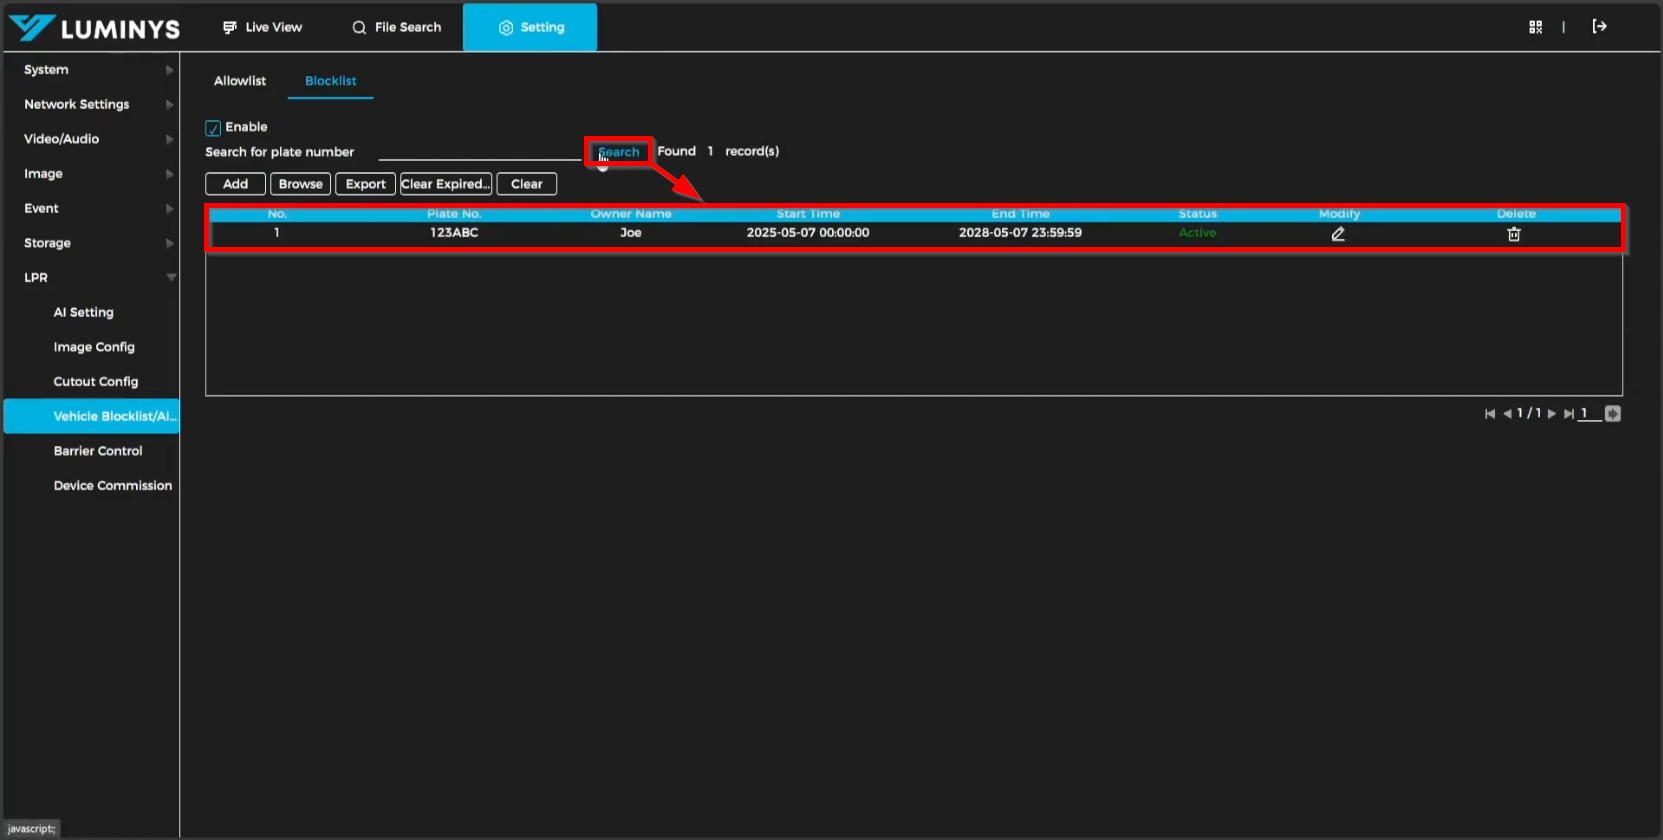
12. Selecting Search will display the complete blocklist.
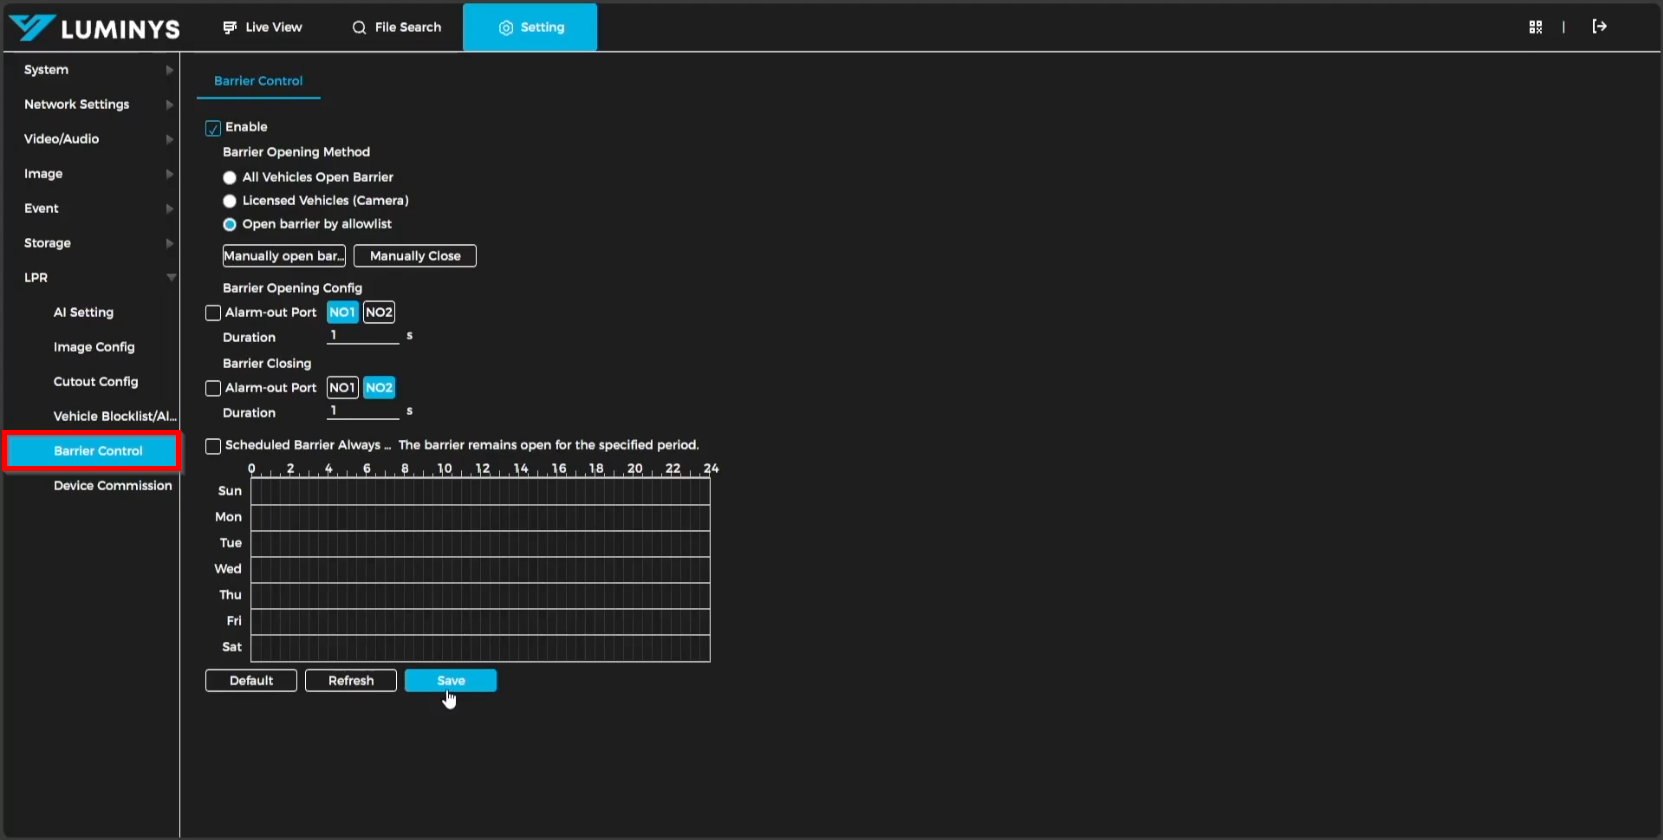
13. The Barrier Control section allows configuration of the allowlist for vehicle access to the premises.
| Barrier Opening Method | *The All Vehicles Open Barrier setting enables the barrier to open automatically whenever any vehicle passes by. *The Licensed Vehicles (Camera) setting restricts barrier access to only licensed vehicles recognized by the camera. *The Open Barrier by Allowlist setting permits the barrier to open exclusively for vehicles listed in the allowlist. |
| Manually open barrier Manually Close |
*Manual control of the barrier is available through the designated buttons: one for opening the barrier and another for closing it. |
| Barrier Opening Config Barrier Closing |
*Both NO1 and NO2 outputs can be configured for barrier opening or closing, but each output can only be assigned to one function. The duration for which the barrier remains open or closed can also be set. For example, if NO1 is assigned to barrier opening, it cannot be used for barrier closing. |
| Scheduled Barrier Always... | *The barrier can be configured to remain open for an extended period based on a predefined schedule. |
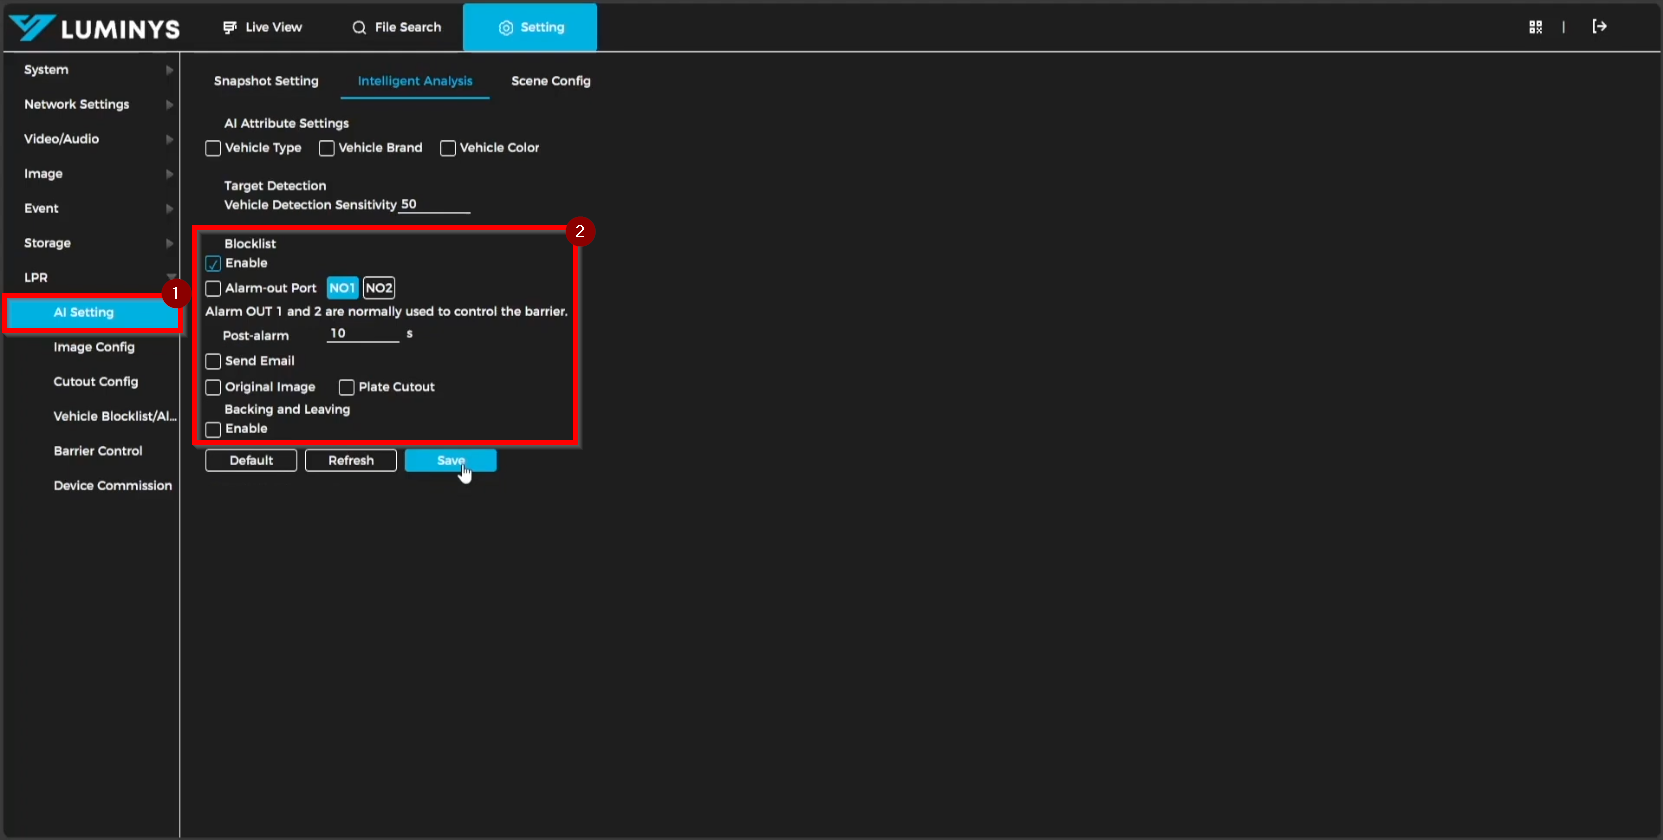
14. For blocklist configuration, navigate to AI Setting. Note that if NO1 is assigned under Barrier Control, only NO2 can be used for the blocklist in AI Setting, and vice versa.