LumiGuardian/How to access WebGUI: Difference between revisions
Techsupport (talk | contribs) |
Techsupport (talk | contribs) |
||
| (4 intermediate revisions by the same user not shown) | |||
| Line 18: | Line 18: | ||
[[File:LumiGuardian_webgui_2.png|720px|link=https://wiki.luminyscorp.com/images/4/42/LumiGuardian_webgui_2.png]] | [[File:LumiGuardian_webgui_2.png|720px|link=https://wiki.luminyscorp.com/images/4/42/LumiGuardian_webgui_2.png]] | ||
3. | 3. A window will slide out from the right. Change the "Method to add:" to "SN" <span style = "color:red">(1)</span>. </br> | ||
After that, enter all the required information: | |||
'''Device Name:''' You can name it anything you prefer. It is recommended to use the same name as in LumiCloud. </br> | |||
'''SN:''' Use the same SN that you used to add the device to LumiCloud. You can also find this SN on the plate of the trailer or on a sticker inside the top control box. </br> | |||
'''Username:''' should always be "admin" </br> | |||
'''Password:''' this is the password you setup for admin.</br> | |||
'''Protocol:''' Keep this as "Private"</br> | |||
After that click "Add and Continue" or "Add" <span style = "color:green">(2)</span> | |||
[[File:LumiGuardian_webgui_3.png|500px|link=https://wiki.luminyscorp.com/images/d/d3/LumiGuardian_webgui_3.png]] | |||
4. Wait until the status displays as Online <span style = "color:red">(1)</span>, then click the gear icon under Operation.<span style = "color:green">(2)</span> | |||
[[File:LumiGuardian_webgui_4.png|720px|link=https://wiki.luminyscorp.com/images/5/50/LumiGuardian_webgui_4.png]] | |||
5. For LumiGuardian, it is recommended to lower the resolution and bitrate. Follow the link below to continue with the guide. | |||
https://wiki.luminyscorp.com/NVR/Video_and_Audio_Settings | |||
Latest revision as of 17:31, 14 July 2026
LumiGuardian How to access WebGUI
Description
This article will cover how to access WebGUI for LumiGuardian devices.
Prerequisites
- A computer with internet access and Lumiviewer installed
- A LumiGuardian up and running with data licenses.
Step-by-step Instruction
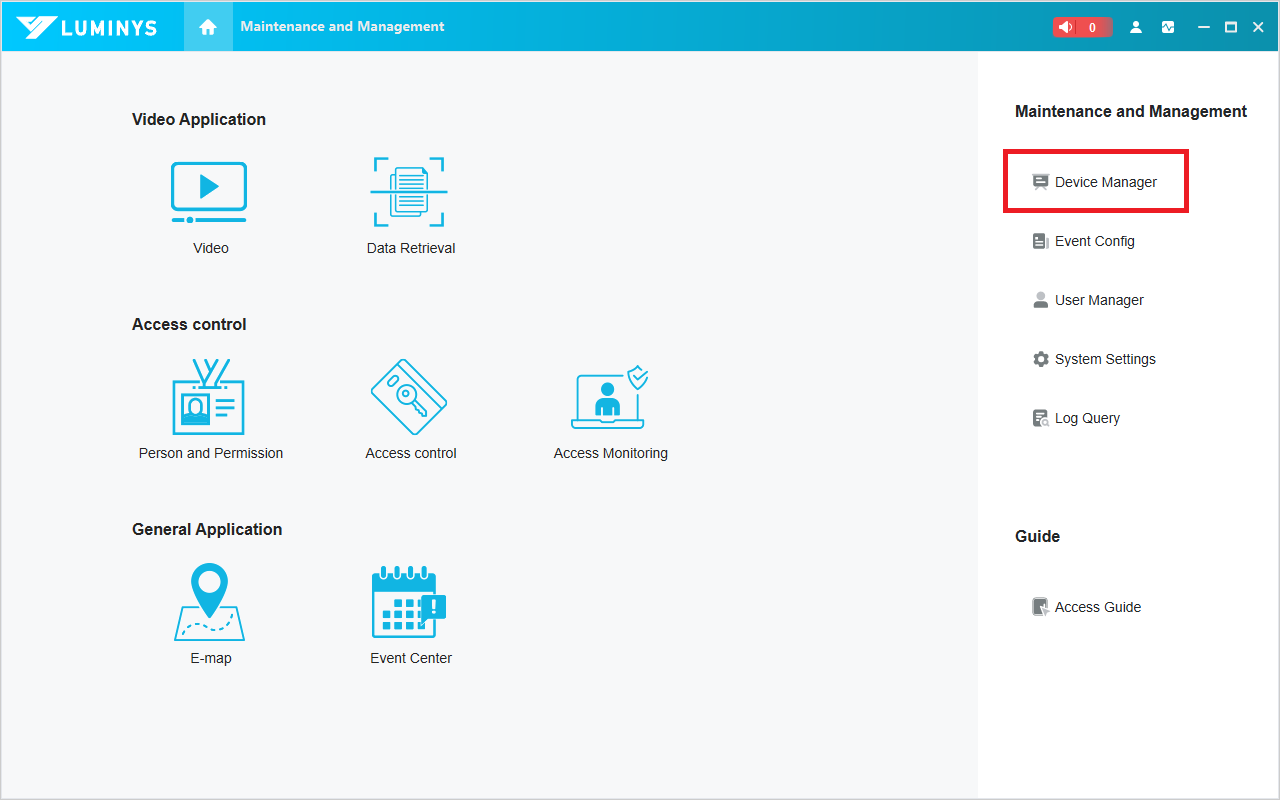
1. Open LumiViewer on PC, click on Device Manager
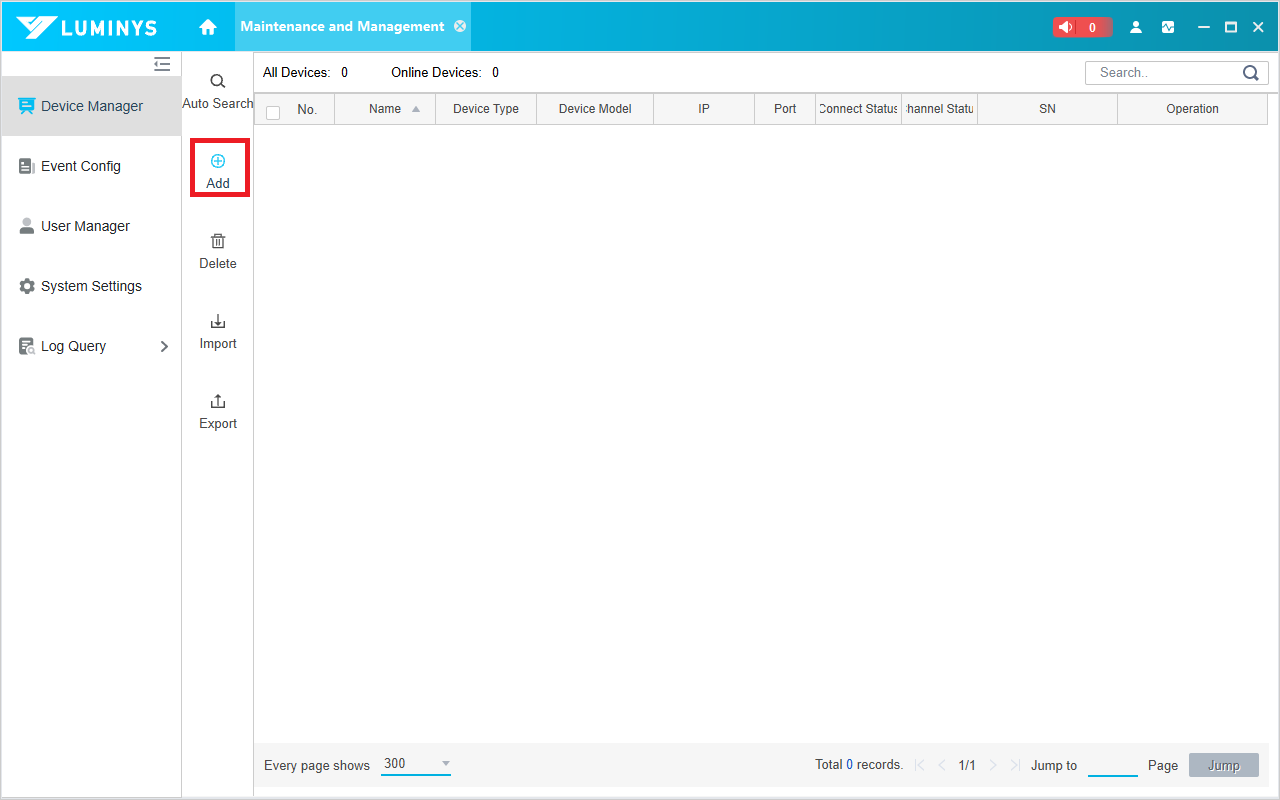
2. In the newly opened window, click Add.
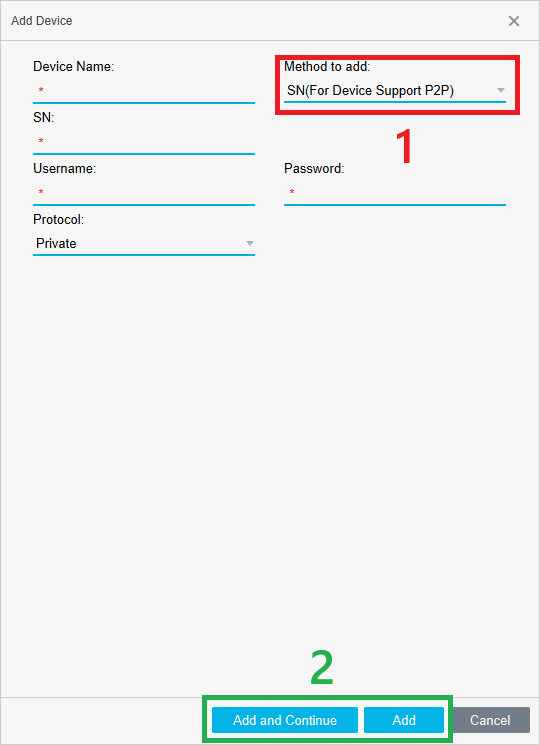
3. A window will slide out from the right. Change the "Method to add:" to "SN" (1).
After that, enter all the required information:
Device Name: You can name it anything you prefer. It is recommended to use the same name as in LumiCloud.
SN: Use the same SN that you used to add the device to LumiCloud. You can also find this SN on the plate of the trailer or on a sticker inside the top control box.
Username: should always be "admin"
Password: this is the password you setup for admin.
Protocol: Keep this as "Private"
After that click "Add and Continue" or "Add" (2)
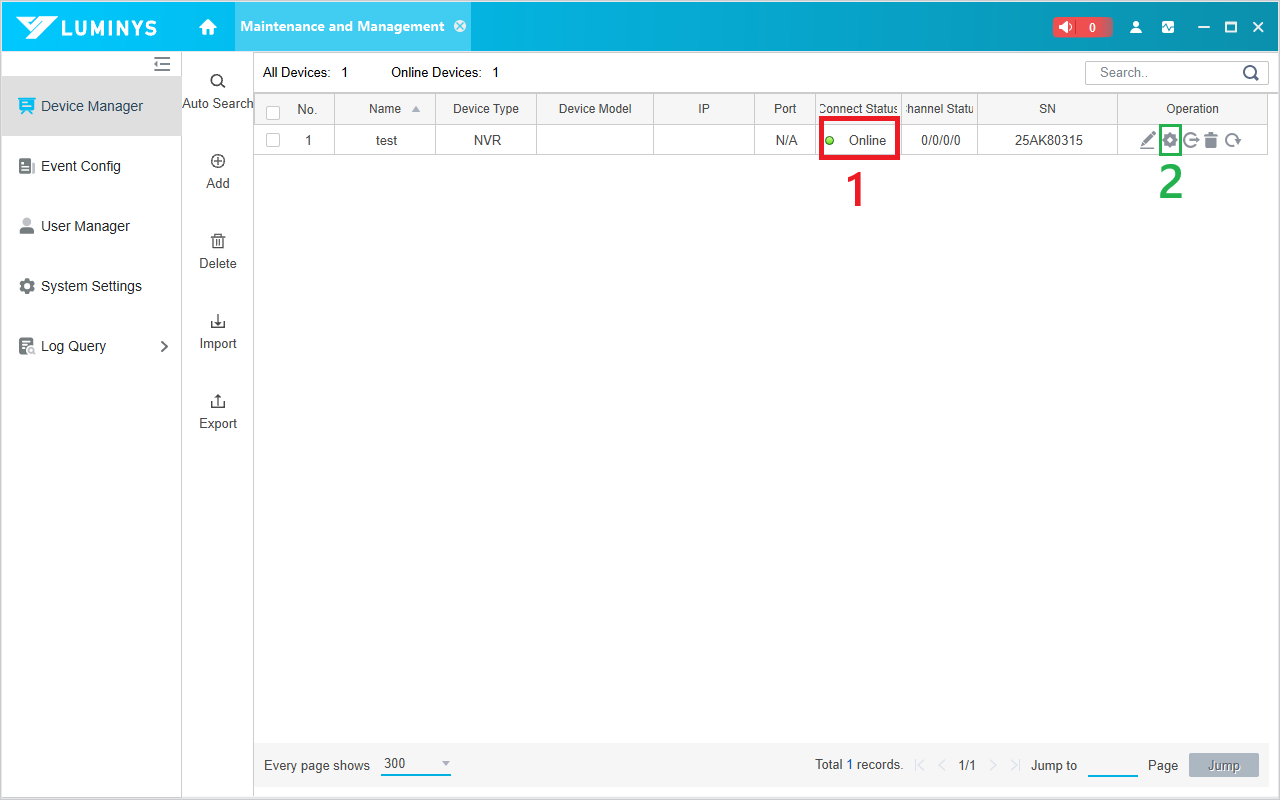
4. Wait until the status displays as Online (1), then click the gear icon under Operation.(2)
5. For LumiGuardian, it is recommended to lower the resolution and bitrate. Follow the link below to continue with the guide.