IPC/IP Camera TCP/IP Network Settings: Difference between revisions
Techsupport (talk | contribs) No edit summary |
Techsupport (talk | contribs) No edit summary Tag: Manual revert |
||
| (2 intermediate revisions by the same user not shown) | |||
| Line 10: | Line 10: | ||
===Video Instructions=== | ===Video Instructions=== | ||
<youtube>https://www.youtube.com/watch?v= | <youtube>https://www.youtube.com/watch?v=H53tLtyLauM</youtube> | ||
===Step by Step Instructions=== | ===Step by Step Instructions=== | ||
Latest revision as of 10:15, 12 May 2025
IP Network Settings
Description
This tutorial will go over how to setup IP network via camera's webGUI.
Prerequisites
- Cameras already initialized.
Video Instructions
Step by Step Instructions
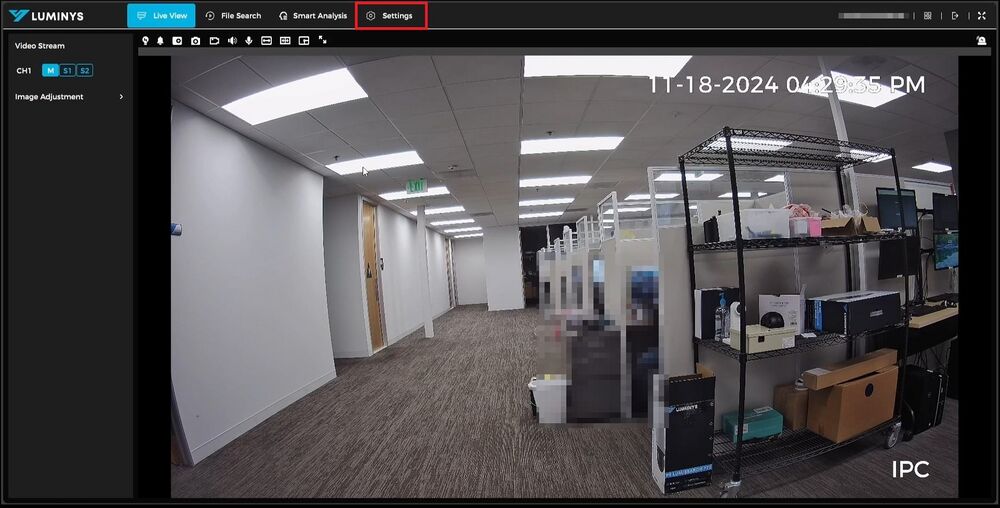
1. Begin by logging into the camera's WebUI. After accessing the interface, proceed to the settings section.
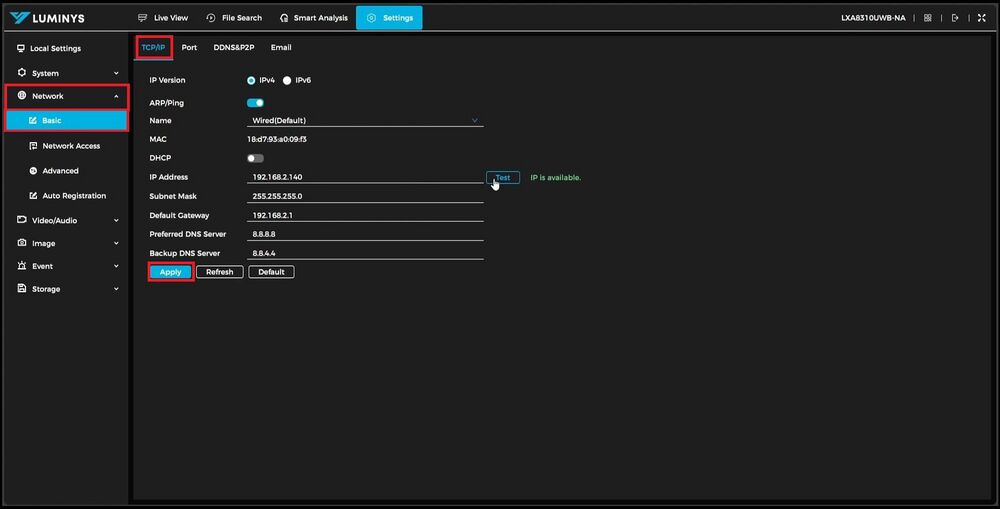
2. In the settings menu, expand the “Network” option and select “Basic.” Under Basic, ensure the TCP/IP tab is selected. Choose the preferred IP version, either IPv4 or IPv6. For cameras with both Ethernet and Wi-Fi capabilities, select the desired connection type from the dropdown menu. Decide whether the camera will obtain an IP address automatically via DHCP or if the information will be entered manually. For static configurations, input the IP address and use the "Test" option to verify that the address is not already in use on the network. If the IP is available, proceed to input the remaining details. Click "Apply" to save the settings.
3. When the changes are applied, the page will reload to reflect the updated IP address, leading back to the login screen. Log in again to make further adjustments if necessary. This finalizes the process of modifying network settings on the Luminys IPC.


