Access Control/Time Plan and Permission Settings: Difference between revisions
Techsupport (talk | contribs) |
Techsupport (talk | contribs) No edit summary |
||
| Line 28: | Line 28: | ||
4. Multiple holidays can be added to a holiday plan if they fall under the same schedule. Ensure a checkmark is placed next to the desired date to keep the holiday active, then click "Apply" to complete the process. | 4. Multiple holidays can be added to a holiday plan if they fall under the same schedule. Ensure a checkmark is placed next to the desired date to keep the holiday active, then click "Apply" to complete the process. | ||
[[File:Access_Control_Permissions_4.png| | [[File:Access_Control_Permissions_4.png|700px|link=https://wiki.luminyscorp.com/images/c/c2/Access_Control_Permissions_4.png]] | ||
5. Open "Zone Settings" and select "Add" to create a new zone. Assign a name to the zone and choose the doors to include. For a single controller setup, two doors can be assigned to the zone. Click "Apply" at the bottom to save the configuration. | 5. Open "Zone Settings" and select "Add" to create a new zone. Assign a name to the zone and choose the doors to include. For a single controller setup, two doors can be assigned to the zone. Click "Apply" at the bottom to save the configuration. | ||
Latest revision as of 15:35, 17 December 2024
Time Plan and Permission Settings
Description
This tutorial will go over how to set time plan and permissions.
Prerequisites
- Able to access access controller's webGUI.
Video Instructions
Coming soon
Step by Step Instructions
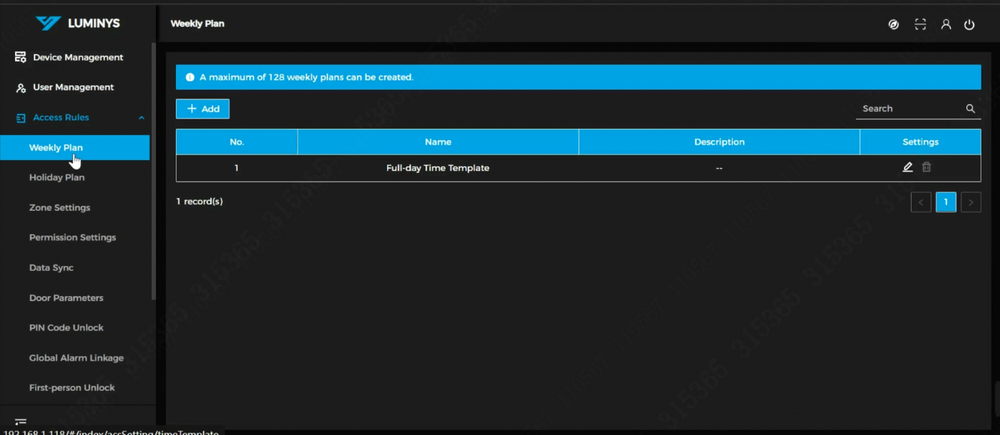
1. To define an access rule, begin by setting up a schedule plan. A weekly plan is used for regular scheduling.
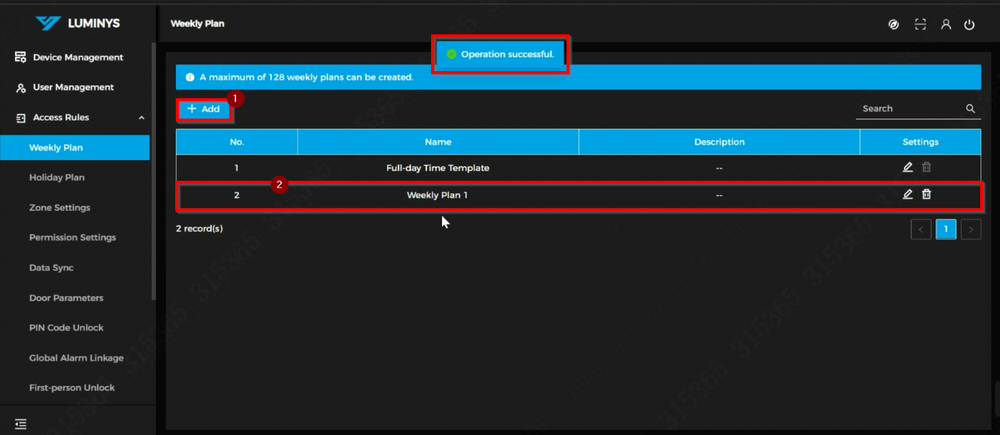
2. By default, a 24/7 full schedule template is provided. Custom templates can be created, and the pencil icon allows editing the template to modify any day of the week and its associated time.
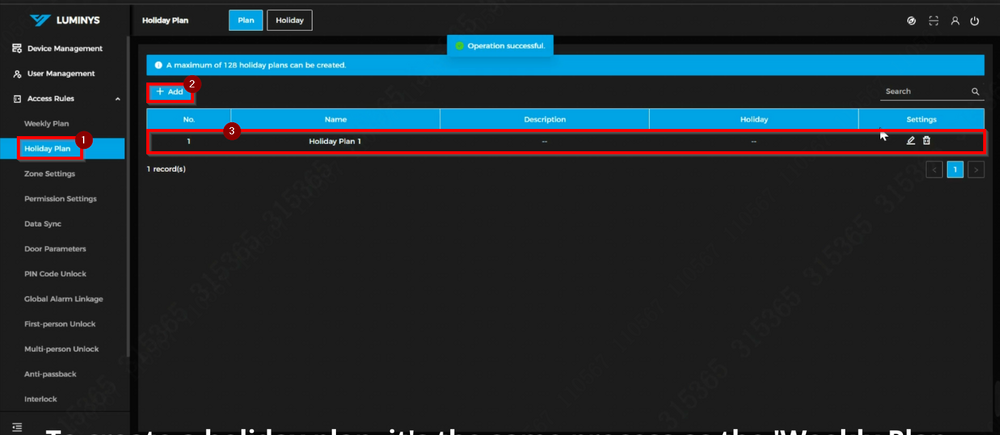
3. A holiday plan takes precedence over a weekly plan. Creating a holiday plan follows the same process as creating a "Weekly Plan." Begin by clicking "Add," then select the pencil icon to edit.
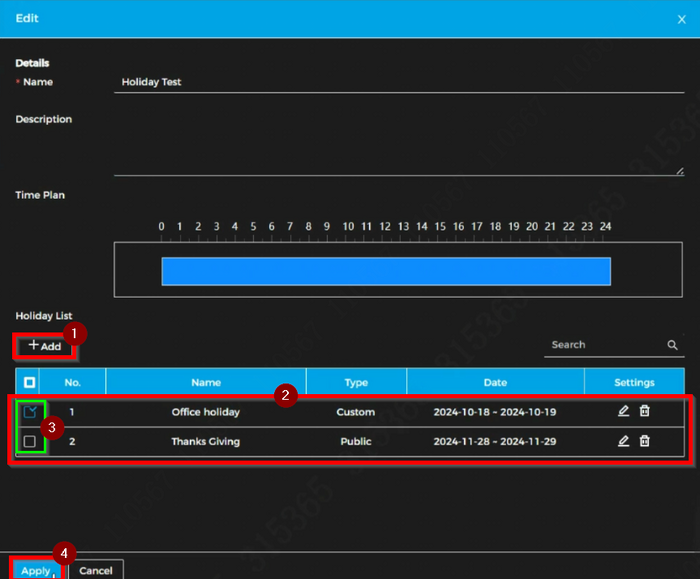
4. Multiple holidays can be added to a holiday plan if they fall under the same schedule. Ensure a checkmark is placed next to the desired date to keep the holiday active, then click "Apply" to complete the process.
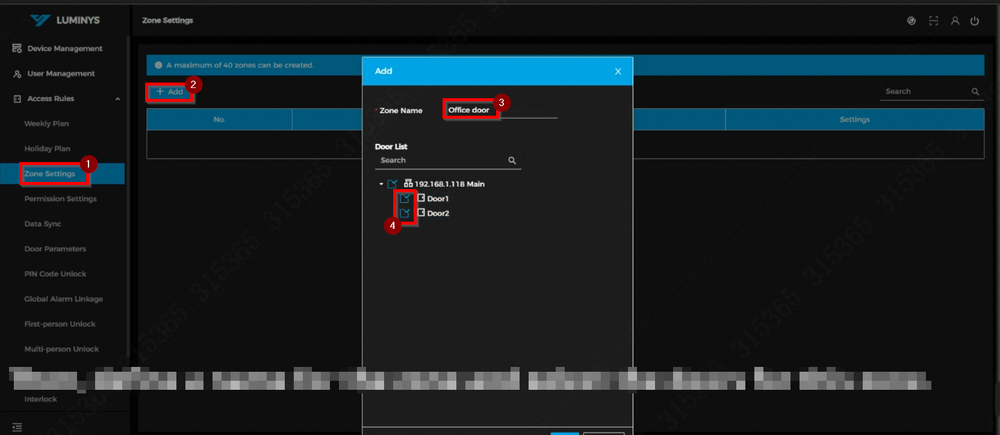
5. Open "Zone Settings" and select "Add" to create a new zone. Assign a name to the zone and choose the doors to include. For a single controller setup, two doors can be assigned to the zone. Click "Apply" at the bottom to save the configuration.
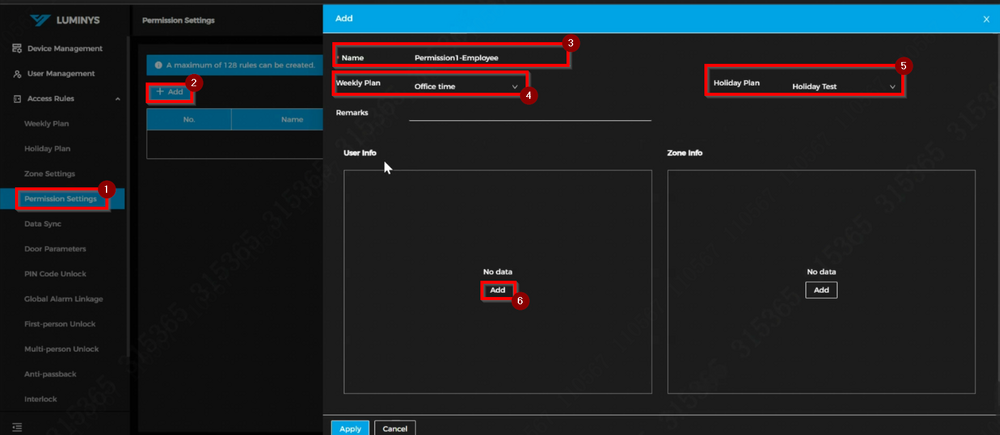
6. Begin by assigning a name to the permission. Select the weekly plan schedule and, if necessary, the holiday plan schedule.
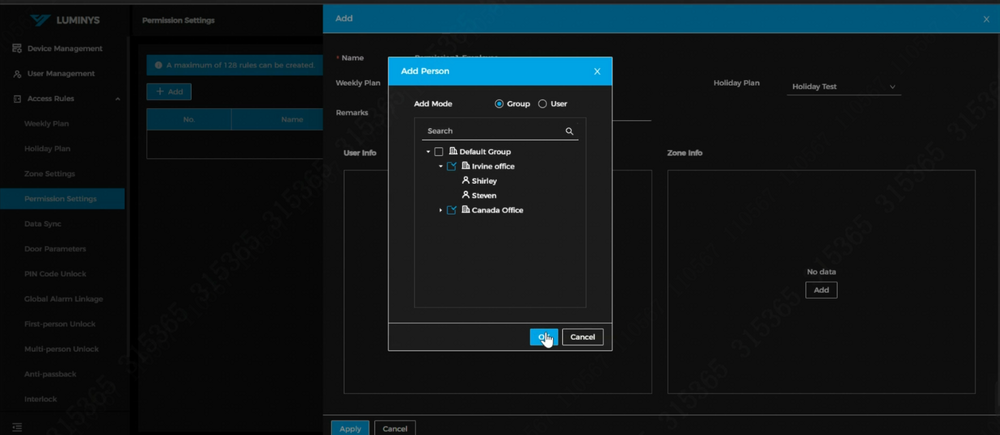
7. Users can be assigned to this permission rule, either by group or individually.
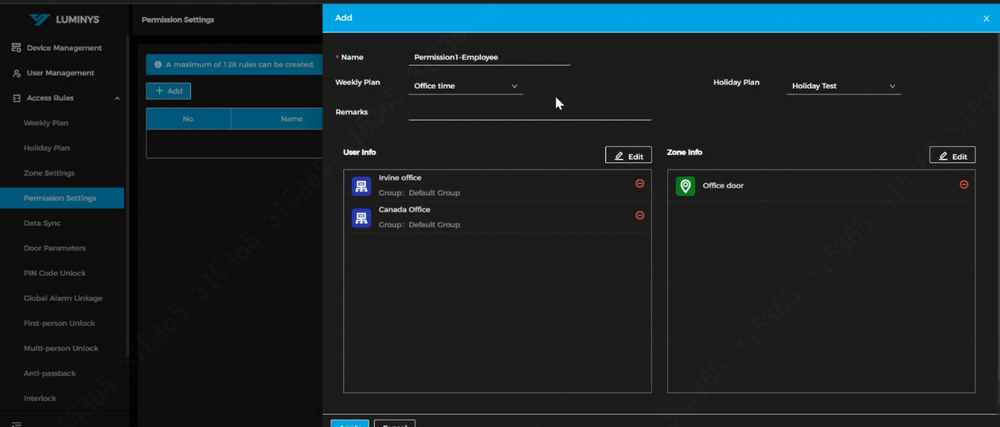
8. Once users are assigned, add zones to the permission rule. Click "Apply" to finalize the process.

