LumiViewer PC/How to Apply License: Difference between revisions
From Luminys WIKI
Techsupport (talk | contribs) No edit summary |
Techsupport (talk | contribs) No edit summary |
||
| (2 intermediate revisions by the same user not shown) | |||
| Line 10: | Line 10: | ||
===Video Instructions=== | ===Video Instructions=== | ||
<Youtube>https://youtu.be/8U5yI0M7dVY</youtube> | |||
===Step by Step Instructions=== | ===Step by Step Instructions=== | ||
| Line 30: | Line 30: | ||
[[File:Viewer4.png|1000px|link=https://wiki.luminyscorp.com/images/d/d6/Viewer4.png]] | [[File:Viewer4.png|1000px|link=https://wiki.luminyscorp.com/images/d/d6/Viewer4.png]] | ||
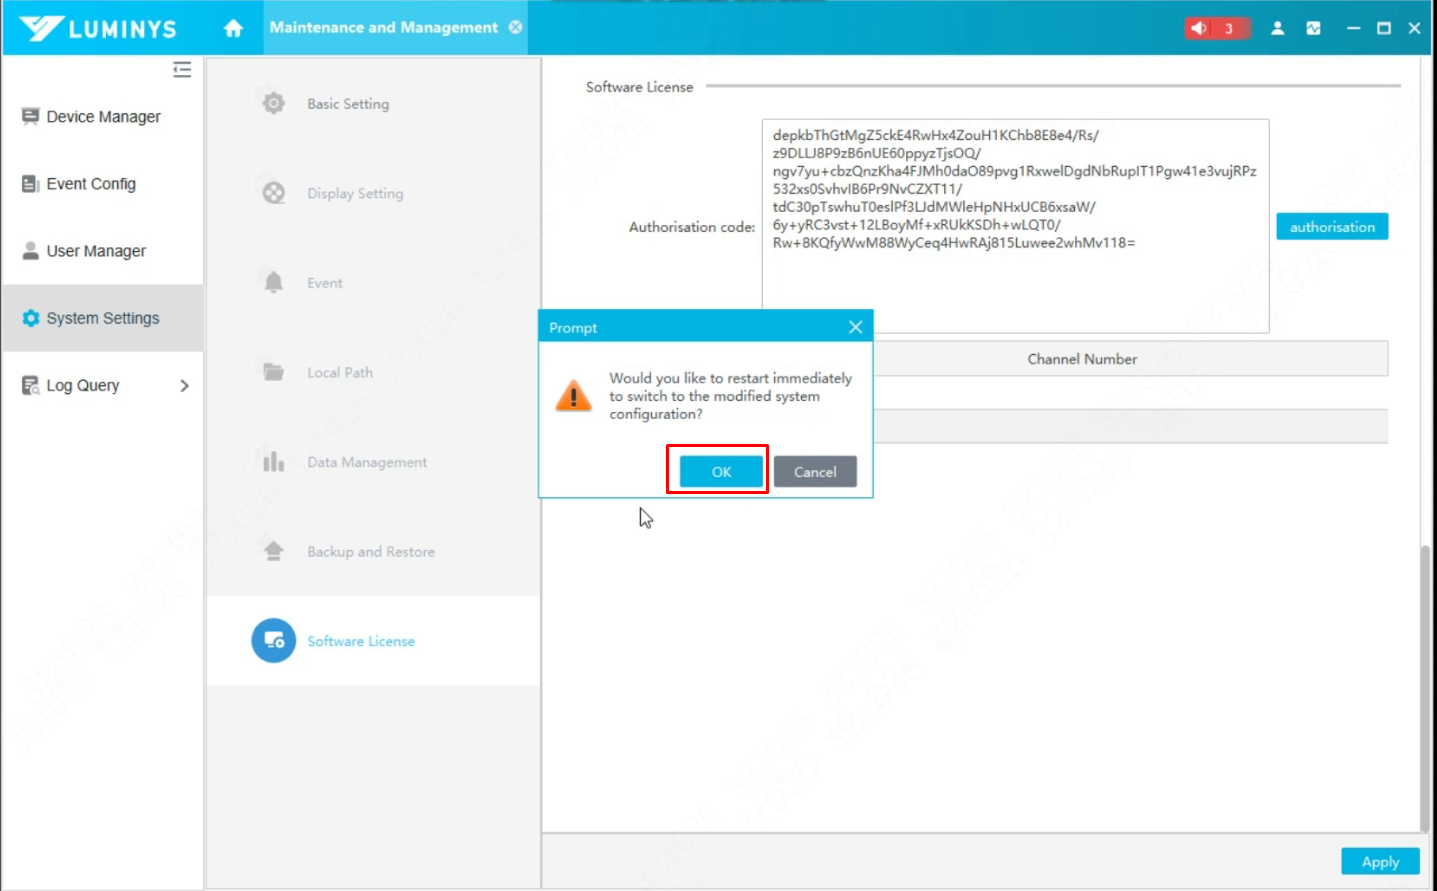
5. | 5. A prompt will appear to restart the software. Please click OK to proceed with the restart. | ||
[[File: | [[File:Viewer_License_5.png|1000px|link=https://wiki.luminyscorp.com/images/e/ed/Viewer_License_5.png]] | ||
6. | 6. The software should reopen automatically. | ||
If the license is applied successfully, you should see an increase in the number of channels. | |||
[[File:ViewerLicense6.png|1000px|link=https://wiki.luminyscorp.com/images/7/78/ViewerLicense6.png]] | |||
[[File: | |||
Latest revision as of 10:52, 9 May 2025

Adding License to LumiViewer
Description
This tutorial will go over how to add License to LumiViewer PC version.
Prerequisites
- LumiViewer application installed on the computer.
Video Instructions
Step by Step Instructions
1. Open LumiViewer application, then select System Settings on the right side of the home screen.

2. Look for the Software License section under System Settings.
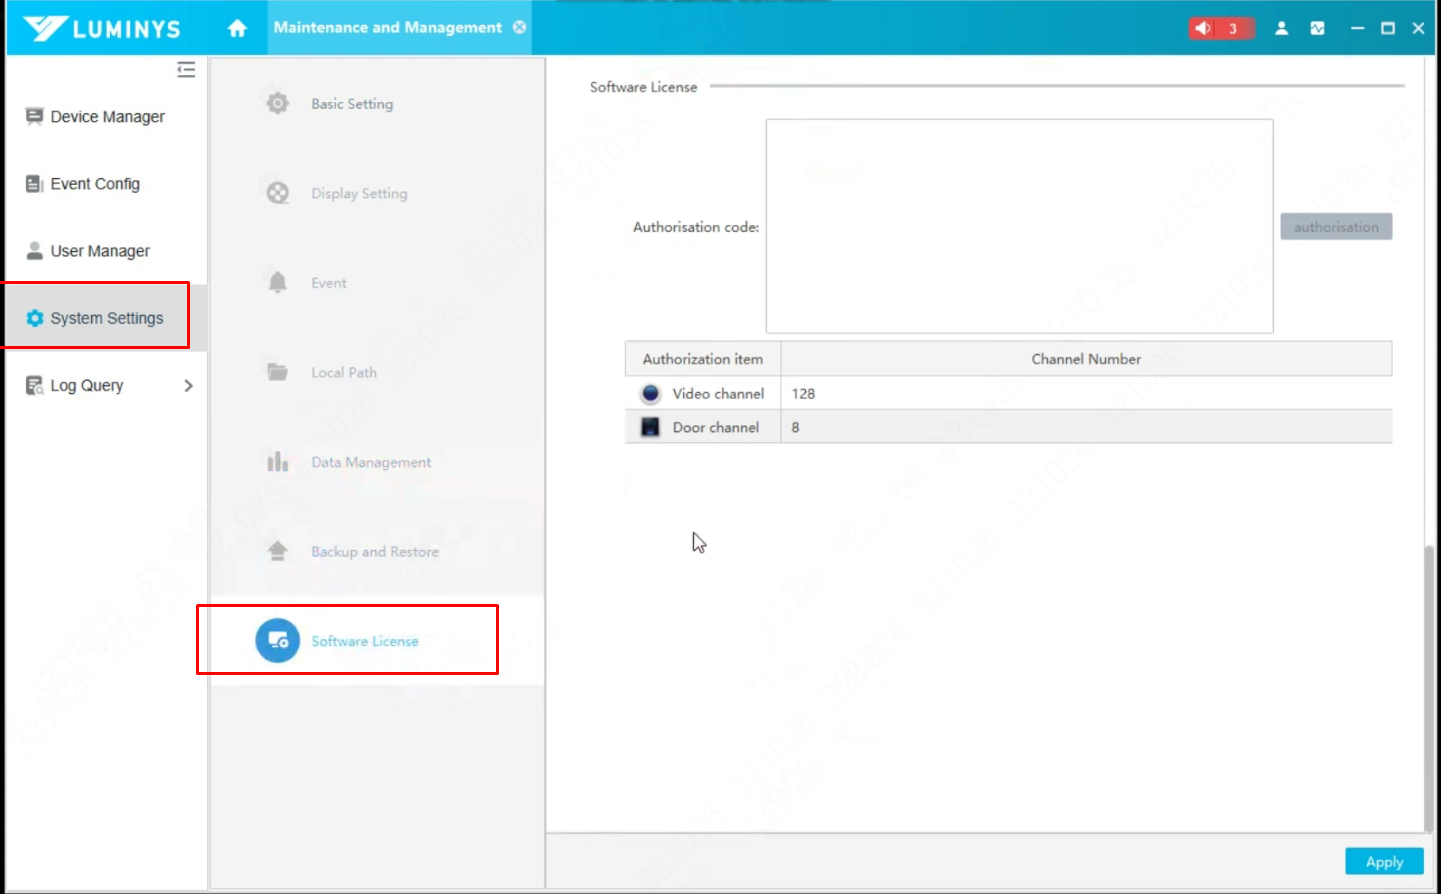
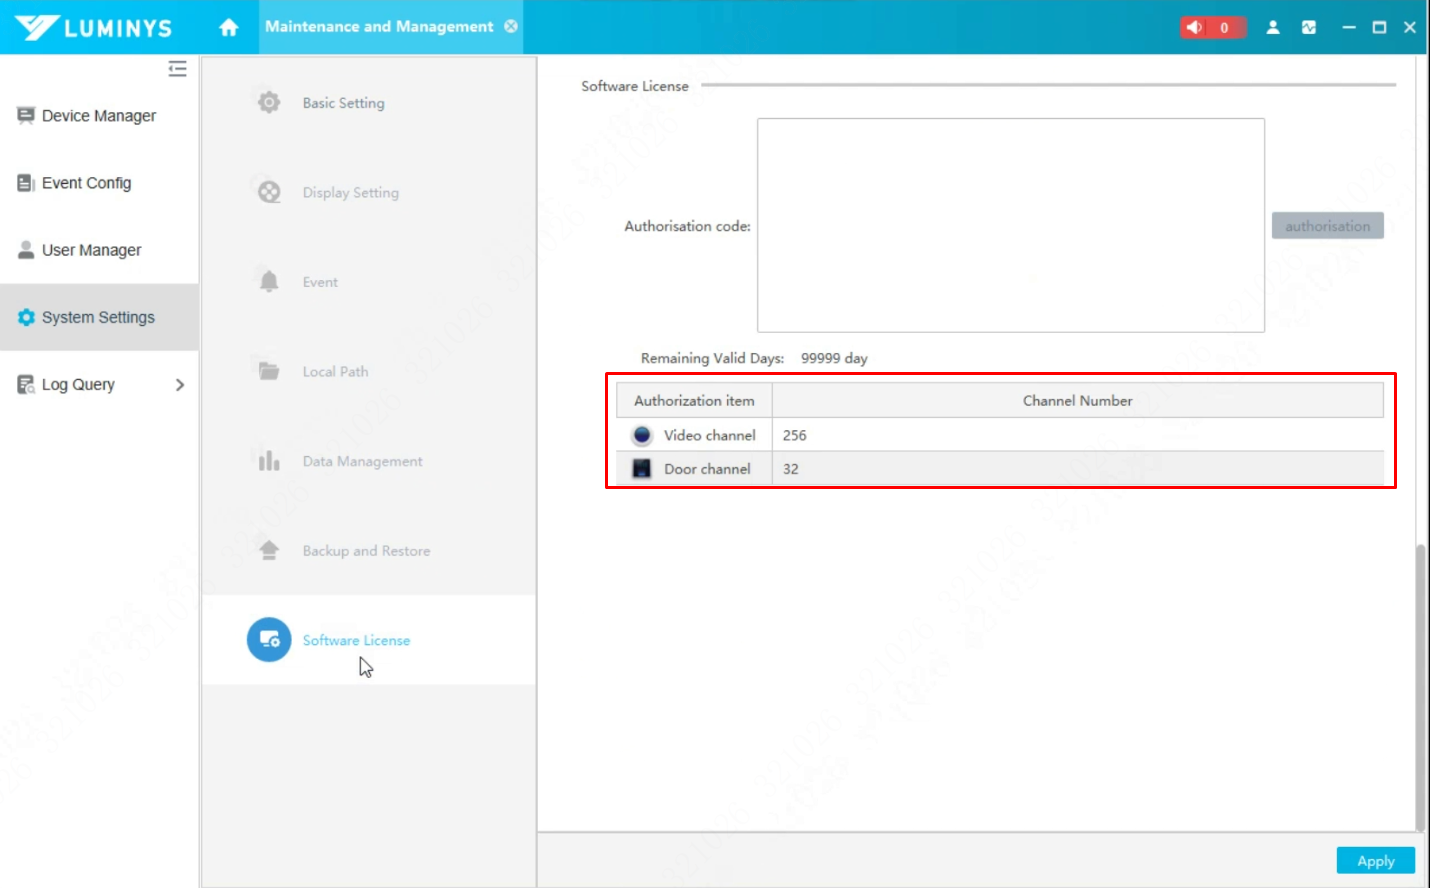
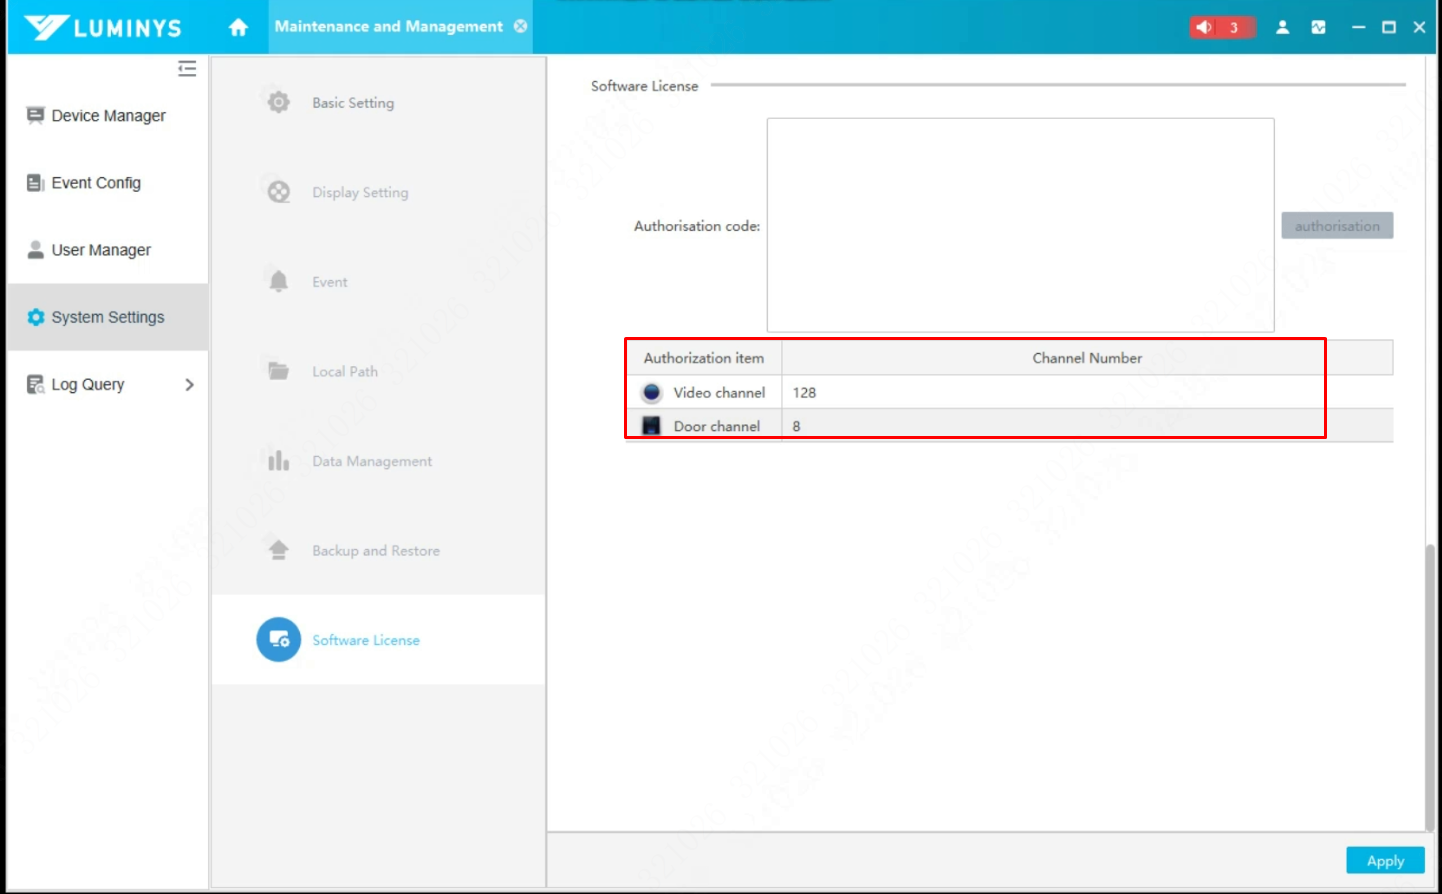
3. By default, it comes with 128 video channels.
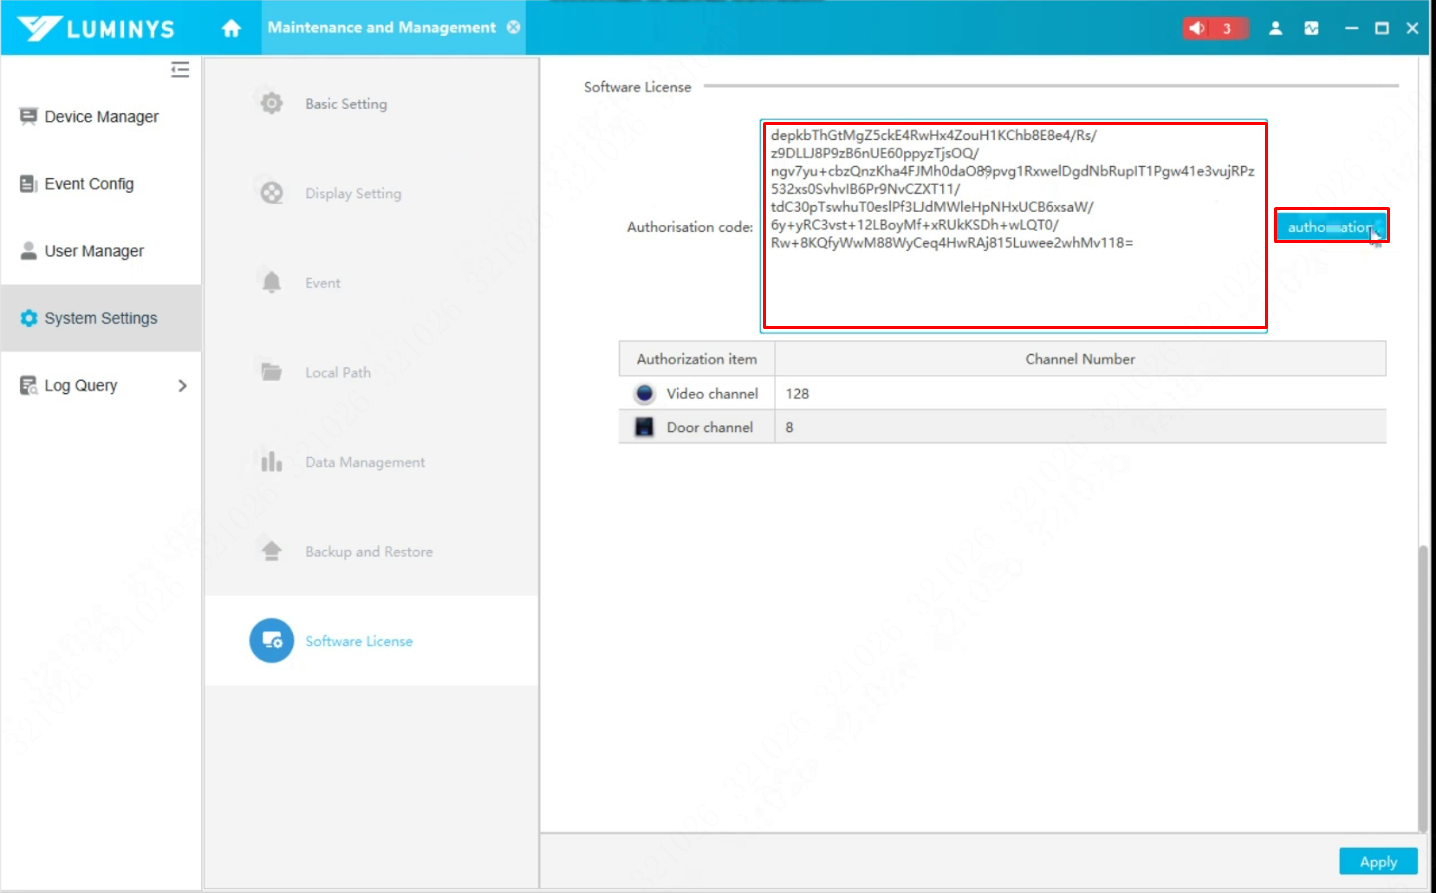
4. To enter the purchased license code, input the code in the Software License box, then click the button next to the box to apply the license.
5. A prompt will appear to restart the software. Please click OK to proceed with the restart.
6. The software should reopen automatically.
If the license is applied successfully, you should see an increase in the number of channels.