LumiCloud/Preset and Tour: Difference between revisions
Techsupport (talk | contribs) |
Techsupport (talk | contribs) |
||
| (7 intermediate revisions by the same user not shown) | |||
| Line 12: | Line 12: | ||
[[File:PTZ_Preset_cloud_1.png|1000px|link=https://wiki.luminyscorp.com/images/b/ba/PTZ_Preset_cloud_1.png]] | [[File:PTZ_Preset_cloud_1.png|1000px|link=https://wiki.luminyscorp.com/images/b/ba/PTZ_Preset_cloud_1.png]] | ||
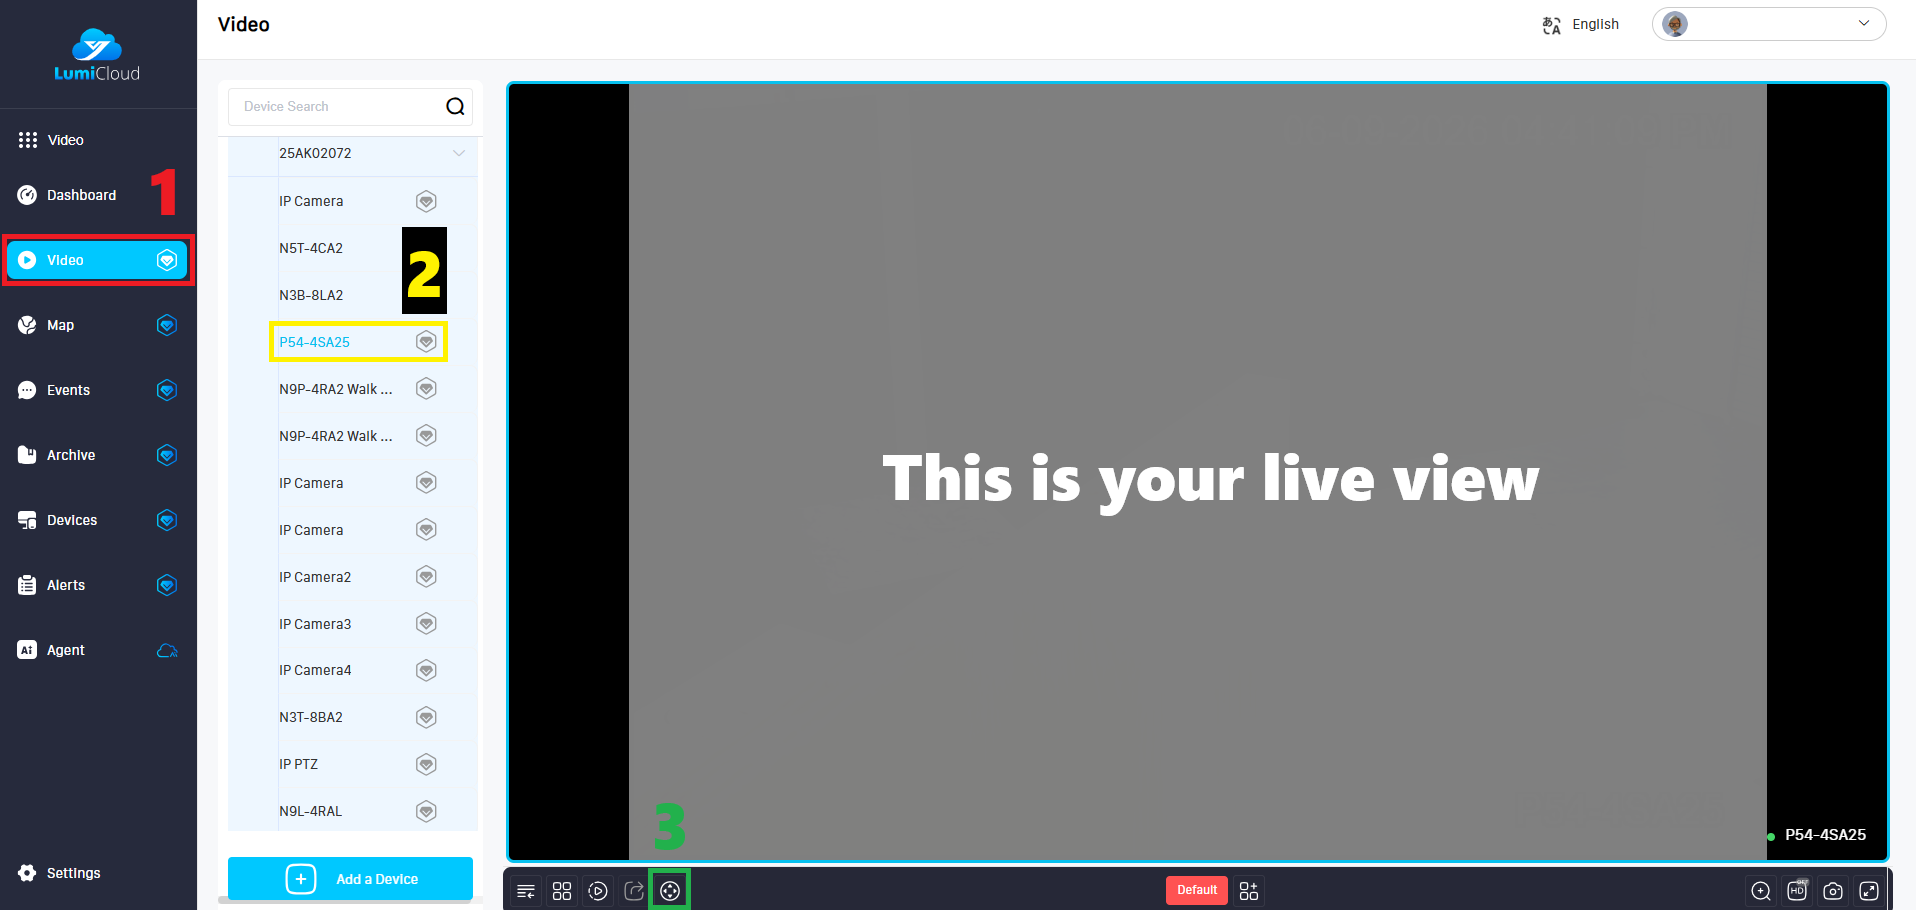
2. Select the “Video” tab <span style = "color: red"> (1) </span> on the left panel, locate the PTZ camera <span style = "color: yellow; | 2. Select the “Video” tab <span style = "color: red"> (1) </span> on the left panel, locate the PTZ camera <span style = "color: yellow; background: black"> (2)</span> for which you want to create a preset, and then click the PTZ icon <span style = "color: green"> (3) </span> at the bottom. | ||
[[File:PTZ_Preset_cloud_2.png|1000px|link=https://wiki.luminyscorp.com/images/e/e5/PTZ_Preset_cloud_2.png]] | |||
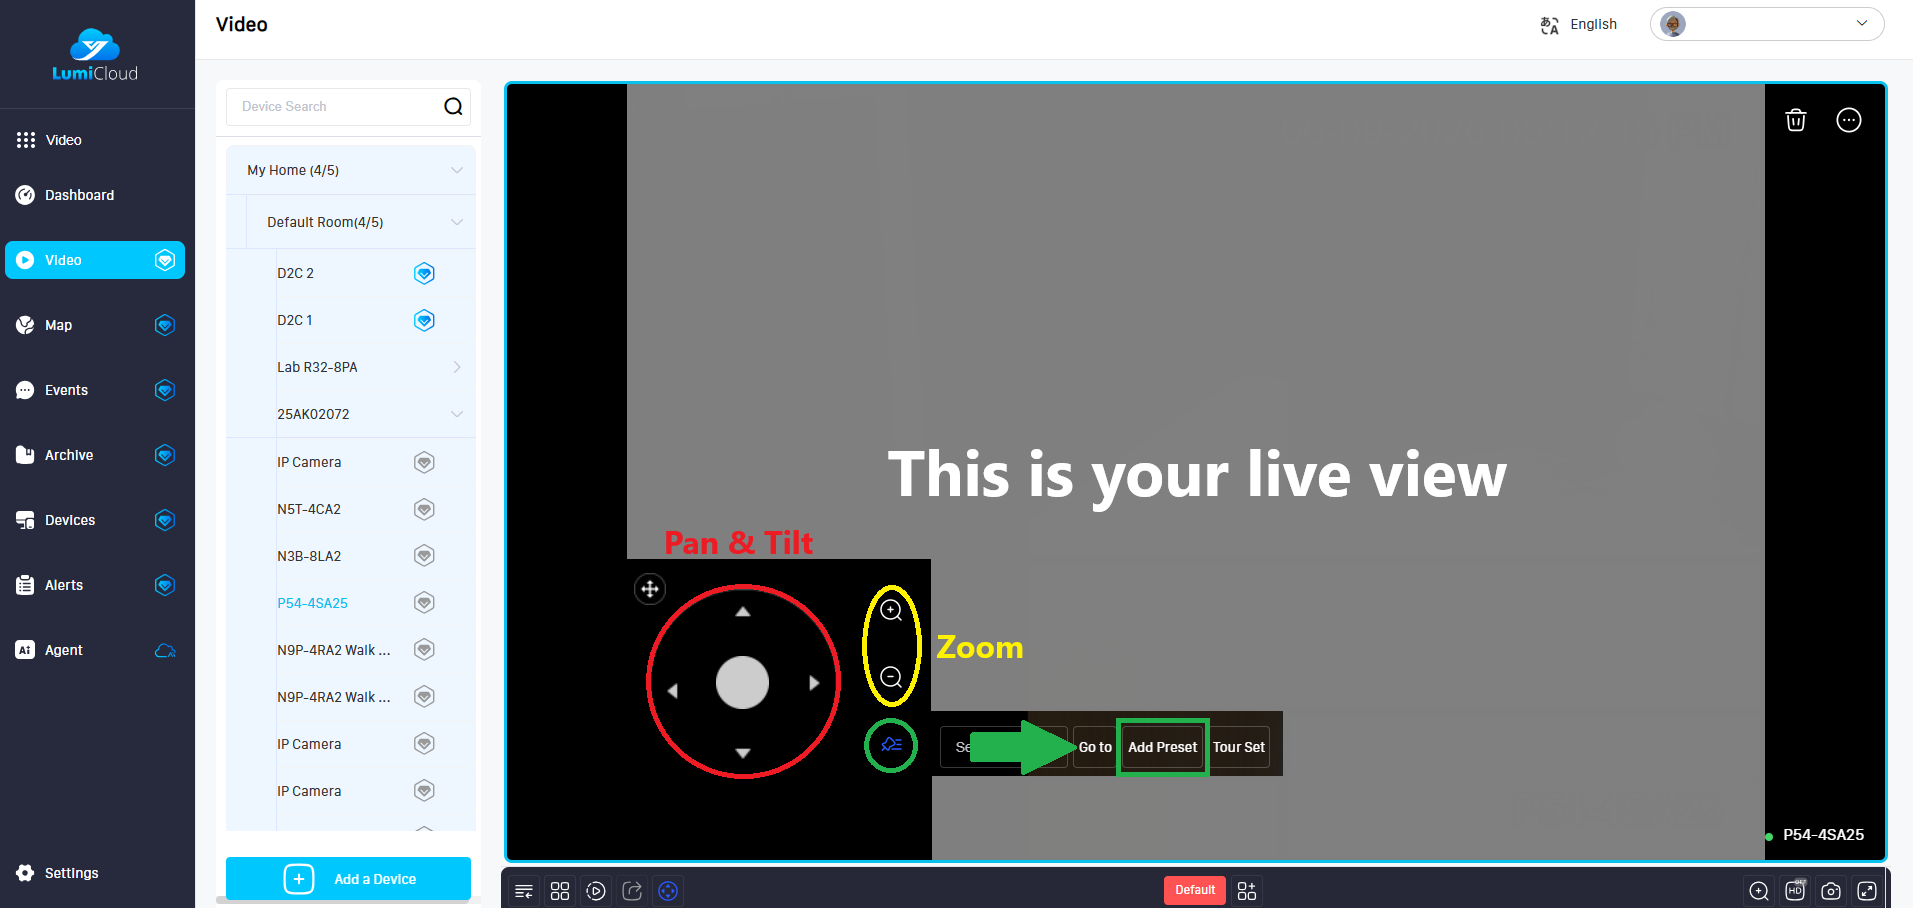
3. Use the on-screen controller to adjust the <span style = "color: red"> pan, tilt, </span> and <span style = "color: yellow; background: black"> zoom</span>. Once you are satisfied with the current view, click the <span style = "color: green"> hamburger icon </span>, then select the <span style = "color: green"> “Add Preset”</span> button. Repeat this step to add additional presets. | |||
[[File:PTZ_Preset_cloud_3.png|1000px|link=https://wiki.luminyscorp.com/images/7/79/PTZ_Preset_cloud_3.png]] | |||
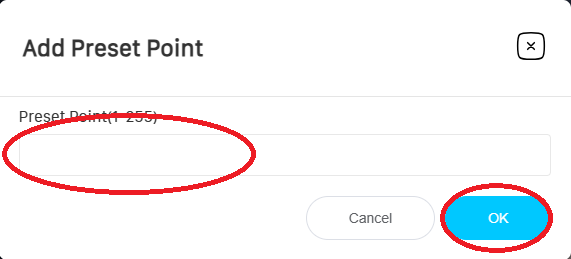
4. Enter the number for Preset Point, then click "OK" | |||
[[File:PTZ_Preset_cloud_4.png|512px|link=https://wiki.luminyscorp.com/images/3/35/PTZ_Preset_cloud_4.png]] | |||
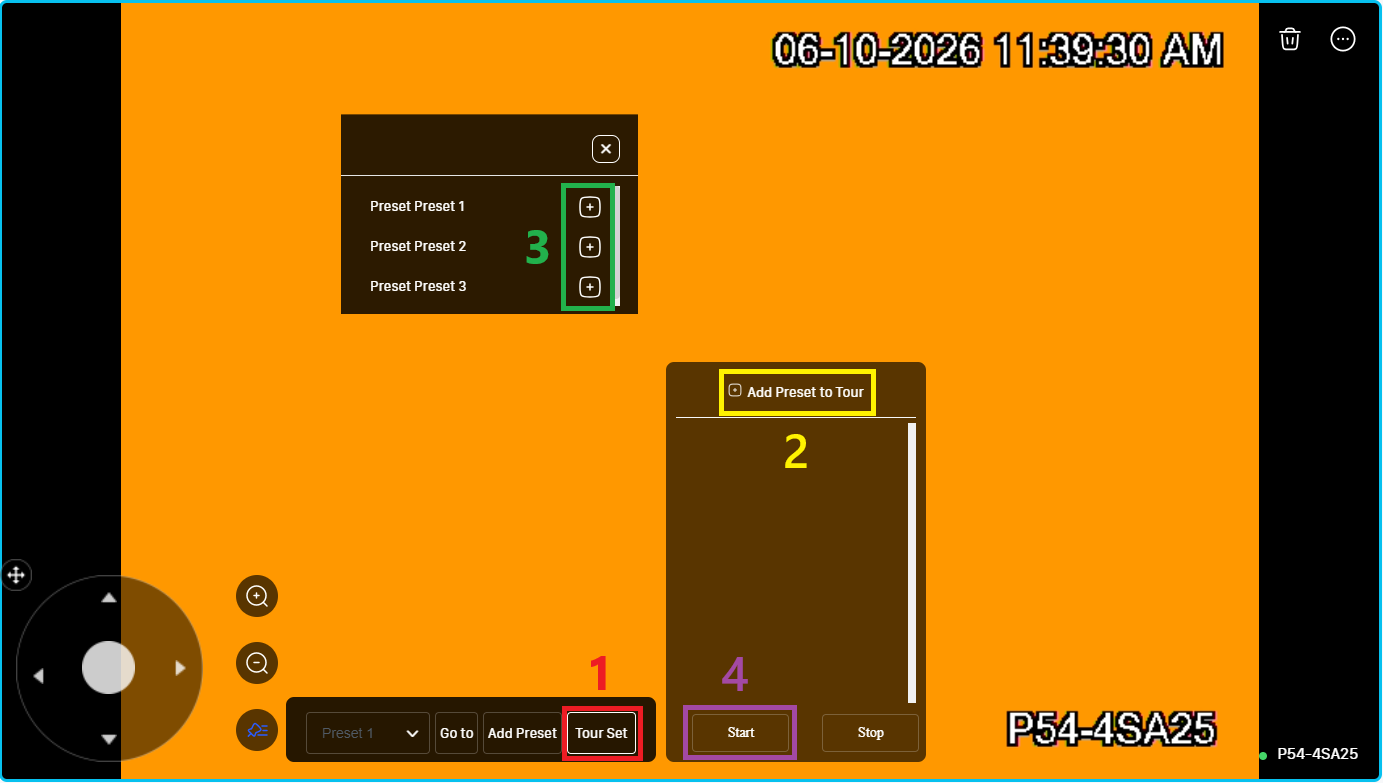
5. To set a Tour, click “Tour Set” <span style = "color: red">(1)</span>, then select “Add Preset to Tour” <span style = "color: yellow; background: black">(2)</span>, add the preset you want to include in the tour <span style = "color: green">(3)</span>, and finally click “Start” <span style = "color: purple">(4)</span>. | |||
[[File:PTZ_Tour_cloud.png|1024px|link=https://wiki.luminyscorp.com/images/0/08/PTZ_Tour_cloud.png]] | |||
Latest revision as of 11:53, 10 June 2026
Description
This tutorial will go over how to setup preset and tour in LumiCloud for PTZ cameras.
Prerequisites
- LumiCloud account logged in to https://webapp.lumicloud.com
- Device with licensed video channels
Instructions
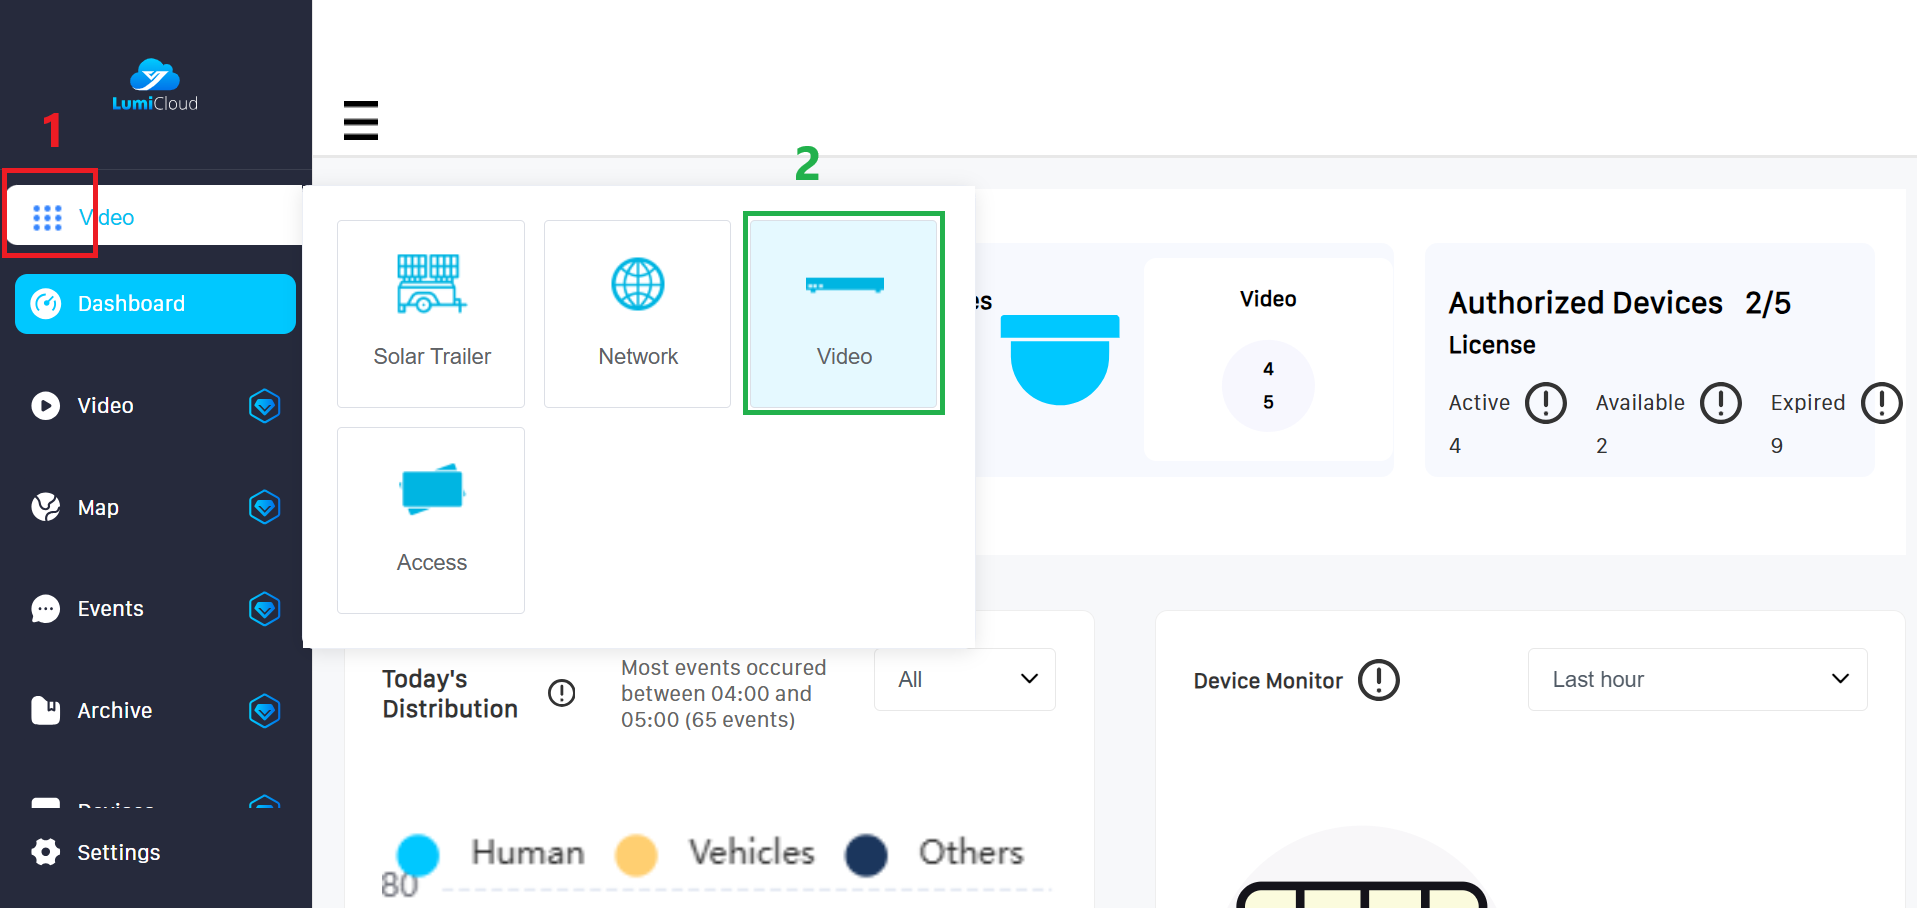
1. After logging in, select launcher (1) icon from the left panel, then choose the "Video" (2) option.
2. Select the “Video” tab (1) on the left panel, locate the PTZ camera (2) for which you want to create a preset, and then click the PTZ icon (3) at the bottom.
3. Use the on-screen controller to adjust the pan, tilt, and zoom. Once you are satisfied with the current view, click the hamburger icon , then select the “Add Preset” button. Repeat this step to add additional presets.
4. Enter the number for Preset Point, then click "OK"
5. To set a Tour, click “Tour Set” (1), then select “Add Preset to Tour” (2), add the preset you want to include in the tour (3), and finally click “Start” (4).