LumiPlayer/How to use Watermark Detection in LumiPlayer: Difference between revisions
From Luminys WIKI
Techsupport (talk | contribs) |
Techsupport (talk | contribs) |
||
| Line 31: | Line 31: | ||
5. The results will be displayed.</br> | 5. The results will be displayed.</br> | ||
Number <span style="color:red">(1)</span> indicates all altered files; | Number <span style="color:red">(1)</span> indicates all altered files; the result will be shown as "Falsified."</br> | ||
Number <span style="color:green">(2)</span> indicates all valid files. These files come directly from the NVR and have not been altered. | Number <span style="color:green">(2)</span> indicates all valid files. These files come directly from the NVR and have not been altered. | ||
[[File:LumiPlayer_WD_5.png|1024px|link=https://wiki.luminyscorp.com/images/f/fc/LumiPlayer_WD_5.png]] | [[File:LumiPlayer_WD_5.png|1024px|link=https://wiki.luminyscorp.com/images/f/fc/LumiPlayer_WD_5.png]] | ||
Latest revision as of 11:08, 25 June 2026

Watermark Detection in LumiPlayer
Description
This tutorial will go over how to use Watermark Detection feature in LumiPlayer.
Prerequisites
- Ensure the LumiPlayer application is on the computer.
- Download the playback video to the computer.
- Verify that the playback video uses the LAV extension (REQUIRED).
Step by Step Instructions
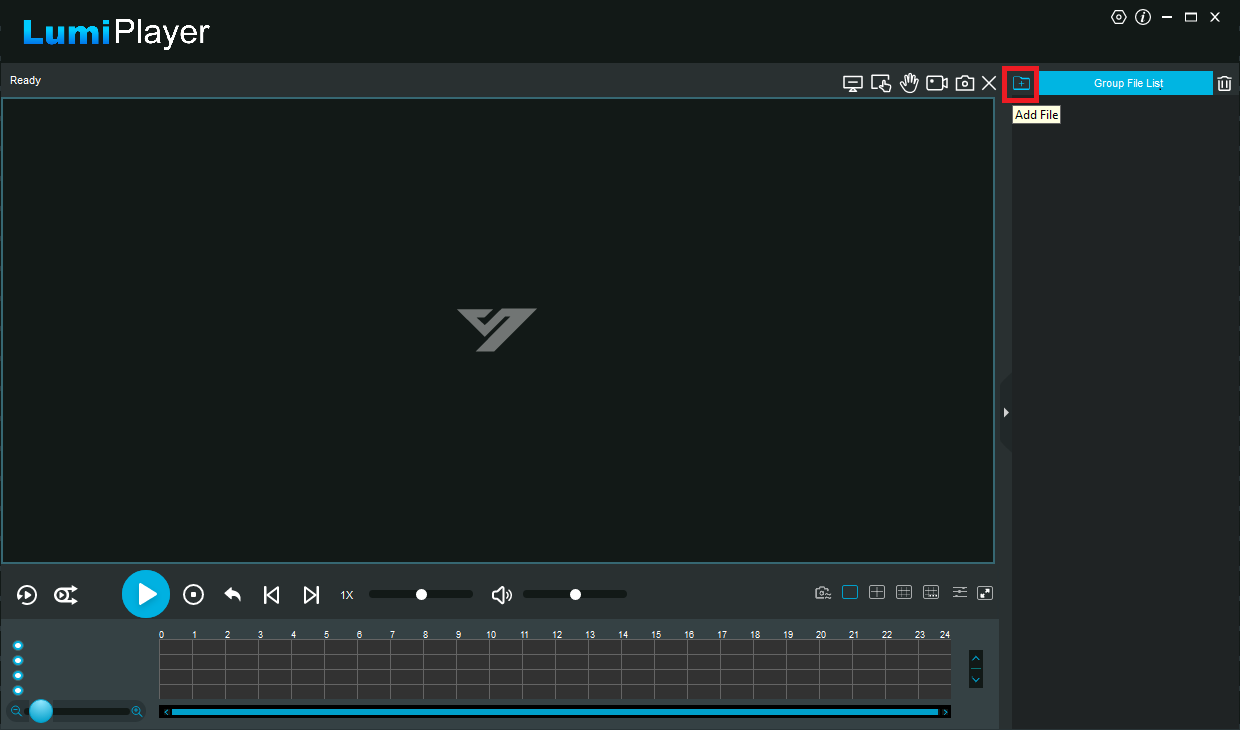
1. Launch the LumiPlayer software. Then, in the top-right corner, click the "Add File" icon.
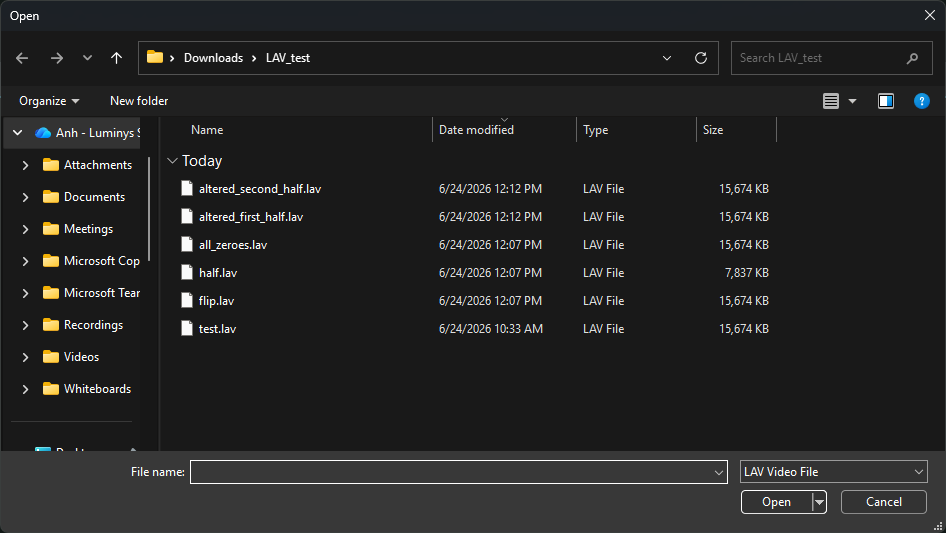
2. Select the LAV file you want to use to check the watermark.
Note: All files in the same folder will also be automatically added to the list.
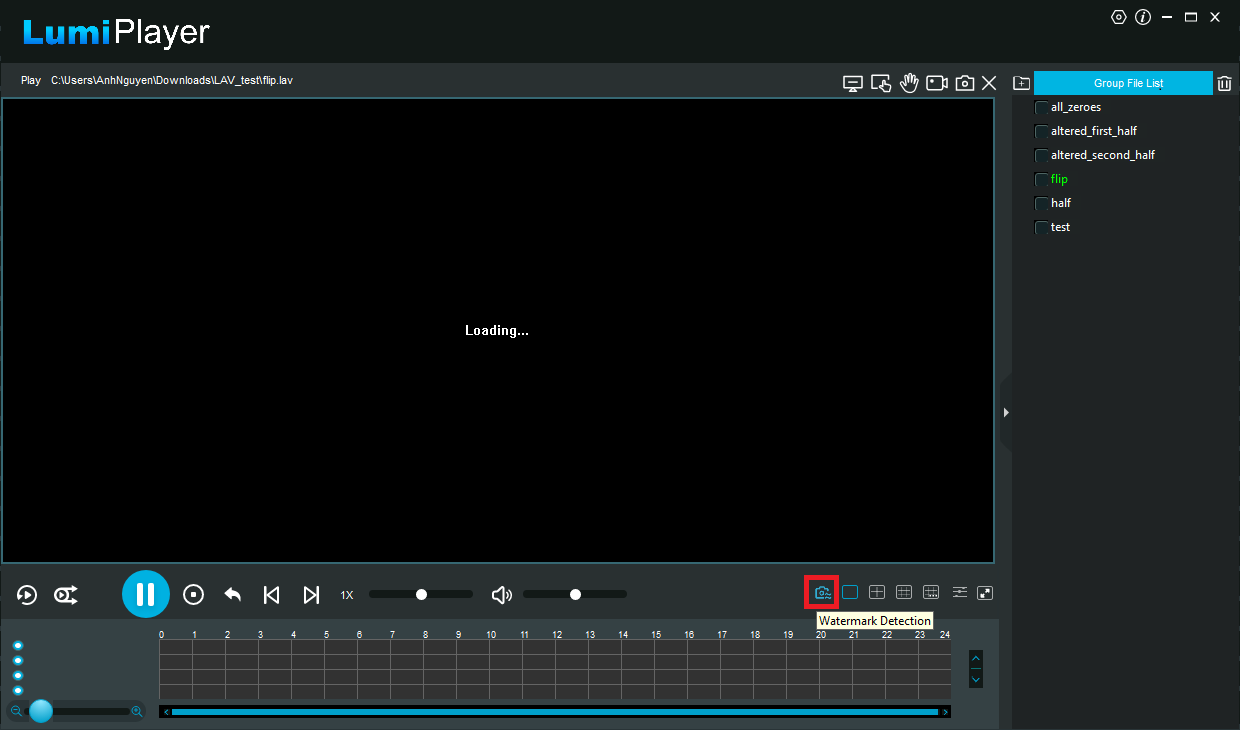
3. Click the "Watermark Detection" icon at the bottom.
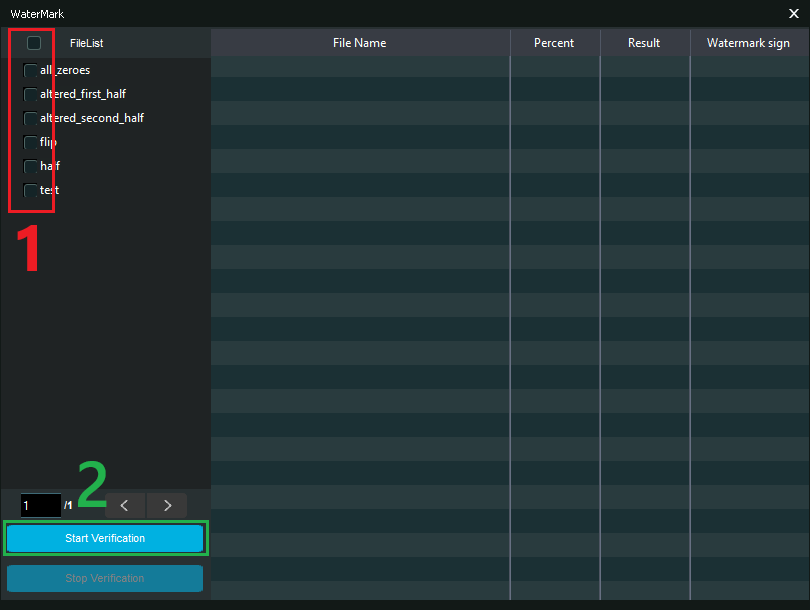
4. Select the checkbox (1) for the file you want to verify, then click Start Verification. (2)
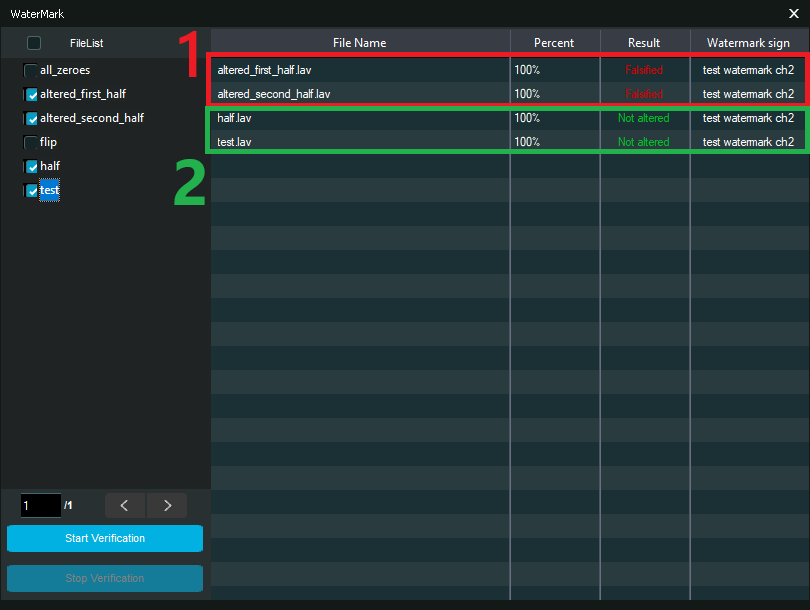
5. The results will be displayed.
Number (1) indicates all altered files; the result will be shown as "Falsified."
Number (2) indicates all valid files. These files come directly from the NVR and have not been altered.