IPC/Initializing Cameras: Difference between revisions
Techsupport (talk | contribs) Created page with "<div class="lm-banner">File:LuminysMainPageBanner2.png</div> = <div class="center">How to Initialize Cameras</div> = ===Description=== This tutorial will go over how to initialize cameras. ===Prerequisites=== * Cameras connected on local network. ===Video Instructions=== <!--<embedvideo service="youtube">Coming soon</embedvideo>--> Coming soon ===Step by Step Instructions=== 1. Step 1 is to connect the camera to a POE switch to power the camera and connect it t..." |
Techsupport (talk | contribs) |
||
| Line 10: | Line 10: | ||
===Video Instructions=== | ===Video Instructions=== | ||
< | <youtube>https://www.youtube.com/watch?v=Ogagz5vLPLM</youtube> | ||
===Step by Step Instructions=== | ===Step by Step Instructions=== | ||
Revision as of 12:12, 15 November 2024
How to Initialize Cameras
Description
This tutorial will go over how to initialize cameras.
Prerequisites
- Cameras connected on local network.
Video Instructions
Step by Step Instructions
1. Step 1 is to connect the camera to a POE switch to power the camera and connect it to the network.
2. Once the IPC is plugged in and has had time to boot up, open a web browser on the computer and navigate to the camera's default IP address, which is (192.168.1.108).
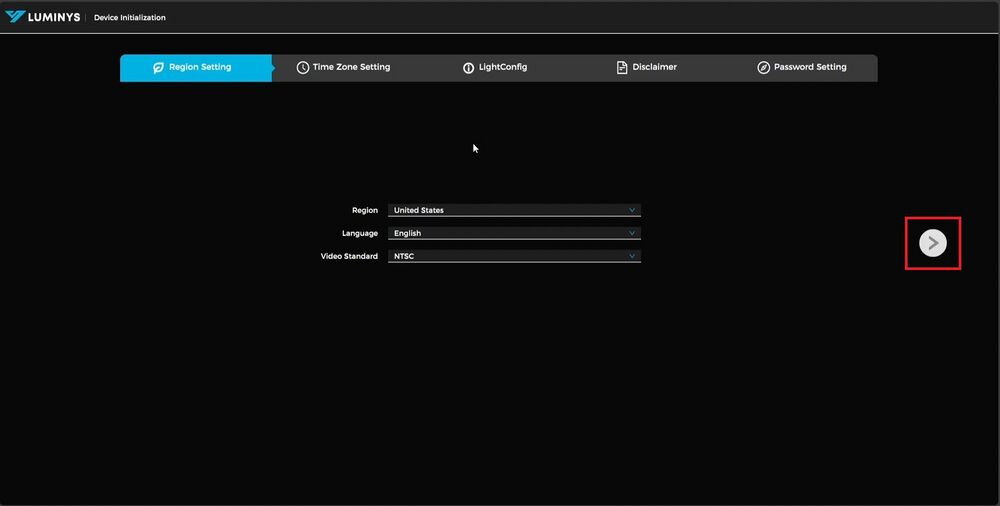
3. Once the IP address of the camera is accessed, the initialization page will appear. On the first page, select your region, followed by the language, and finally the video standard. For North America, NTSC should be selected. After making these selections, click the arrow on the right to proceed to the next options.
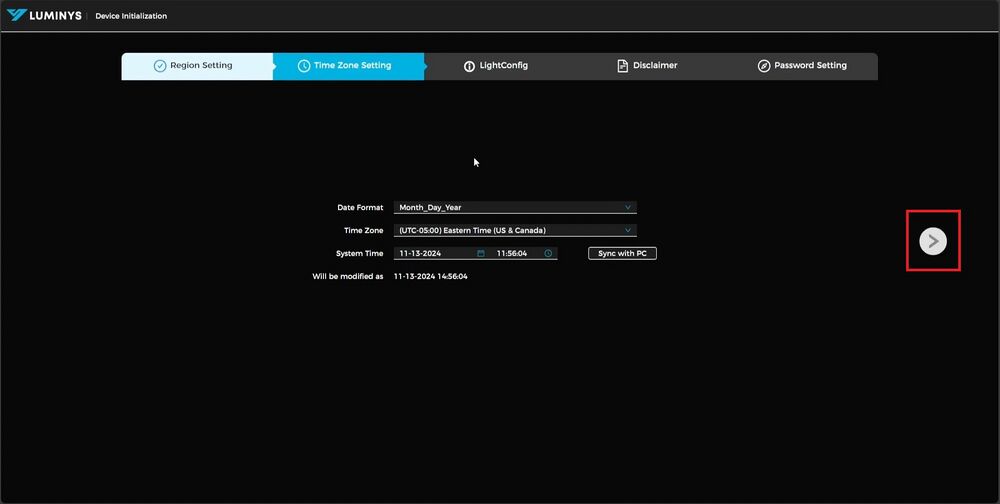
4. On the next screen, the Time Zone settings will be presented, allowing you to adjust the date and time. The first option is the date format, where the order of the date display can be modified. Next, select the appropriate time zone, followed by the current date and time settings. To modify the date and time, click into the respective fields, or if the computer's date and time are correct, select "sync with PC." After making these adjustments, click the arrow to proceed to the next page.
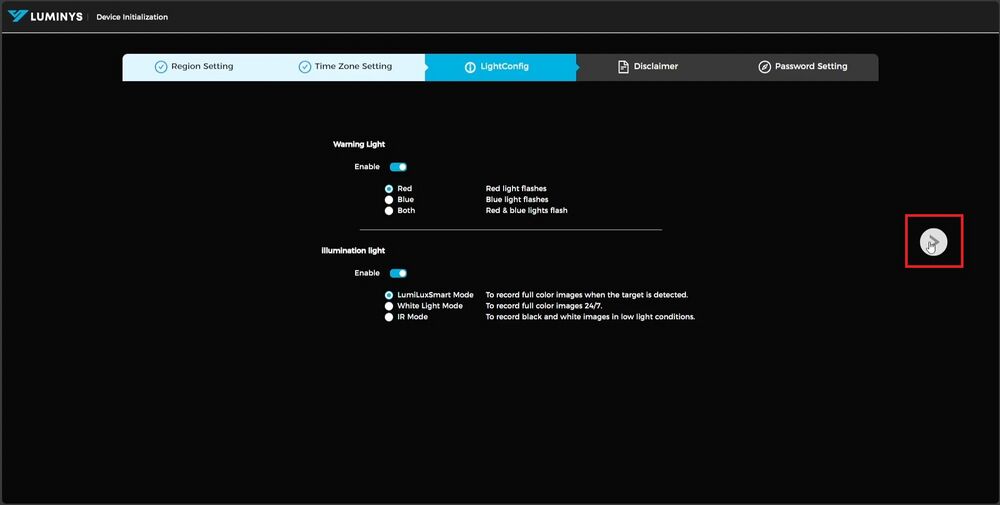
5. On the next page, additional settings for the camera are available, including options for the lights and illuminator behavior. The first option, "Warning Light," controls the active deterrent light, allowing you to choose when it is on and the colors displayed when it turns off. The next option, "Illumination Light," defines the camera's illuminator behavior in low light conditions. The first option activates the white light only when a target is detected in the frame. The second option enables the white light when it becomes too dark for color display, and the last option keeps the white light off, allowing the camera to record in black and white using IR when it’s dark. Once the choices are made, proceed to the next page.
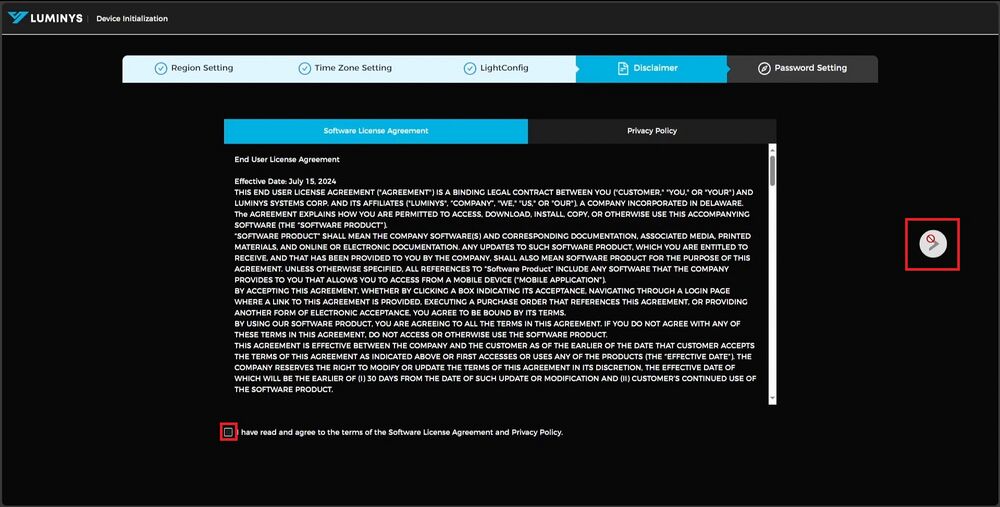
6. The next page presents the disclaimer. After reading through it, click the checkbox to agree, then proceed to the final page.
7. The final page allows for the setup of the login password. Additionally, an email address can be added to the device for password reset purposes in the future. Once all settings are configured, click the green check on the right to complete the initialization process.


