NVR/LumiSearch: Difference between revisions
Techsupport (talk | contribs) Created page with "<div class="lm-banner">File:LuminysMainPageBanner2.png</div> = <div class="center">LumiSearch on WebGUI</div> = ===Description=== This tutorial provides instructions for performing LumiSearch over the webGUI. ===Prerequisites=== * Access NVR's webGUI ===Video Instructions=== Coming Soon ===Step by Step Instructions=== 1. Start by accessing the NVR's web GUI and entering the login credentials. File:Lumisearch1.png|1000px|link=https://wiki.luminyscorp.com/ima..." |
Techsupport (talk | contribs) No edit summary |
||
| Line 18: | Line 18: | ||
[[File:Lumisearch1.png|1000px|link=https://wiki.luminyscorp.com/images/4/41/Lumisearch1.png]] | [[File:Lumisearch1.png|1000px|link=https://wiki.luminyscorp.com/images/4/41/Lumisearch1.png]] | ||
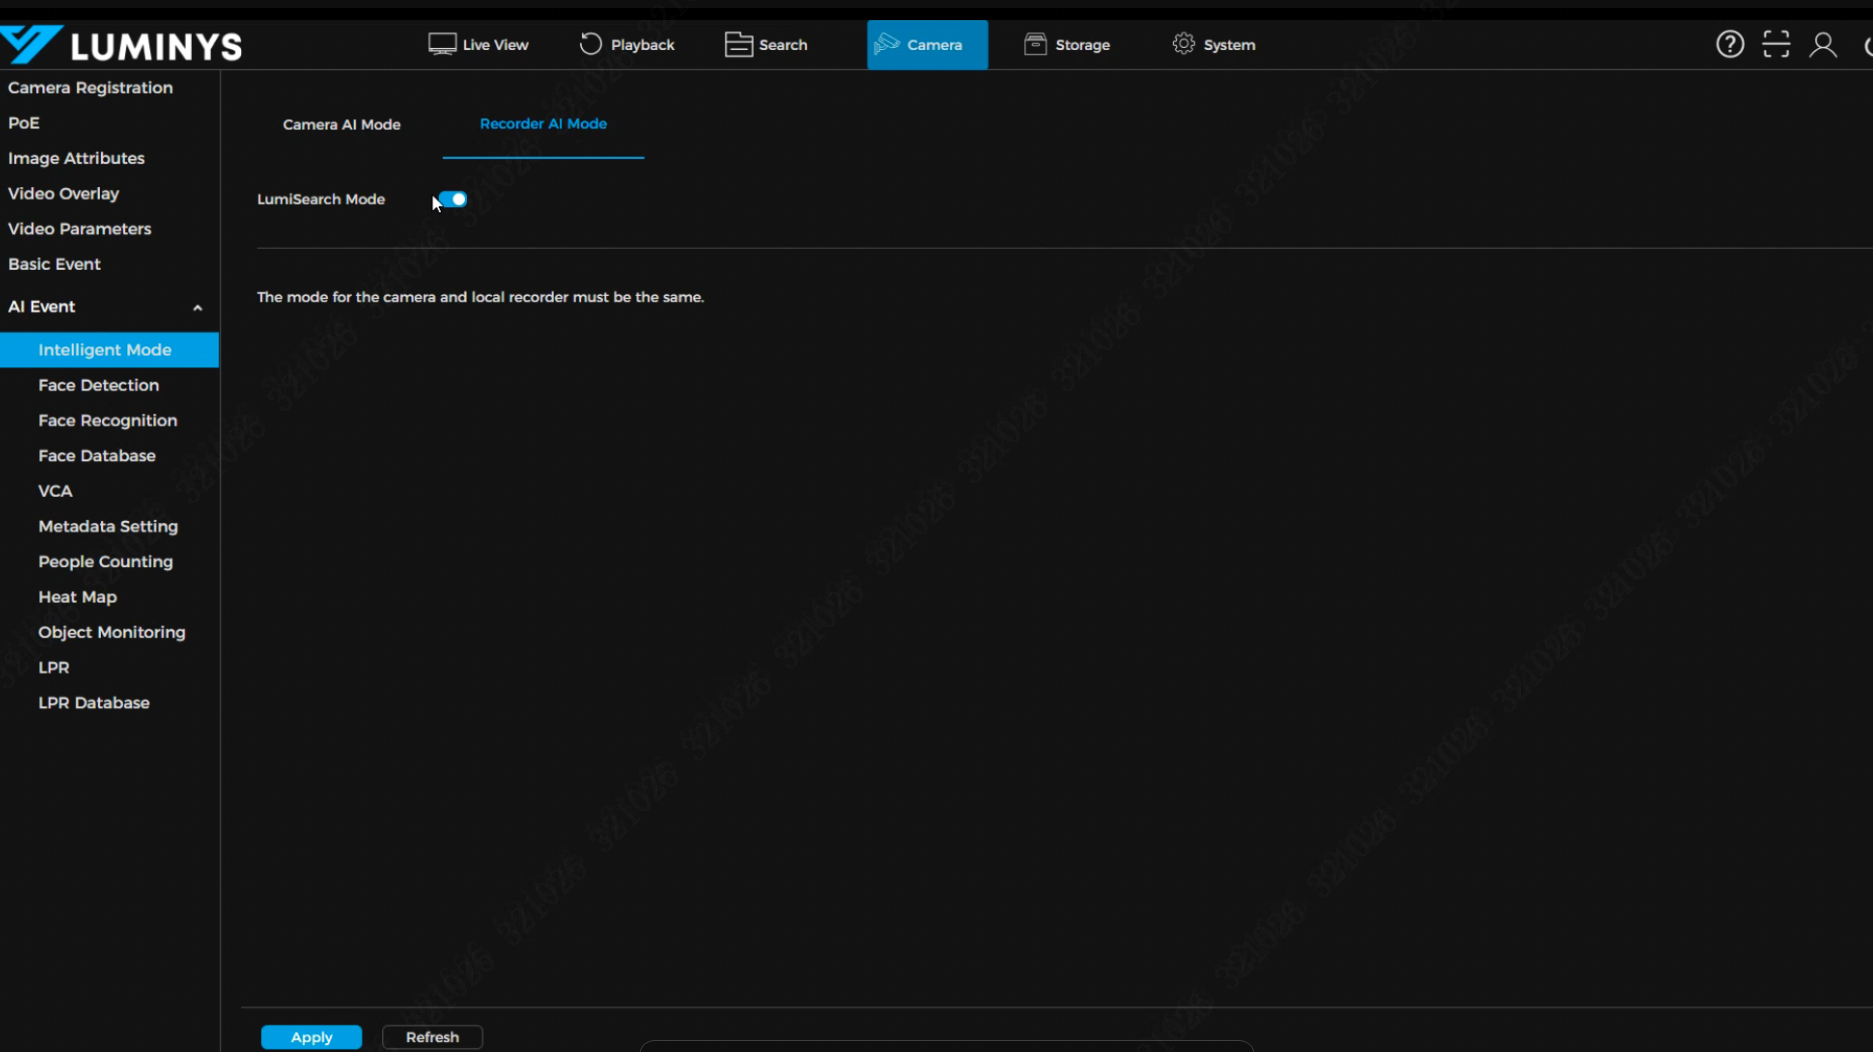
2. | 2. After logging in, verify that LumiSearch mode is enabled on the NVR. | ||
[[File: | [[File:LumiSearch2.png|1000px|link=https://wiki.luminyscorp.com/images/5/5e/LumiSearch2.png]] | ||
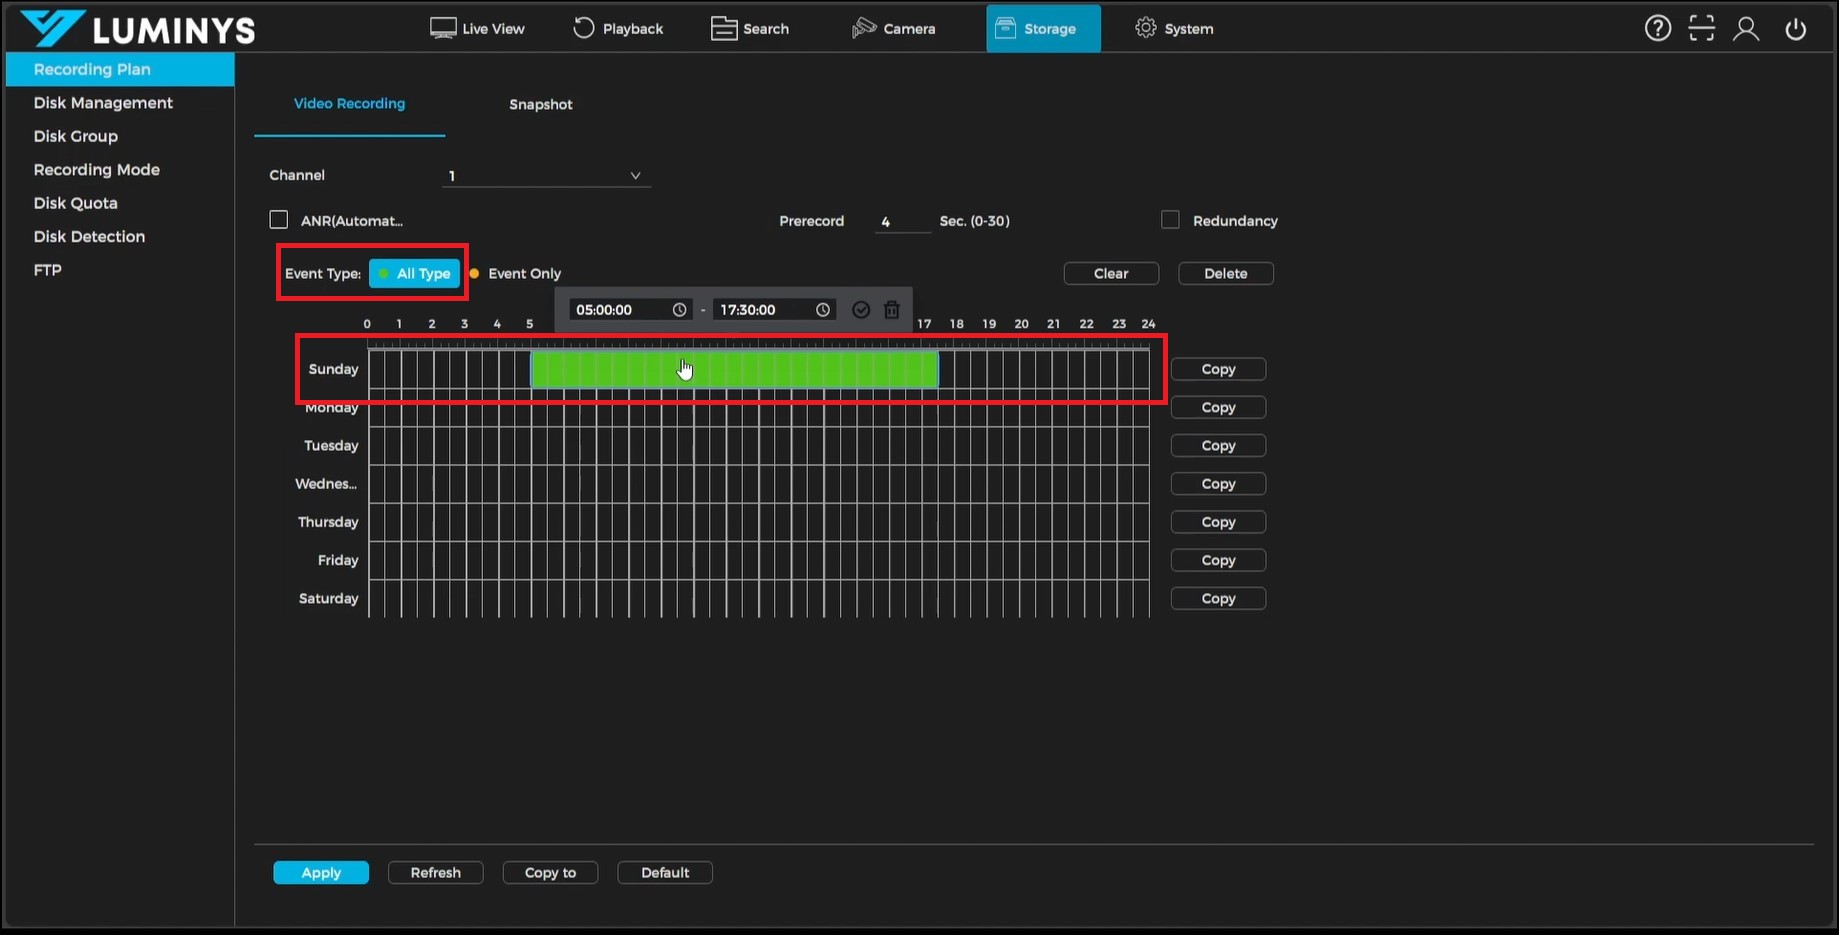
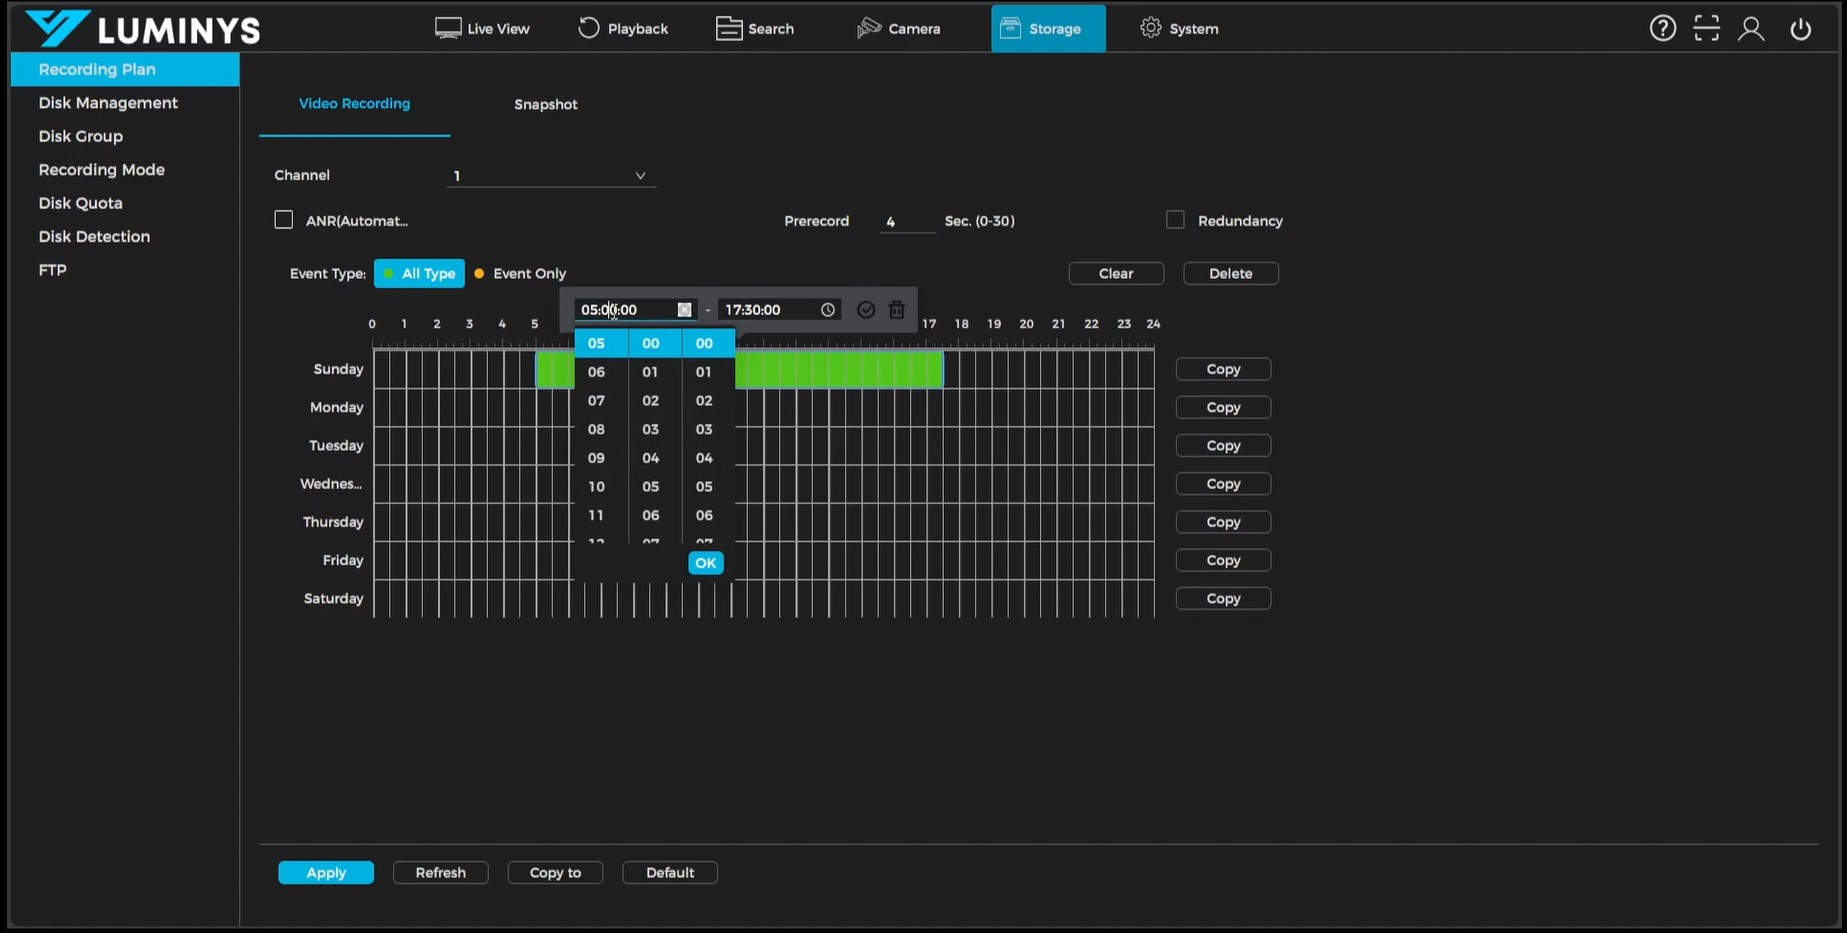
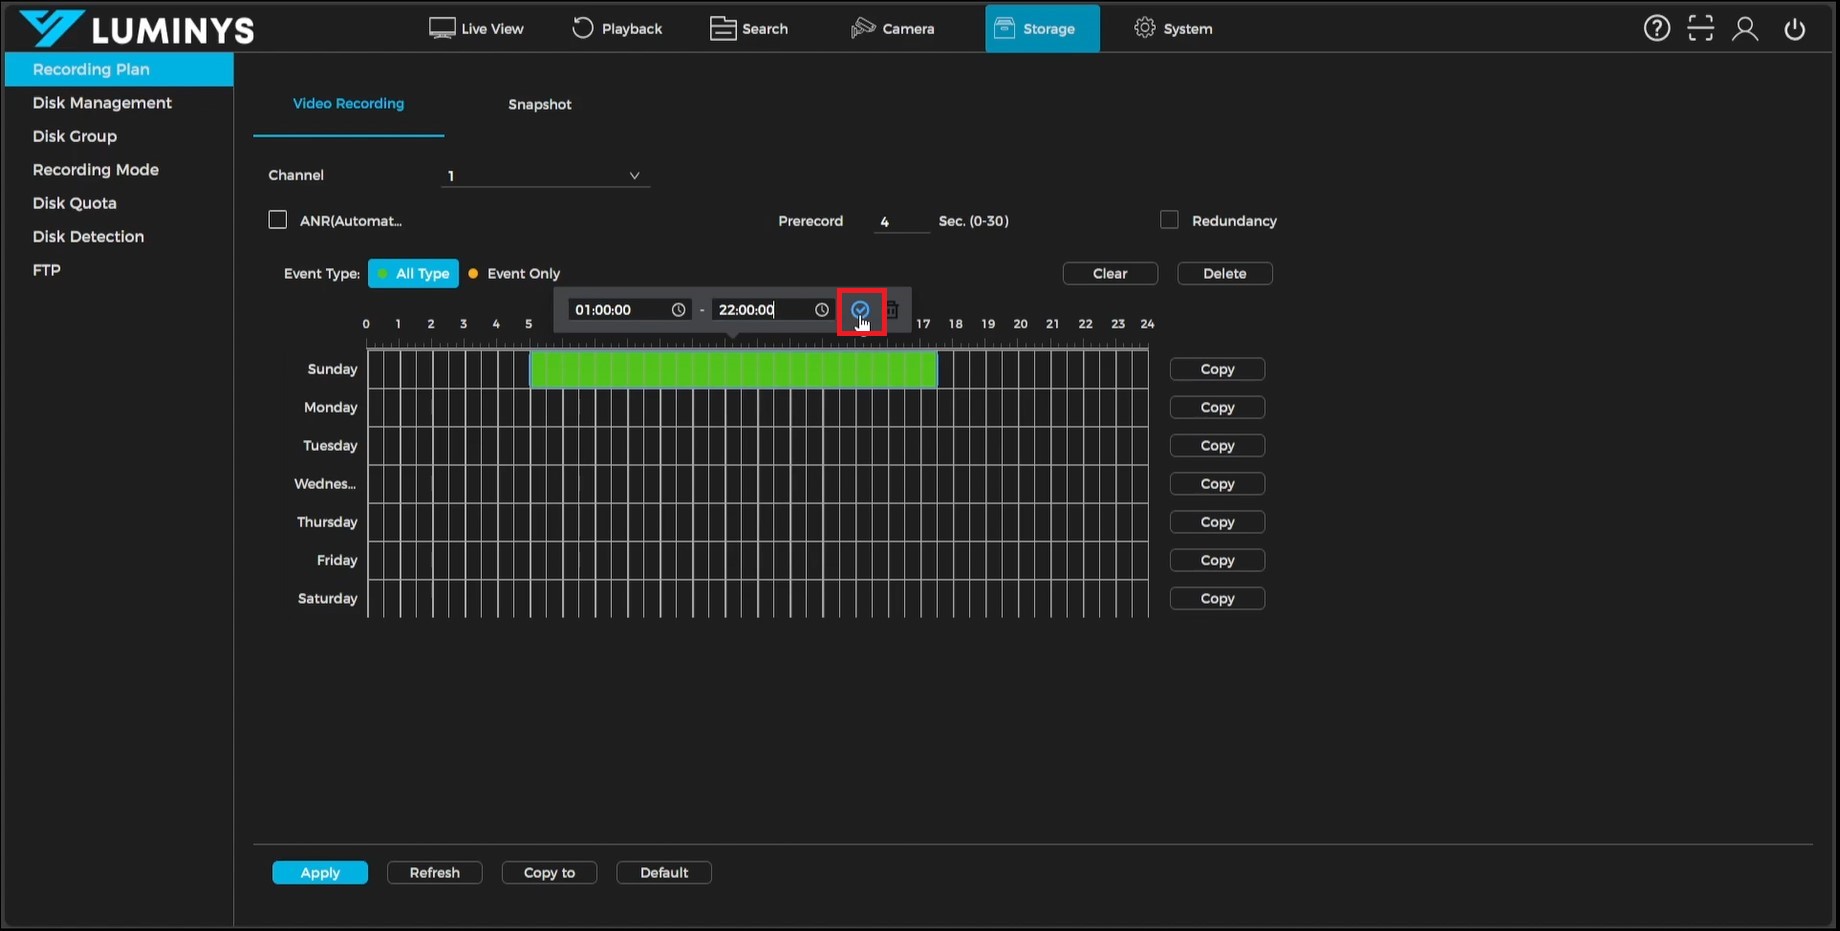
3. After selecting the channel, choose the event type for the recording setup. For continuous recording, use the "All Type" option. Use the mouse to draw the desired recording times on the schedule. To specify exact times, click on a green section, adjust the time settings in the pop-up box, and confirm by clicking the checkmark to save the configuration. | 3. After selecting the channel, choose the event type for the recording setup. For continuous recording, use the "All Type" option. Use the mouse to draw the desired recording times on the schedule. To specify exact times, click on a green section, adjust the time settings in the pop-up box, and confirm by clicking the checkmark to save the configuration. | ||
Revision as of 10:40, 31 March 2025

LumiSearch on WebGUI
Description
This tutorial provides instructions for performing LumiSearch over the webGUI.
Prerequisites
- Access NVR's webGUI
Video Instructions
Coming Soon
Step by Step Instructions
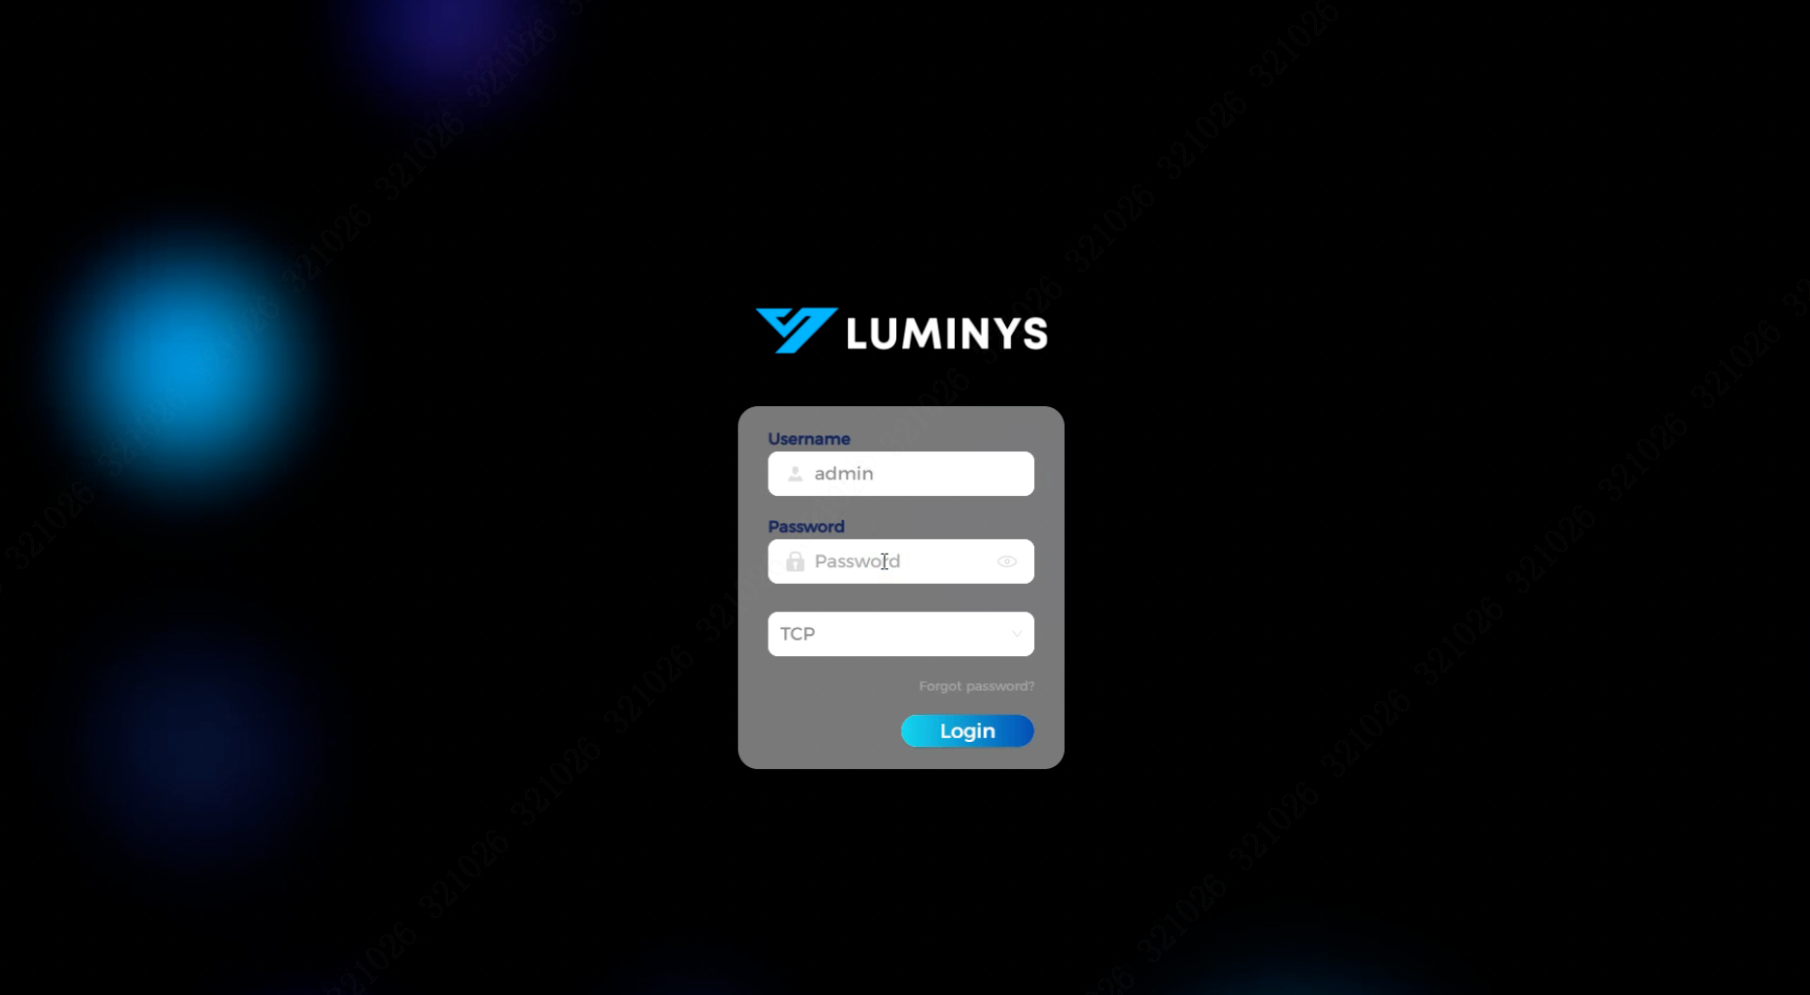
1. Start by accessing the NVR's web GUI and entering the login credentials.
2. After logging in, verify that LumiSearch mode is enabled on the NVR.
3. After selecting the channel, choose the event type for the recording setup. For continuous recording, use the "All Type" option. Use the mouse to draw the desired recording times on the schedule. To specify exact times, click on a green section, adjust the time settings in the pop-up box, and confirm by clicking the checkmark to save the configuration.
4. Use the copy button next to the day to replicate the schedule for selected days of the week.
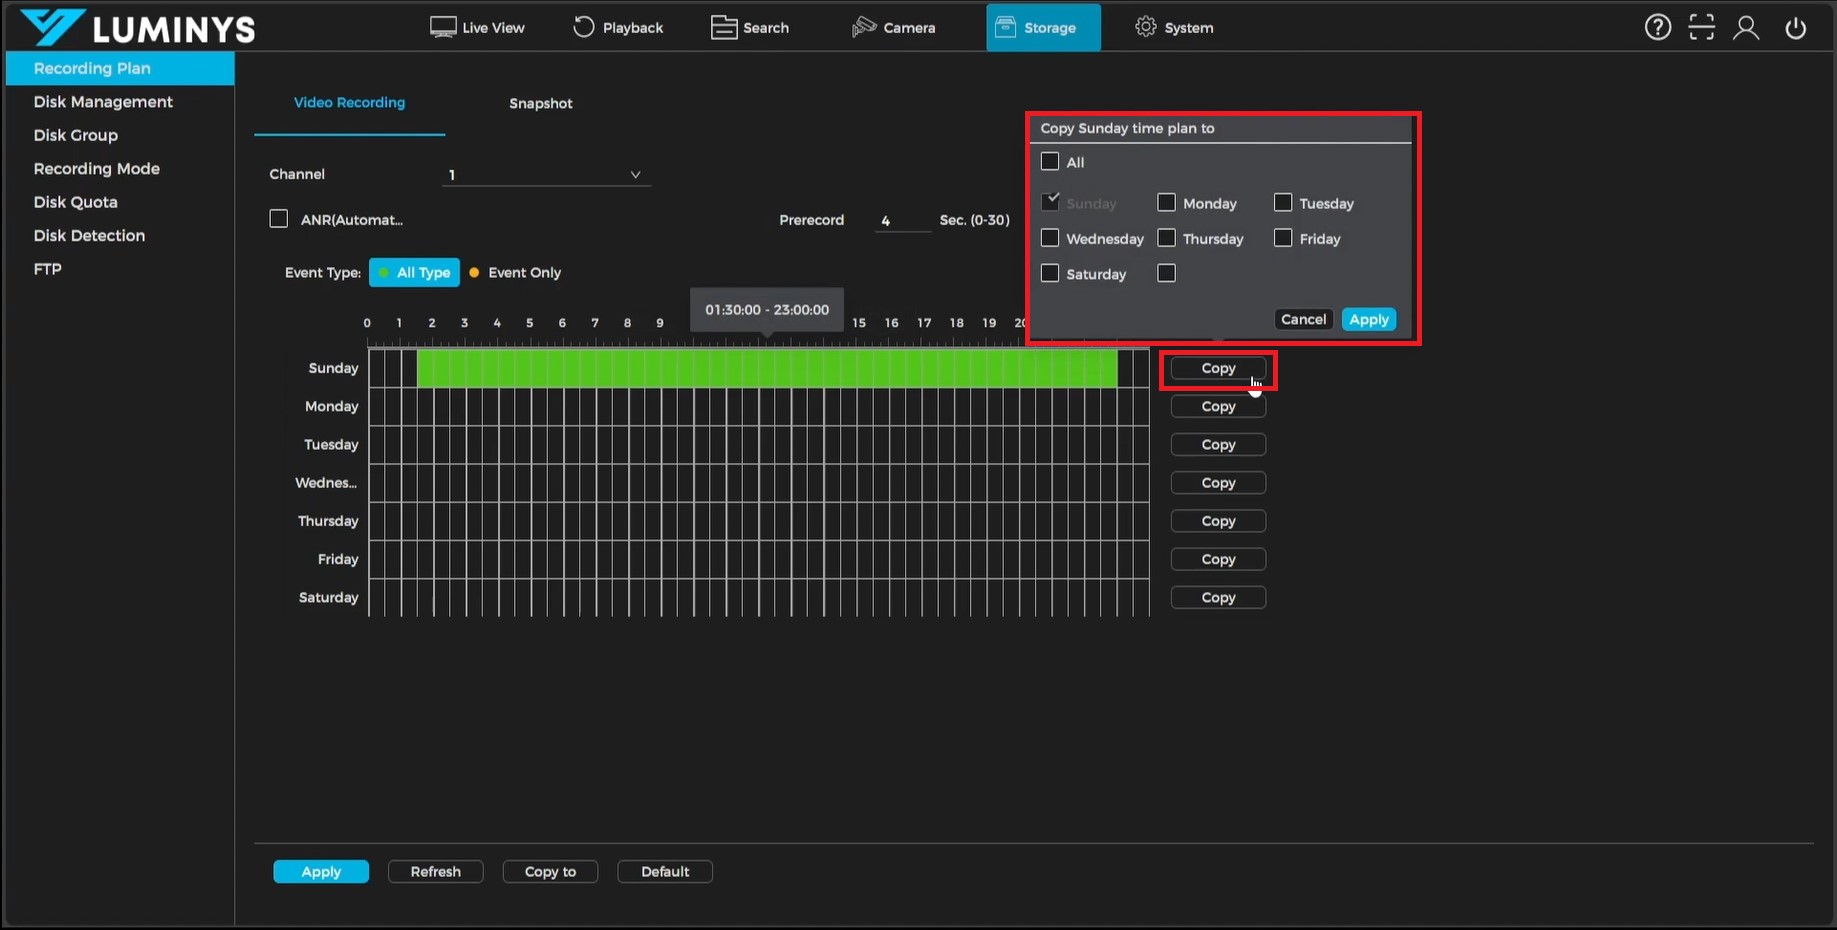
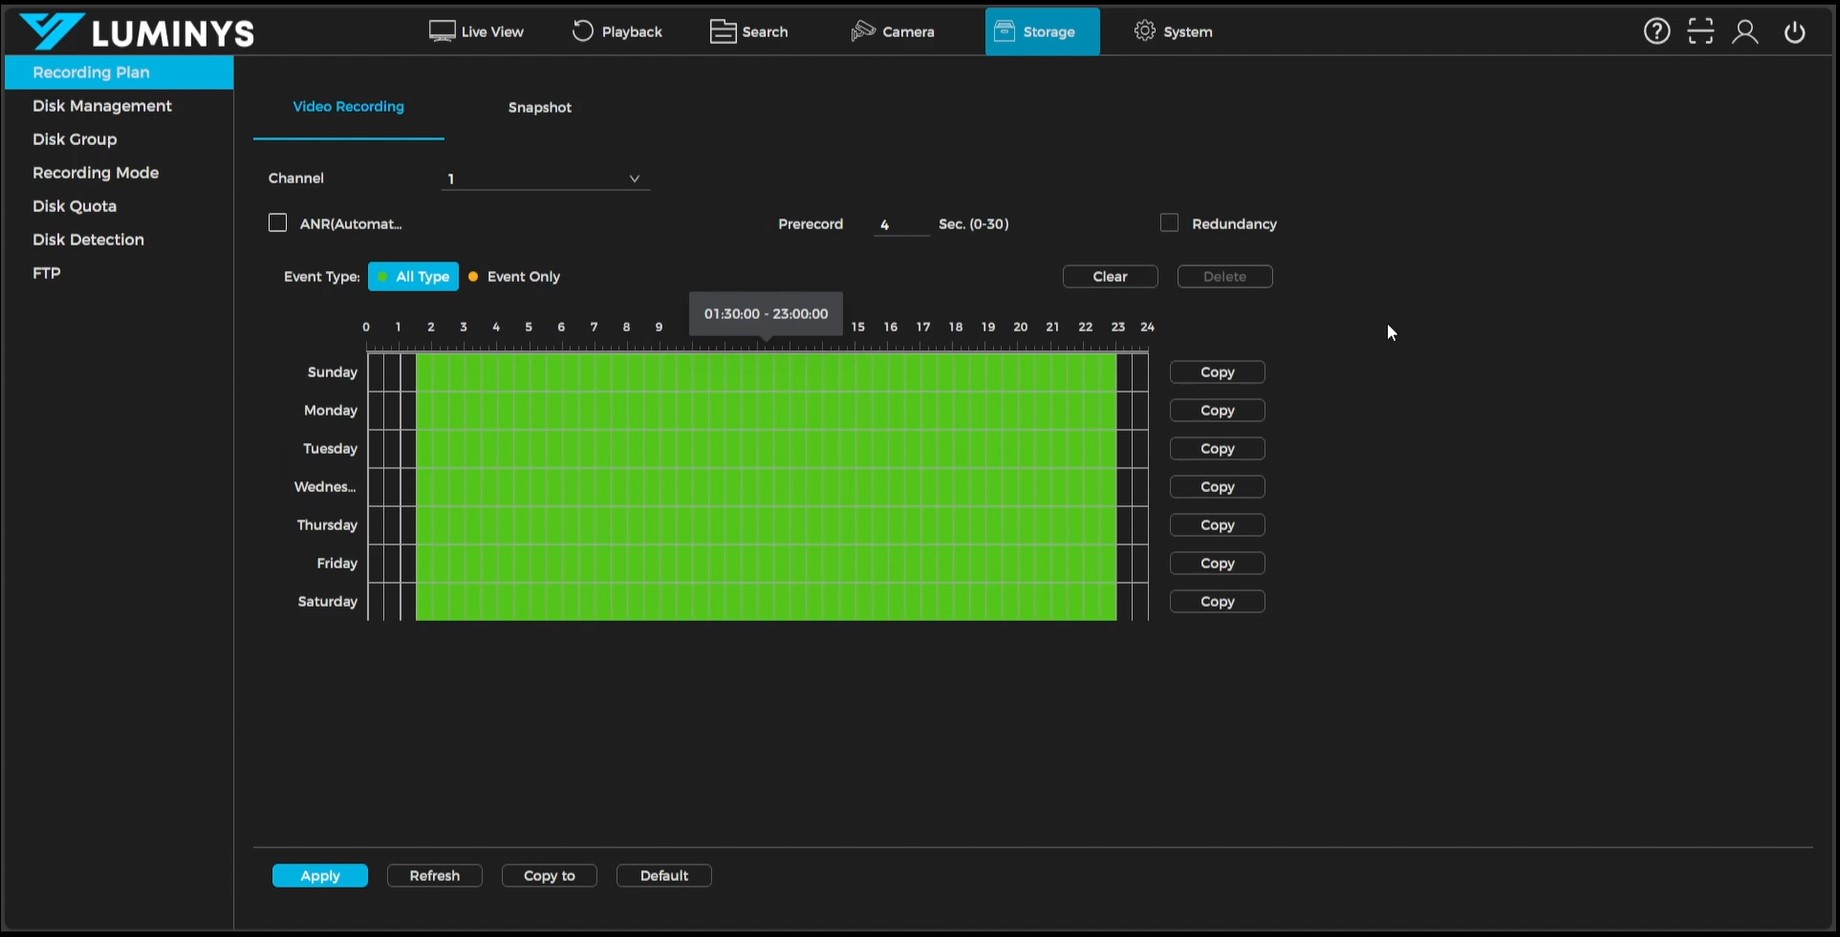
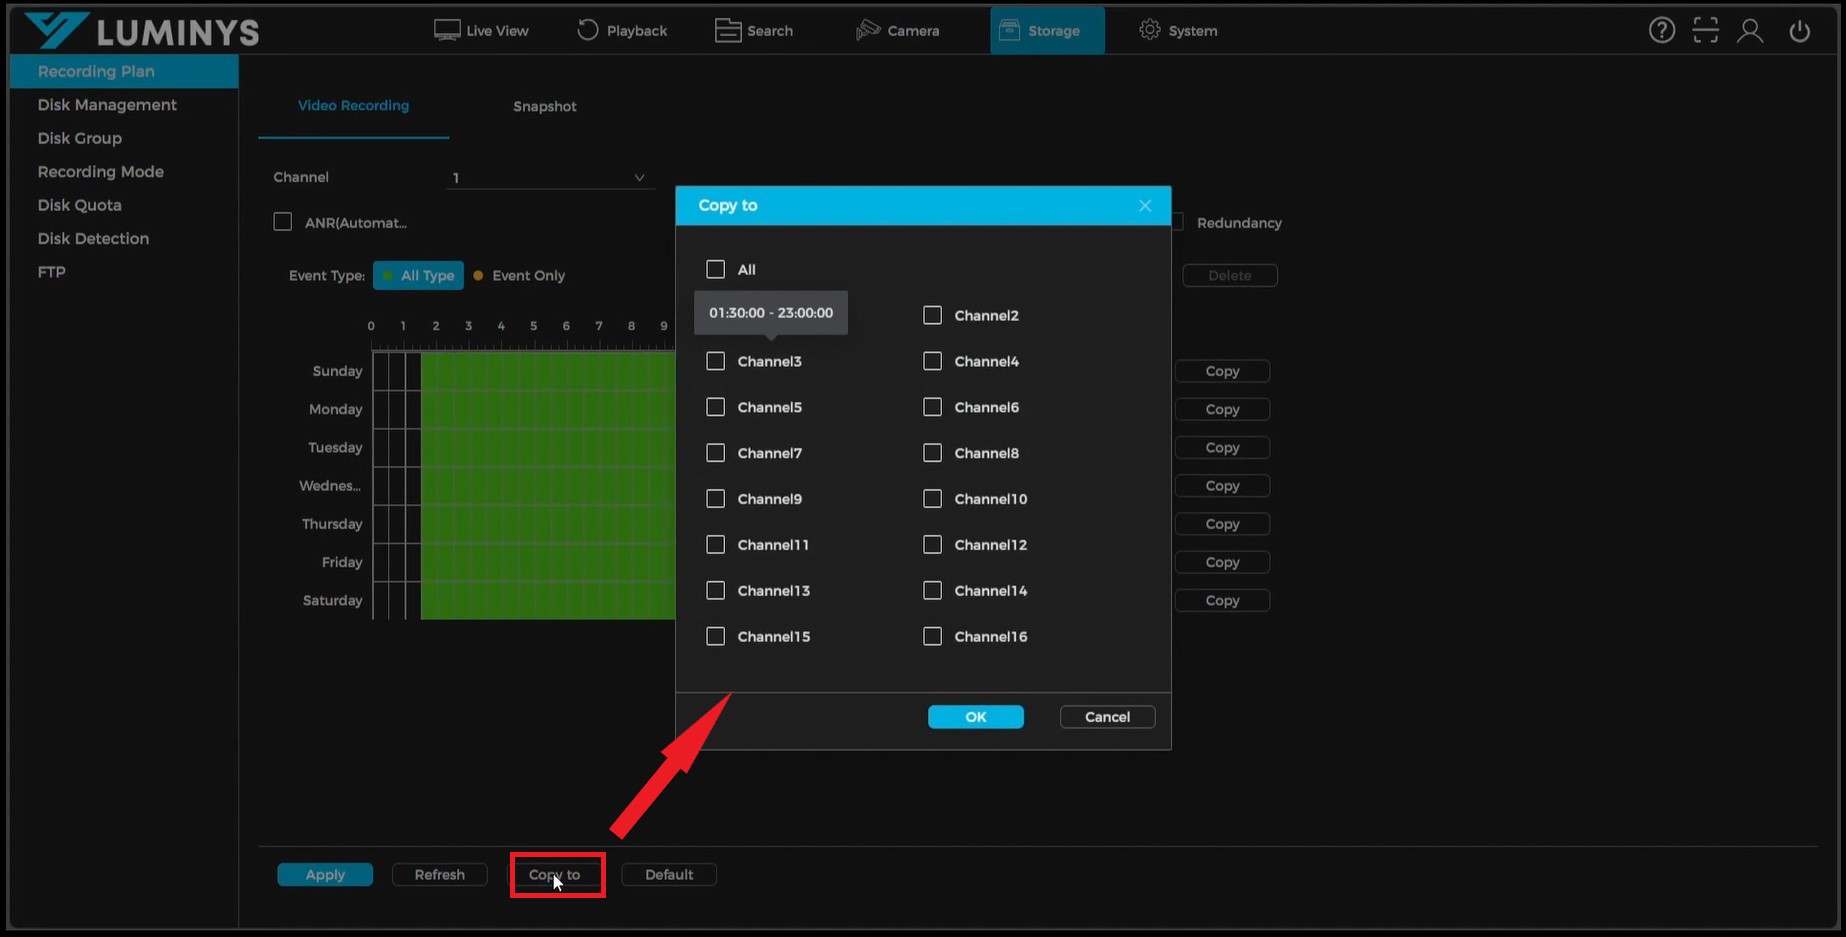
5. To apply the schedules to other cameras, use the "Copy To" function. Select the desired cameras from the list that appears after clicking the button, then confirm by clicking OK. Ensure all changes are saved by selecting "Apply" at the bottom. This completes the setup process for a recording schedule.