NVR/Hard Drive Configurations: Difference between revisions
From Luminys WIKI
Techsupport (talk | contribs) No edit summary |
Techsupport (talk | contribs) No edit summary |
||
| Line 15: | Line 15: | ||
1. Under <span style=color:black;font-weight:bold>Storage</span>, the list will display the connected hard drives. In this case, two hard drives are inserted. | 1. Under <span style=color:black;font-weight:bold>Storage</span>, the list will display the connected hard drives. In this case, two hard drives are inserted. | ||
<span style=color: | <span style=color:black;font-style:italic;>Note: A star icon next to a number indicates the hard drive currently in use. Once the active hard drive is full, the star will shift to the other hard drive, indicating the change in recording location.</span> | ||
[[File:Setup_Hard_Drive_WebGUI_1.png|1000px|link=https://wiki.luminyscorp.com/images/a/af/Setup_Hard_Drive_WebGUI_1.png]] | [[File:Setup_Hard_Drive_WebGUI_1.png|1000px|link=https://wiki.luminyscorp.com/images/a/af/Setup_Hard_Drive_WebGUI_1.png]] | ||
Revision as of 09:42, 22 April 2025
Setup Hard Drives via WebGUI
Description
This tutorial will go over how to format hard drives and related configurations.
Prerequisites
- Web browser on a computer.
Video Instructions
Coming Soon
Step by Step Instructions
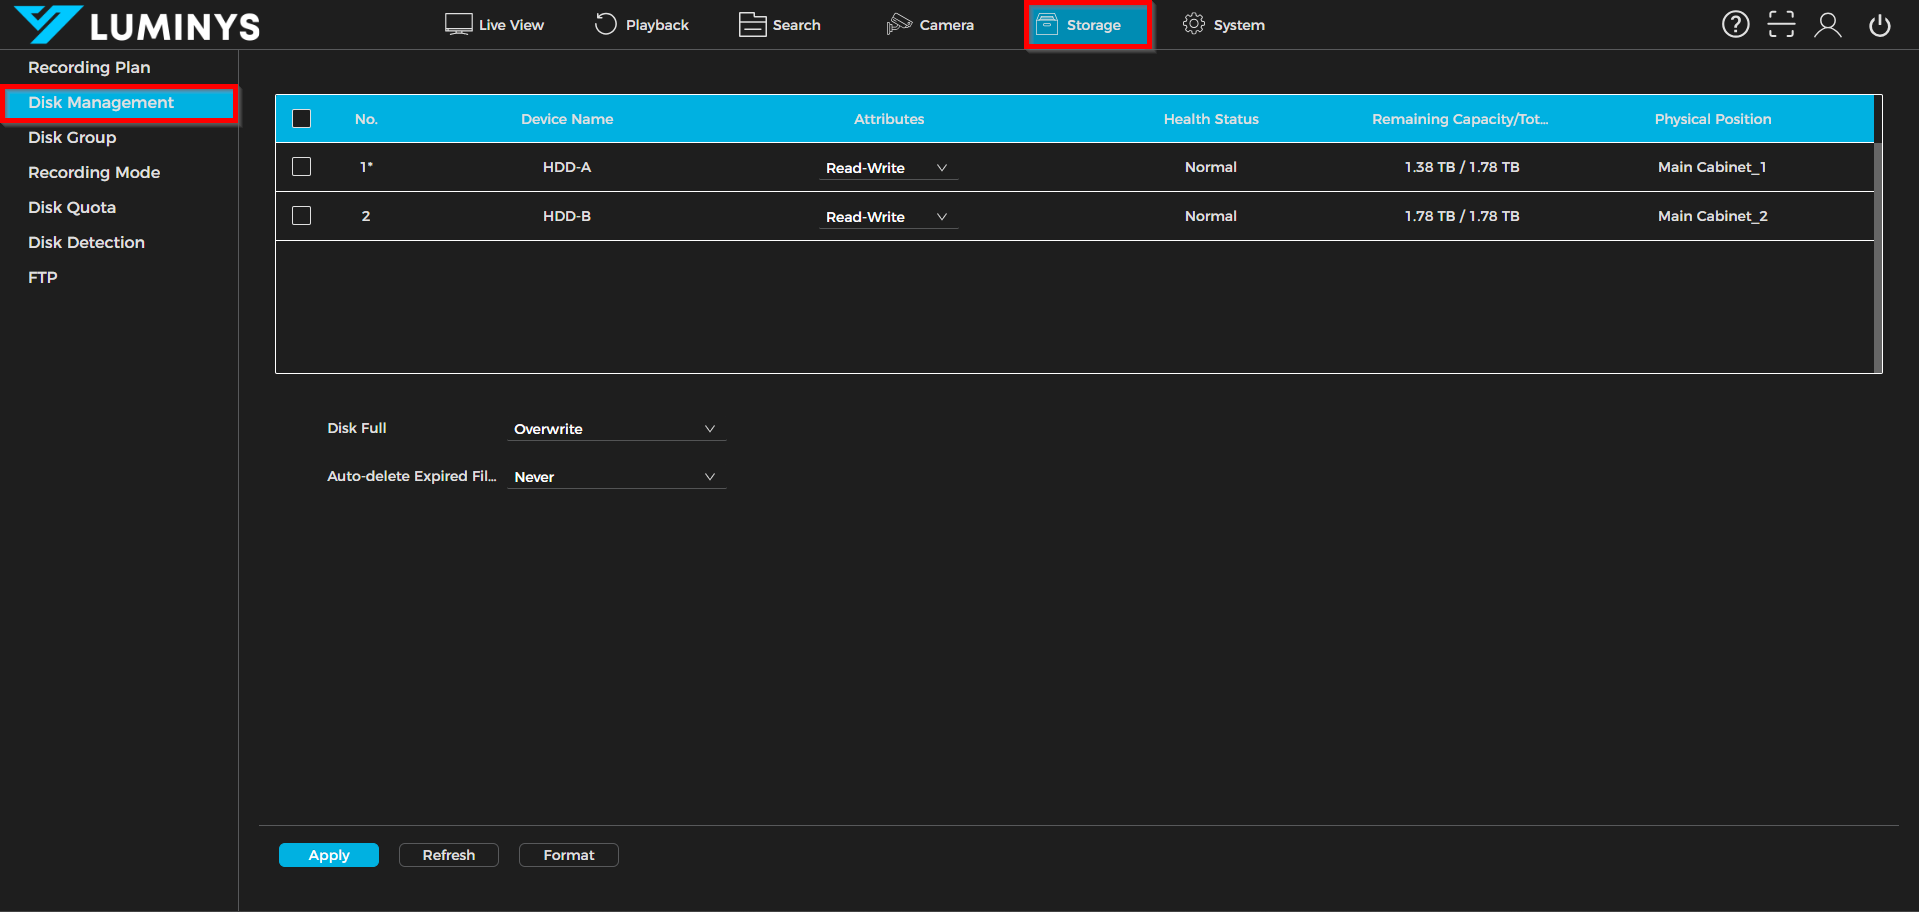
1. Under Storage, the list will display the connected hard drives. In this case, two hard drives are inserted.
Note: A star icon next to a number indicates the hard drive currently in use. Once the active hard drive is full, the star will shift to the other hard drive, indicating the change in recording location.
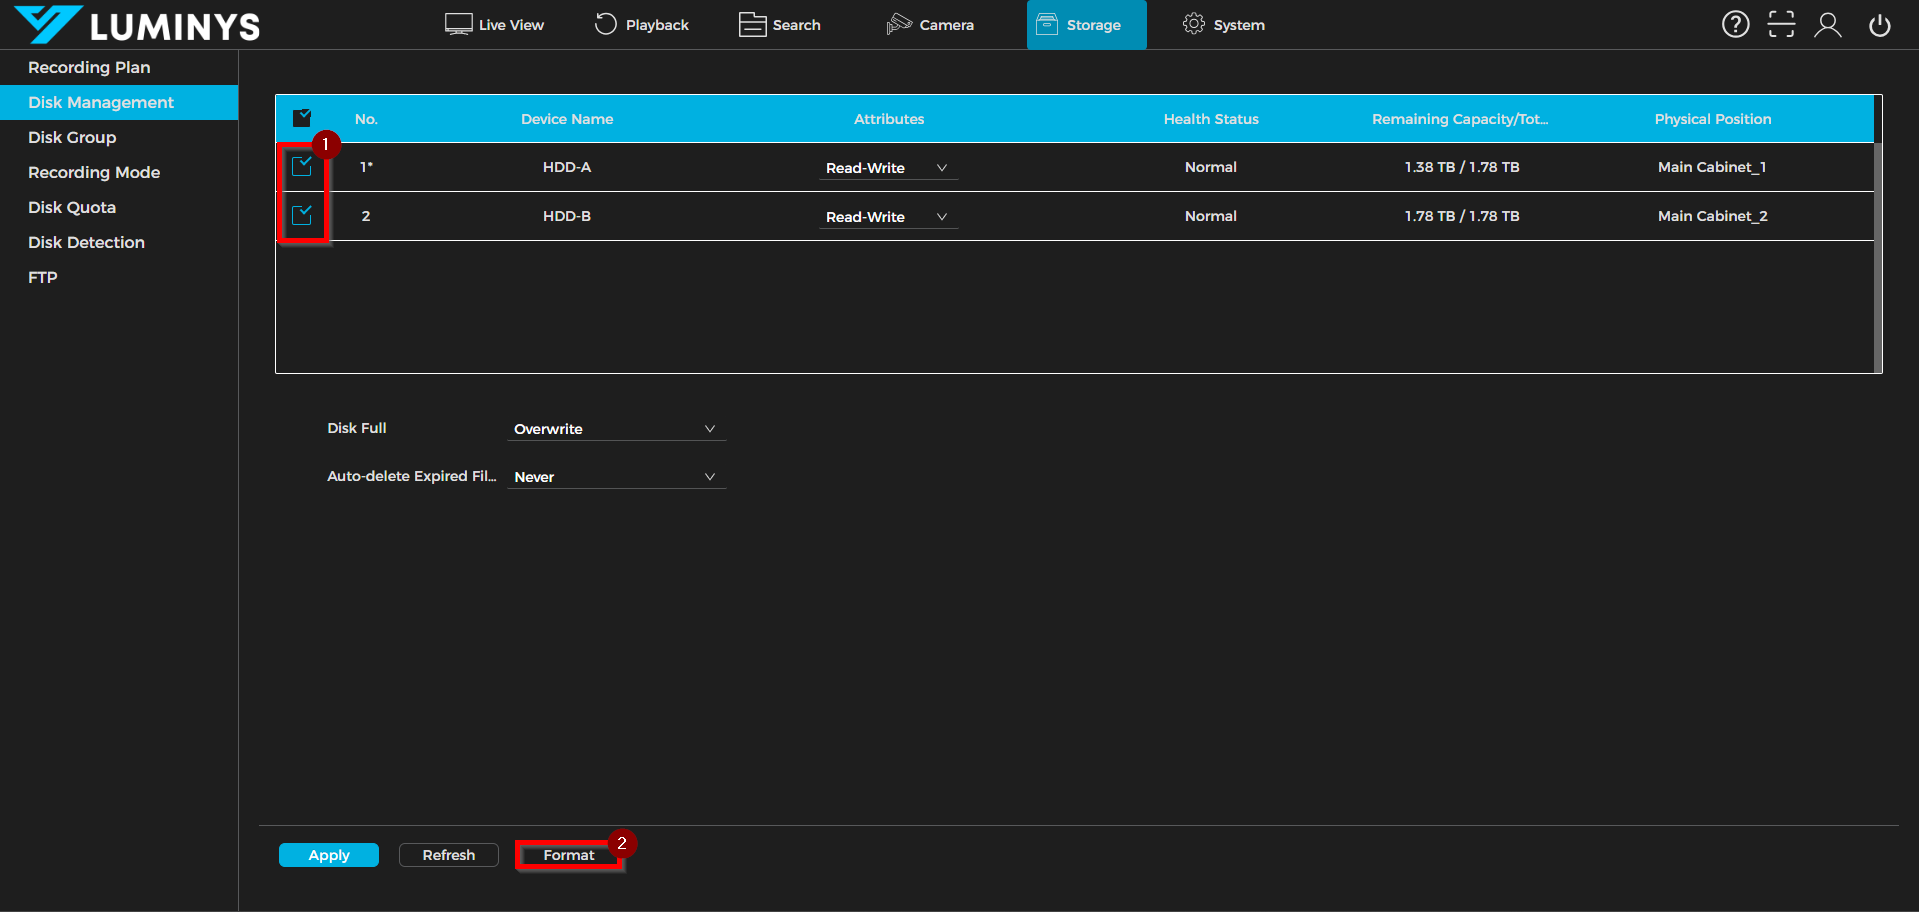
2. Select the desired hard drives for formatting, then click Format to begin the process.
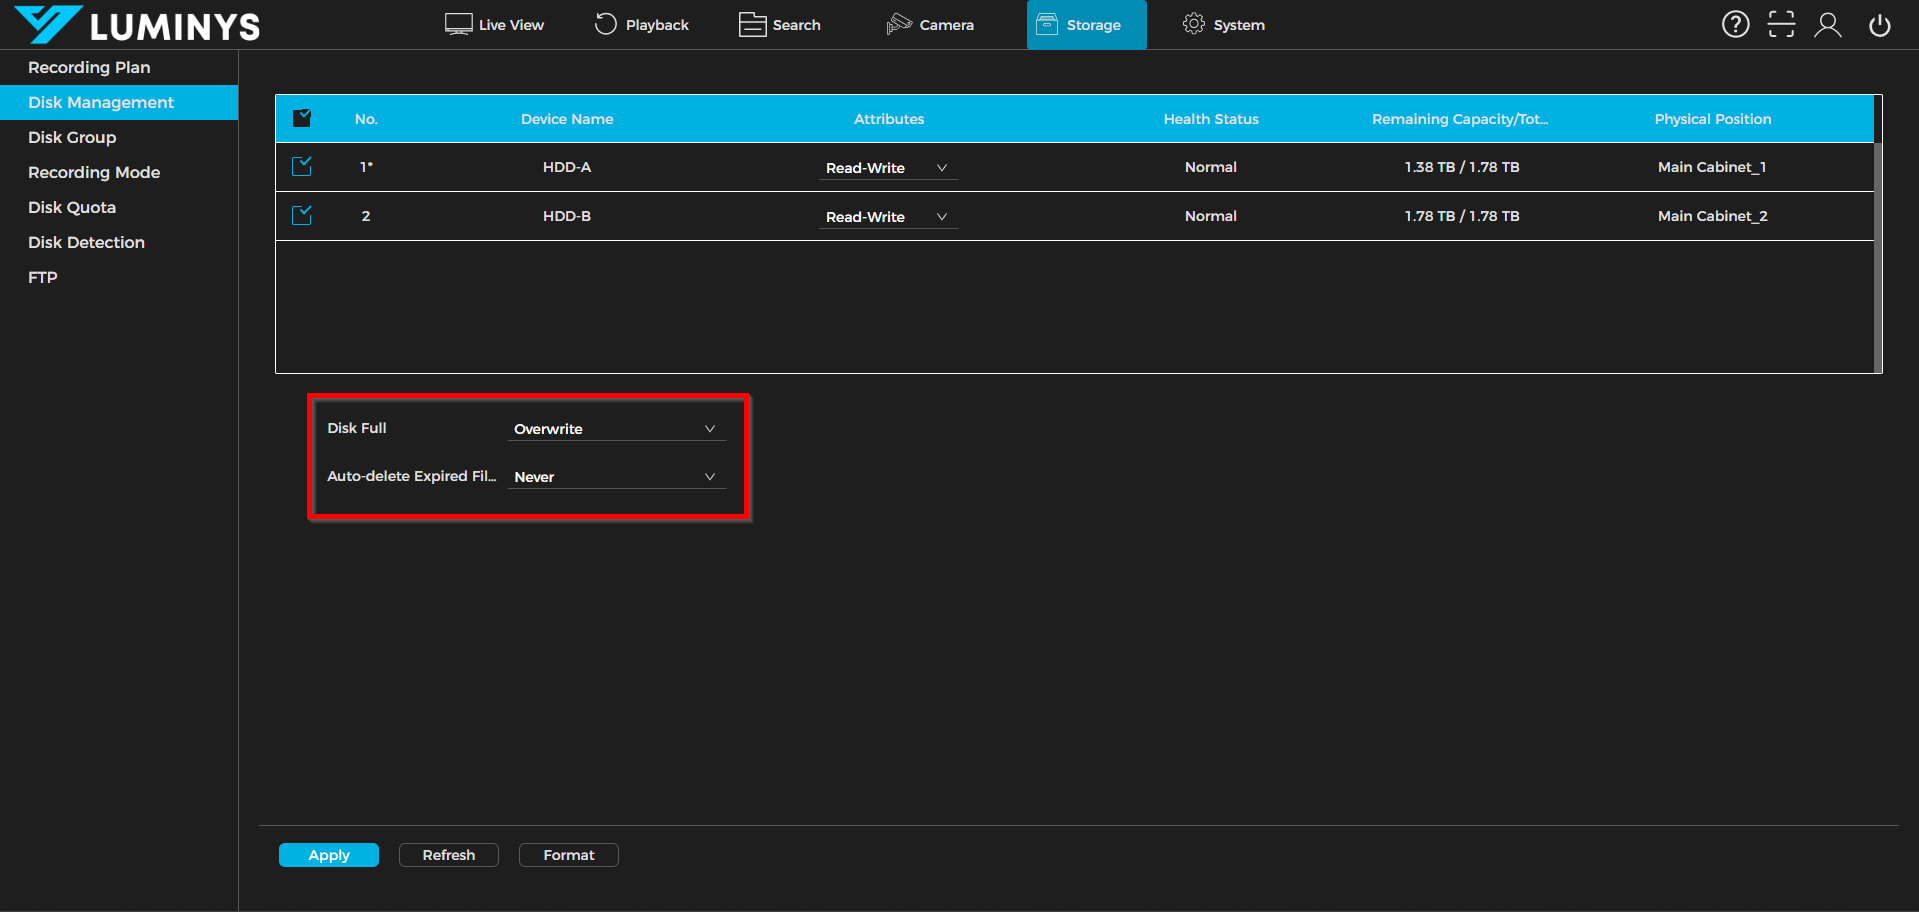
3. By default, when the drives reach full capacity, the system will begin overwriting the oldest recordings. It is recommended to set Auto-delete expired Files to Never to ensure that recordings are only removed when the drives are full.