NVR Timelapse: Difference between revisions
From Luminys WIKI
Techsupport (talk | contribs) |
Techsupport (talk | contribs) |
||
| Line 21: | Line 21: | ||
[[File:Timelapse_2.png|1000px|link=https://wiki.luminyscorp.com/images/4/49/Timelapse_2.png]] | [[File:Timelapse_2.png|1000px|link=https://wiki.luminyscorp.com/images/4/49/Timelapse_2.png]] | ||
3. | 3. Double-click to open the dropdown and choose a channel number. | ||
[[File: | [[File:Timelapse_3.png|1000px|link=https://wiki.luminyscorp.com/images/2/20/Timelapse_3.png]] | ||
Revision as of 16:47, 28 May 2026
Timelapse feature for R5 series
Description
This tutorial will show you how to enable the timelapse feature on the R5 Series NVR, followed by how to export the video.
Prerequisites
- Web browser on a computer.
- Time-lapse is available on specific firmware versions only (contact Support)
Video Instructions
Coming Soon
Step by Step Instructions
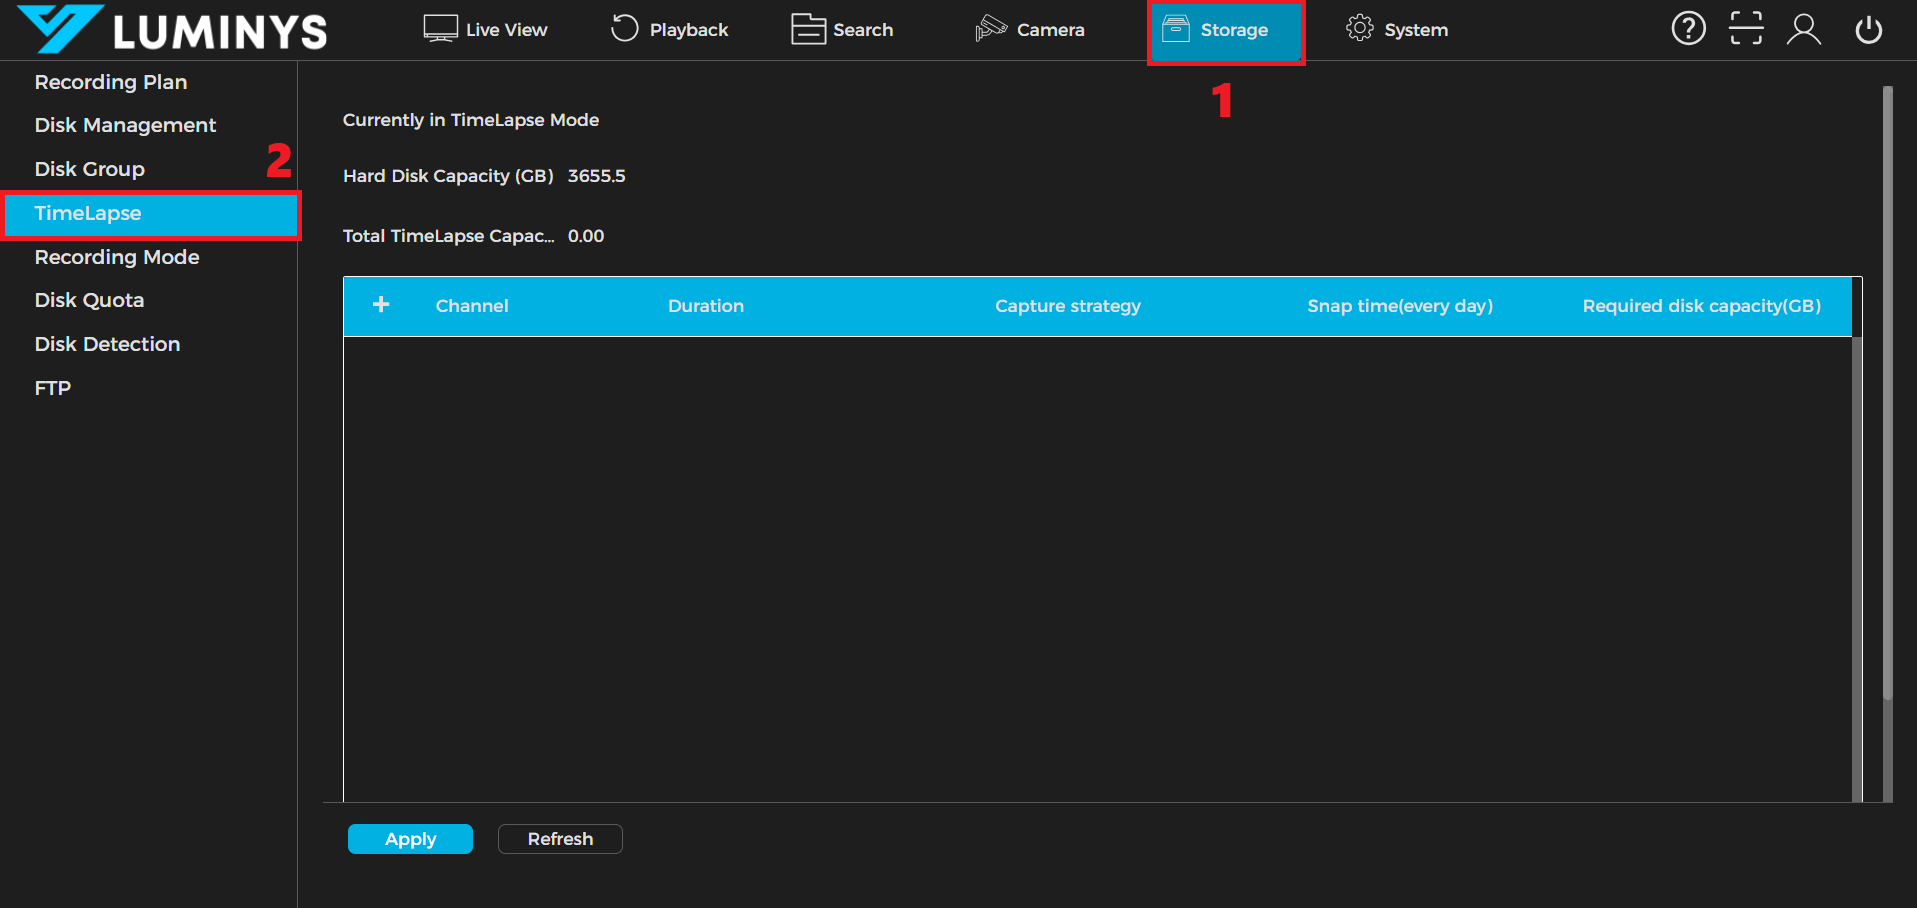
1. Click Storage tab (1) then click on the Timelapse option (2) on the left panel of the GUI.
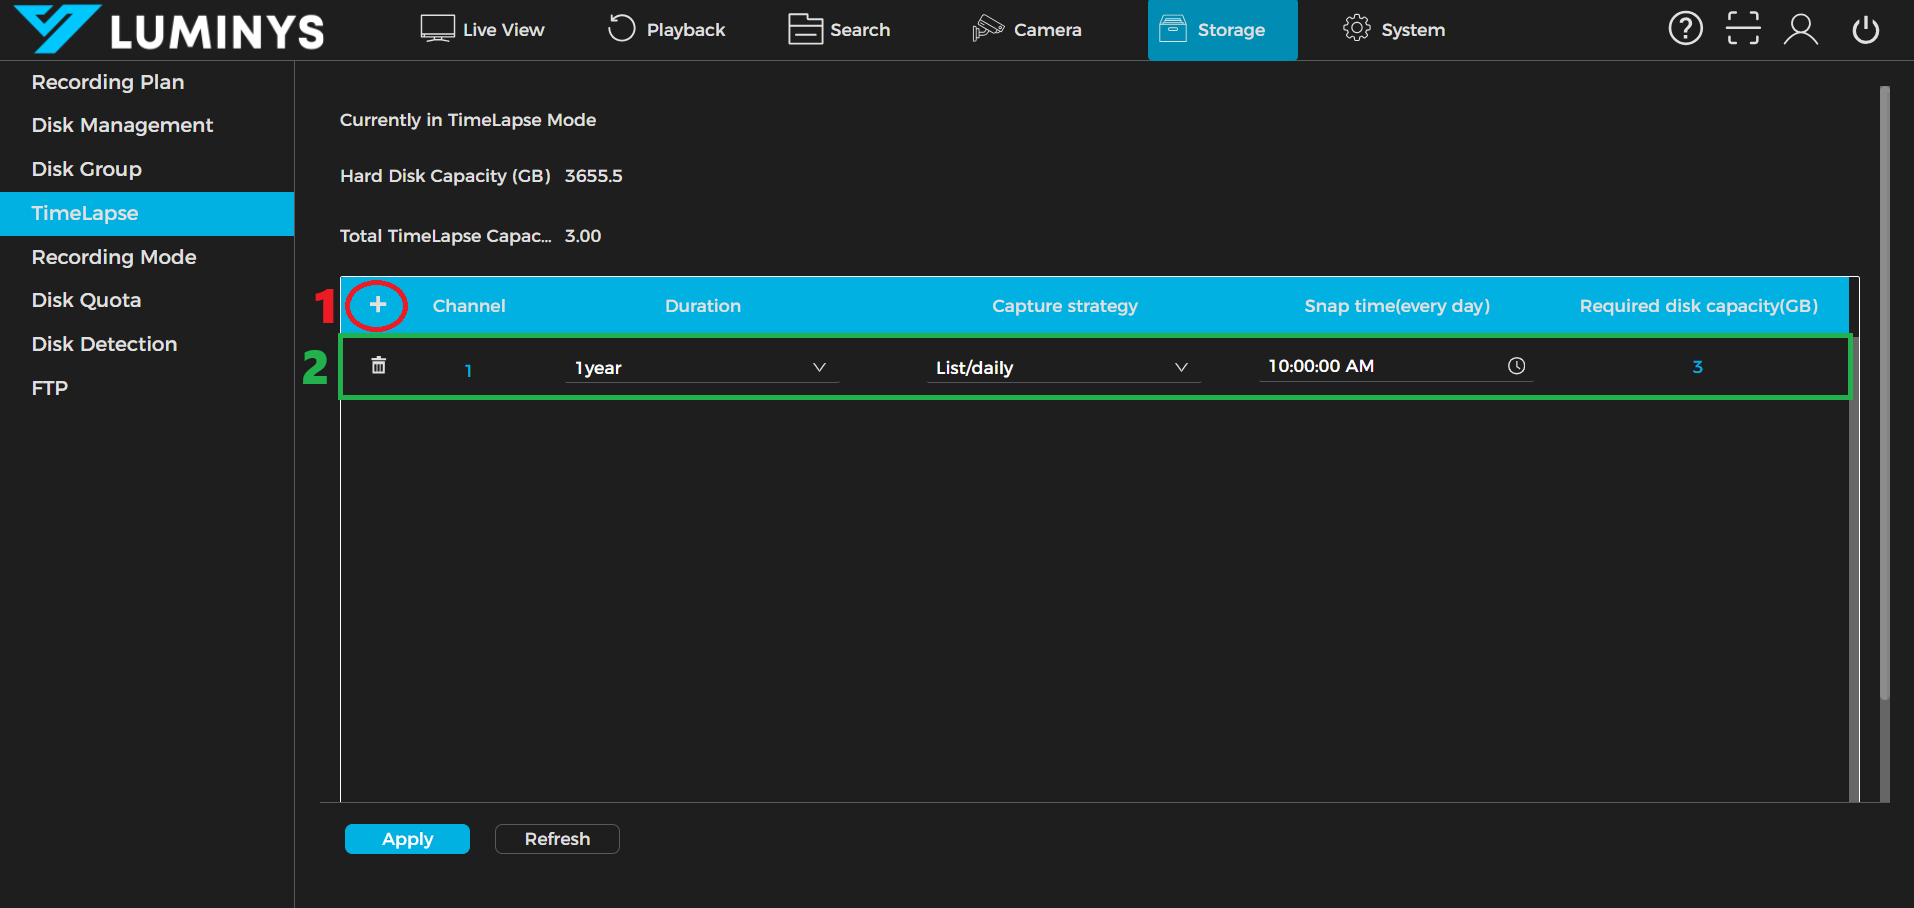
2. Click the plus icon (1) to add a timelapse profile. A profile will popup. (2)
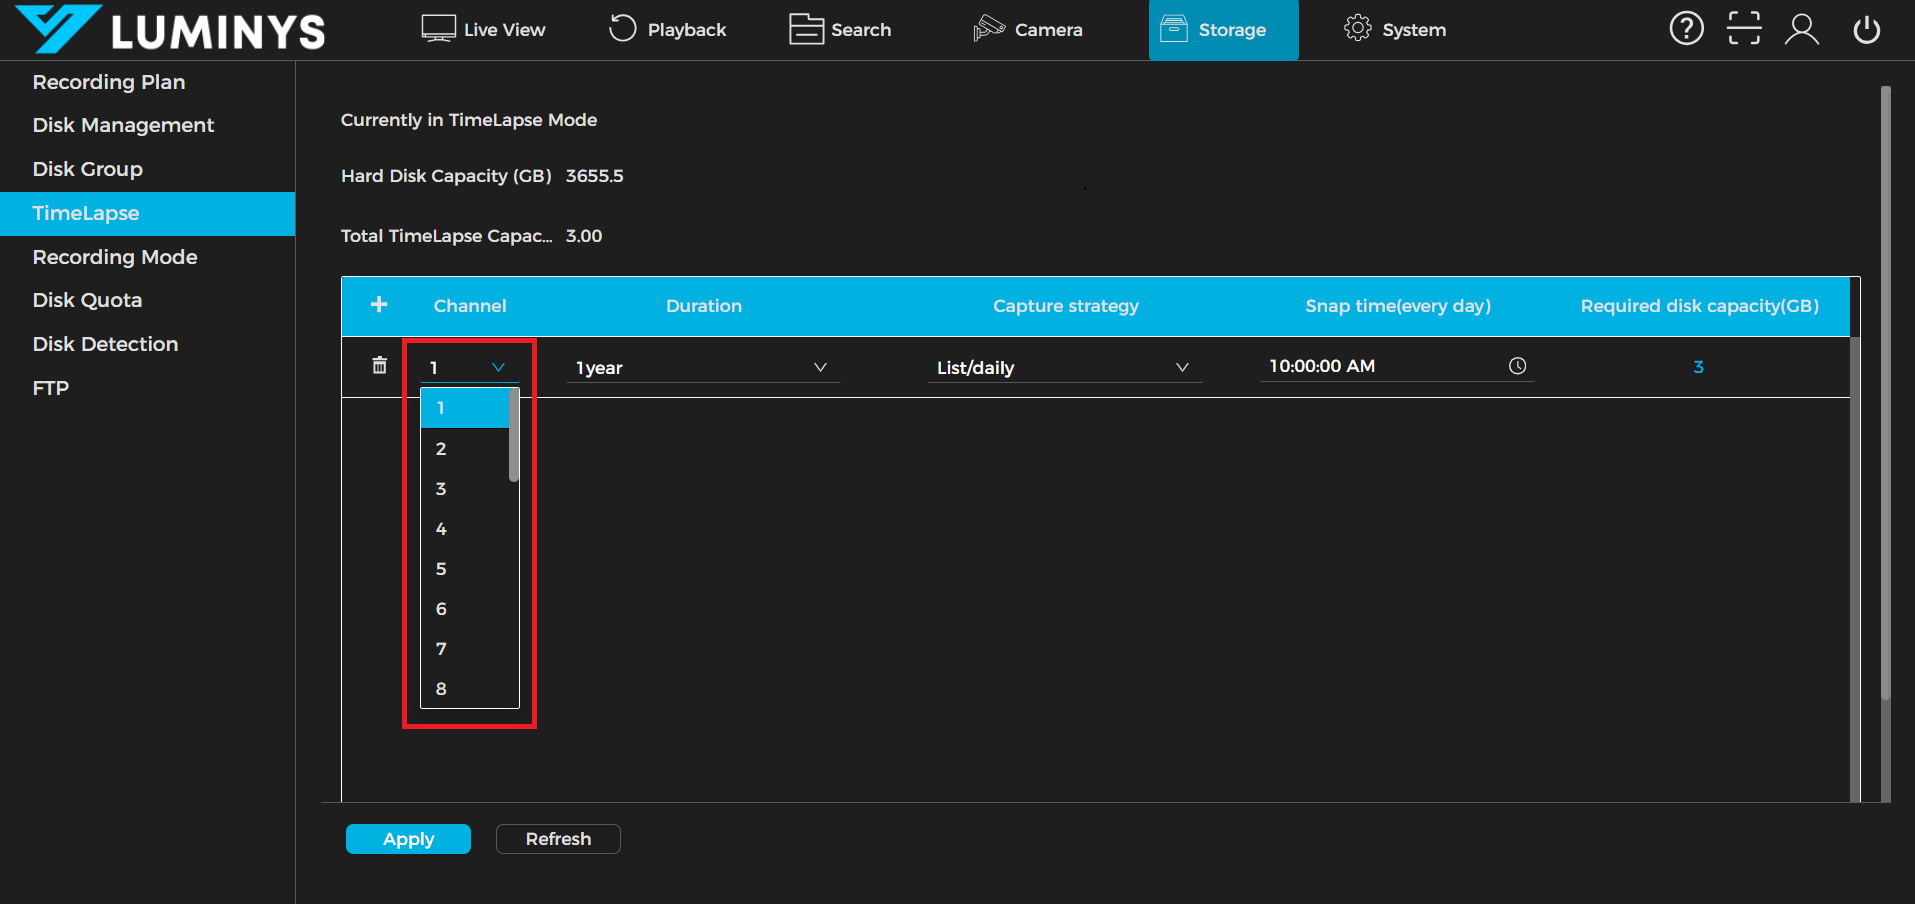
3. Double-click to open the dropdown and choose a channel number.