LumiCenter/How to Control Macros: Difference between revisions
Techsupport (talk | contribs) No edit summary |
Techsupport (talk | contribs) No edit summary |
||
| Line 42: | Line 42: | ||
[[File:MacroControl7.jpg|1000px|link=https://wiki.luminyscorp.com/images/c/ca/MacroControl7.jpg]] | [[File:MacroControl7.jpg|1000px|link=https://wiki.luminyscorp.com/images/c/ca/MacroControl7.jpg]] | ||
[[File:MacroControl8.jpg| | [[File:MacroControl8.jpg|500px|link=https://wiki.luminyscorp.com/images/e/e4/MacroControl8.jpg]] | ||
8. To review the changes, return to the Macro page and select the “Stand Up” rule under cycle rules. Notice that the working mode has switched to “Never,” whereas previously, before selecting the menu option in Live View, it was set to “Always.” Adding cycle rules to the menu enables toggling the cycle rule on and off. | 8. To review the changes, return to the Macro page and select the “Stand Up” rule under cycle rules. Notice that the working mode has switched to “Never,” whereas previously, before selecting the menu option in Live View, it was set to “Always.” Adding cycle rules to the menu enables toggling the cycle rule on and off. | ||
Revision as of 15:40, 7 November 2024
Title
Description
This tutorial will go over how to control macros.
Prerequisites
- Macros already setup
Video Instructions
N/A
Step by Step Instructions
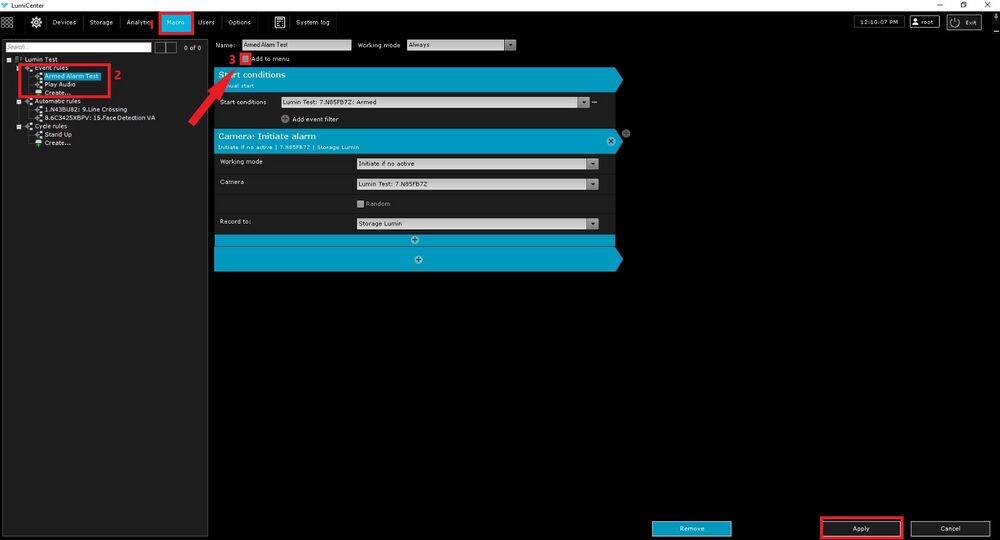
1. First, review the event rules. Event rules generally trigger automatically when the event start conditions are met, though manual control is also an option. Begin by navigating to the Macro page and selecting an event rule. For this example, an existing Arm event is used. Next, mark the “Add to menu” checkbox and click "Apply" in the bottom right corner.
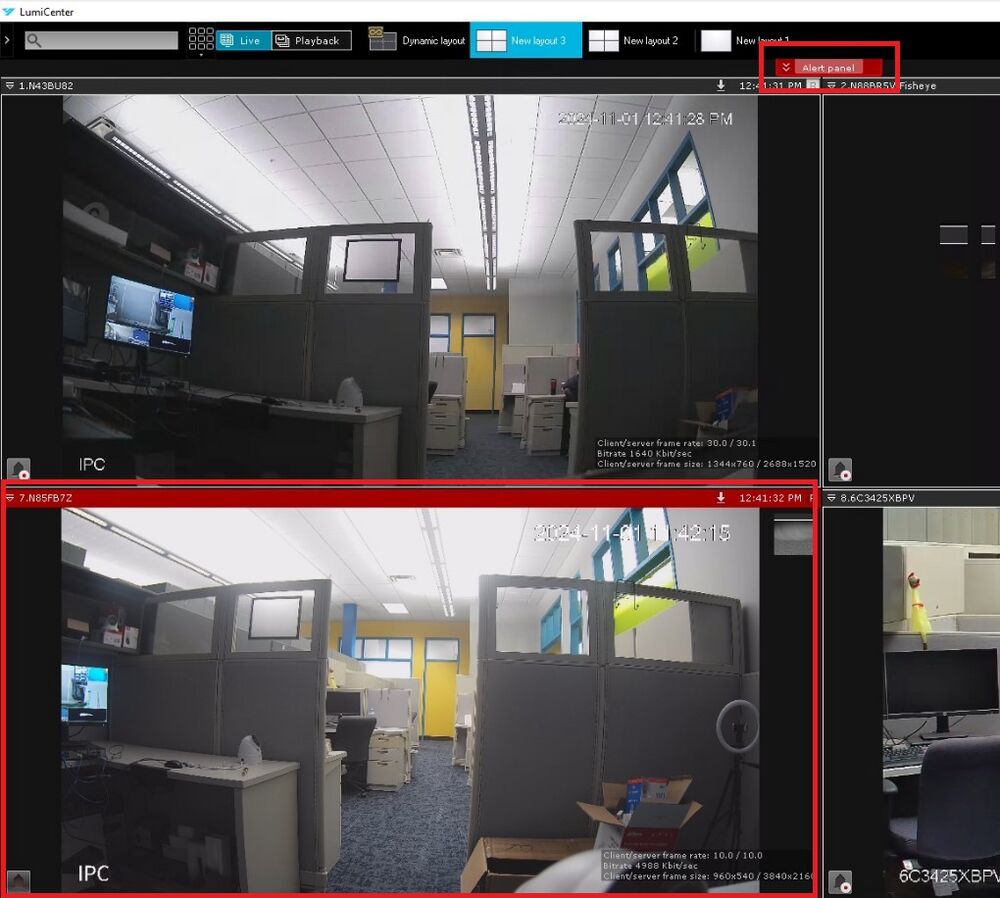
2. Next, navigate to the Live View page. In the top right, a new option will appear if this is the first macro added to the “Add to menu” setting. Clicking on it opens a dropdown showing the added macro. Simply select it to automatically initialize the macro.
3. Upon selecting the macro, it activates and executes the designated action. In this example, the macro is configured to trigger the alarm when the camera is "Armed." As shown in the picture, after selecting the macro from the menu, an alarm message and a red bar on the camera are displayed. This step completes the process of manually controlling Event Macros.
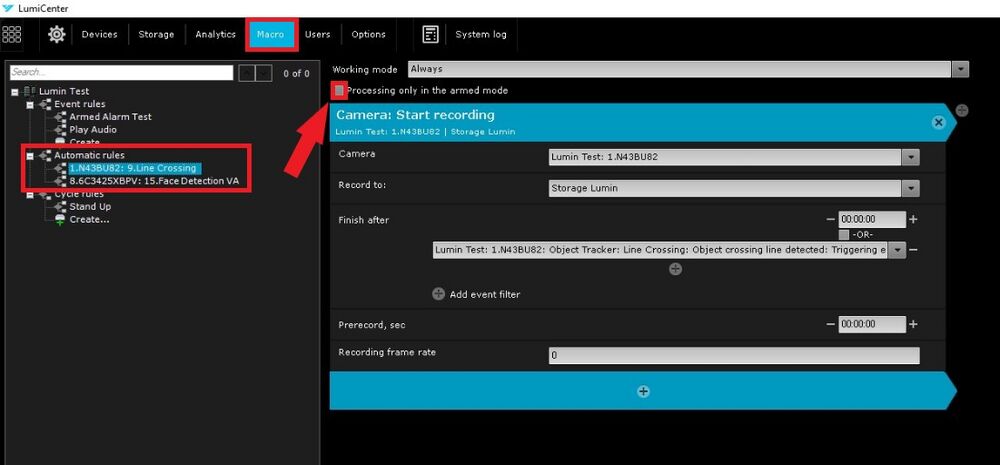
4. Next, explore the Automatic Rules and available control options. Navigate back to the Macro page and select one of the automatic rules, such as the line-crossing rule. The next step is to check the box for “Processing only in the Armed mode.” After selecting the checkbox, click "Apply" in the bottom right. This setting ensures the rule activates only when the camera is in Armed mode.
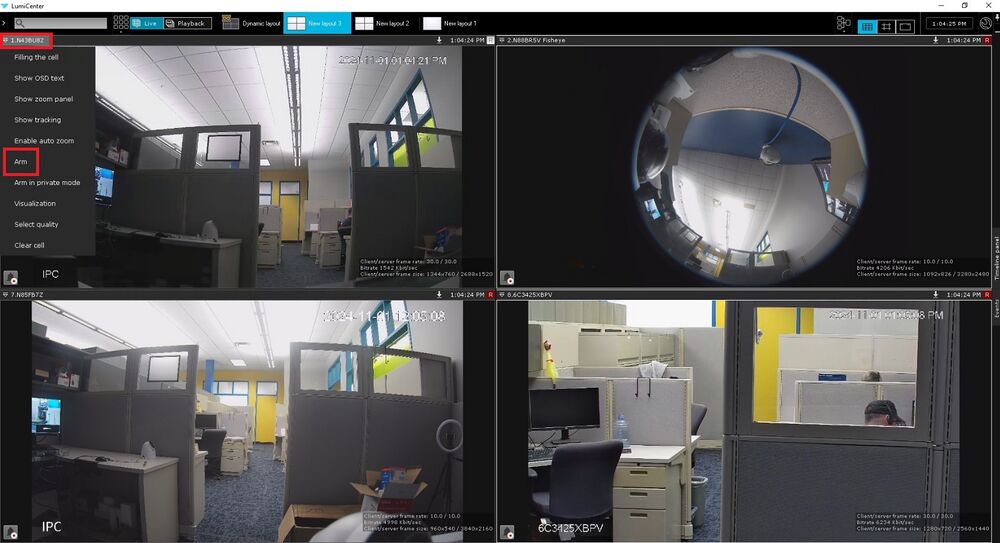
5. Next, return to the Live View window to “Arm” the camera, enabling the rule to take effect. Open the context menu in the top left of the camera view, where a dropdown option allows for selecting “Arm” to place the camera in Armed mode. Note that with “Processing only in the Armed mode” selected in the rule, the macro won’t trigger, even if its start condition is met, unless the camera is Armed. The camera can be disarmed using the same method.
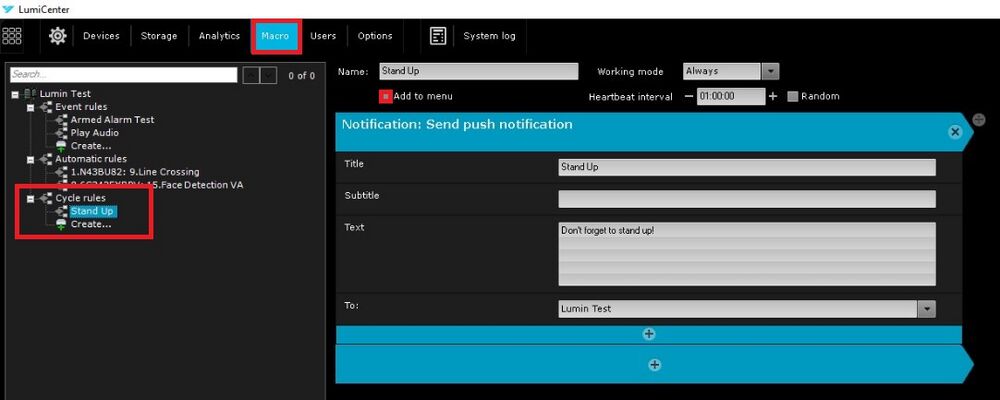
6. Now, proceed to the “Cycle Rules.” Navigate back to the Macro menu and select one of the created cycle rules. Next, check the “Add to menu” option. Although these steps resemble those for event rules, the behavior will differ slightly.
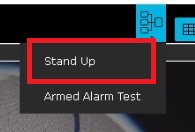
7. Next, return to the Live View window. Click on the menu in the top right, where the “Stand Up” rule will appear with an “On” label. Select it, and after doing so, click on the menu again to see that “Stand Up” now appears without the “On” label.
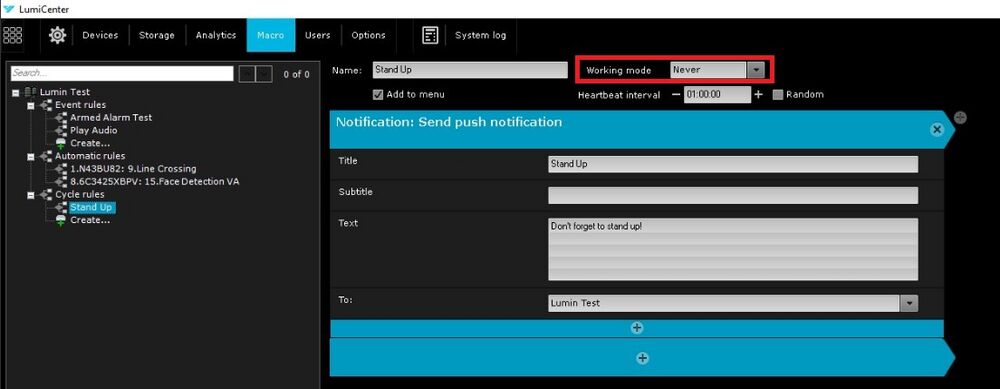
8. To review the changes, return to the Macro page and select the “Stand Up” rule under cycle rules. Notice that the working mode has switched to “Never,” whereas previously, before selecting the menu option in Live View, it was set to “Always.” Adding cycle rules to the menu enables toggling the cycle rule on and off.
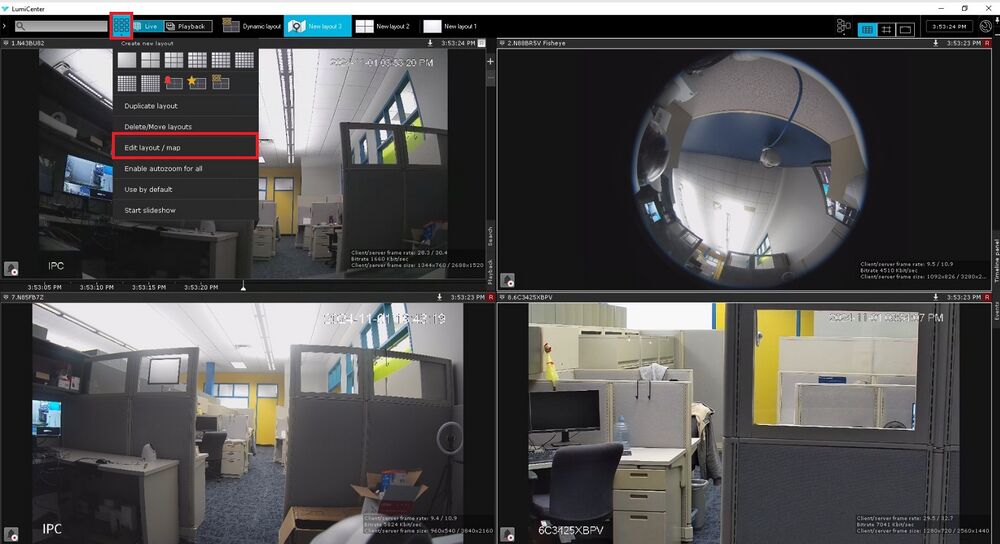
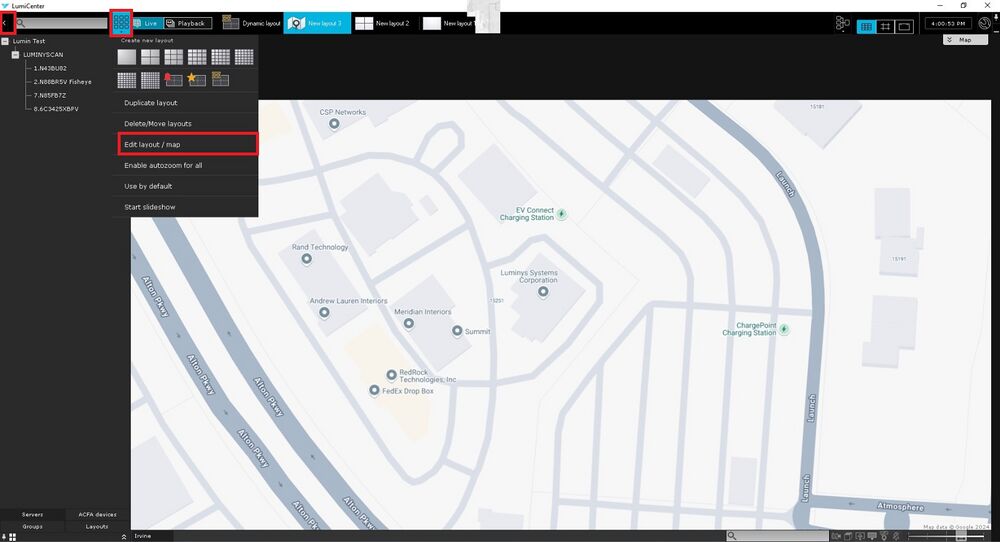
9. Macros can also be triggered from the Map View. To do this, begin on the Live View page, select the layout option at the top, and then choose "Edit Layout/Map."
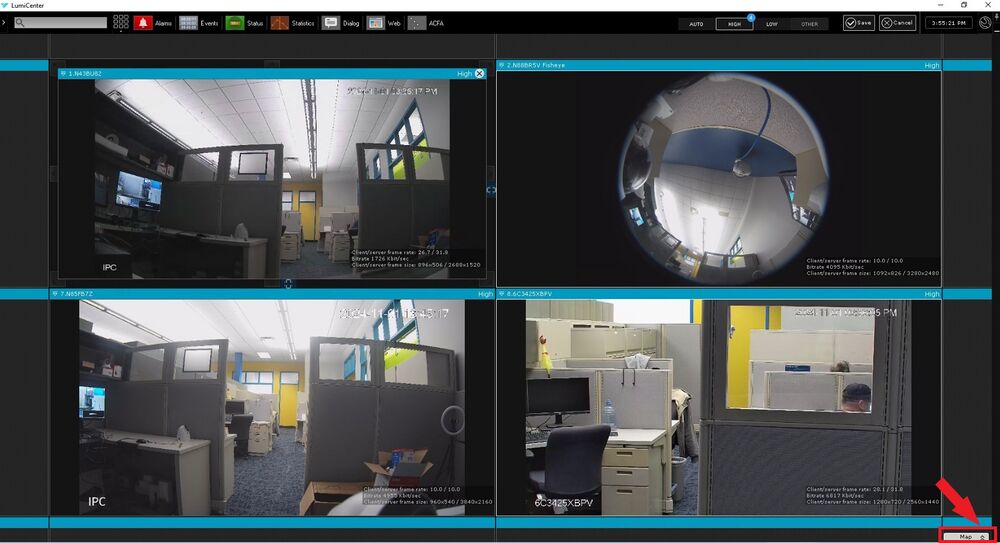
10. Next, click the up arrow on the map option in the bottom right to open the Map View.
11. Once the map page loads, click on the layout option again and then select "Edit Layout/Map." Additionally, expand the device list on the left by clicking the arrow in the top left. The arrow on mine is already pointing the opposite direction, indicating the list is expanded.
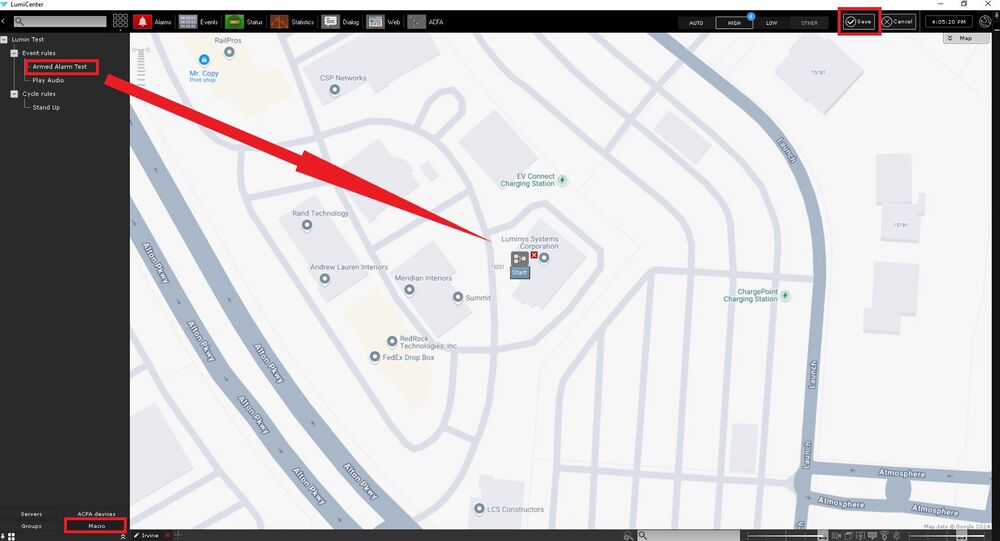
12. The options on the bottom left will now change. Select the Macro option, and you will see all the added macros at the top left. You can then drag and drop the rule onto the map. In this case, the Armed Alarm Test was moved onto the map. Once that’s done, click "Save" in the top left.
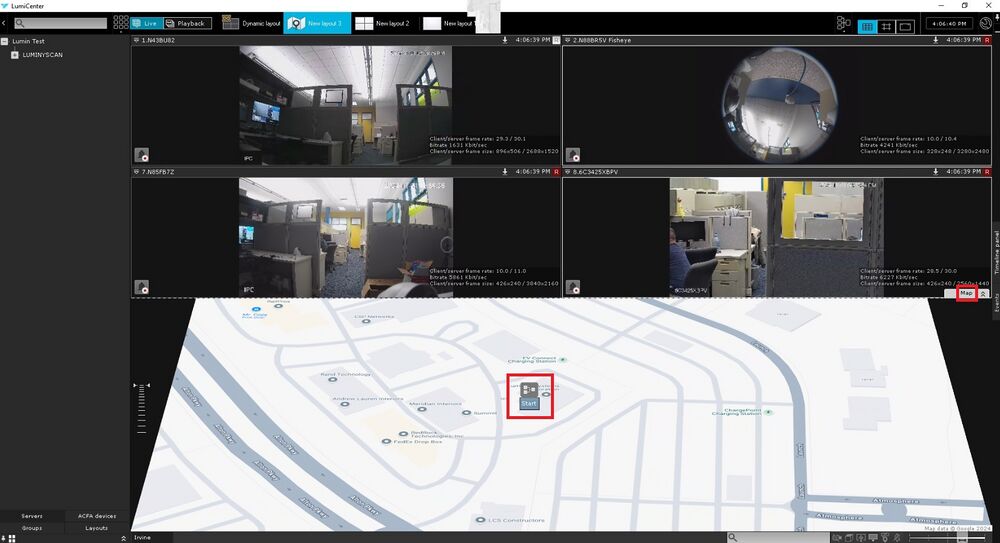
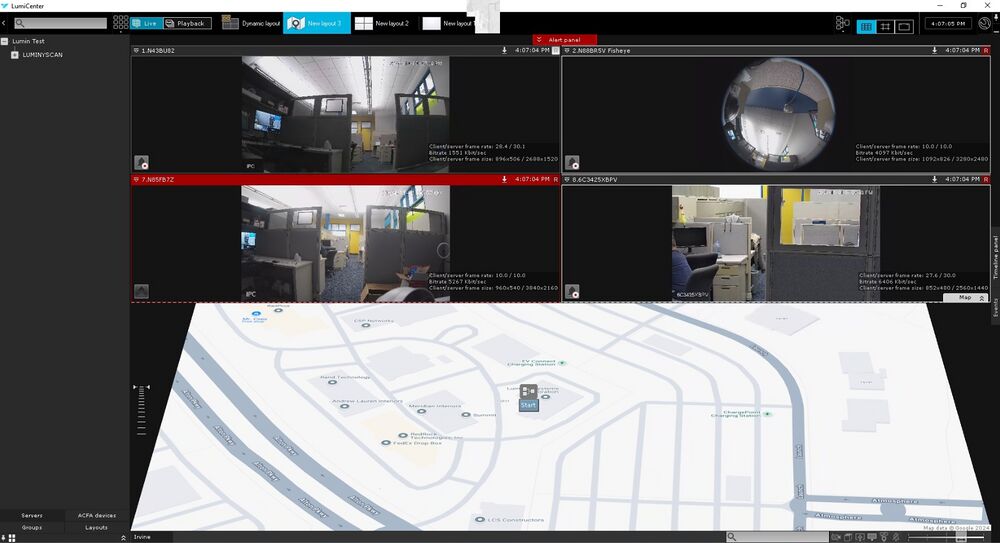
13. To split the view and display both the map and the cameras, click the word "Map" on the map button to enable the split view. Once the view is split, click the start button on the macro on the map to activate it.
14. After clicking the start button, the macro will behave the same way as it did when selected from the dropdown menu. This concludes the process of controlling Macros.

