NVR Timelapse: Difference between revisions
Techsupport (talk | contribs) |
Techsupport (talk | contribs) |
||
| Line 11: | Line 11: | ||
Coming Soon | Coming Soon | ||
===Step by Step Instructions=== | ===Step by Step Instructions - Enable Timelapse=== | ||
1. Click Storage tab <span style=color:red;font-weight:bold>(1)</span> then click on the Timelapse option <span style=color:red;font-weight:bold>(2)</span> on the left panel of the GUI. | 1. Click Storage tab <span style=color:red;font-weight:bold>(1)</span> then click on the Timelapse option <span style=color:red;font-weight:bold>(2)</span> on the left panel of the GUI. | ||
Revision as of 17:40, 28 May 2026
Timelapse feature for R5 series
Description
This tutorial will show you how to enable the timelapse feature on the R5 Series NVR, followed by how to export the video.
Prerequisites
- Web browser on a computer.
- Time-lapse is available on specific firmware versions only (contact Support)
Video Instructions
Coming Soon
Step by Step Instructions - Enable Timelapse
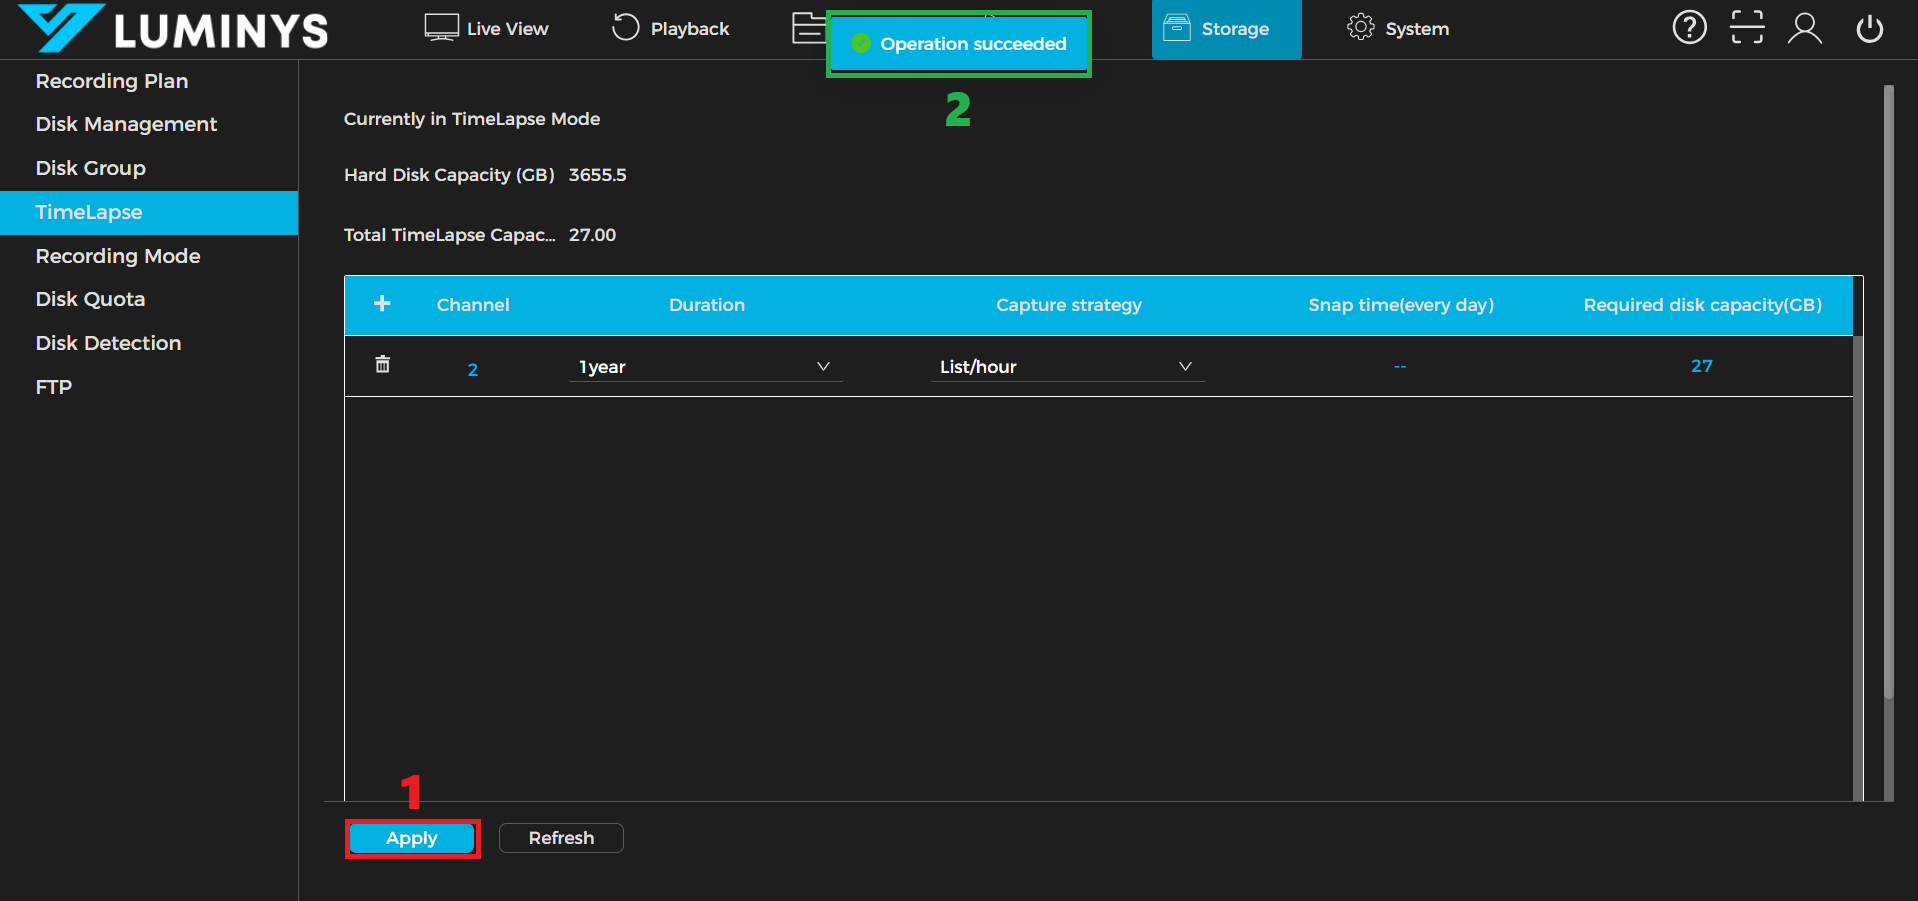
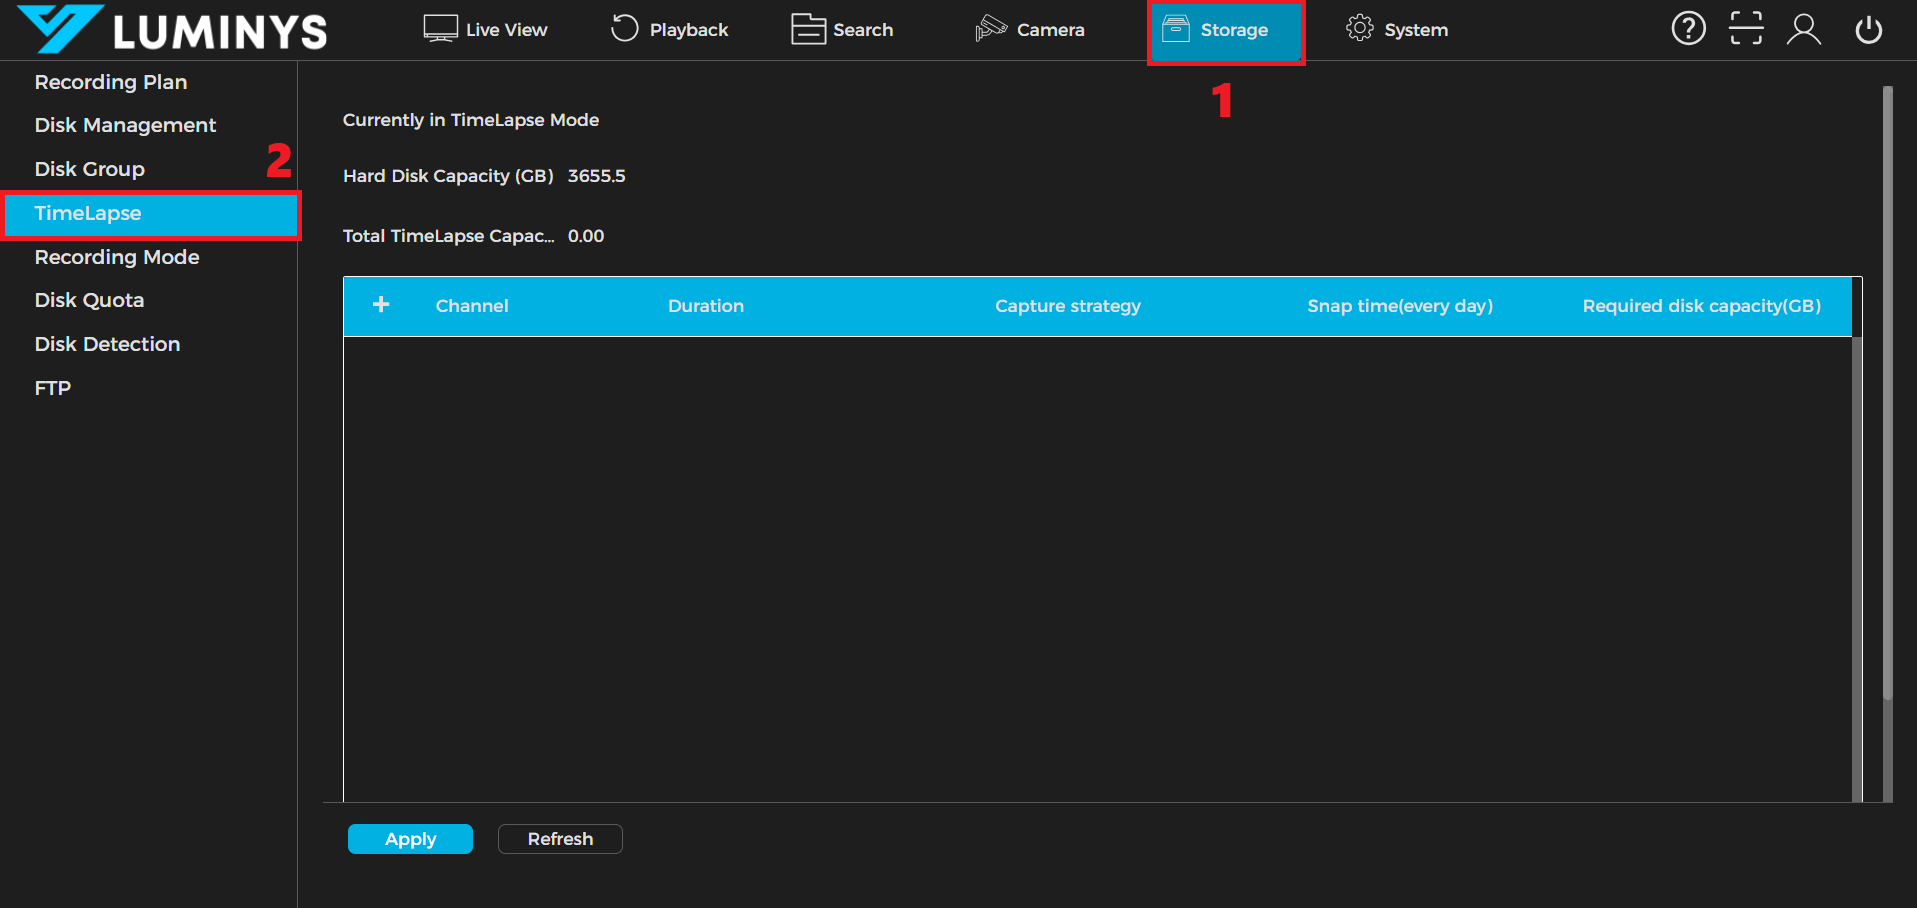
1. Click Storage tab (1) then click on the Timelapse option (2) on the left panel of the GUI.
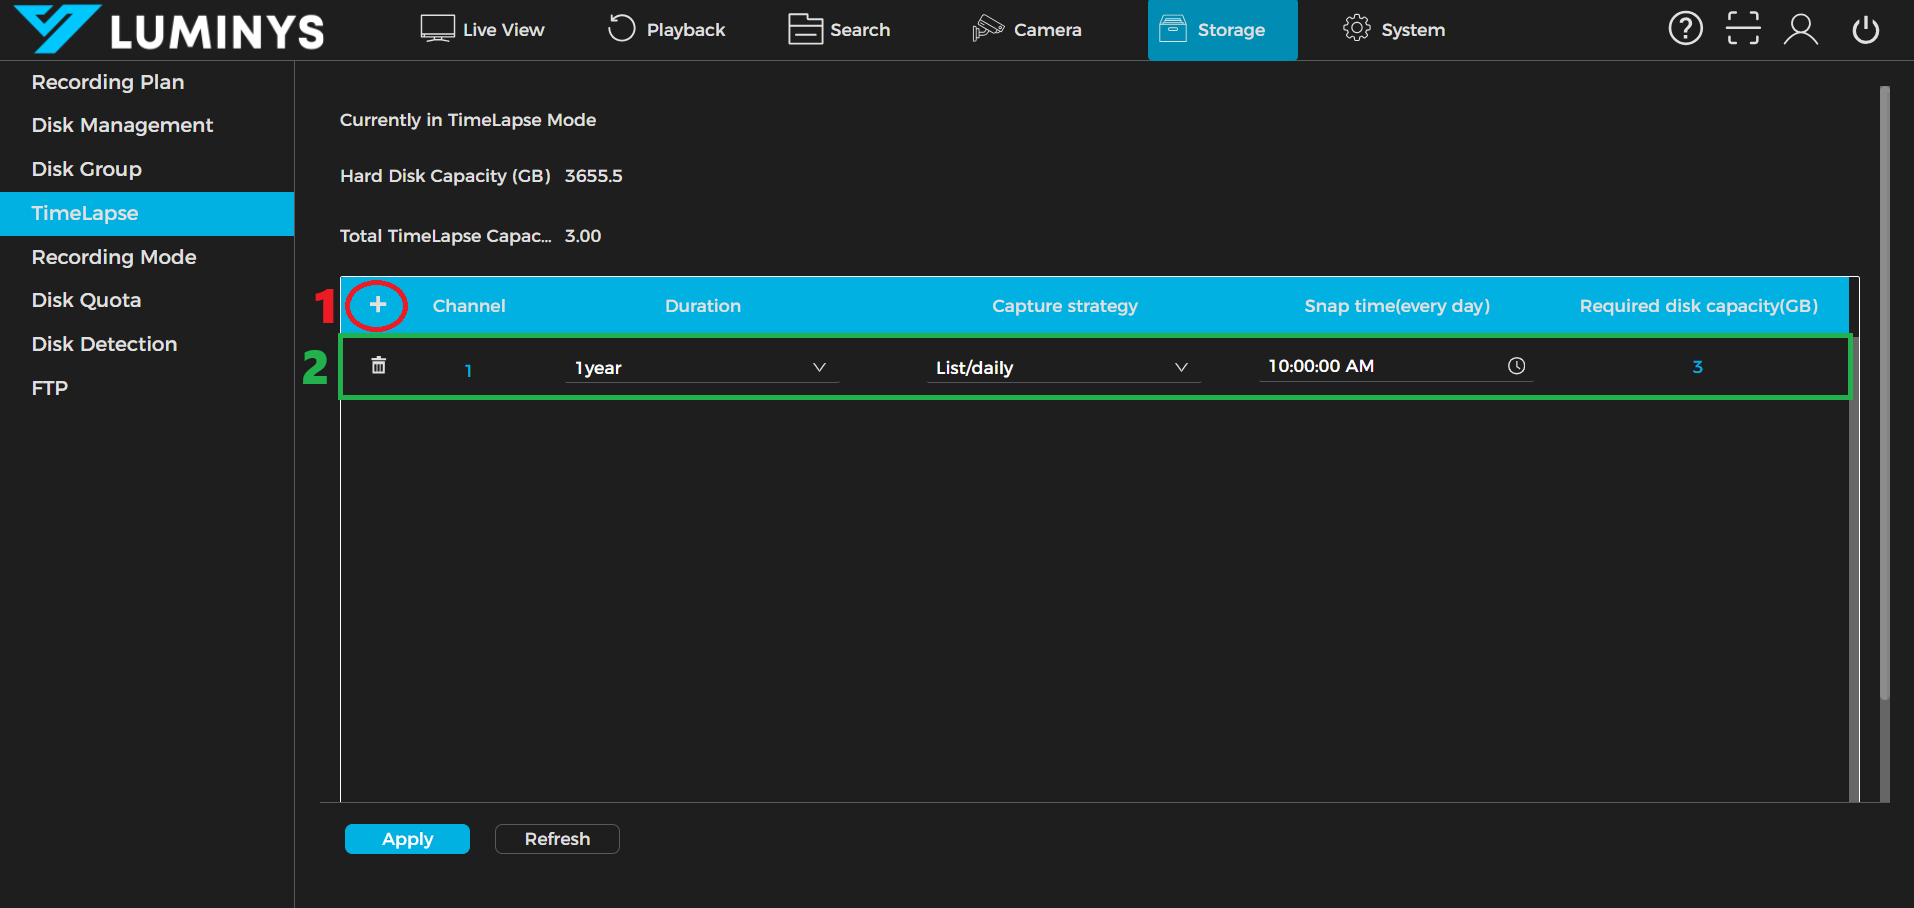
2. Click the plus icon (1) to add a timelapse profile. A profile will popup. (2)
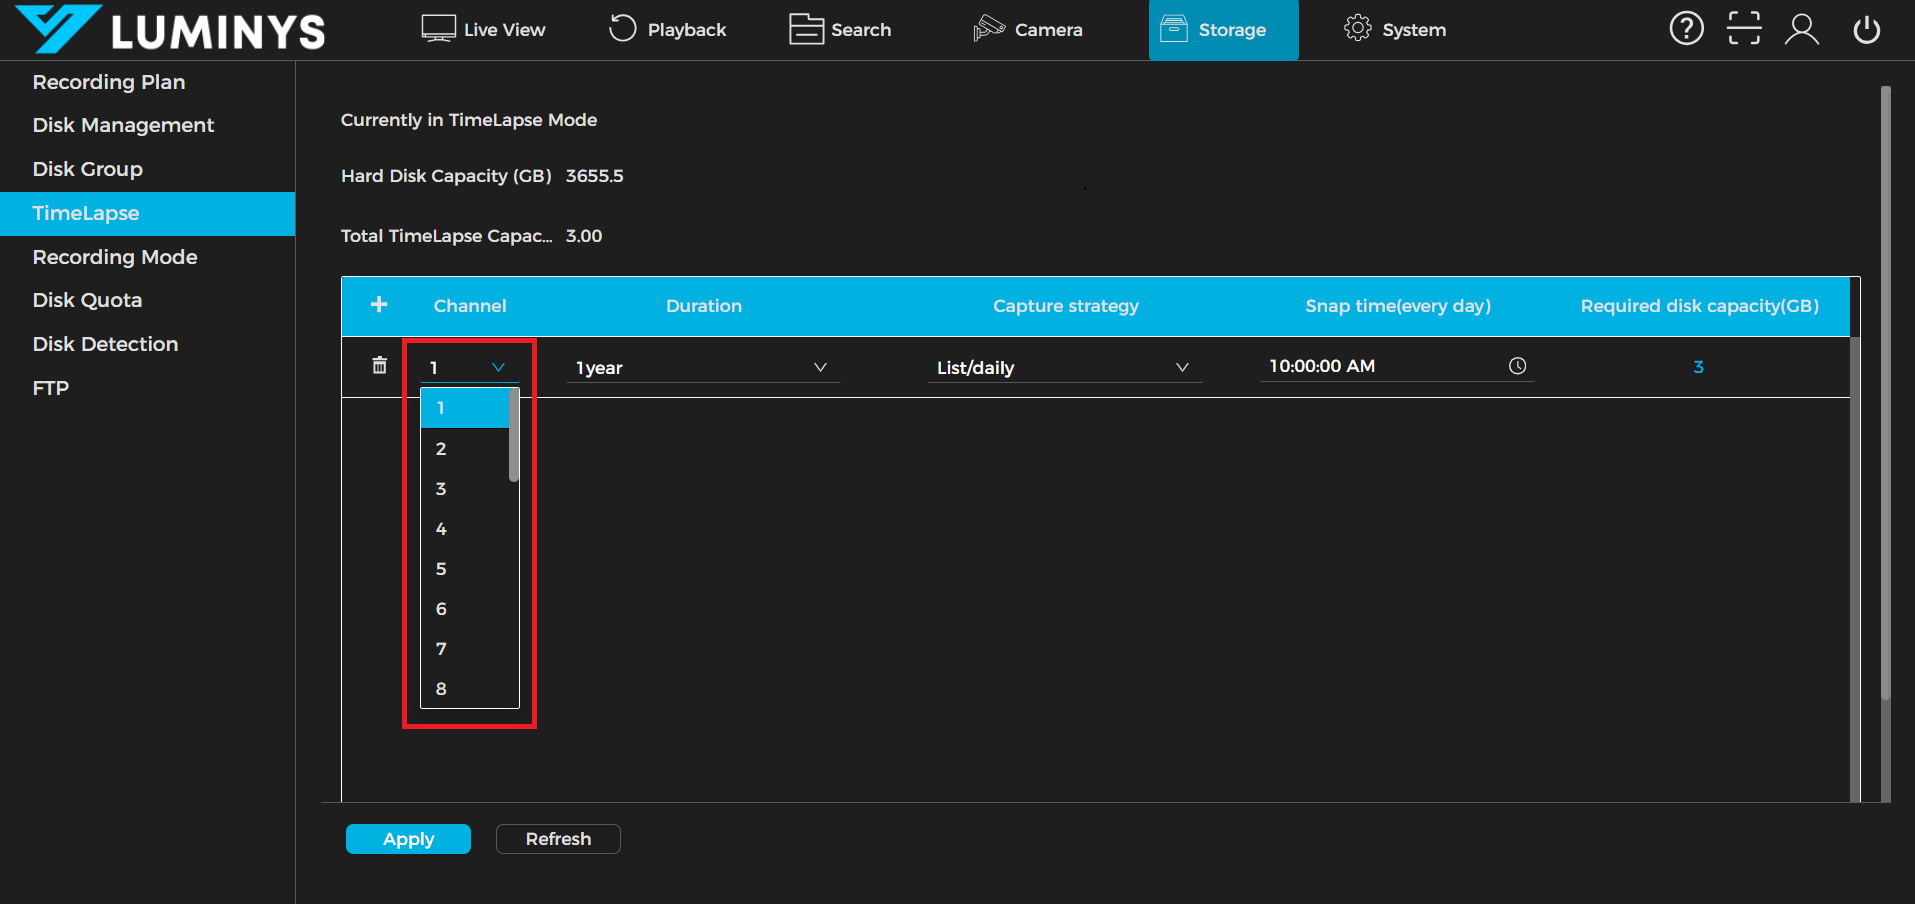
3. Double-click to open the dropdown and choose a channel number.
4. Click the duration dropdown to select the duration of the timelapse feature.
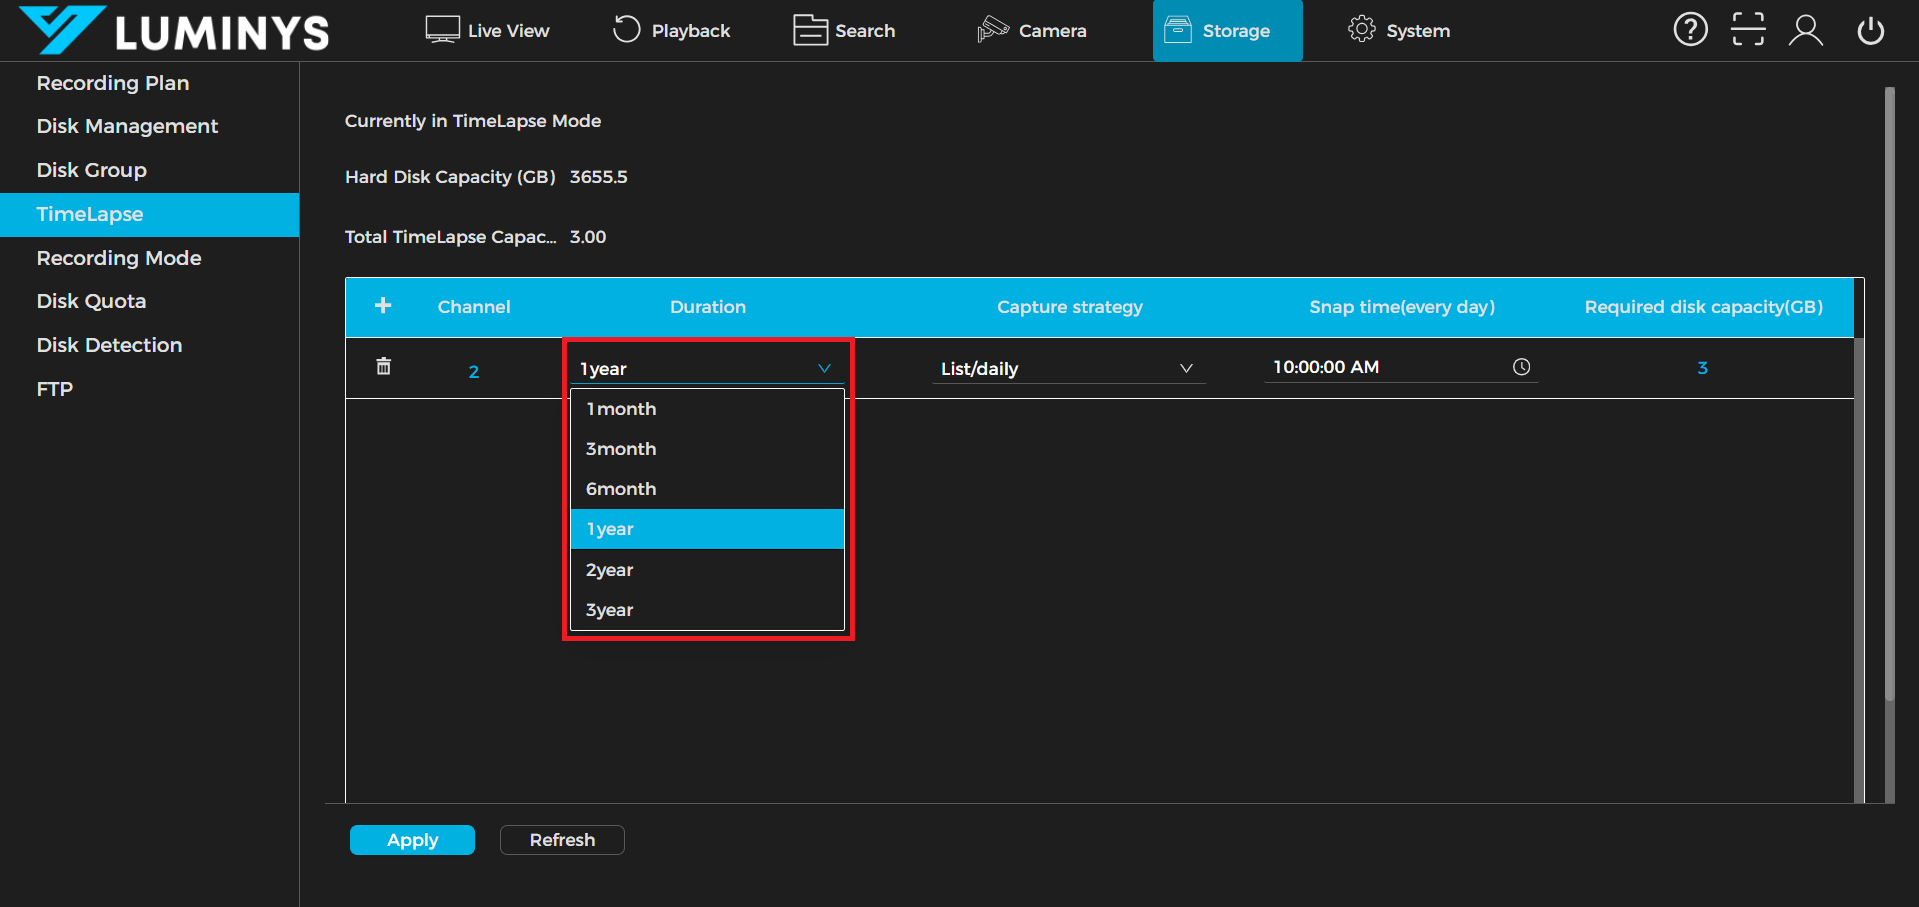
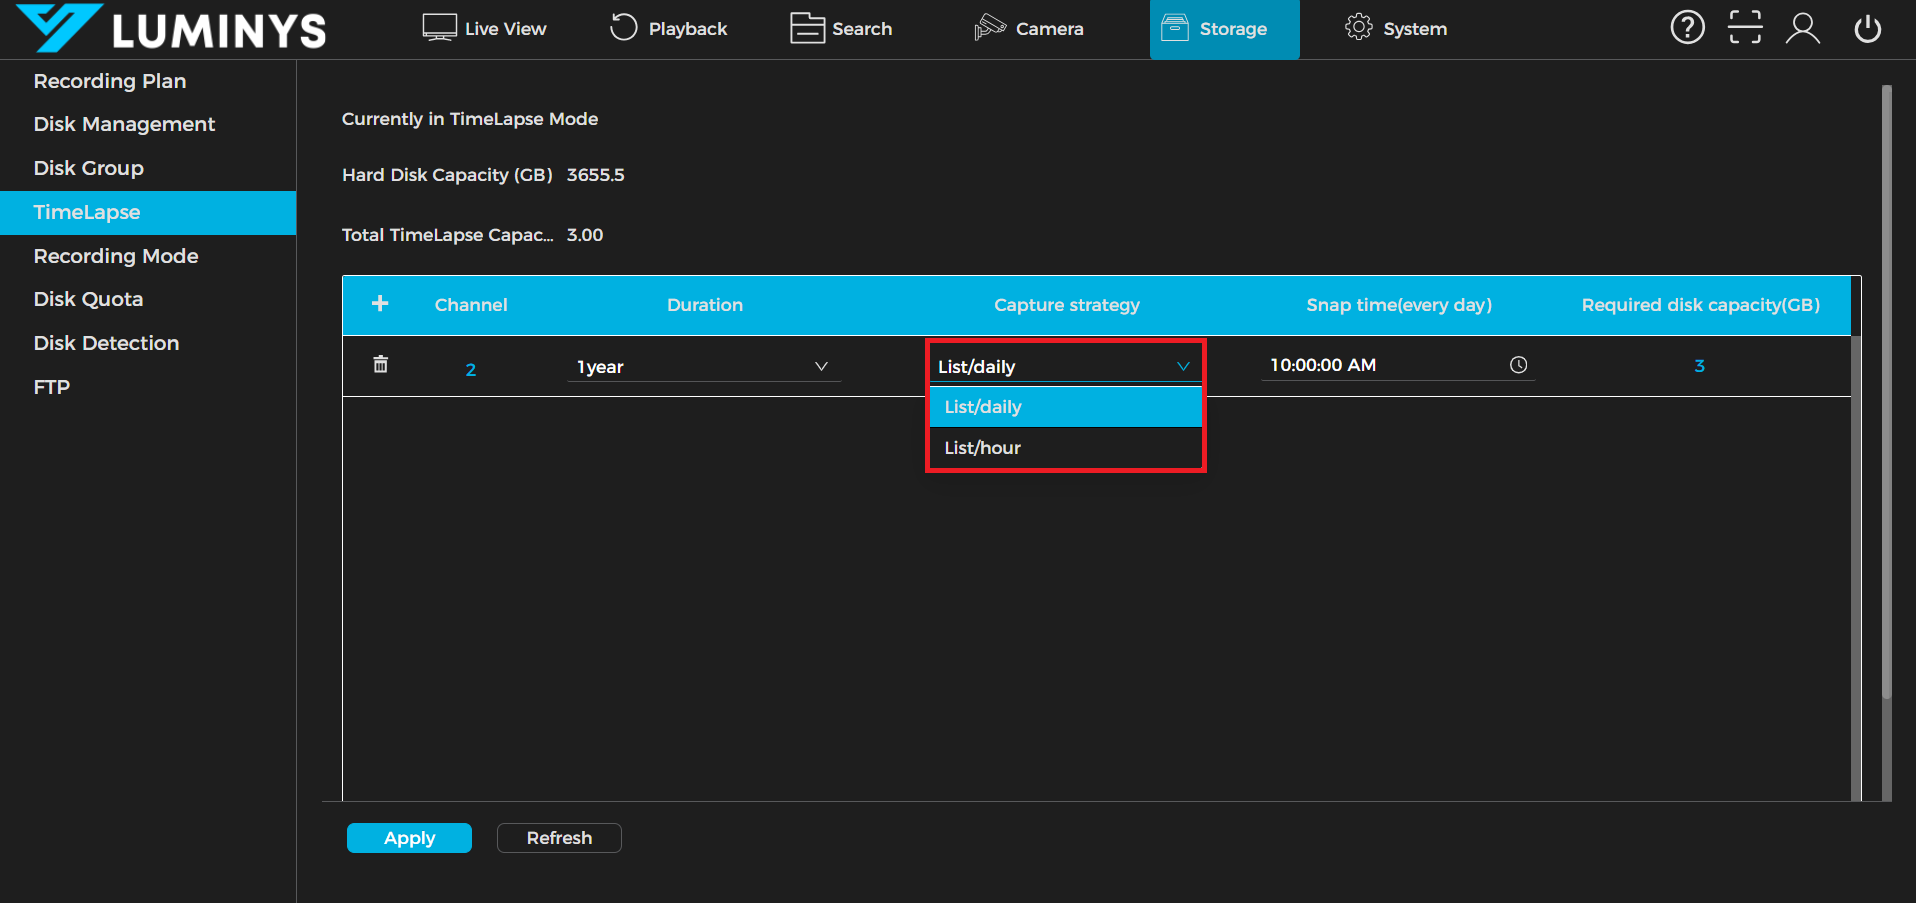
5. Click the Capture Strategy dropdown to select a mode:
- List/Daily: Captures one image per day at a specified time.
- List/Hour: Captures one image every hour.
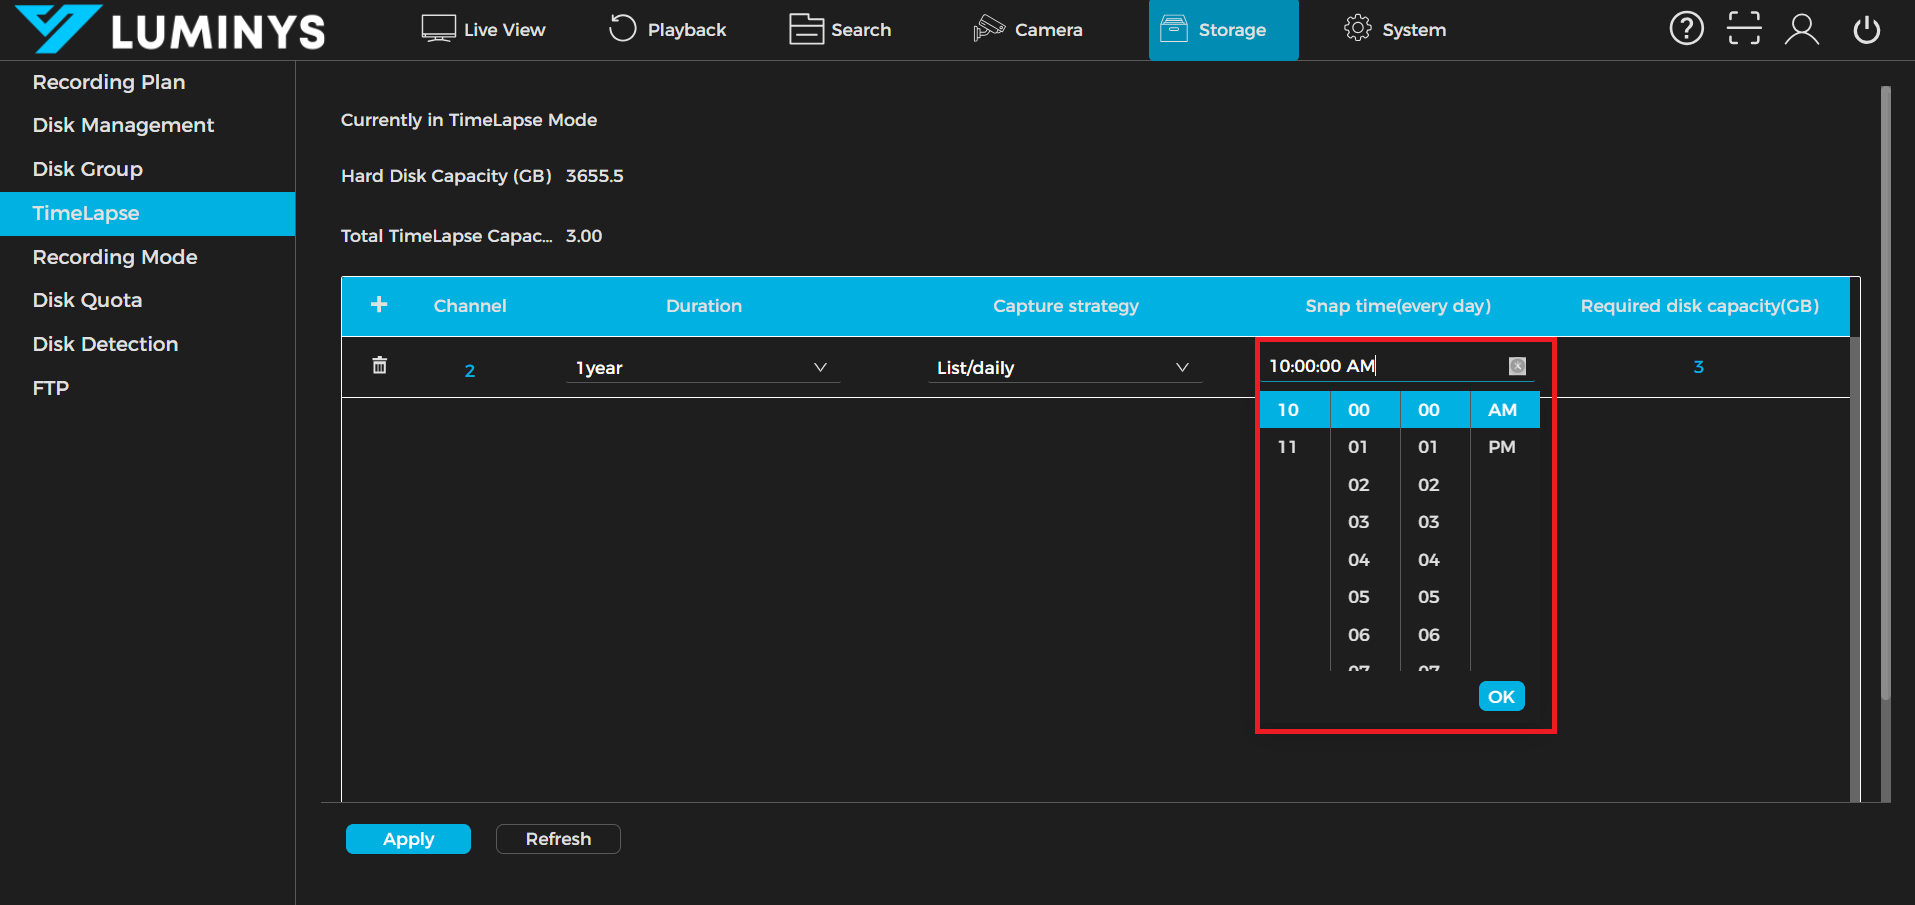
6. Click Snaptime to configure the daily capture time (available only when List/Daily is selected).
7. To apply the time-lapse feature to additional channels, repeat Step 2 to 6.
8. Click Apply (1) to save the settings. A confirmation message, “Operation Succeeded,” will appear. (2)