NVR/Adding Video Doorbell to NVR: Difference between revisions
From Luminys WIKI
Techsupport (talk | contribs) |
Techsupport (talk | contribs) No edit summary |
||
| Line 23: | Line 23: | ||
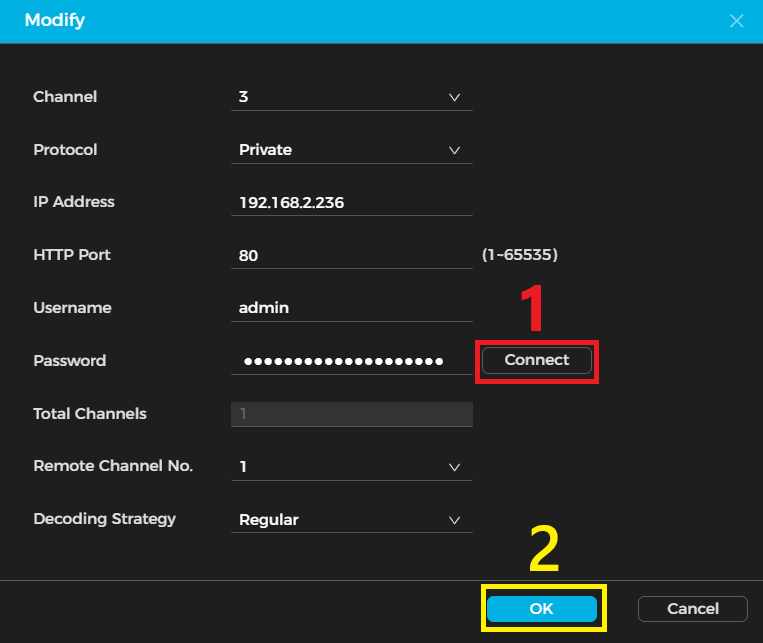
3. Verify all the doorbell parameters, especially the password. Then click Connect <span style = "color:red">(1)</span>, followed by OK<span style = "color:yellow, background:black">(2)</span>. | 3. Verify all the doorbell parameters, especially the password. Then click Connect <span style = "color:red">(1)</span>, followed by OK<span style = "color:yellow, background:black">(2)</span>. | ||
[[File:NVR_db_3.png|1000px|link=https://wiki.luminyscorp.com/images/ | [[File:NVR_db_3.png|1000px|link=https://wiki.luminyscorp.com/images/c/c5/NVR_db_3.png]] | ||
Revision as of 11:20, 22 June 2026

Adding Video Doorbell to NVR
Description
This tutorial will go over how to add Video Doorbell to the NVR.
Prerequisites
- Install the Doorbell
- Initial setup the Doorbell
- Access the WebUI of the NVR
Step by Step Instructions
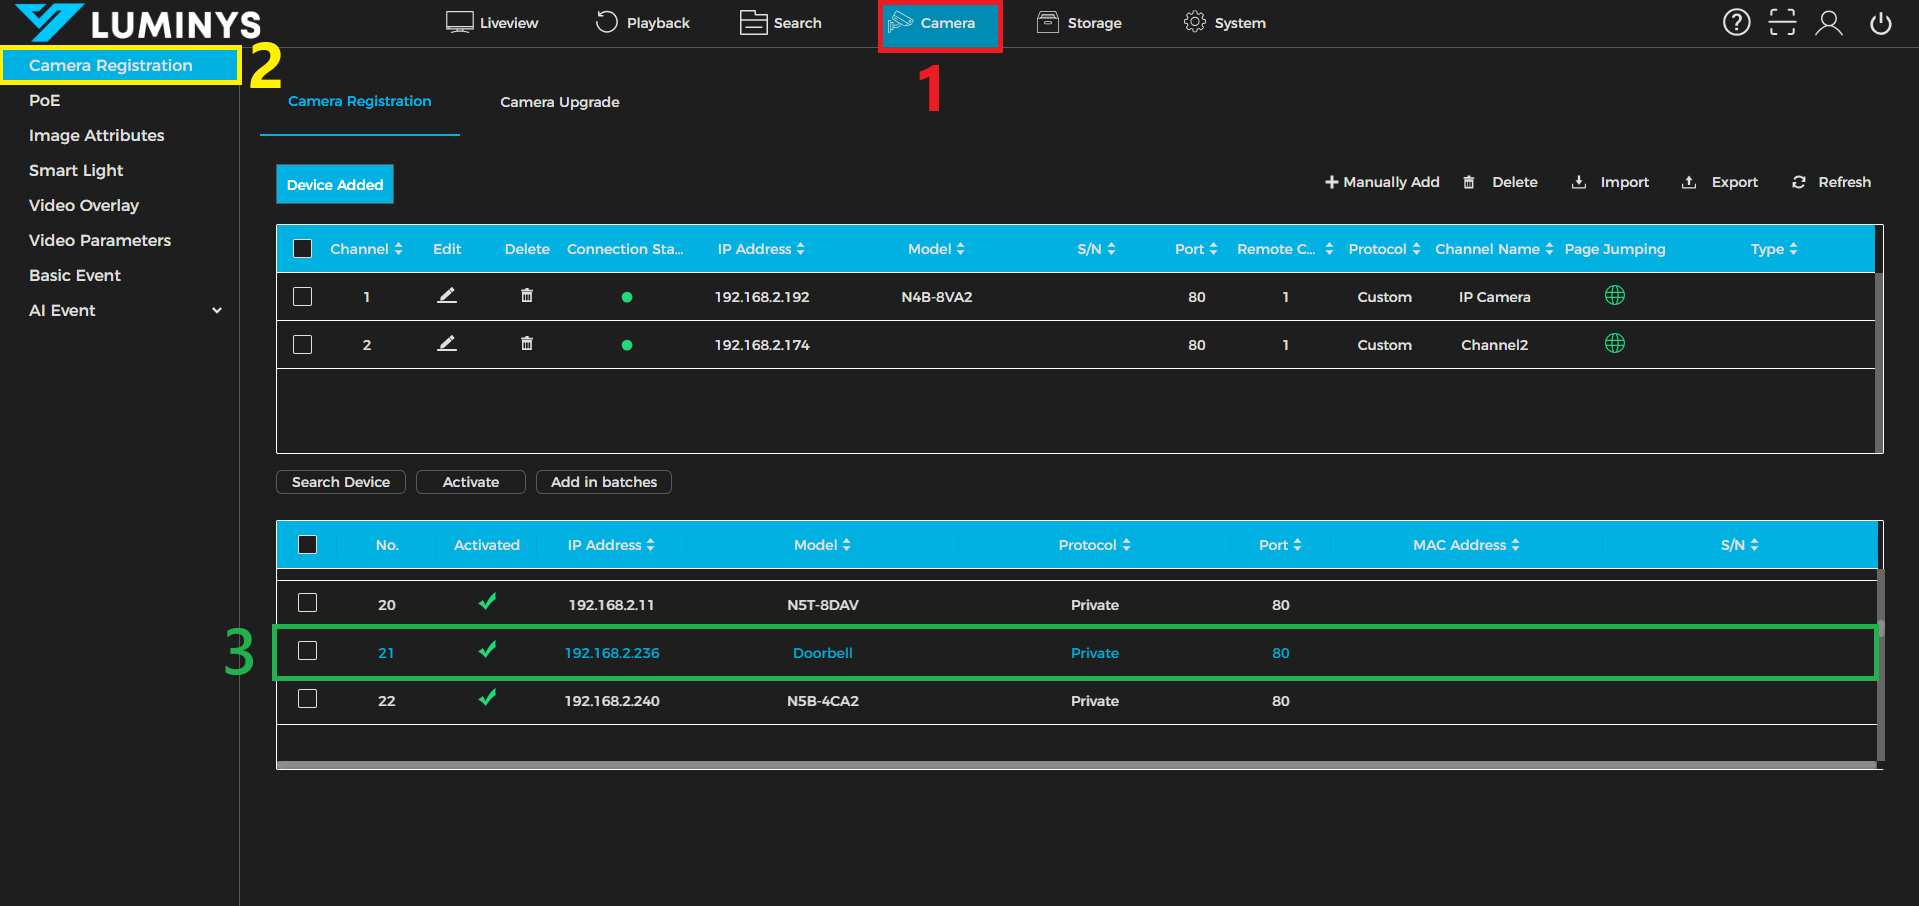
1. From the NVR WebUI, click the Camera (1) tab, then select Camera Registration (2) from the left panel. Locate the doorbell in the device list (3), then double-click the doorbell’s IP address.
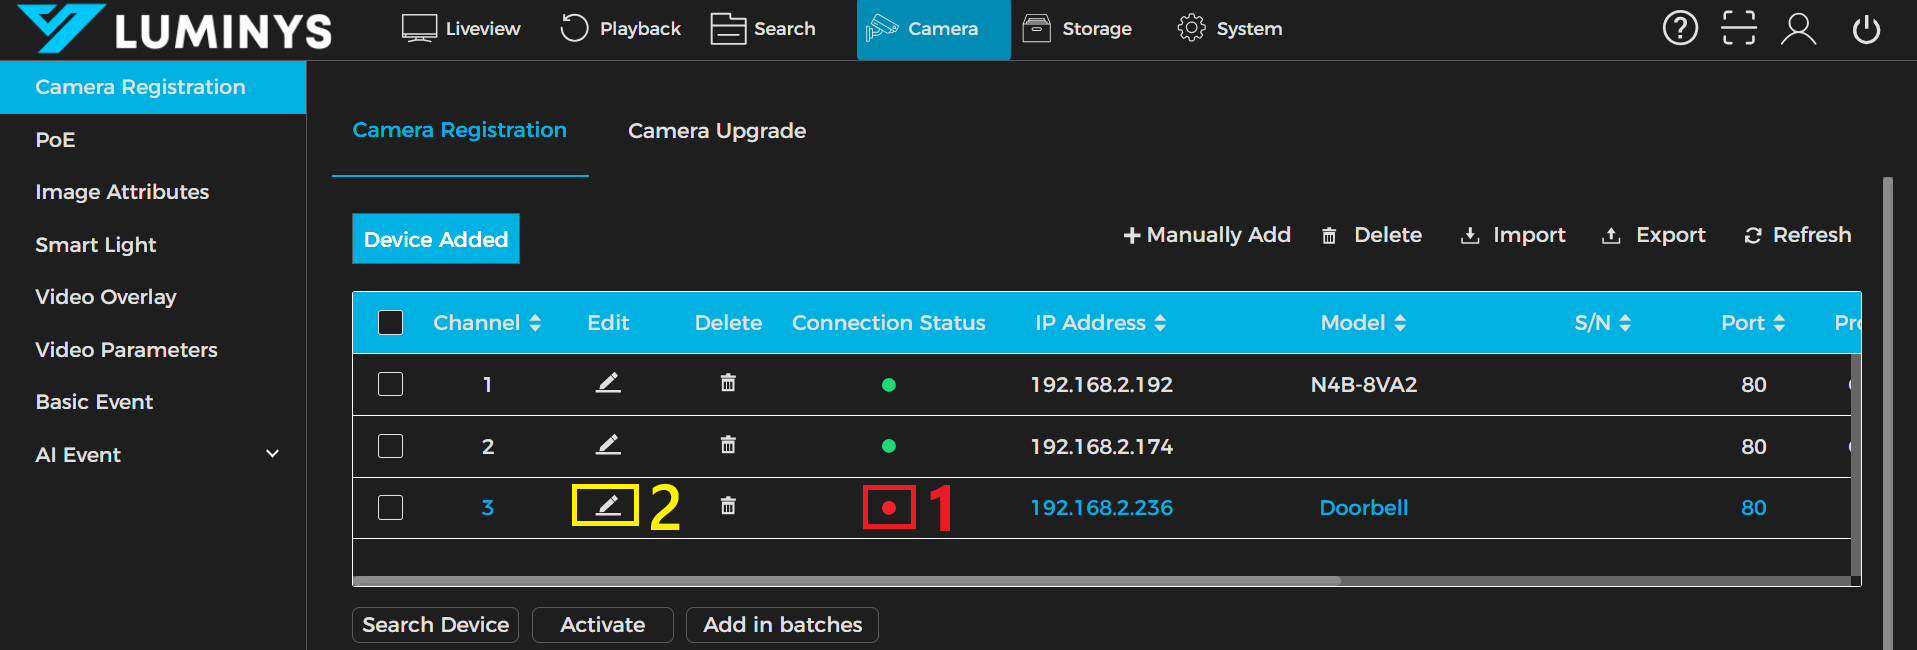
2. The doorbell will be added under the “Device Added” group. If the doorbell’s Connection Status appears in red (1) instead of green, click the Edit (2) icon for the doorbell.
3. Verify all the doorbell parameters, especially the password. Then click Connect (1), followed by OK(2).