LumiGuardian/How to access WebGUI: Difference between revisions
From Luminys WIKI
Techsupport (talk | contribs) |
Techsupport (talk | contribs) |
||
| Line 29: | Line 29: | ||
After that click "Add and Continue" or "Add" <span style = "color:green">(2)</span> | After that click "Add and Continue" or "Add" <span style = "color:green">(2)</span> | ||
[[File:LumiGuardian_webgui_3.png| | [[File:LumiGuardian_webgui_3.png|500px|link=https://wiki.luminyscorp.com/images/d/d3/LumiGuardian_webgui_3.png]] | ||
Revision as of 17:07, 14 July 2026
LumiGuardian How to access WebGUI
Description
This article will cover how to access WebGUI for LumiGuardian devices.
Prerequisites
- A computer with internet access and Lumiviewer installed
- A LumiGuardian up and running with data licenses.
Step-by-step Instruction
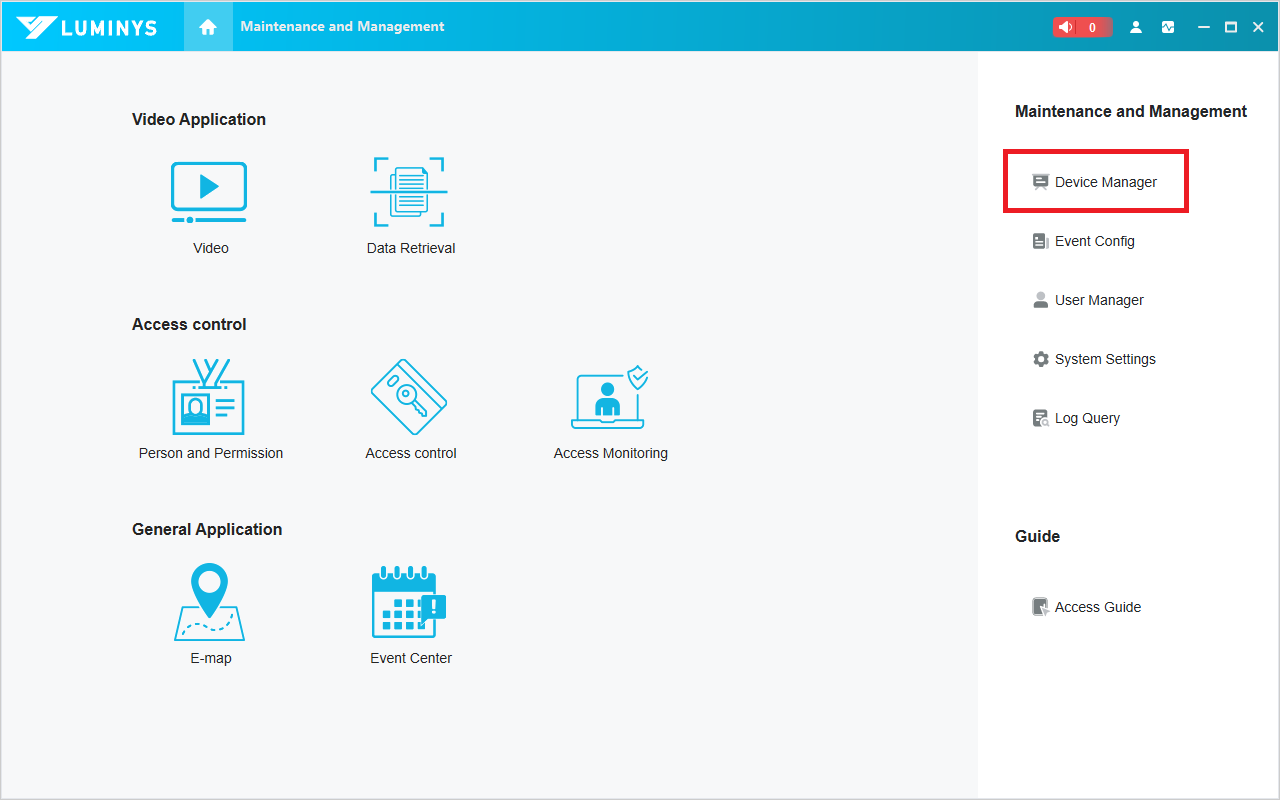
1. Open LumiViewer on PC, click on Device Manager
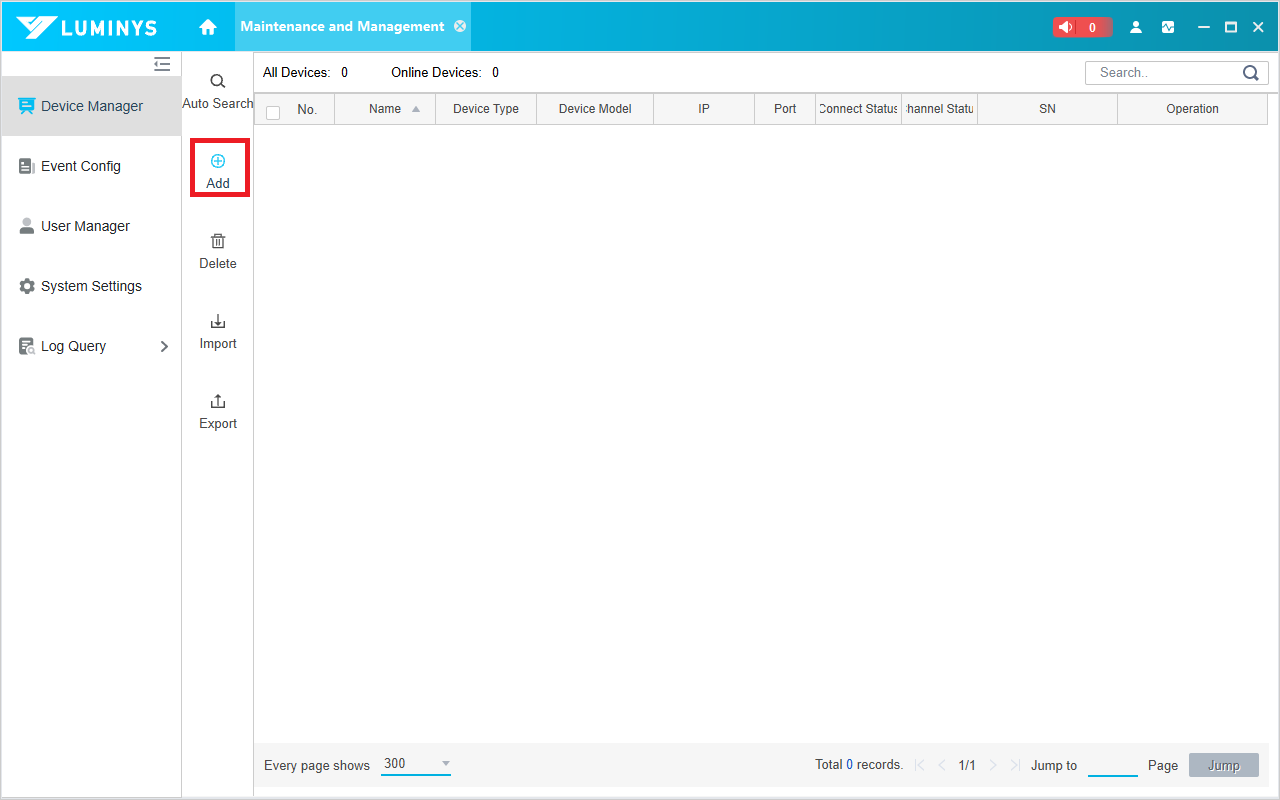
2. In the newly opened window, click Add.
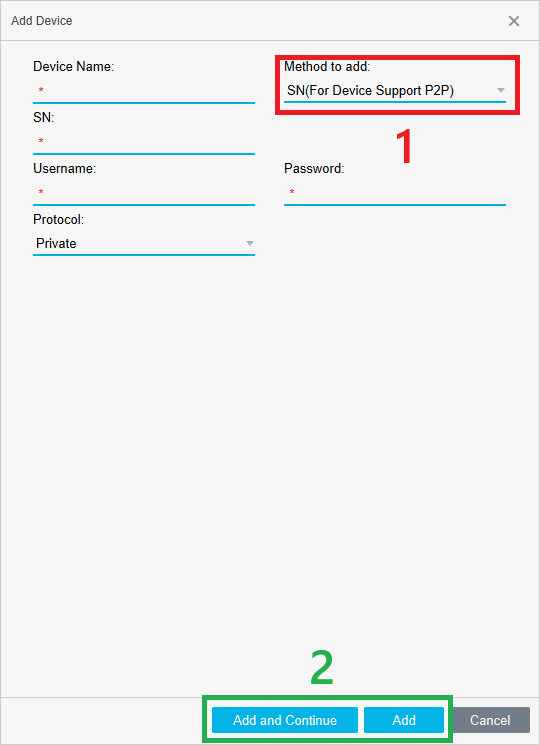
3. A window will slide out from the right. Change the "Method to add:" to "SN" (1).
After that, enter all the required information:
Device Name: You can name it anything you prefer. It is recommended to use the same name as in LumiCloud.
SN: Use the same SN that you used to add the device to LumiCloud. You can also find this SN on the plate of the trailer or on a sticker inside the top control box.
Username: should always be "admin"
Password: this is the password you setup for admin.
Protocol: Keep this as "Private"
After that click "Add and Continue" or "Add" (2)