LumiCenter/How to Use Face Detection Tool: Difference between revisions
Techsupport (talk | contribs) No edit summary |
Techsupport (talk | contribs) No edit summary |
||
| Line 29: | Line 29: | ||
3. Various parameters can be adjusted, such as the capture angle, and options are available to capture age and gender in the background. | 3. Various parameters can be adjusted, such as the capture angle, and options are available to capture age and gender in the background. | ||
[[File:Face_Detect4.jpg|1000px|link=https://wiki.luminyscorp.com/ | [[File:Face_Detect4.jpg|1000px|link=https://wiki.luminyscorp.com/images/4/4a/Face_Detect4.jpg]] | ||
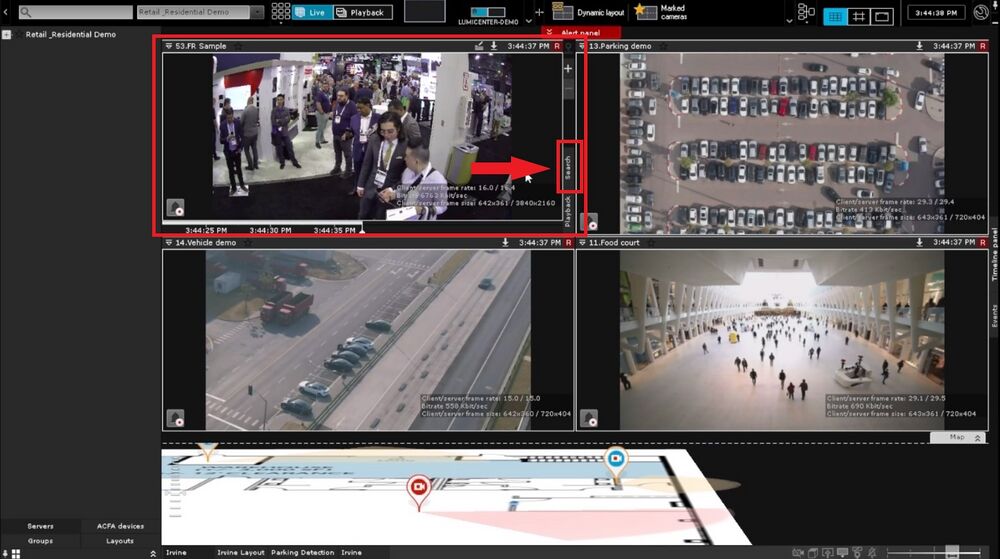
4. Next, to search for captured faces, go to the Live View page. Select the camera for the search and click the search button. | 4. Next, to search for captured faces, go to the Live View page. Select the camera for the search and click the search button. | ||
Revision as of 12:50, 12 November 2024
How to Use Face Detection Tool
Description
This tutorial will go over how to use face detection tool.
Prerequisites
- Devices already added on LumiCenter.
Video Instructions
N/A
Step by Step Instructions
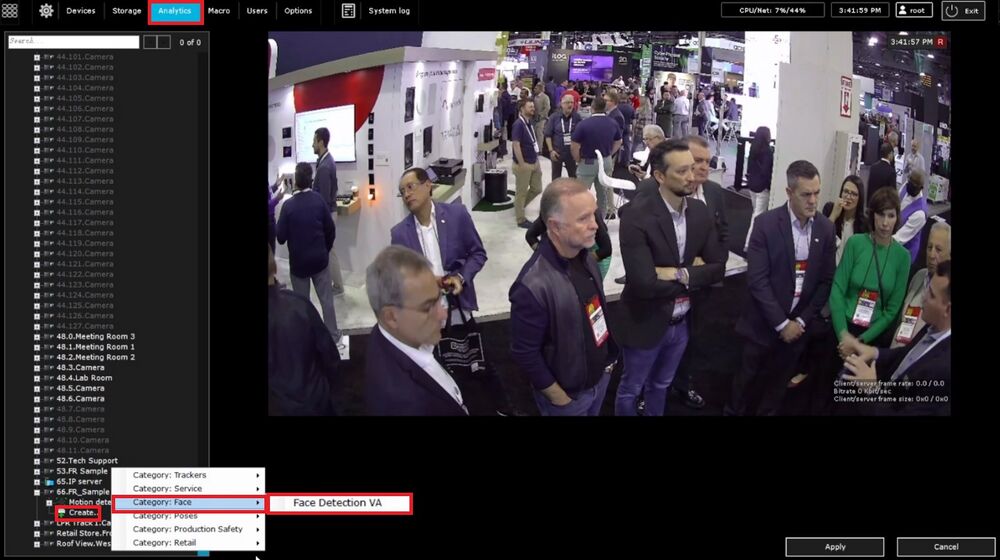
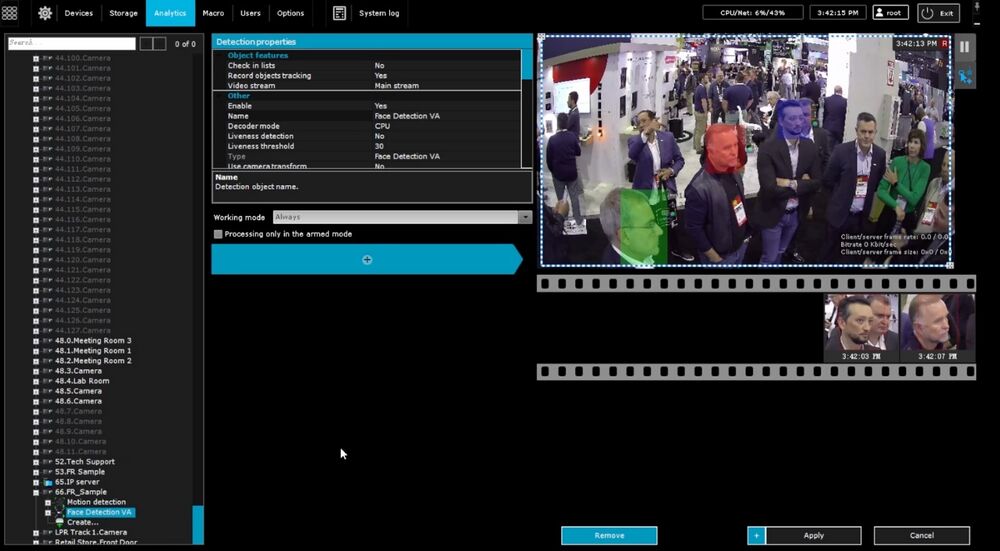
1. To set up the face detection tool, start by navigating to the Analytics section. Select the camera for face detection, click "Create," then choose “Category Face” followed by "Face Detection VA." Allow a moment for the function to set up.
Colored boxes will now appear around faces, indicating that the tool is tracking them.
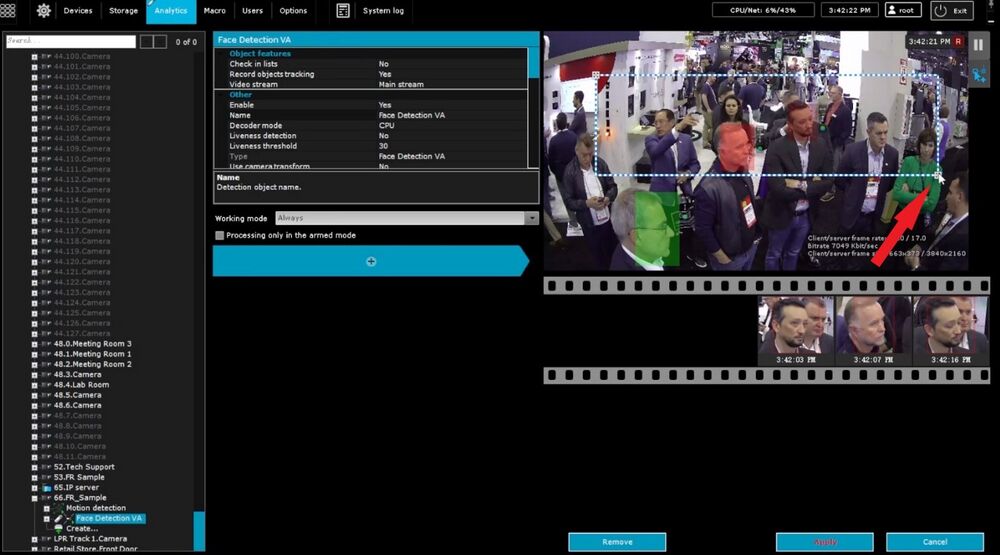
2. The size of the capture box can also be adjusted to focus on capturing faces within a specific area of the camera view.
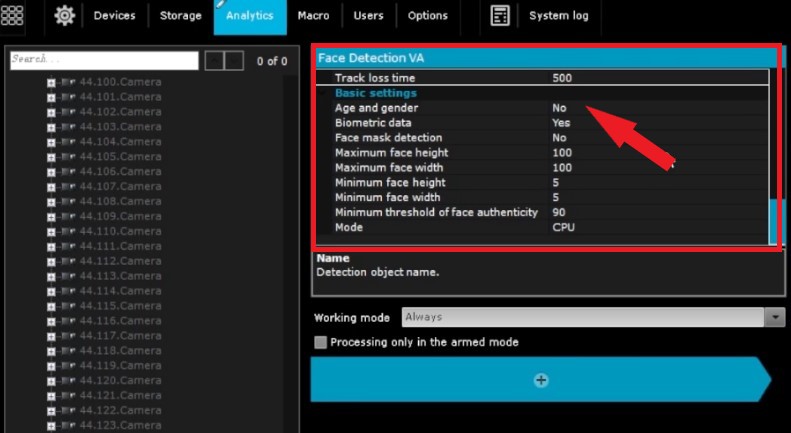
3. Various parameters can be adjusted, such as the capture angle, and options are available to capture age and gender in the background.
4. Next, to search for captured faces, go to the Live View page. Select the camera for the search and click the search button.
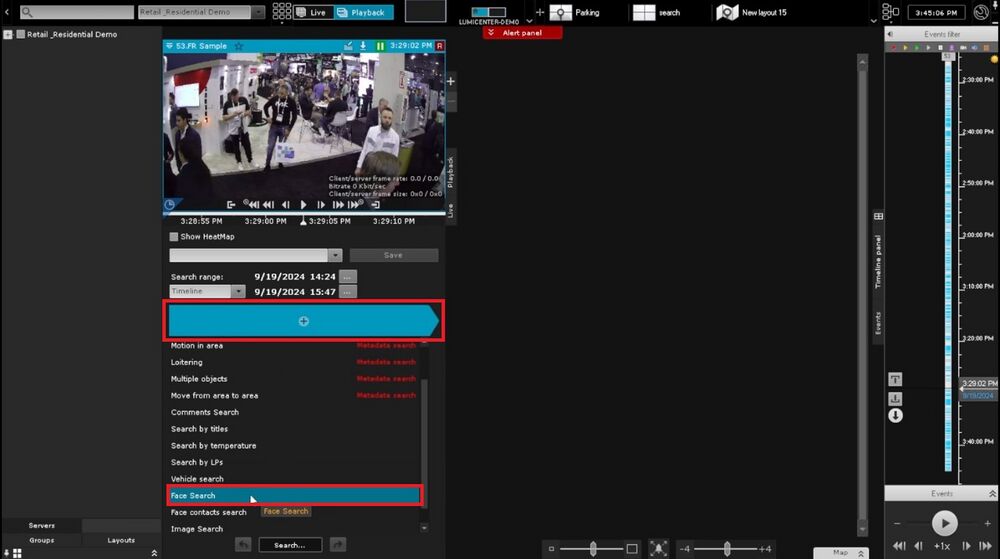
5. After clicking "Search," the search page will open. Click on the blue bar with the "+" button, which will expand with options. Select the "Face Search" option.
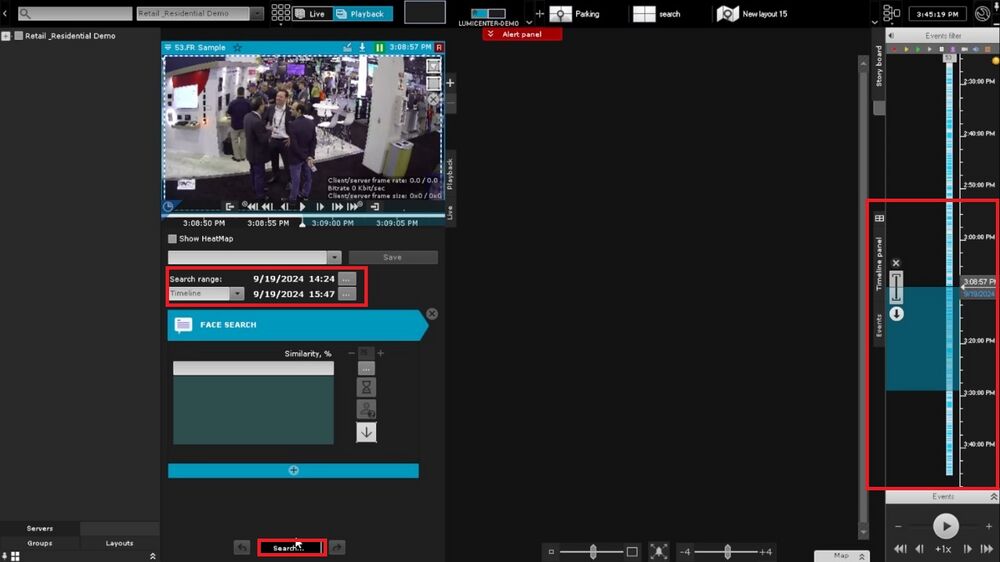
6. After selecting the Face Search option, choose the desired time range by either using the timeline on the right or the range option above the search. Once the date and time range are set, click "Search" at the bottom.
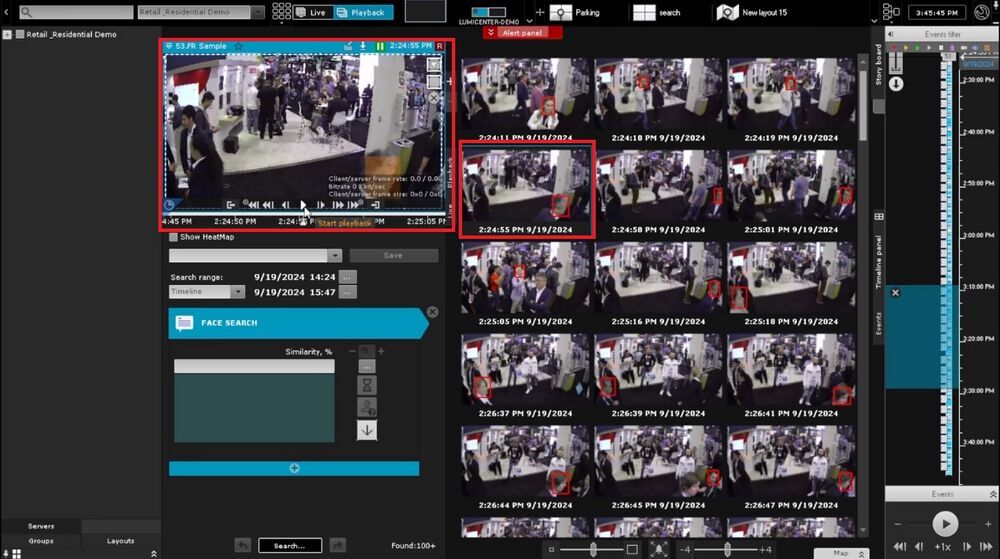
7. After performing the search, all results from the selected time range will appear. To view a specific result, click on it, then use the playback option in the top right to review it.
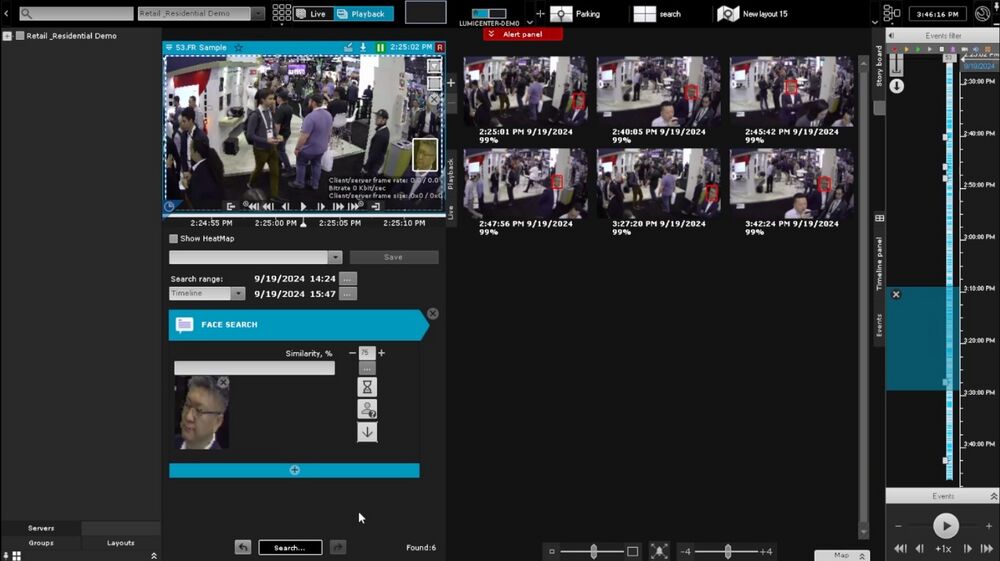
8. Another feature available during video playback with face detection is the ability to select a person’s face from the video, as shown in the picture. After selecting the face, it will appear in the Face Search section. From there, adjust the similarity percentage, then click "Search" at the bottom. This will search the event history to locate all instances where that person’s face appeared.
9. The search results will now display all instances of that specific face.
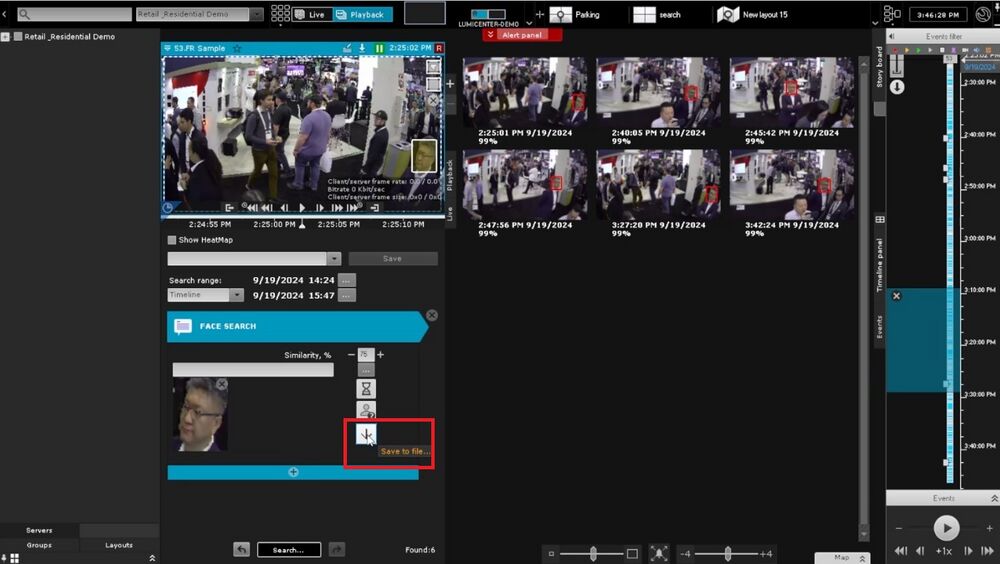
10. The next step is to save the face to the PC, enabling future searches for that specific face.
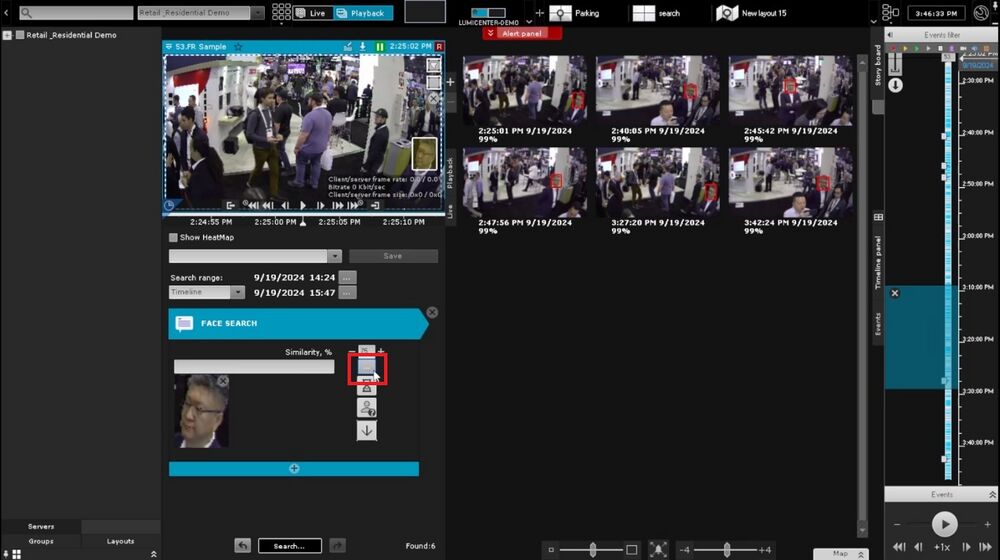
11. Finally, if face pictures are saved (like the one shown above), use the three dots in the Face Search section to locate a saved face picture and use it for searching.

