LumiGuardian/LumiCloud for User Account General Functions
LumiCloud for User Account General Functions
Description
This tutorial will go over how to use some of the general functions in user accounts.
Prerequisites
- LumiGuardian needs to be added to user account before proceeding.
Video Instructions
COMING SOON
Step by Step Instructions
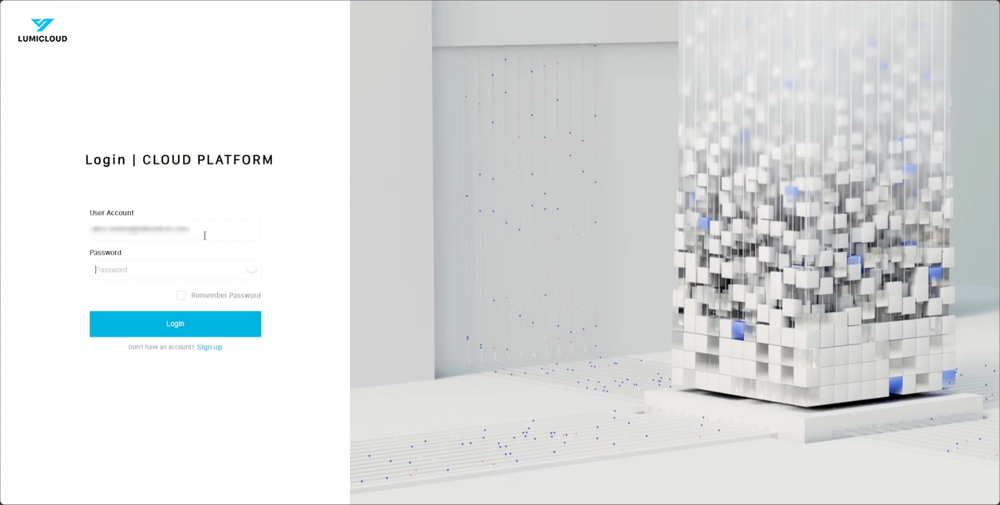
1. Login to the user account.
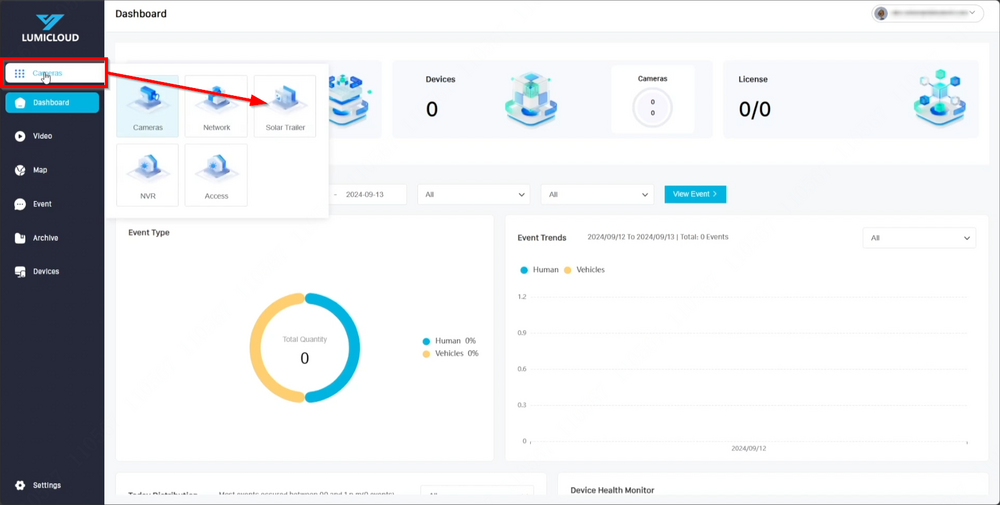
2. Select the 9-dotted menu and choose "Solar Trailer."
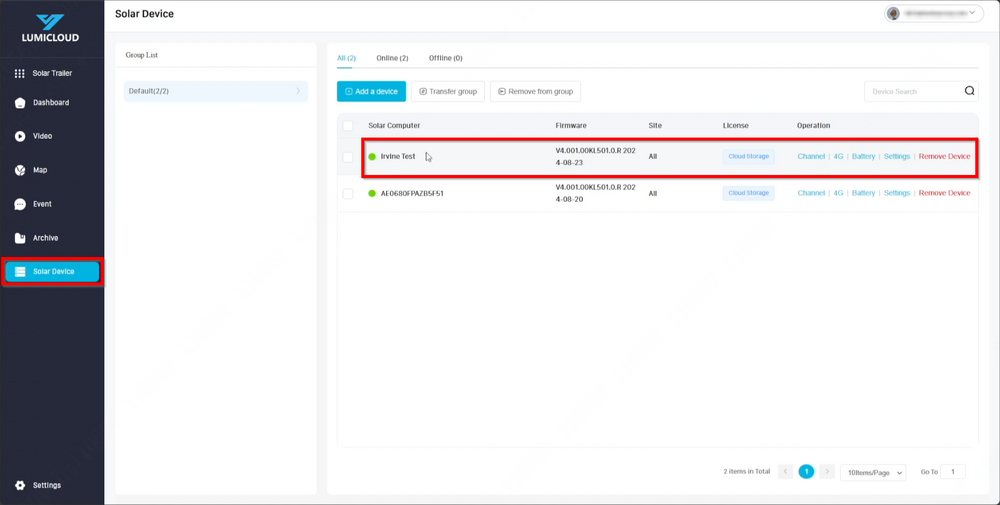
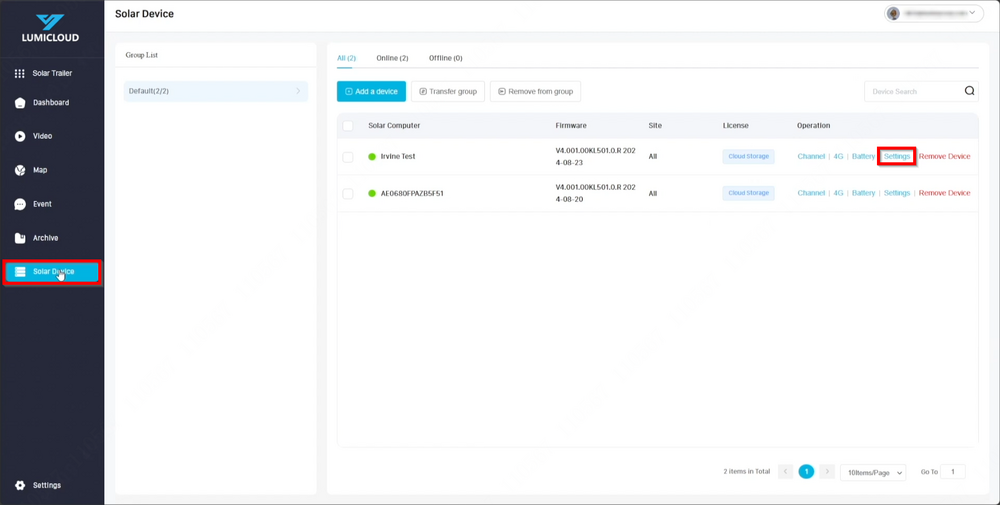
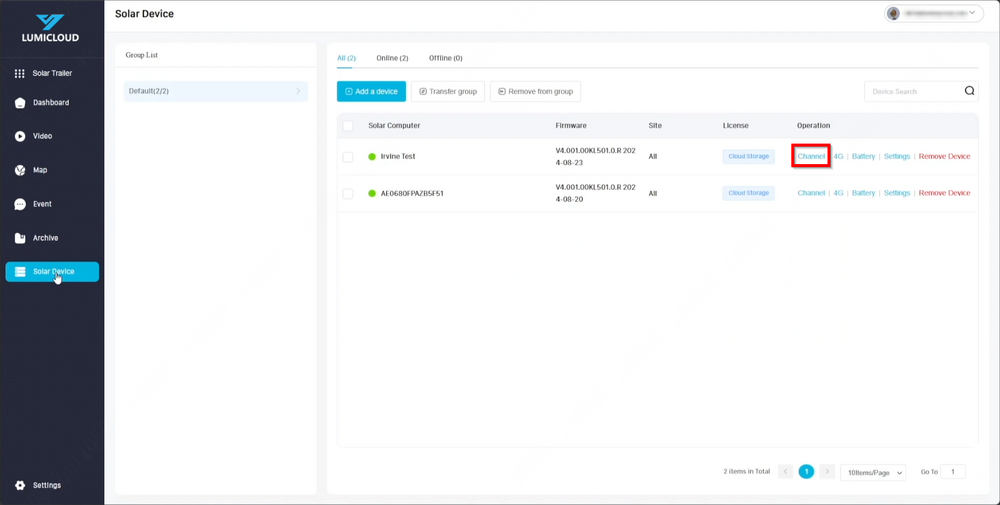
3. Select "Solar Device" to view the added Solar Trailers. A green indicator will appear if the device is online, and a red indicator if it is offline.
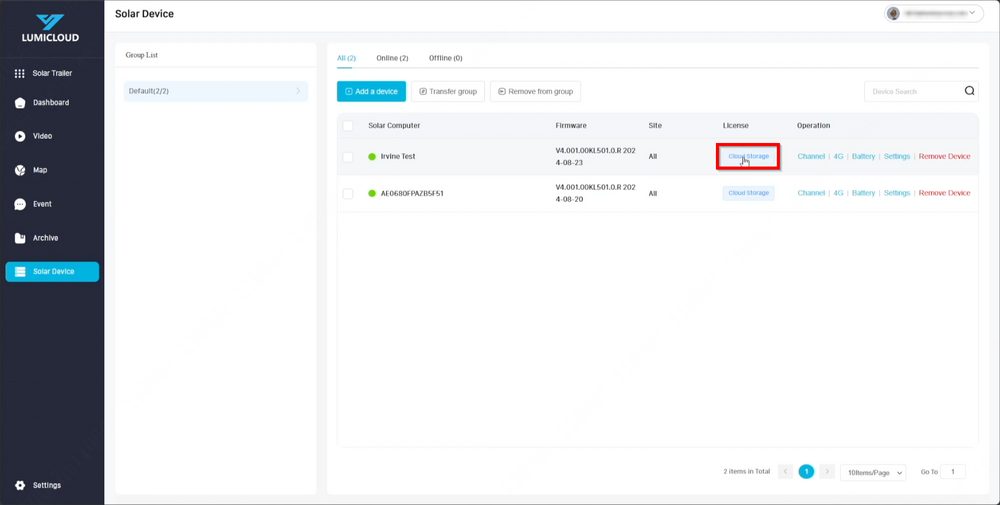
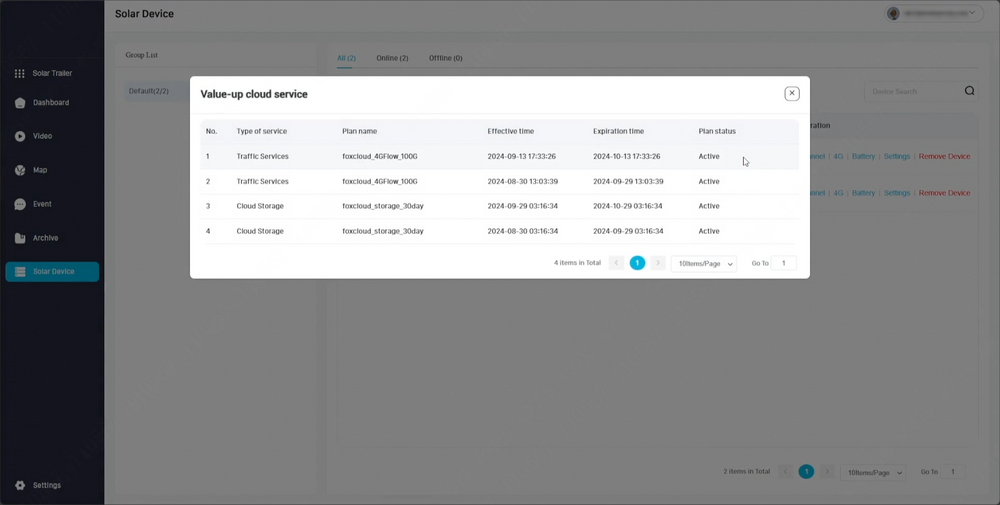
4. Select "Cloud Storage" to view the licenses that have been added.
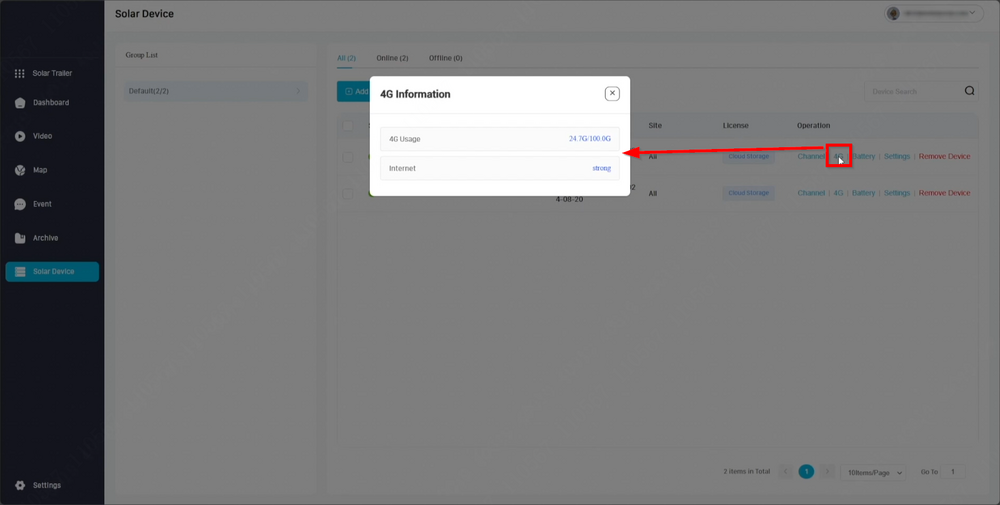
5. Select "4G" to display the 4G usage and Internet connection signal.
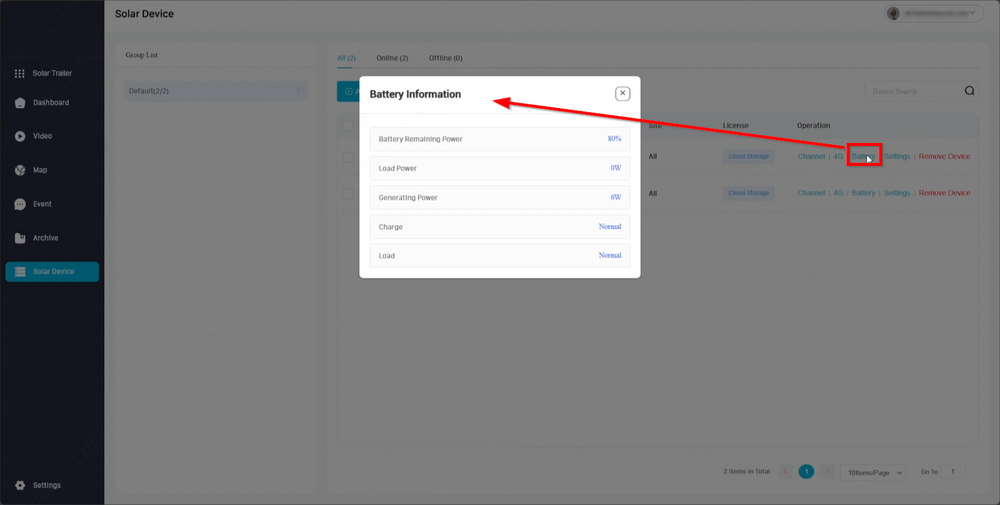
6. Select "Battery" to display battery information.
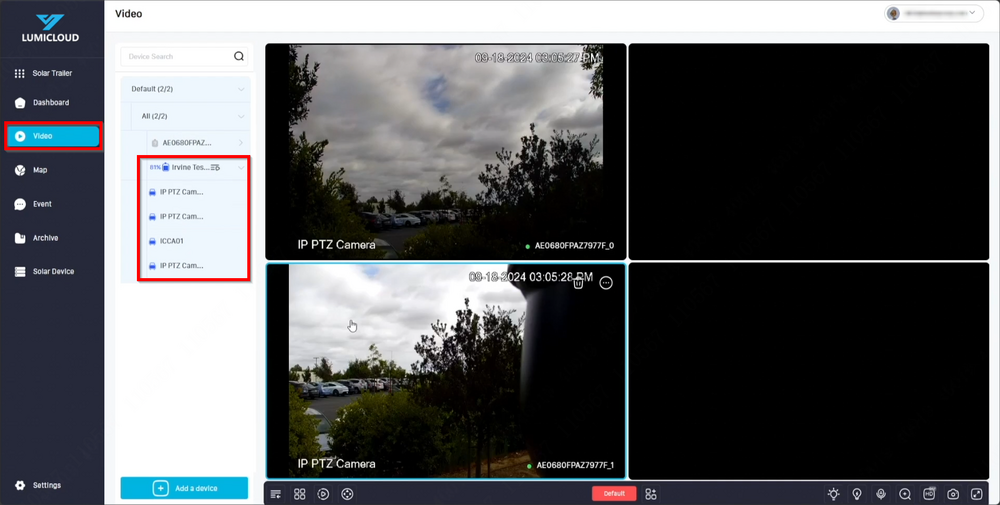
7. Select "Video" to start the live view process.
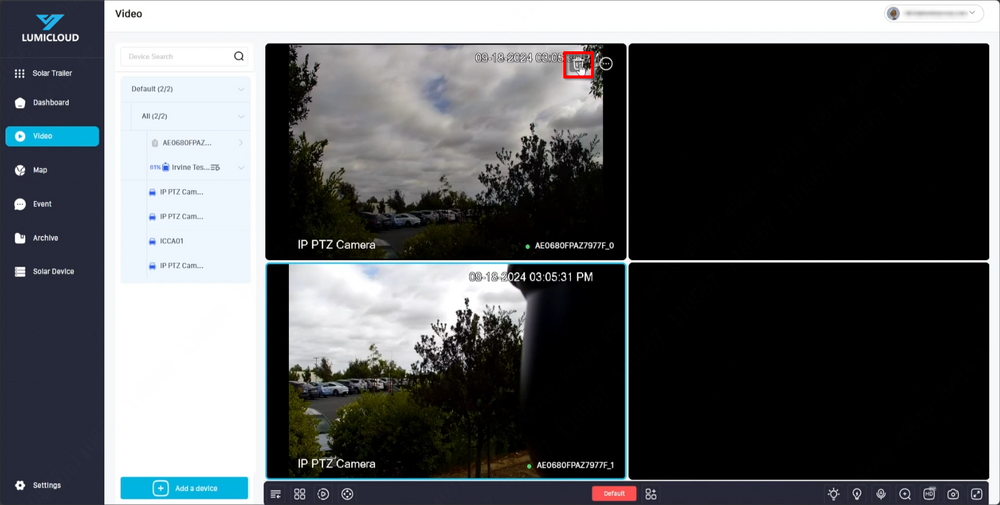
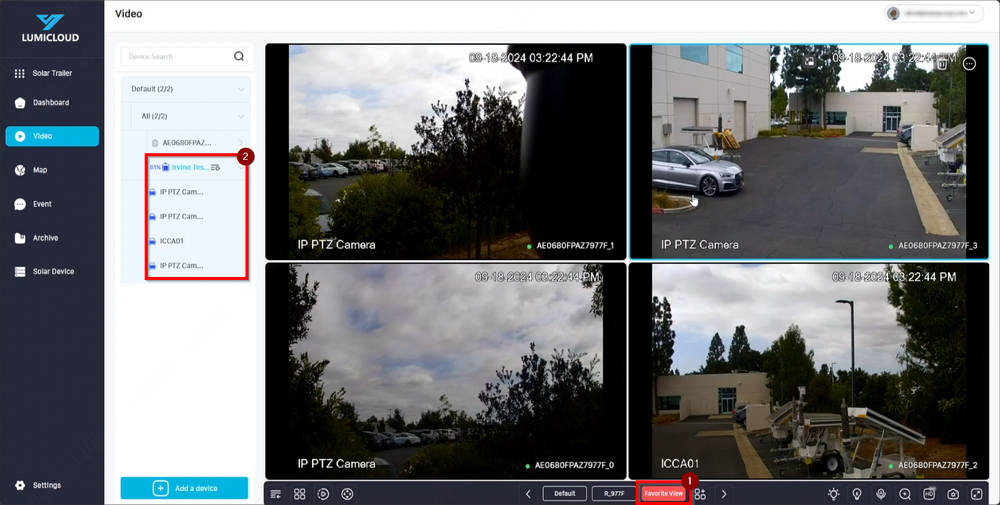
a) Expand the drop-down list until all four cameras are visible. Select the icon with three horizontal lines and a play button to display all cameras at once, or manually drag and drop each camera into the empty grids on the right side.
b) To remove a camera's live view from the grid, select the trash can icon located at the top right of each camera grid.
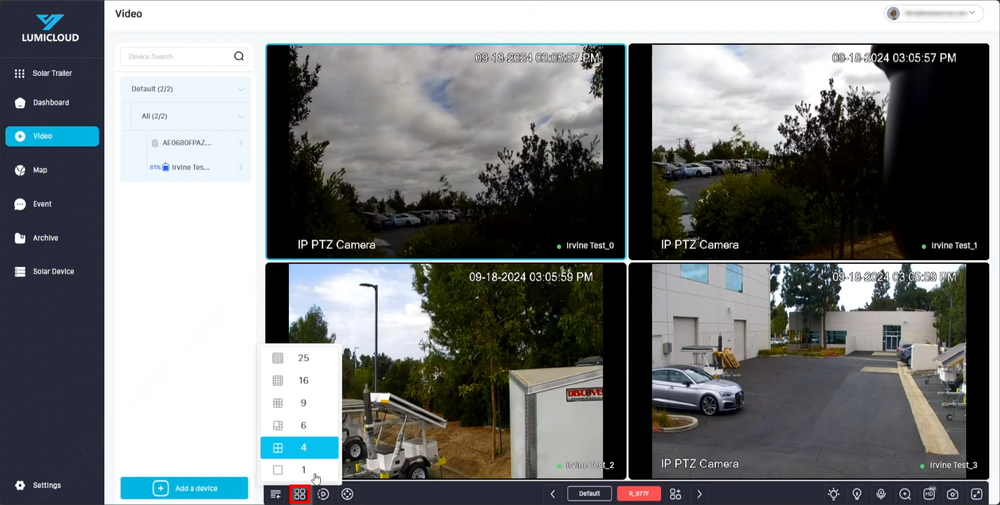
c) Select the icon with four squares to initiate the layout.
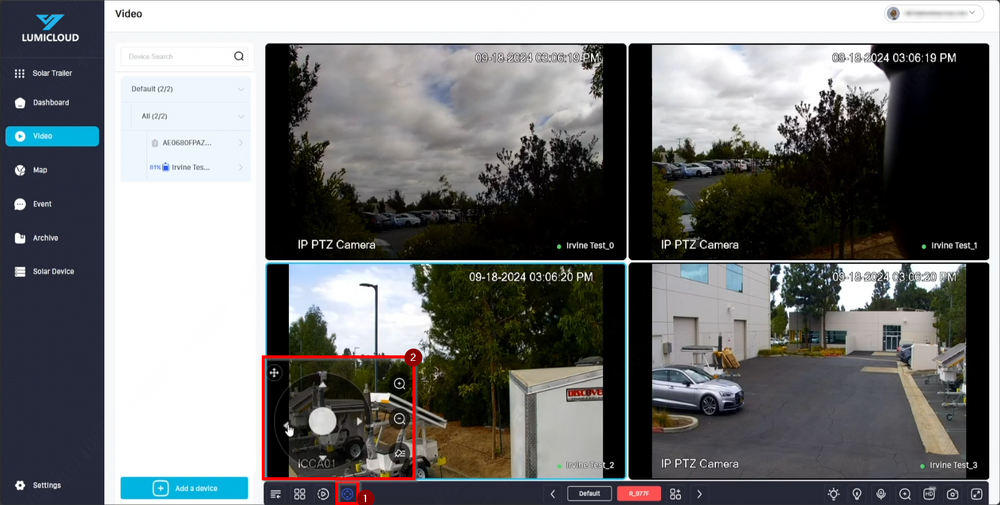
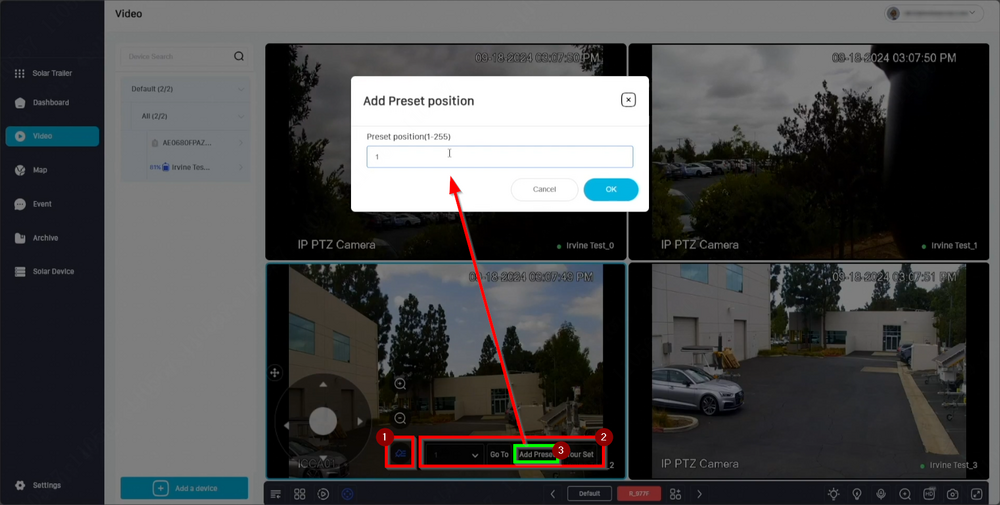
d) Select the PTZ icon to initiate PTZ Control.
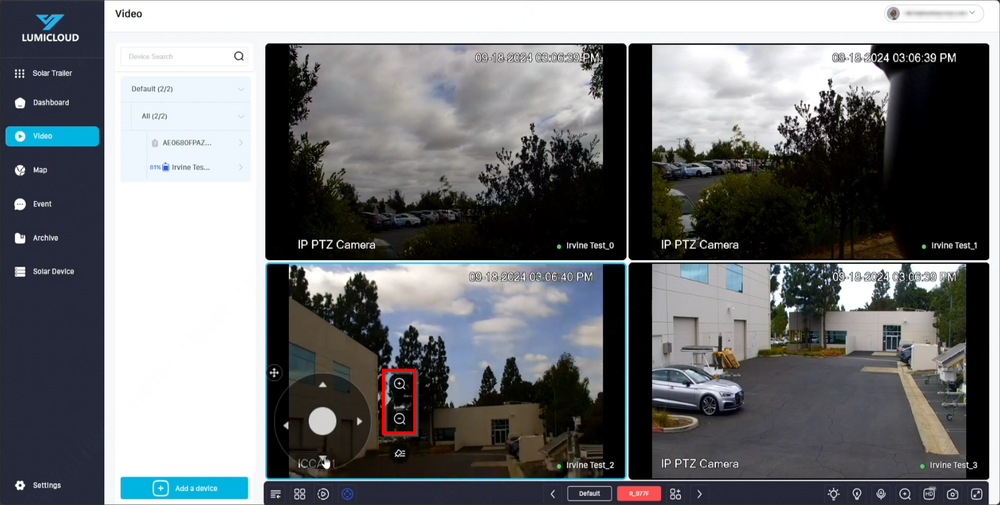
e) The magnifying icons with "+" and "–" are used for zooming in and out.
f) Select the "Preset" button to set a preset for the PTZ camera.
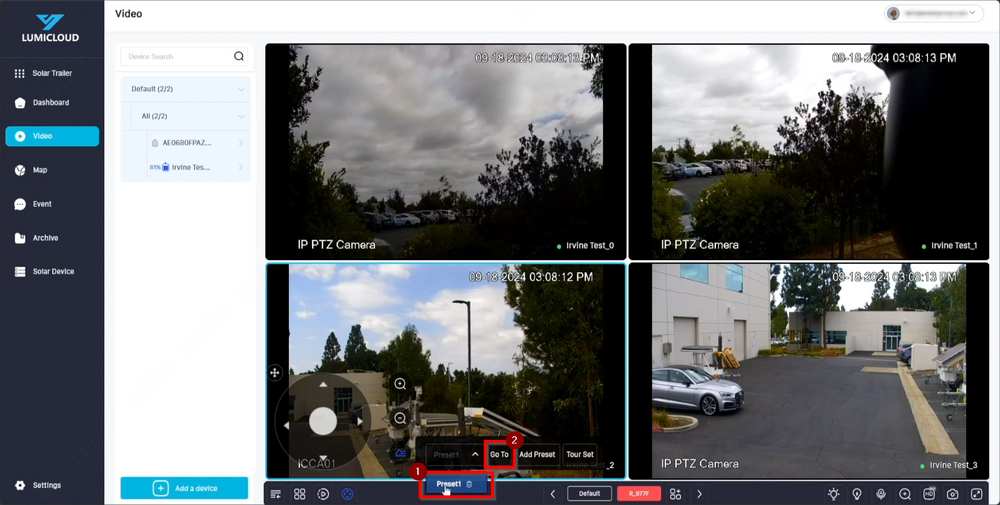
g) After configuring the preset, select the desired preset from the drop-down menu and click "Go To" to navigate directly to that preset.
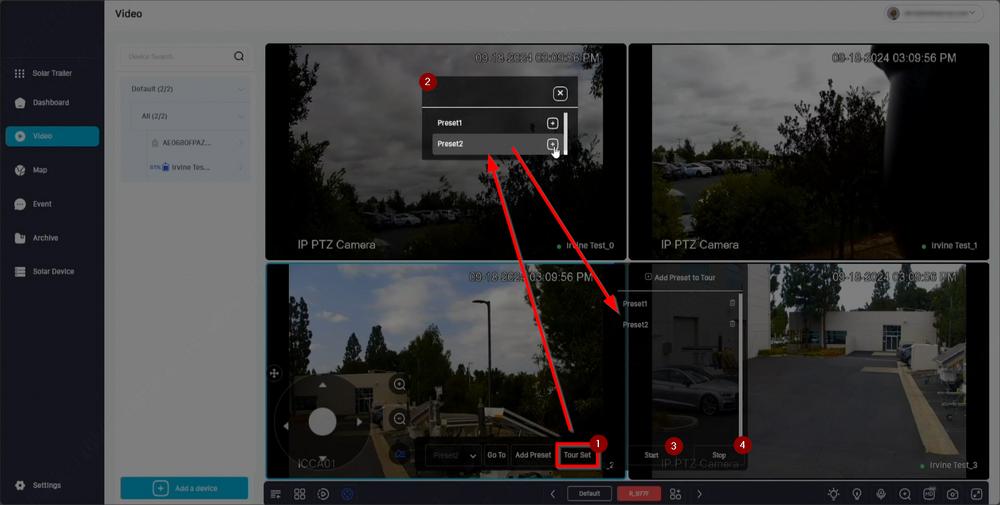
h) Select the "Tour Set" button to configure a tour for the PTZ camera. Add the desired presets to the Tour Set, then click "Start" to initiate the tour and "Stop" to end it.
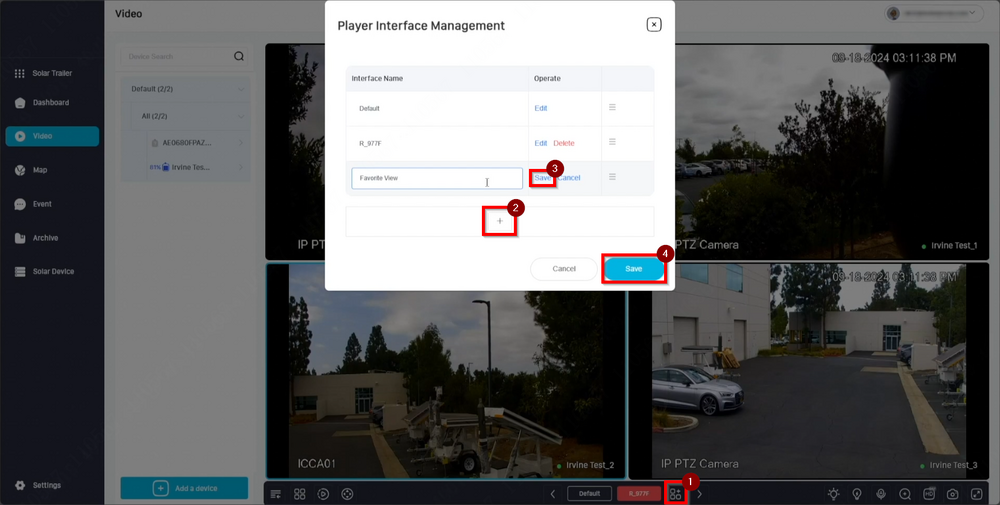
i) Views can be set under "View Management" to save cameras for easy access during future live views.
j) After saving the desired view, select it and drag and drop the cameras into the respective empty grids. To access the same view in the future, click on that view, and the cameras will automatically display in the grids.
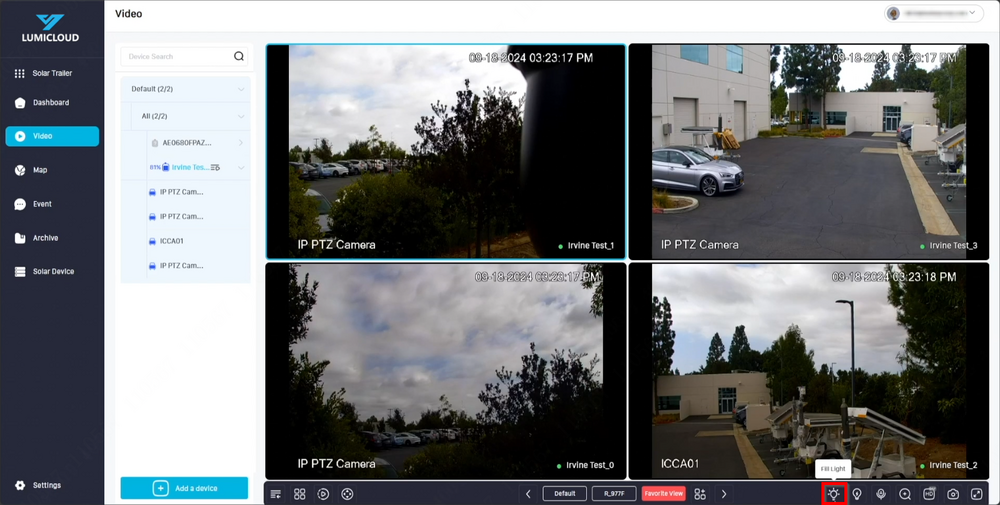
k) Select "Fill Light" to turn the white light on or off.
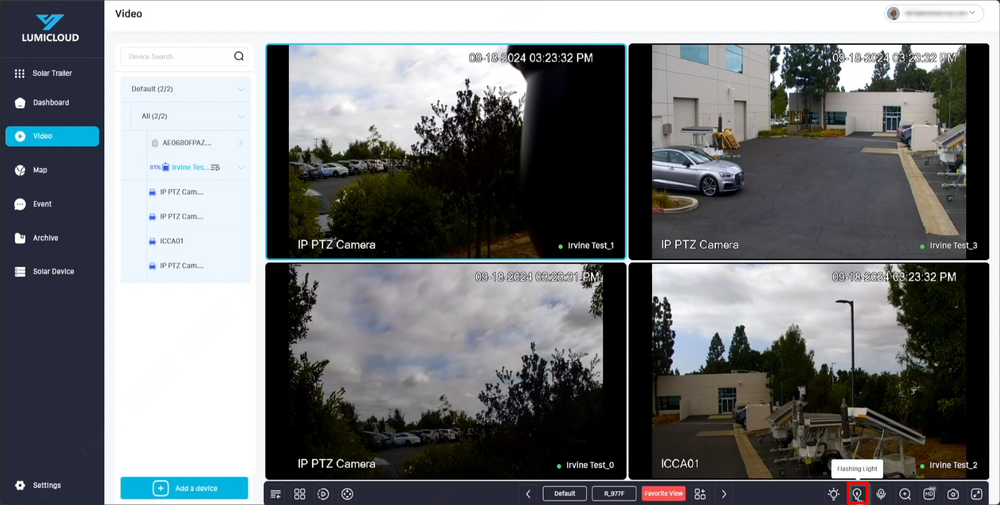
l) Toggle the "Flashing Light" on to enable the red and blue lights.
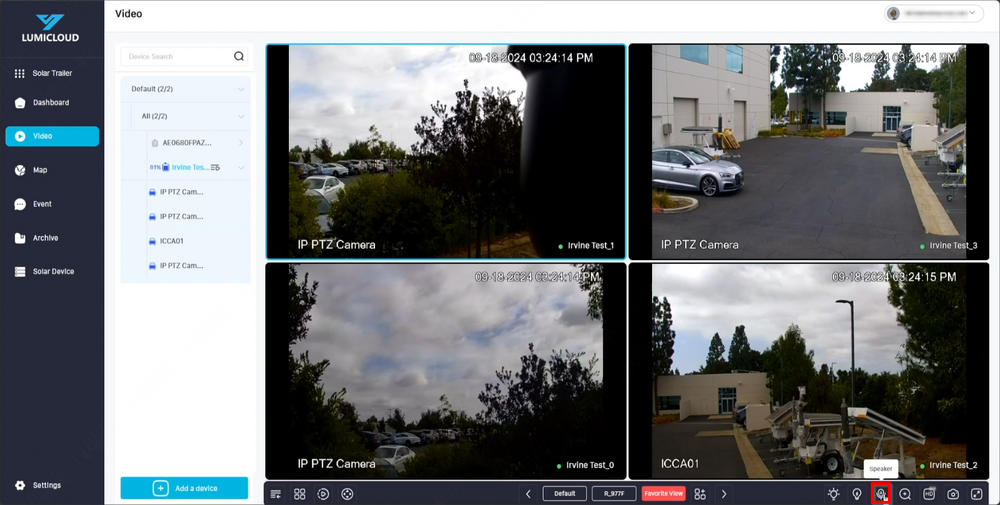
m) Toggling the "Speaker" icon will enable the computer's microphone and transmit sound to the speaker.
n) Toggling the "Zoom" icon will enable digital zoom for the currently selected camera.
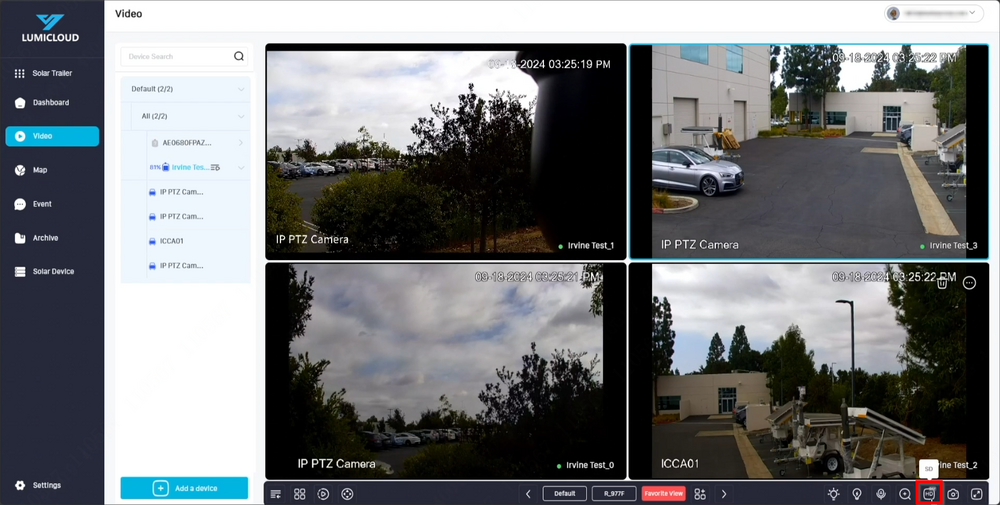
o) On the selected camera, toggle the resolution icon to switch between SD and HD.
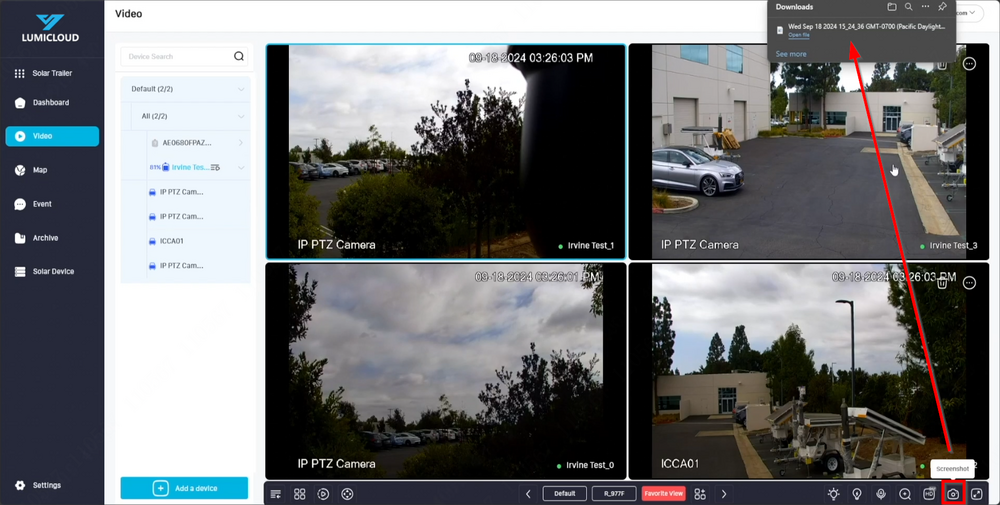
p) Select the "Snapshot" icon to take a manual screenshot, which will be saved onto the computer.
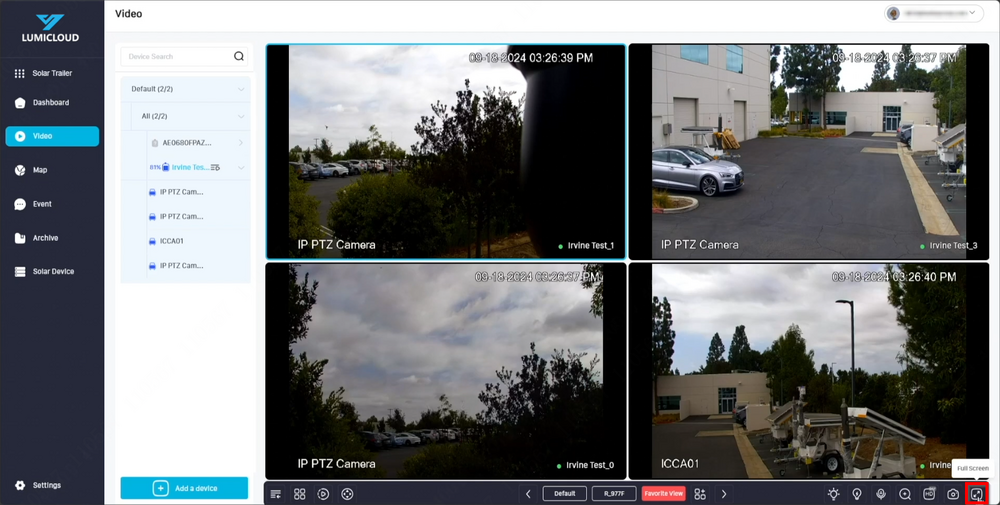
q) Toggling the "Full Screen" icon will expand the four cameras to occupy the entire screen. Press "ESC" on the keyboard to exit full screen mode if needed.
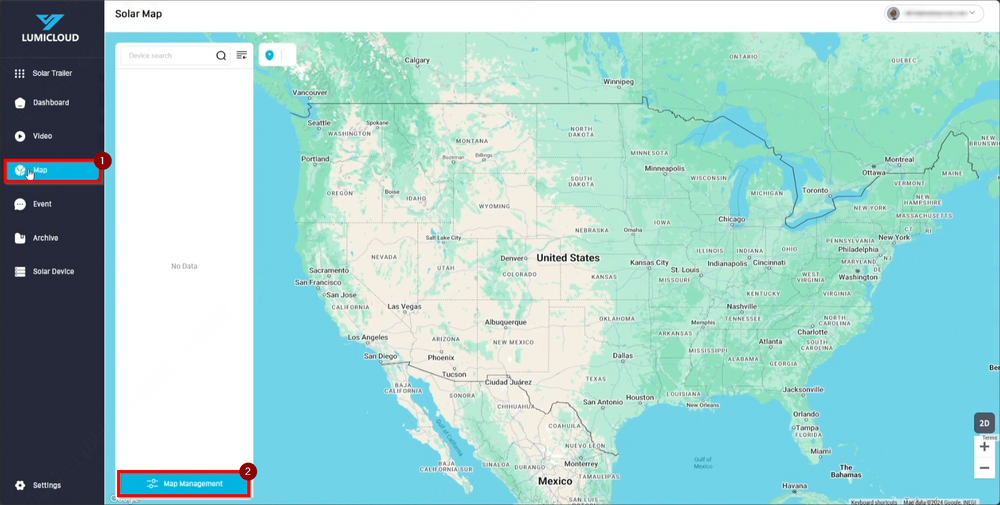
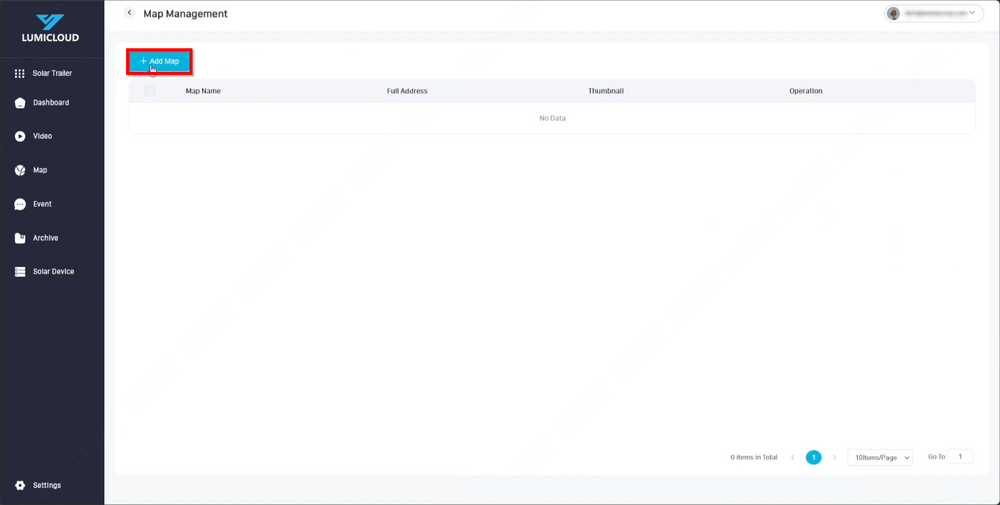
8. Select "Map" to initiate the setup process.
9. Select "Add Map."
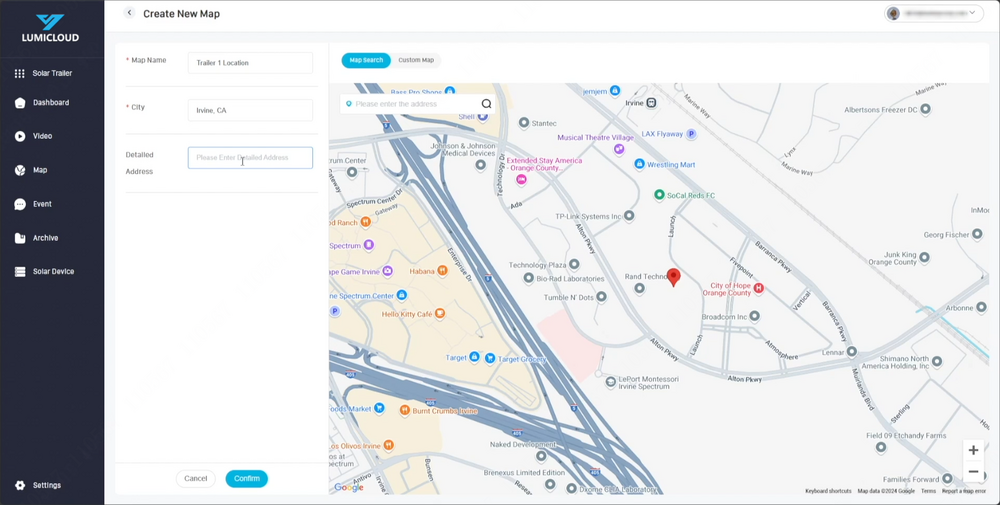
10. By default, the current location will be provided if location services in the browser are enabled. The location can also be searched using the "Map Search" button. Once the location is set, fill in the Map Name and City, as these are required to proceed.
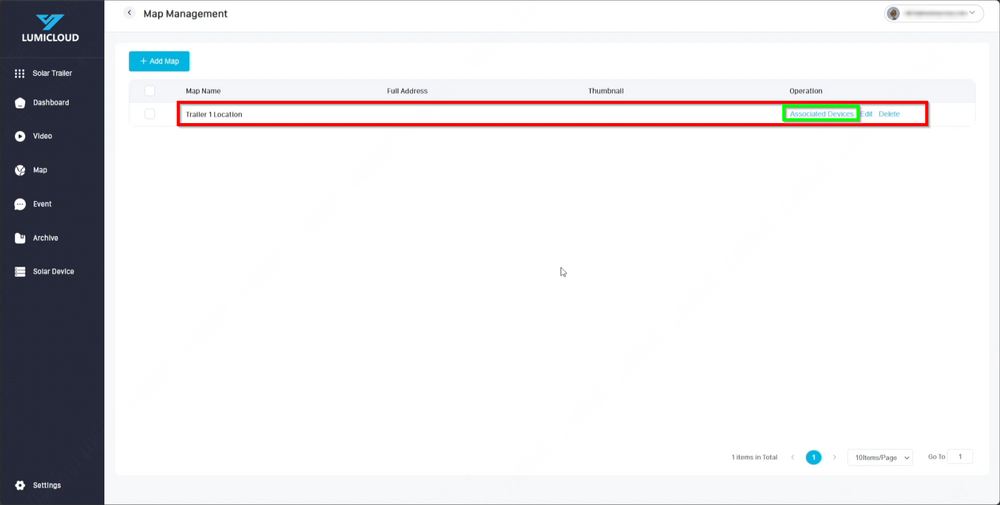
11. After the map is created, associate it with the Solar device.
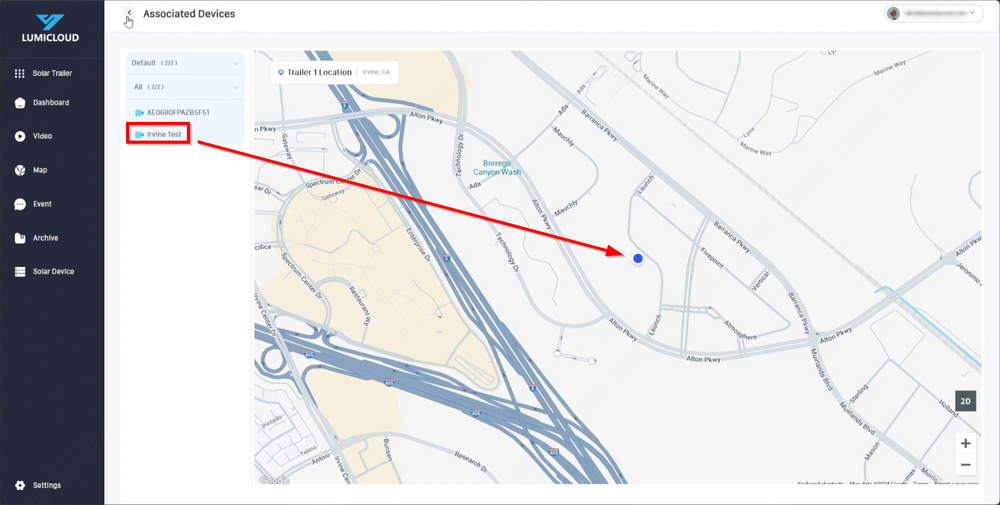
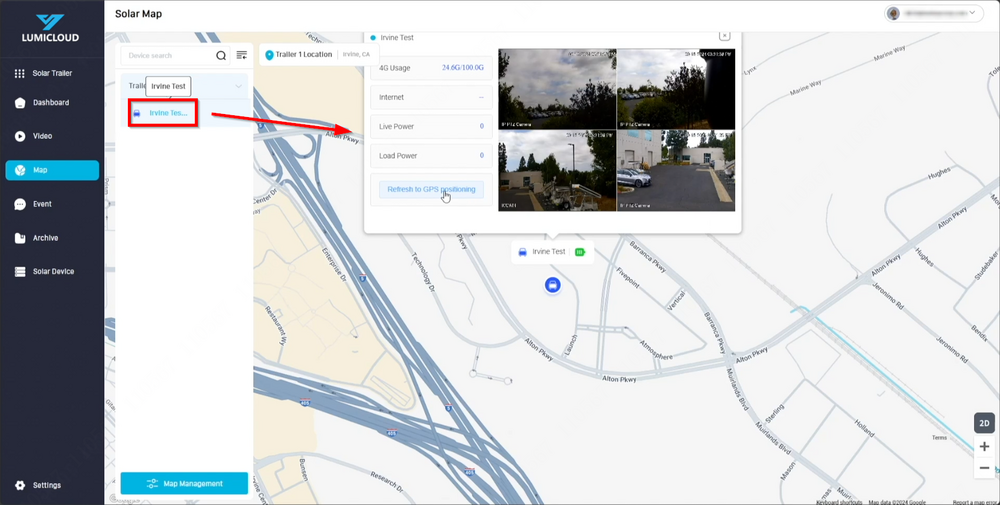
12. Expand the Solar Devices and drag and drop the desired device into the location.
13. Double-click on the Solar Device to display it on the map on the right side. Clicking on "Refresh to GPS positioning" will reposition the Solar Device for more accurate placement on the map.
14. To set up recordings, navigate to the Solar Device and select Settings for the desired Solar Trailer.
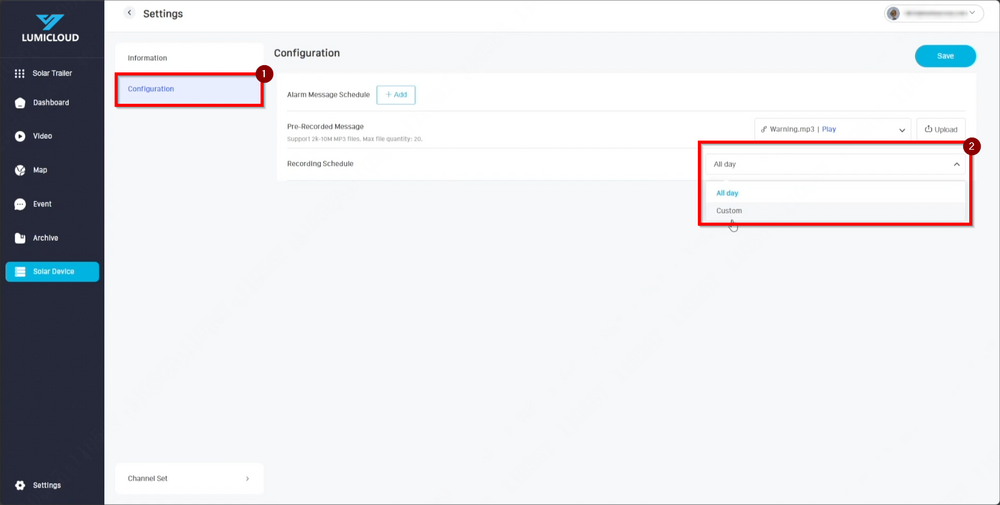
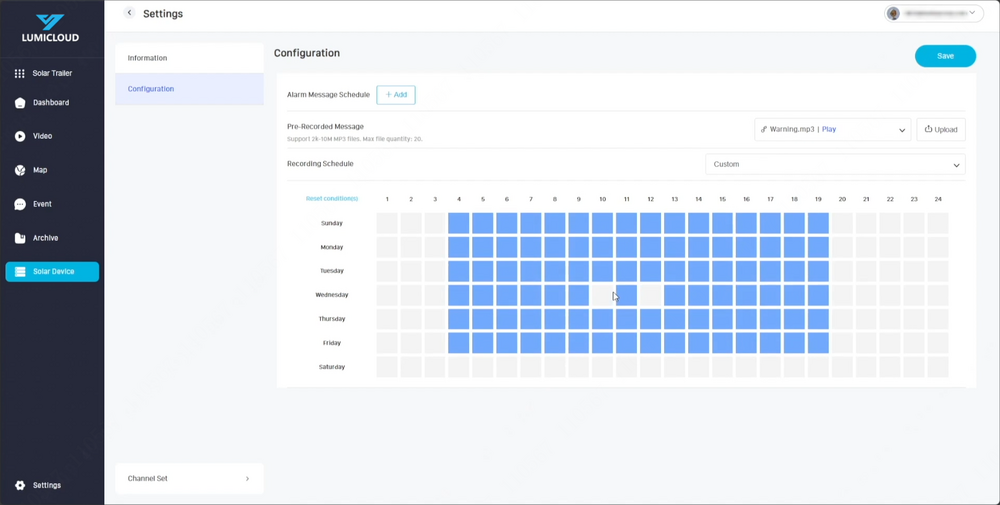
15. Configure the recording schedules as needed.
16. Configure custom recording schedules by clicking and dragging the mouse to include time slots or by single-clicking on each cell individually.
17. To setup Motion Recording, select “Channel”.
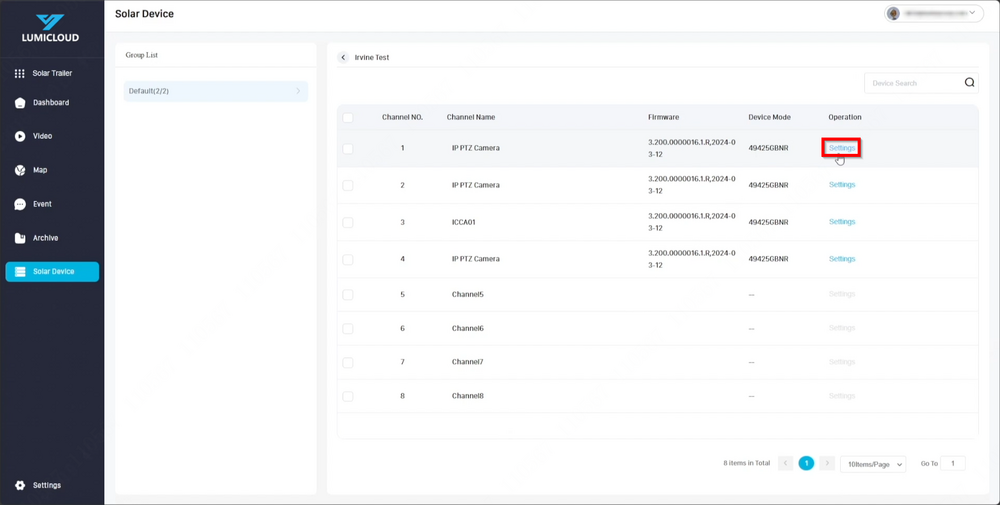
18. Select "Settings" for each camera.
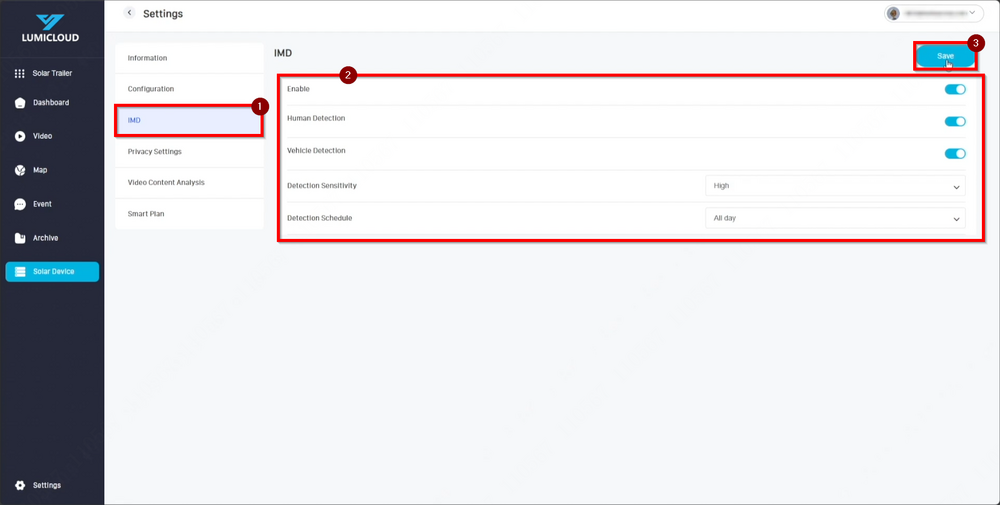
19. In IMD, options are available to enable Human Detection, Vehicle Detection, adjust Detection Sensitivity, and set the Detection Schedule. Once configured, click "Enable" and save the changes.
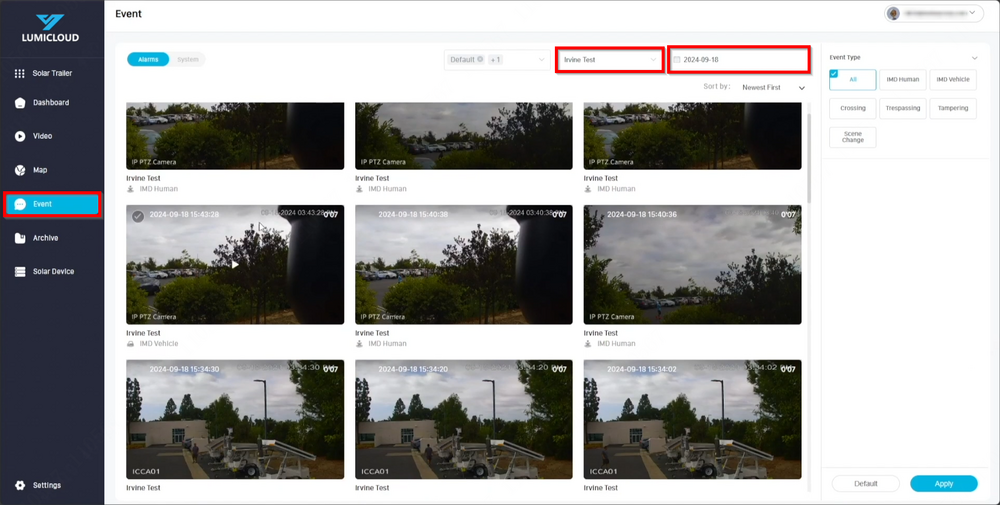
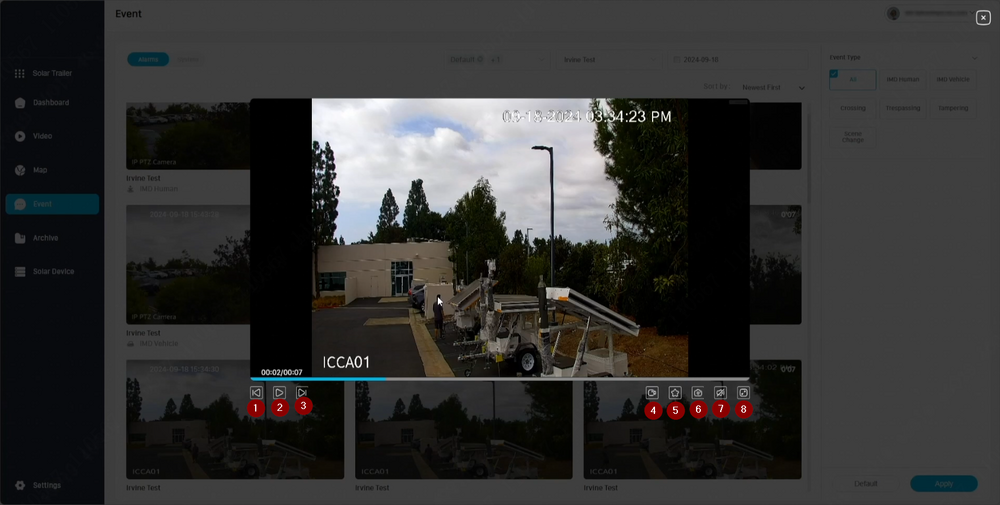
20. Under "Events," select the desired Trailer from the drop-down list at the top and choose the date to view the events.
21. Select the "Play" icon on each event to initiate playback.
1) Play the previous event.
2) Play or pause the current event.
3) Play the next event.
4) Playback of the event.
5) "Archive" to prevent the event from being deleted.
6) Take a manual snapshot of the current event's view by selecting the "Snapshot" icon.
7) Toggle the audio on or off during event playback using the audio icon.
8) Toggle the full screen on or off for the current event using the full screen icon.
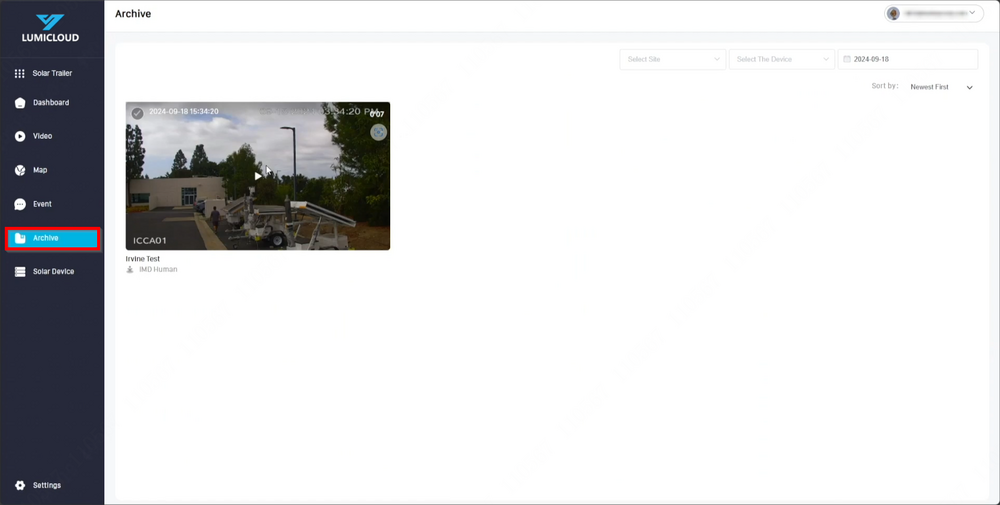
22. Once events are archived, they will disappear from the Event section and move to the Archive section. To un-archive events, play back the event in the Archive section and click the "Cancel Archive" button to remove it from that section.

