Access Control/Device and User Management
Device and User Management
Description
This tutorial will go over how to add sub-controller into main controller and user management.
Prerequisites
- Access controller connected on local network and accessible via webGUI.
Video Instructions
Coming soon
Step by Step Instructions
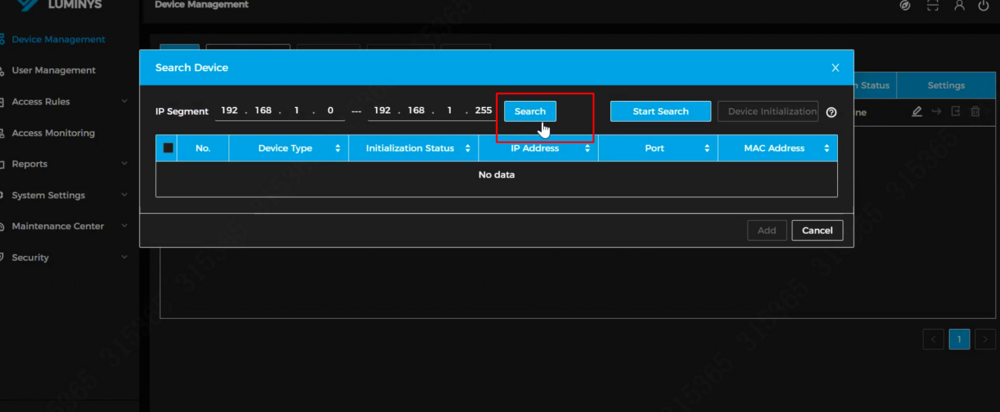
1. Select the "Search Device" button to scan for sub-controllers and add them to the main controller.
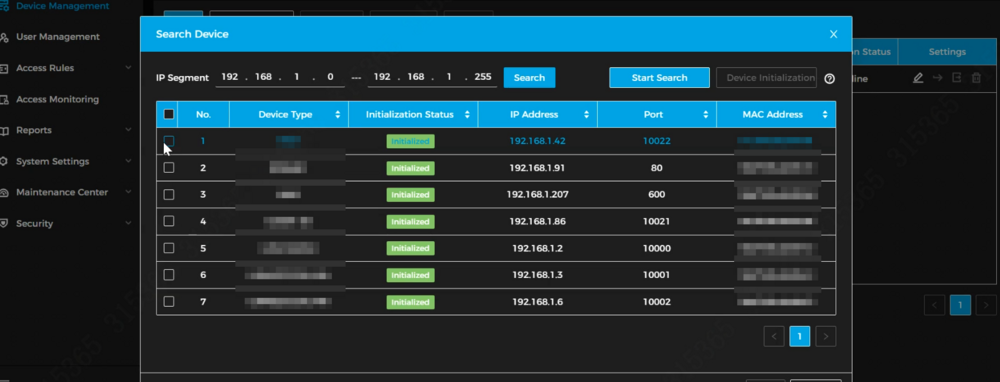
2. From the search results, select the desired sub-controller(s) to add to the main controller.
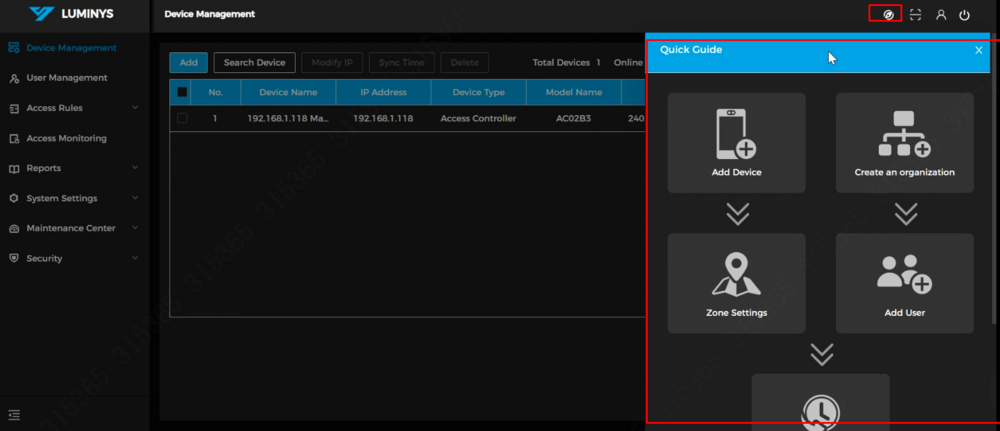
3. The Quick Guide icon, located in the top-right corner, can be selected for step-by-step setup guidance. This flowchart provides a comprehensive overview of the access control configuration process.
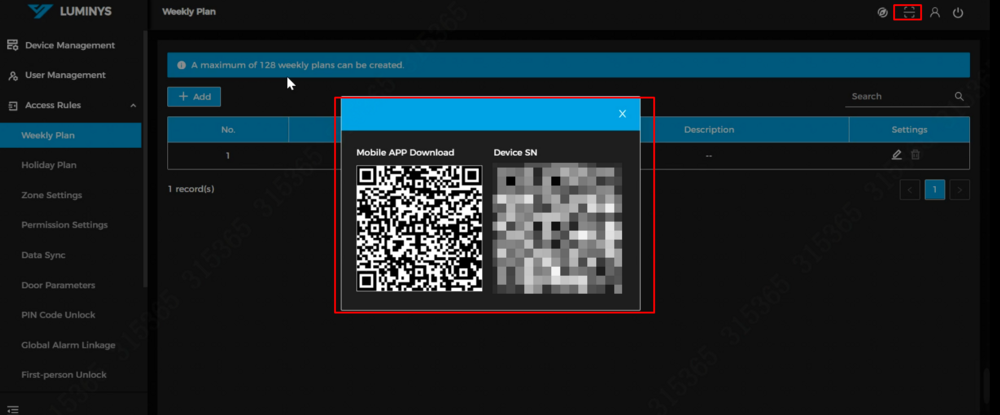
4. Tap the QR code icon in the top-right corner to view the QR code for the mobile app and the main controller's device serial number.
Scan the QR code to install the mobile app. Use the app to scan the serial number and register the device to LumiCloud for cloud-based device management.
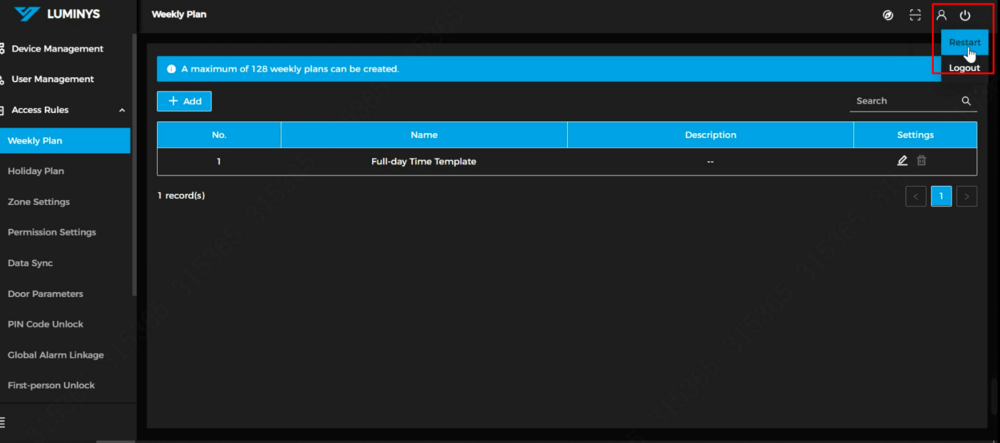
5. The person icon in the top-right corner indicates the user level currently logged in. The power icon next to it provides options to restart the system or log out.
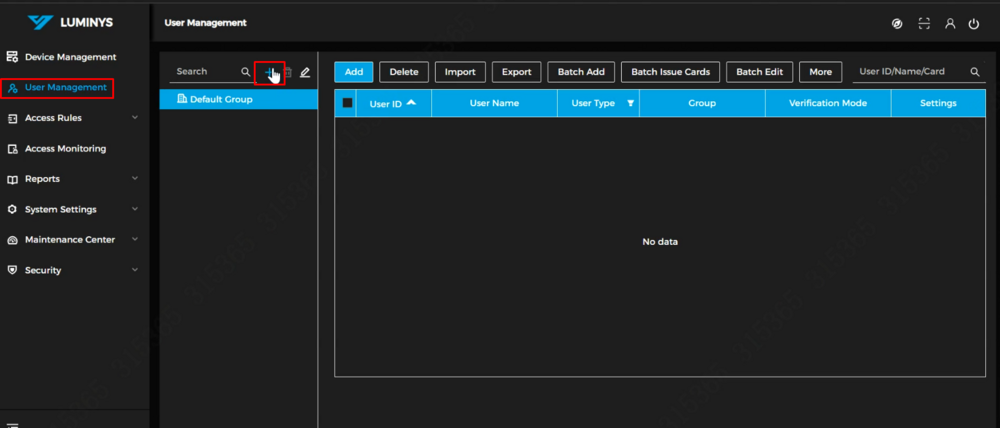
6. To create users, select "User Management" and click the "+" icon to add a new user or assign them to a pre-defined user group. Multiple user groups can be created to define different levels of access permissions.
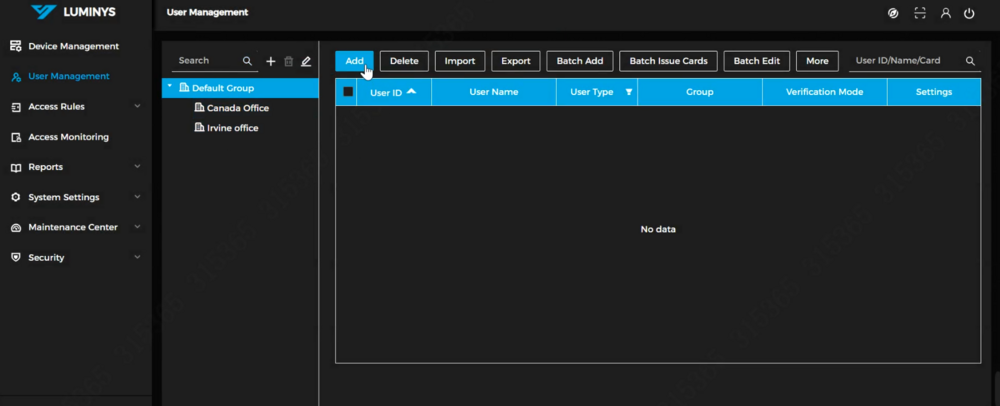
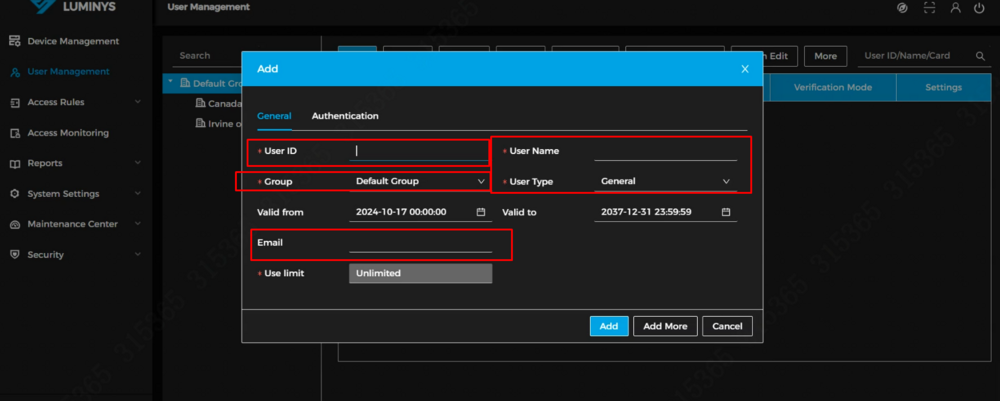
7. Click the "Add" button at the top to add users. Fill in the User ID, User Name, and select the appropriate user type.
Fill in the required information. A valid email address is necessary if Bluetooth access is required.
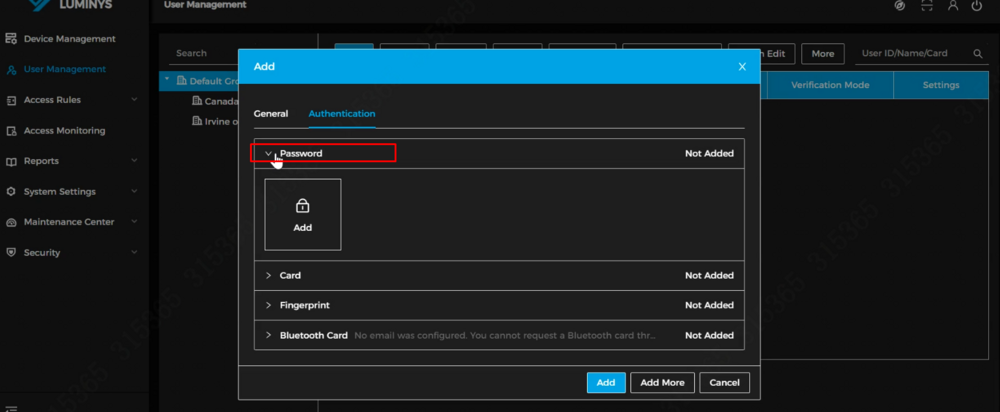
8. Select the Authentication tab above to set a password (4 to 8 digits).
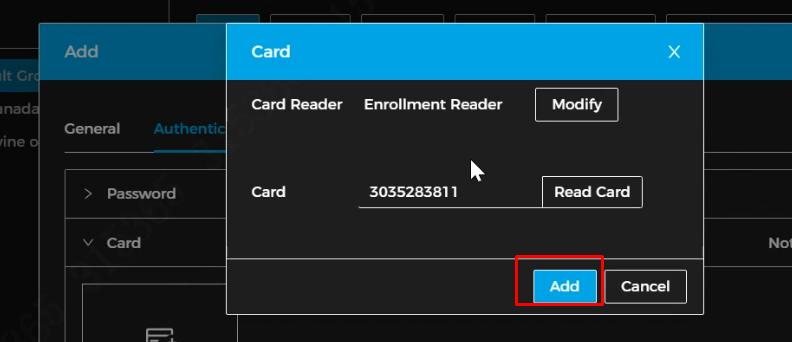
9. Select **Card > Add** to enroll access cards.
Connect a USB card enrollment reader (physically) to the PC, ensuring that the enrollment reader is selected. Then, scan the cards. The card ID number will display when successfully read. Alternatively, use the existing reader connected to the access control system.
10. Select the "Add" button to complete the card enrollment.
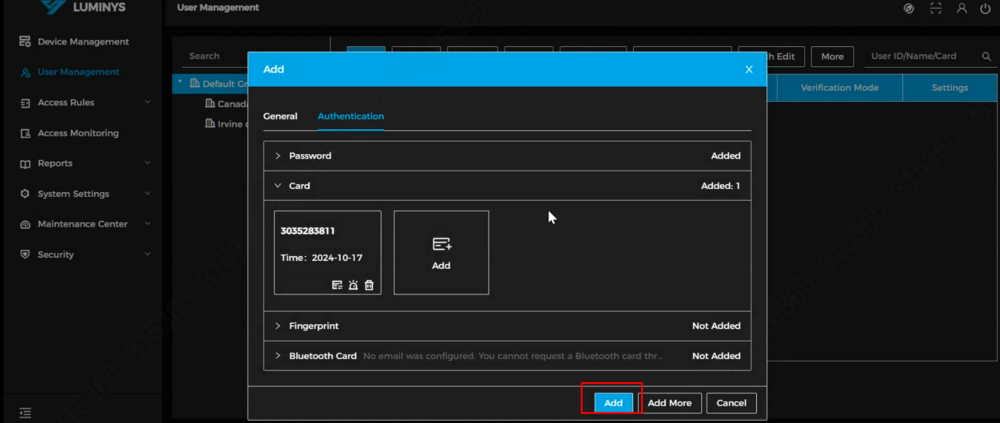
11. Select the "Add" button at the very bottom of the window to complete the setup.
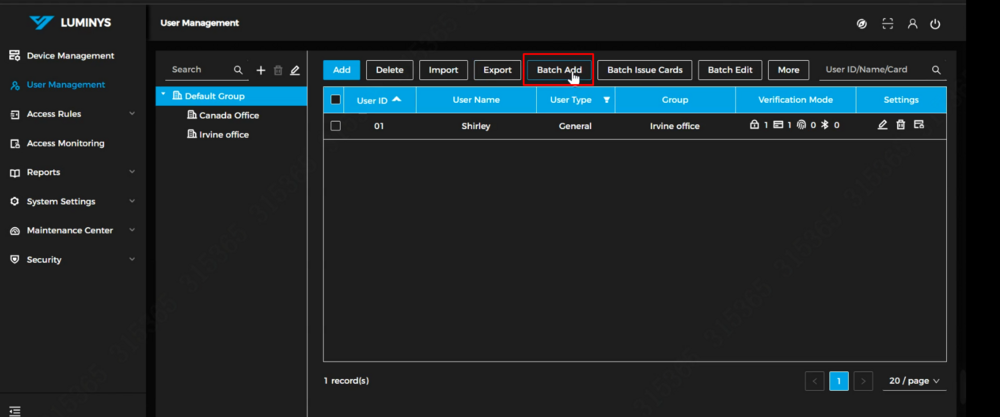
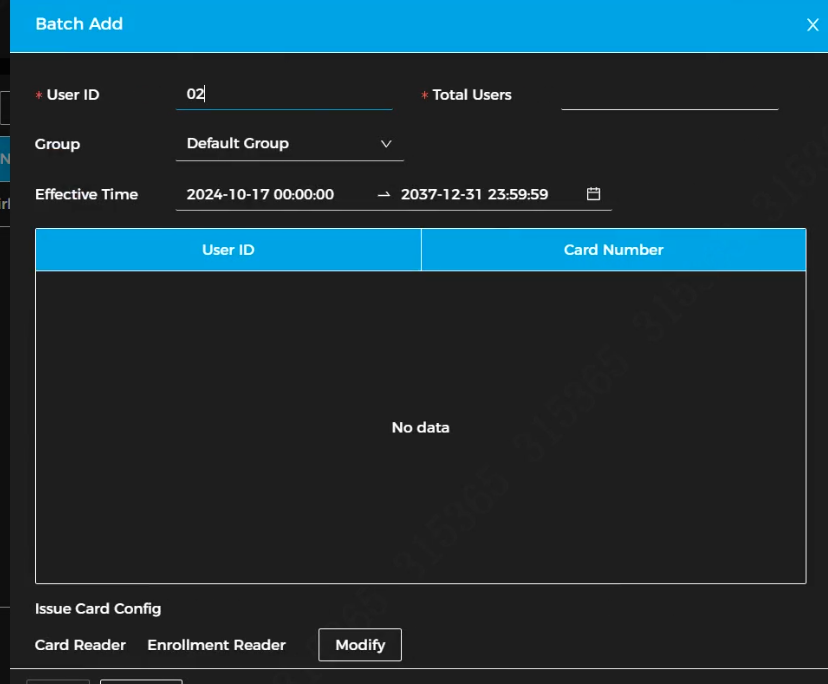
12. Batch adding users is also supported. Select the "Batch Add" button at the top.
Select a starting number for the User ID, then specify the total number of users to add. After that, select the appropriate group for the users.
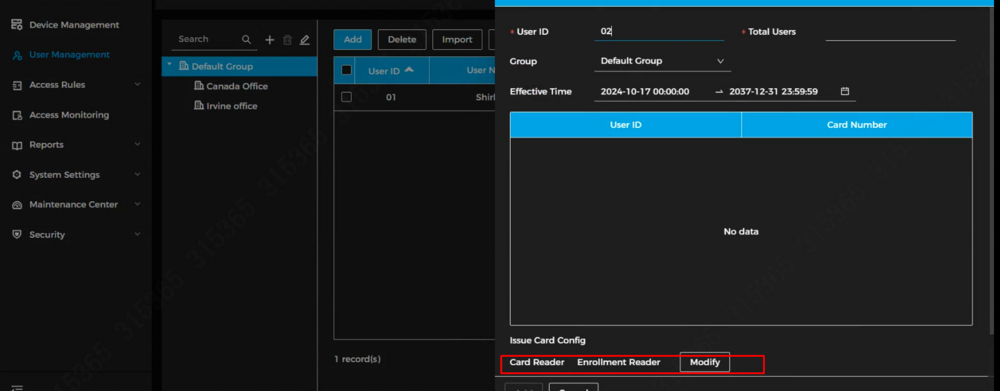
13. You can also use the general card readers to enroll the cards.
Select the "Modify" button next to the card reader, choose the desired card reader, and click "Start issuing cards." Once finished, click the "Add" button at the bottom of the window to complete the process.
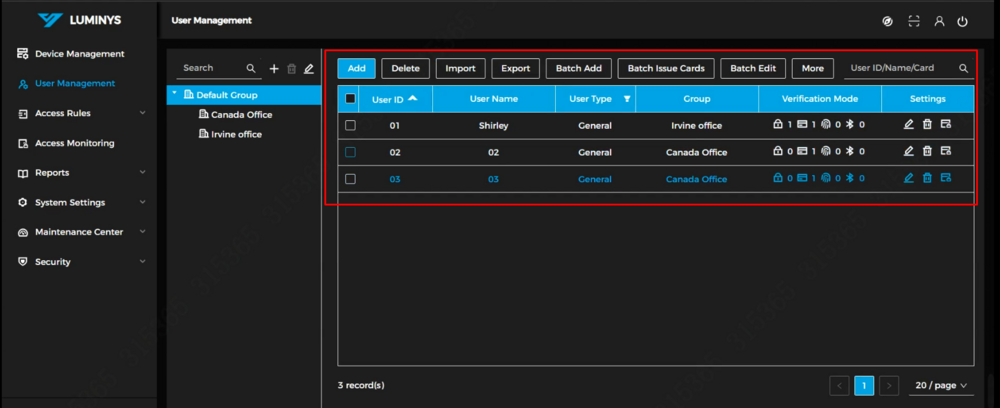
14. All added users will be displayed in the "User Management" menu.
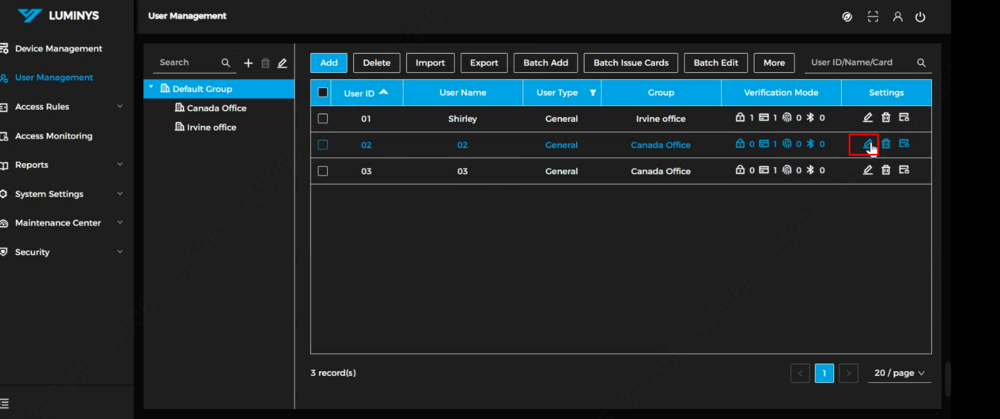
15. Select the Edit pencil icon to make any needed adjustments such as username, authentication, and user Group.
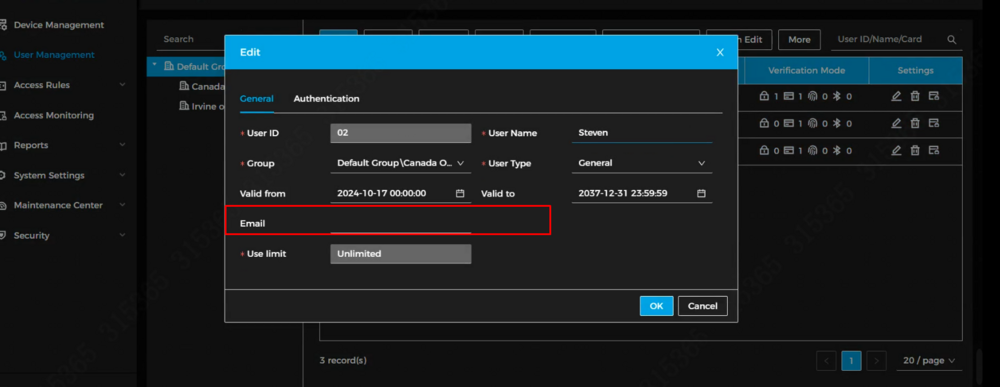
16. Bluetooth setup cannot be completed until a valid email address is entered. The email address can be set up in the "General" tab menu of the user profile.
Note: Before setting up Bluetooth, the main controller must be registered on the LumiViewer App for use with Bluetooth access.
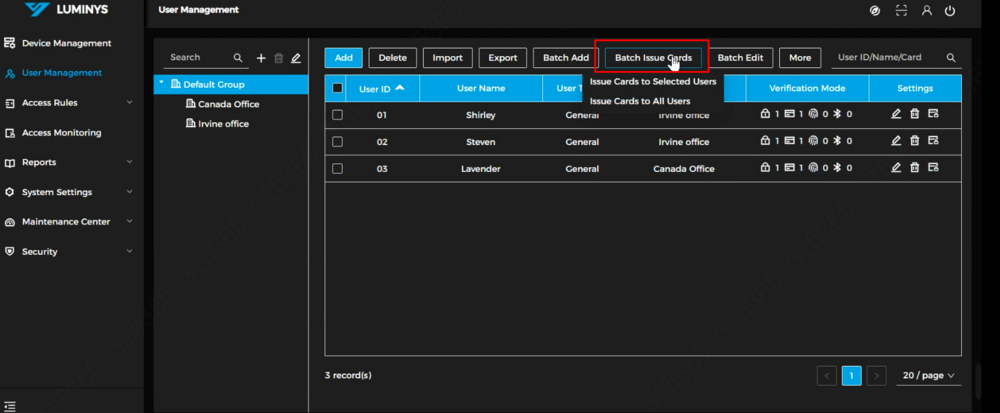
17. Batch issuing cards allows for the selection of multiple users to assign specific cards to them at once.
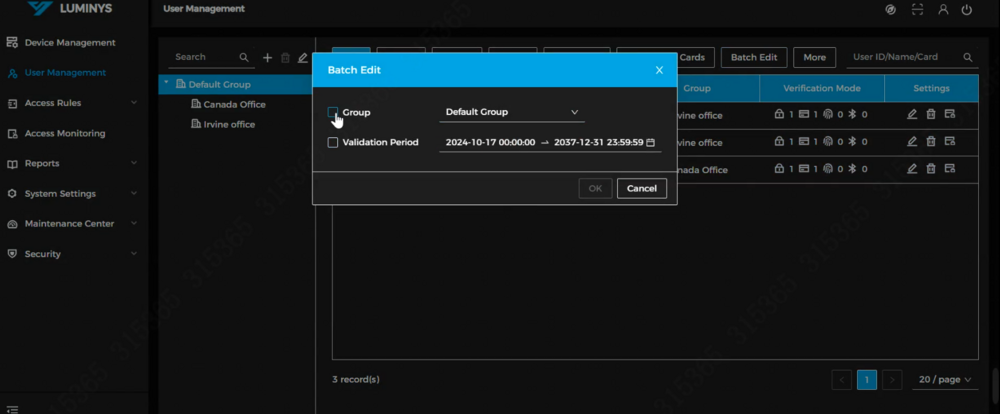
18. Batch editing users allows for modification of user details by groups and validation periods simultaneously.
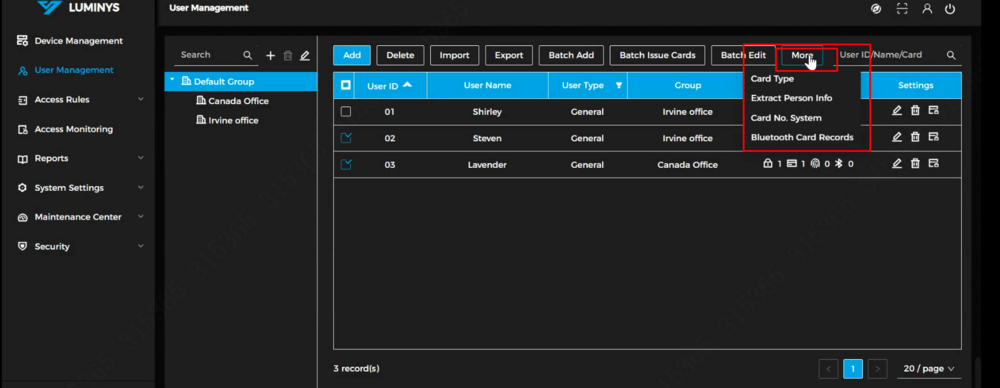
19. Additional functions include:
- Extract Person Info: Retrieve and manage personal details of users.
- Card No. System: Choose between Decimal or Hexadecimal formats for card numbers.
- Bluetooth Card Records: Access and manage records associated with Bluetooth card usage.

