LumiUtility/How to Search Devices in LumiUtility
How to Search Devices in LumiUtility
Description
This tutorial will go over how to search devices in LumiUtility software.
Prerequisites
- LumiUtility application installed on the computer.
Video Instructions
Step by Step Instructions
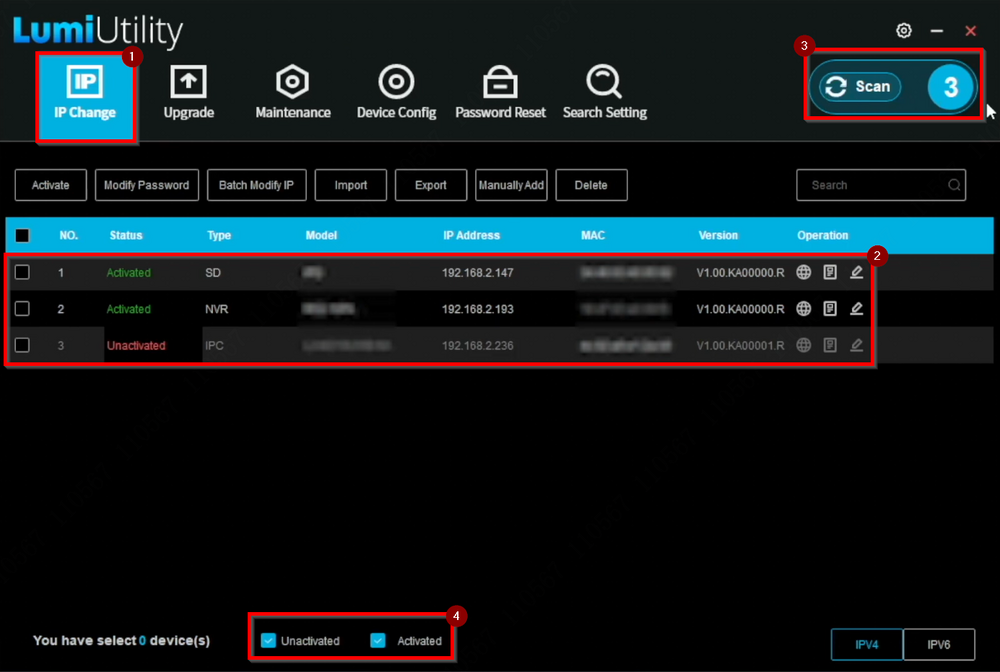
1. When LumiUtility is launched, the “IP Change” section is displayed by default, showing both initialized and uninitialized devices on the local network.
The “Scan” option refreshes the device list. The “Inactivated/Activated” options toggle the view between initialized and uninitialized devices.
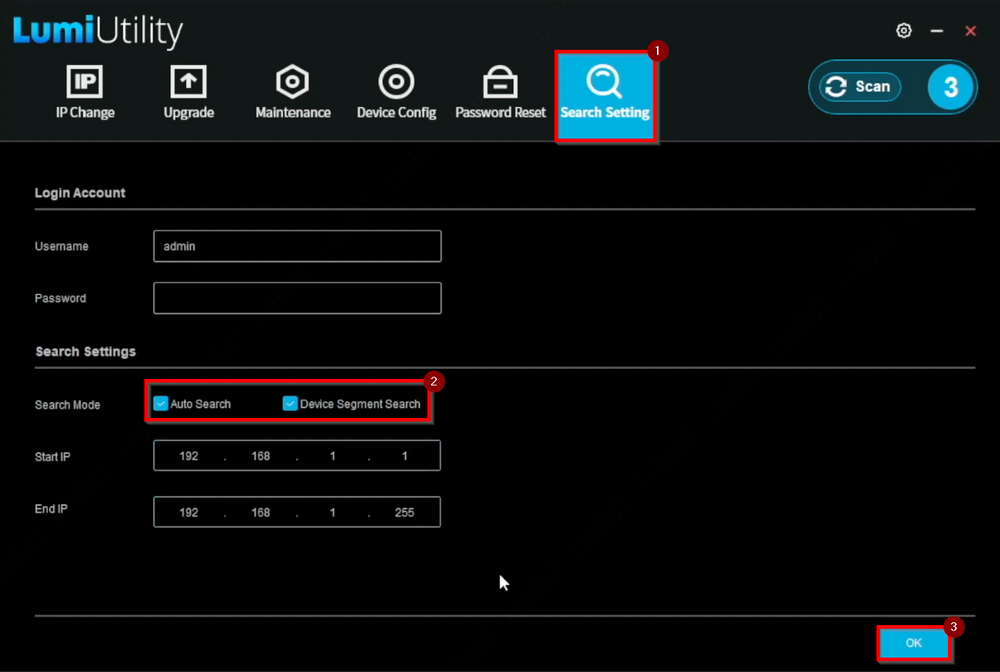
2. In the “Search Setting” section, Auto Search is enabled by default to locate devices within the local network. To search devices outside the default IP range, enable “Device Segment Search”. For example, if the computer operates in the 192.168.1.x range, LumiUtility searches within that segment by default, while “Device Segment Search” allows manual input for other ranges, such as 192.168.2.x.
Note: Disabling Device Segment Search grays out the options to edit “Start IP” and “End IP.”
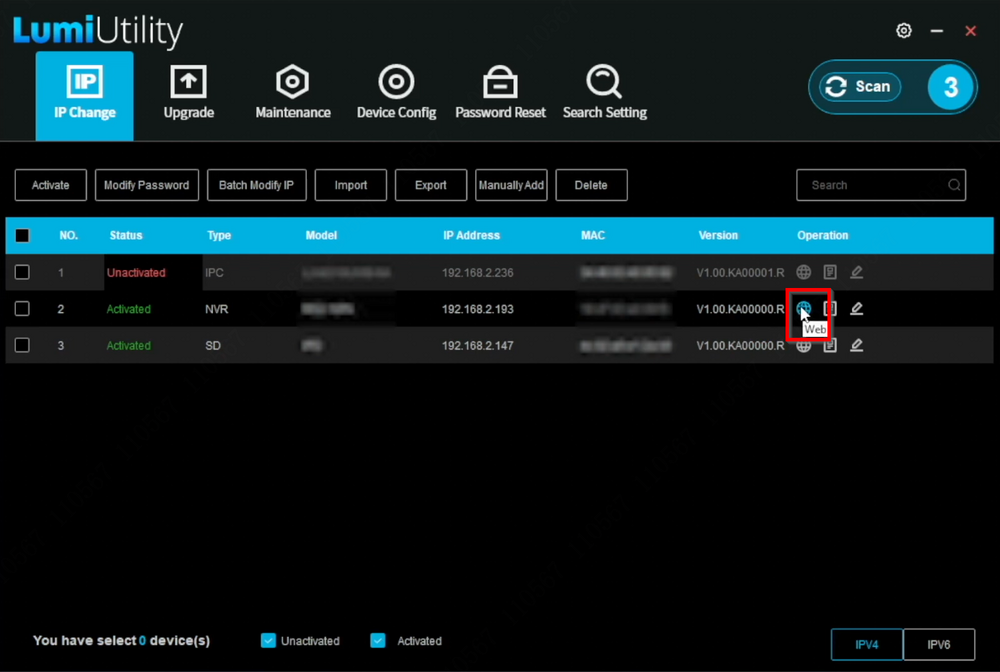
3. Clicking the globe icon opens the device's webGUI in a web browser.
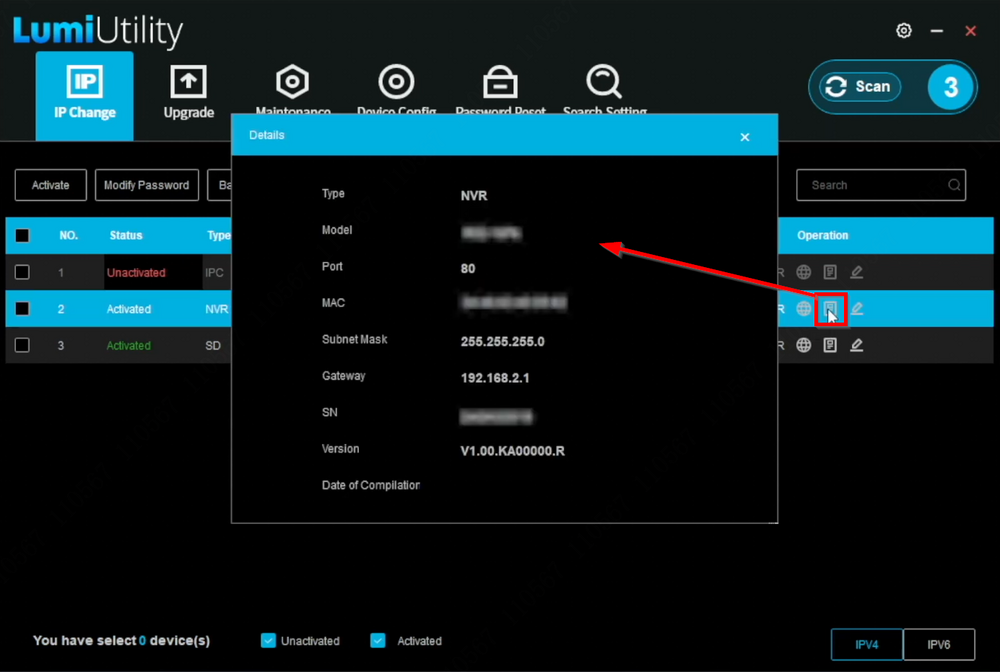
4. Clicking the detail icon displays a pop-up window with information about the device, including Model, Port, and MAC address, and more.


