LumiCloud/Liveview & Video Playback
How to View Playback and Live View in the End User Portal
Prerequisites
- LumiCloud account
- Devices added to LumiCloud
Video Guide
Steps
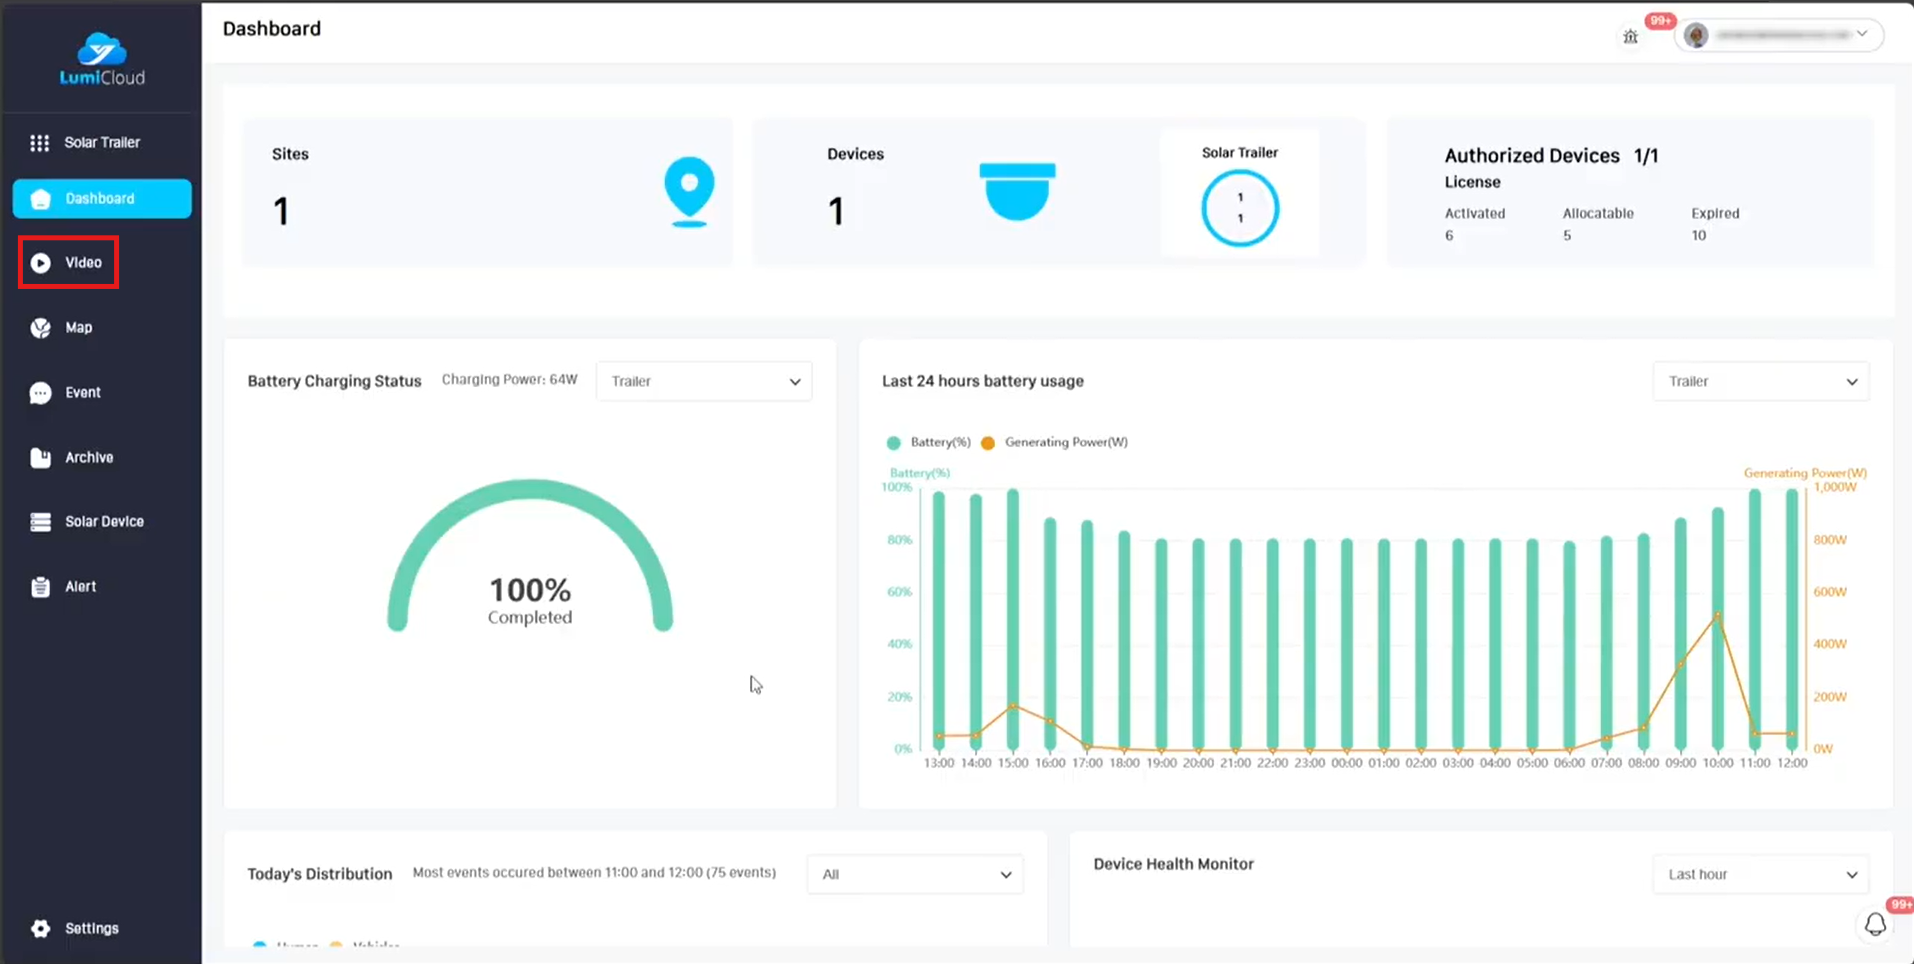
1. Today we will be learning how to view live view as well as playback through the LumiCloud End user portal. To do this, the first thing you will want to do is log into the LumiCloud portal. Once logged in, you will want to click on the “Video” option on the left.
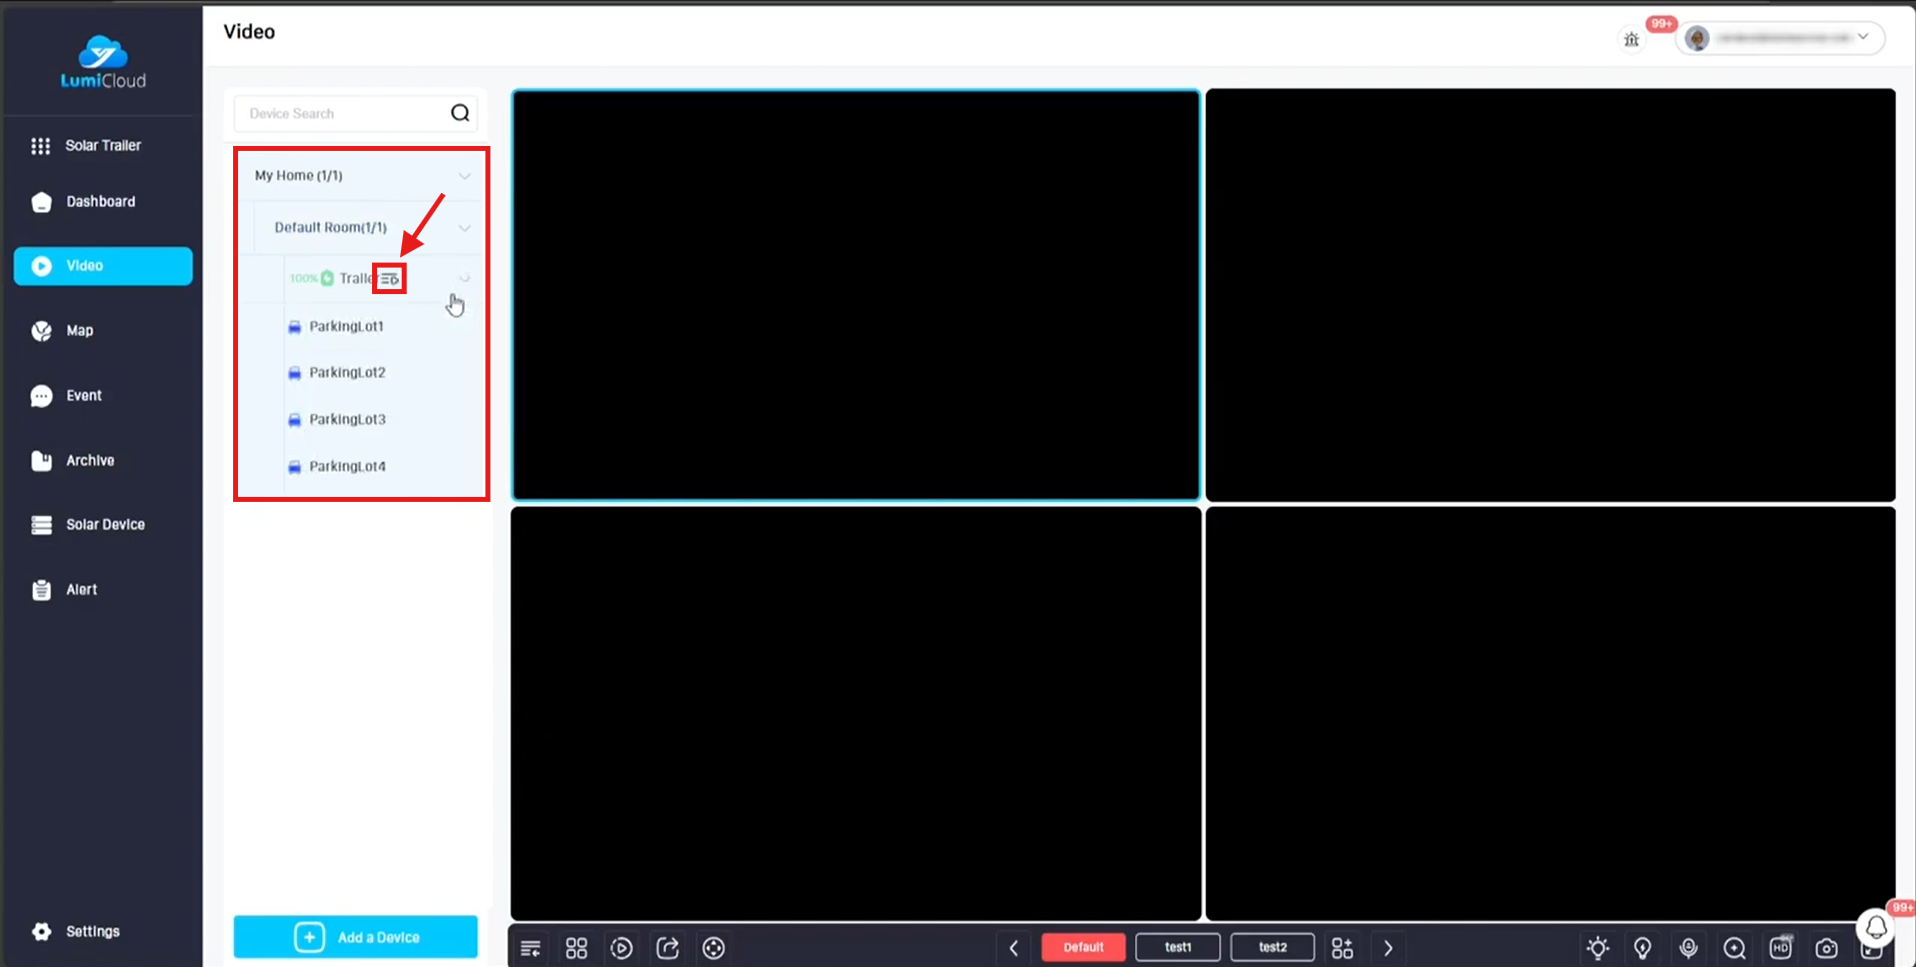
2. Once on the video page, you will see the live view page. To the left of the live view windows, you will see your sites, and then if you expand your site, you will see your devices, and then if you expand the device, you will see your cameras. There are a few ways to view your cameras. The first way would be to drag and drop the channel you want to view into one of the available live view windows. The next would be to select a live view window, then you can double click on the channel and it will fill into the selected window you chose. The last would be if you want to view all of the channels, to do this you will notice a little play button with lines to the right of the device (highlighted with an arrow in the picture), if you click on that, it will auto populate all of the channels into the live view.
3. Navigation bar at the bottom.
a. This button will hide/show the device list to the left of the live view screen.
b. “View Layout” This button allows you to change how many views you have in your live view layout. (1, 4, 6, 9, 16, 25)
c. “Playback” Clicking this button will take you to playback for the selected camera. (This will be discussed later in the document)
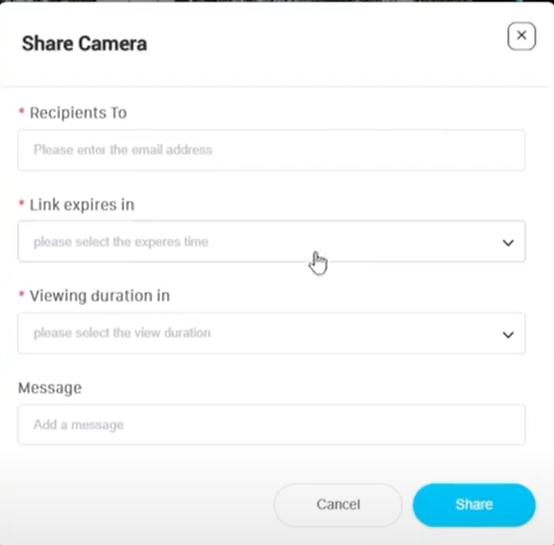
d. “Share Video” This button allows you to send the video that you are viewing to other people via email. The options you have once you click the button are “Recipients To” this would be the email address of the recipient(s) you want to send it to. “Link expires in” would be how long the link remains live. Viewing duration would be the length of the video from the present time. “Message” would be if you would like to include a message to the recipients.
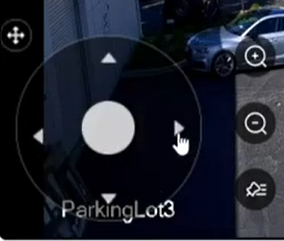
e. “Show PTZ” If you are viewing a PTZ camera, clicking this button will bring up the PTZ controls which you can use to control the PTZ, the zoom as well as adding presets or tours.
f. These are the already created “views”. The view listed as default would be the view that automatically pulls up.
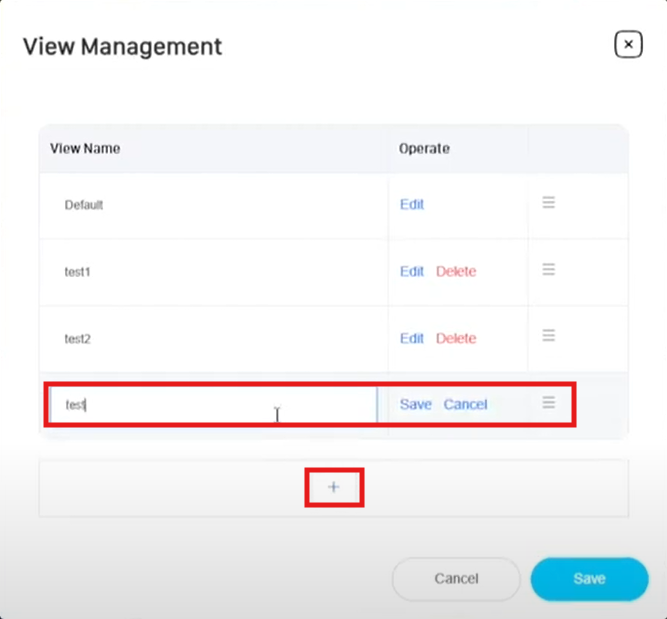
g. “View Management” This button allows you to create views to make it easy to view specific cameras. When clicking this button, the view it will save is the view you are live viewing at the time, so the first thing you want to do is in the live view create the view you like, then click on view management. Once inside this screen, you can click the (+) button to add the view at which time you will give it a name, and then click save to save the view. You can also delete existing views as well as change the order of the views.
h. “Fill Light” This button will enable or disable the fill light on the solar trailer.
i. “Flashing Light” This button will enable or disable the red/blue flashing lights on the solar trailer.
j. “Speaker” This button will allow you to use the microphone on the computer you are using to talk out of the speakers located on the solar trailer.
k. “Zoom” This button allows you to use digital zoom. After clicking on this button, the camera you are selected on will display a digital zoom (+) and (-) that will allow you to zoom in and out and then you can use your mouse to move around. To stop using digital zoom, click the button again.
l. “HD/SD” This button allows you to switch between main stream and sub stream.
m. “Screenshot” Clicking this button will take a snapshot of the camera you are selected on.
n. “Full Screen” Clicking this button will cause the live view window to maximize to full screen.
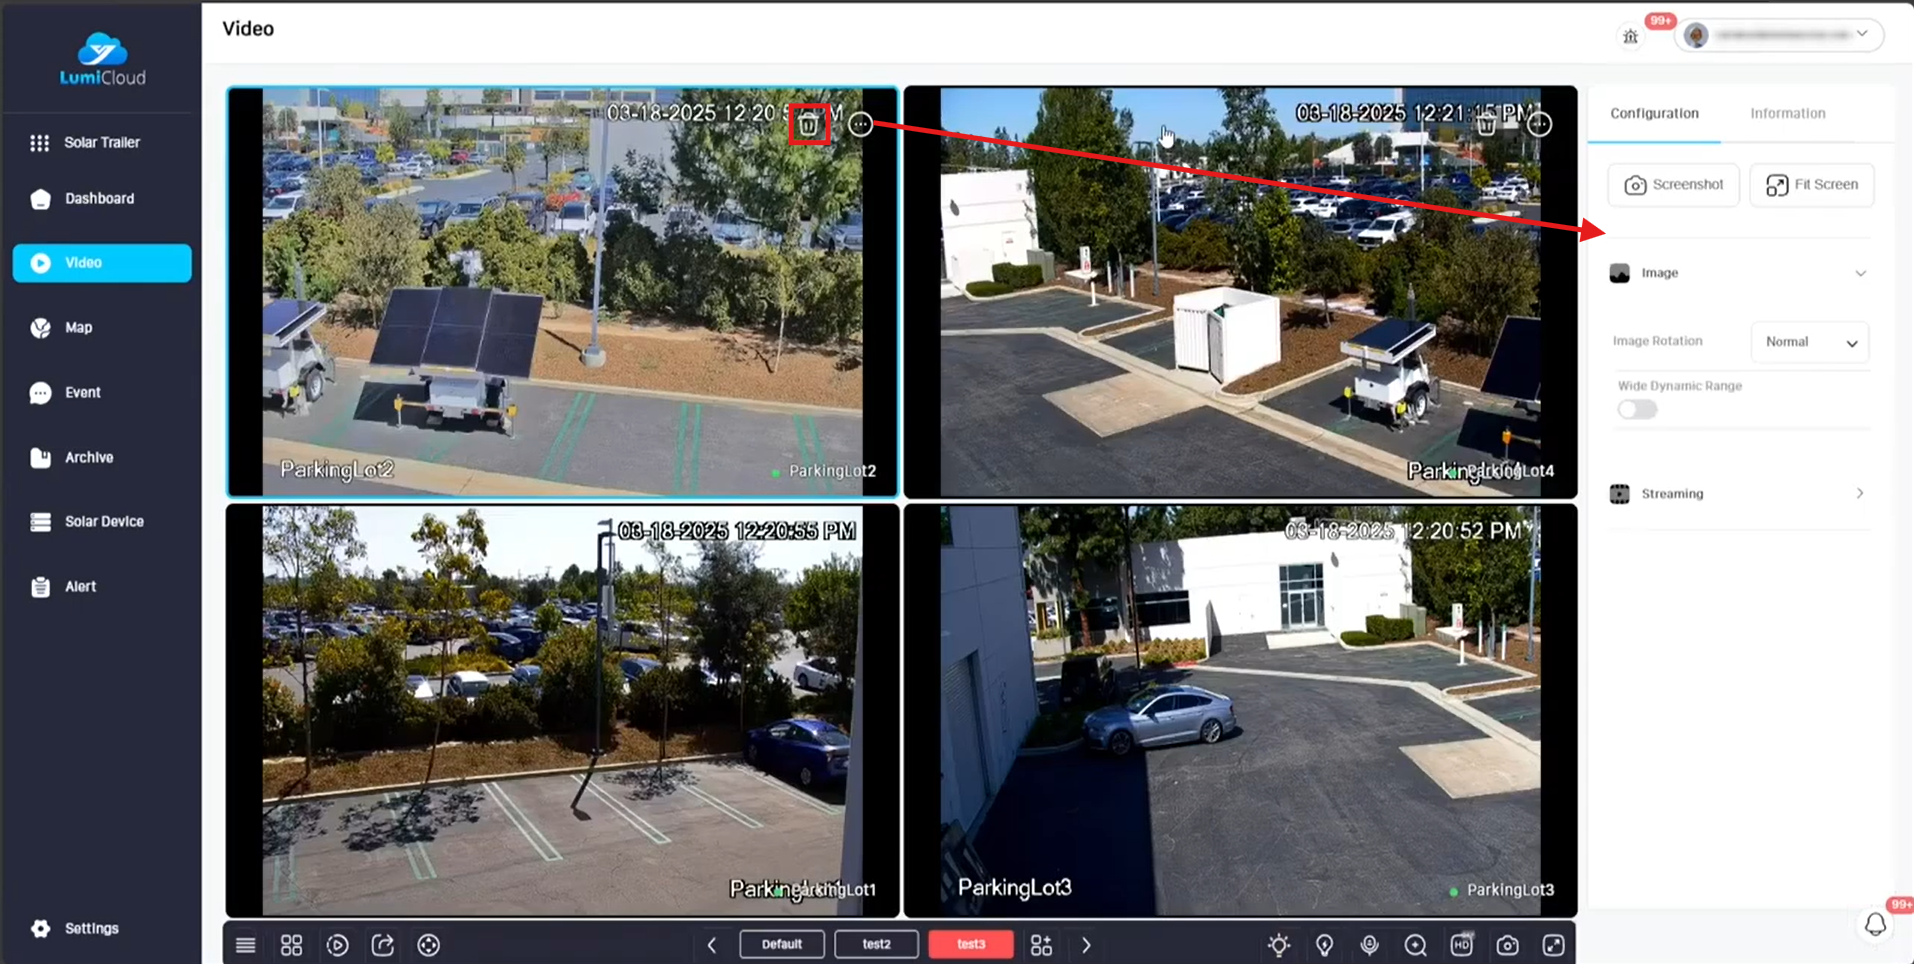
4. Next if you hover over one of the cameras on live view, you will see 2 options. The first is the trash bin icon which will remove the camera from the live view. The next is the circle with 3 dots which will cause another menu to pop up with some additional options.
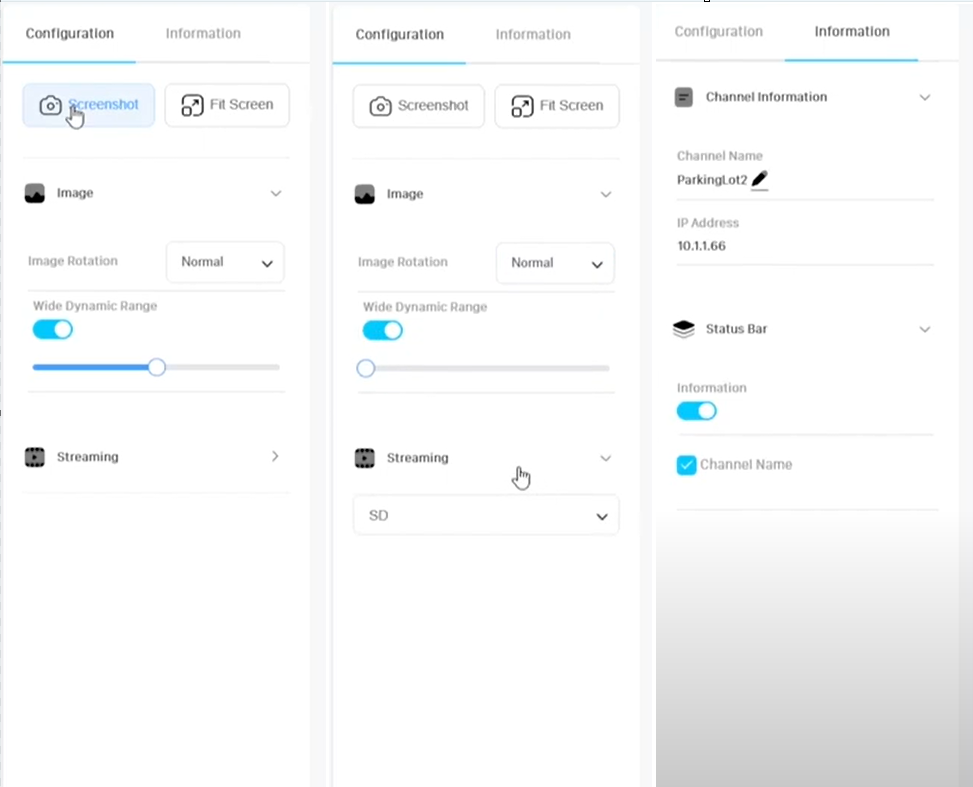
5. Under the configuration section of the side panel here are what the options do. “Screenshot” will take a screenshot of the currently selected camera. “Fit Screen” will adjust the aspect ration to fit the screen. “Image Rotation” under the image section allows you to rotate 180 degrees or leave it as normal. “Wide Dynamic Range” allows you to enable or disable WDR as well as adjust how much. Under the “Streaming” section you can flip between main and sub stream. Then under the information section, you can rename the camera under the “Channel Name” section, it also displays the current IP address. Under the “Status Bar” section you can choose whether the channel name is display in the bottom right of the camera view.
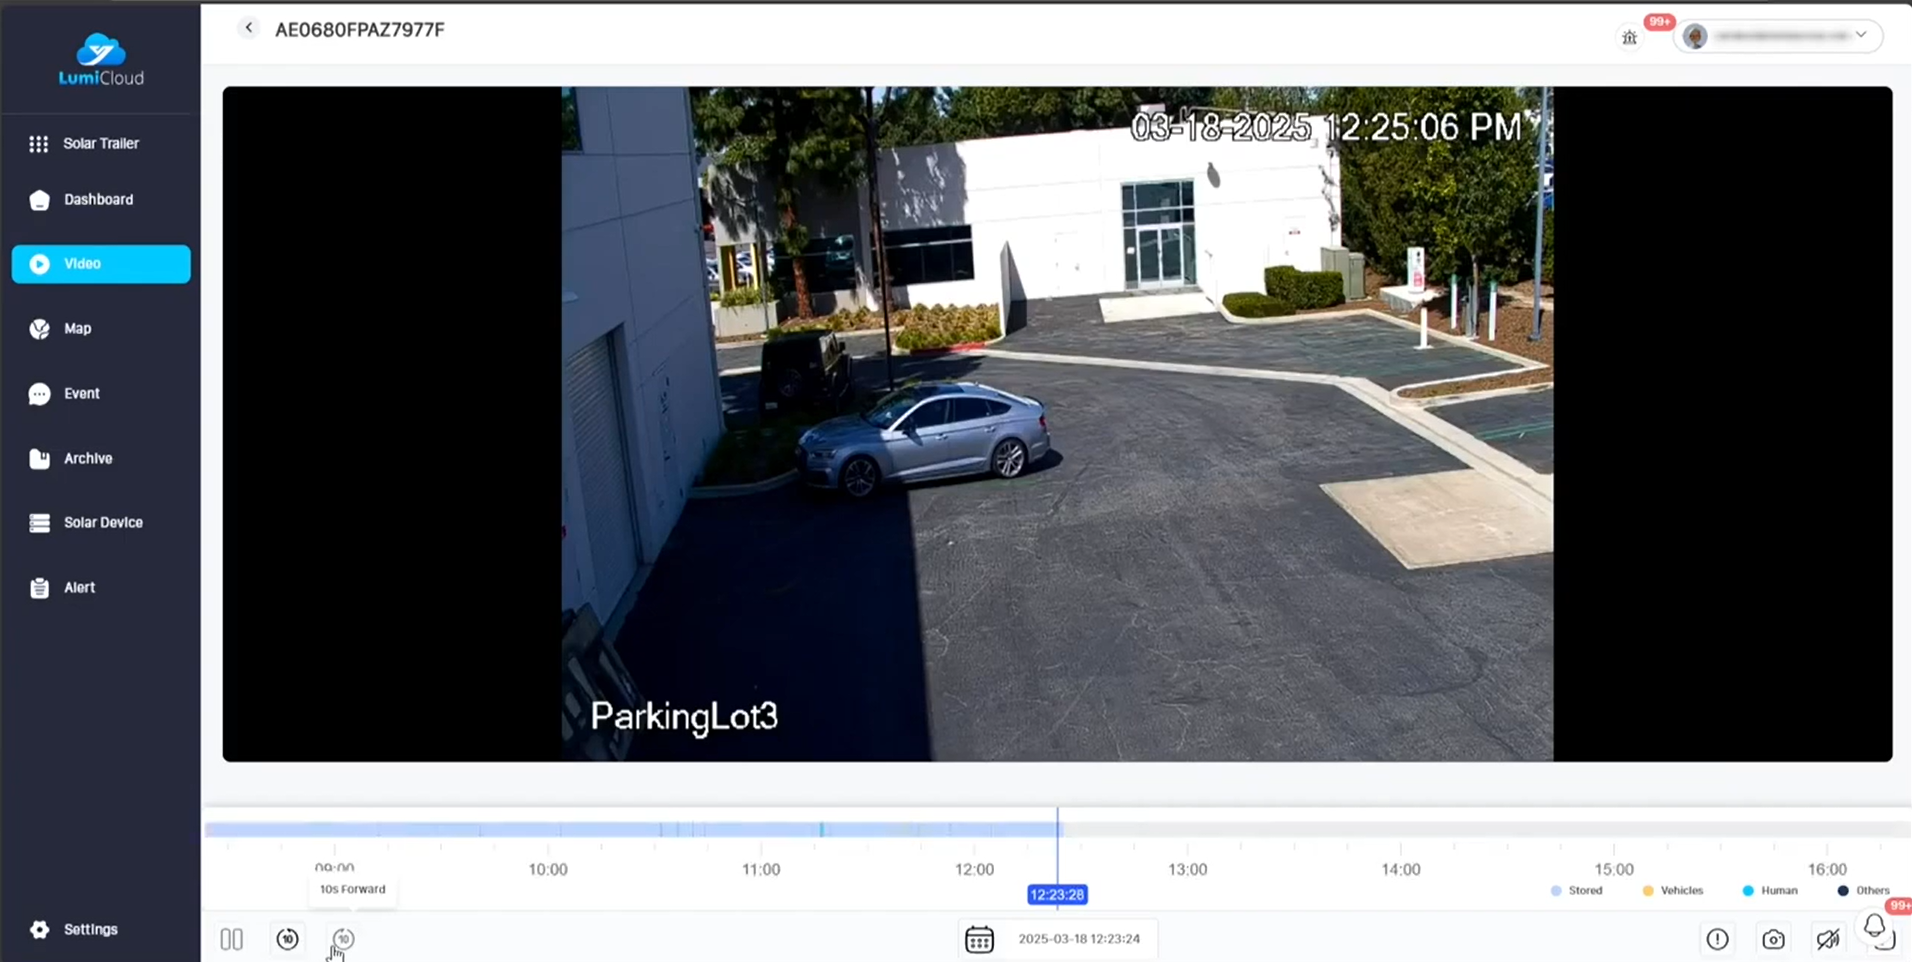
6. Next we will be looking at the playback function. As a reminder the playback button is labelled as c. on the navigation bar. The first step will be to select the camera you want to do playback on, then click the playback button. This will bring the playback section up. Down in the bottom right it will give you a key to understand the colors on the playback bar. Light blue being your general recording, yellow for vehicles, sky blue for humans then a dark blue for “others”. You can start the playback by clicking on the timeline, use the pause button in the bottom left to pause the playback. You then have buttons to jump back 10 seconds, or jump forward 10 seconds. You can use the calendar in the bottom middle to choose the date of the playback, then to the right you have the exclamation button which will display only the events, click it again to go back to the timeline, the camera button will take a snapshot of what you are watching, then the speaker button will enable audio if the camera is recording audio, clicking it again will mute, and lastly the button in the bottom right will switch to full screen. This concludes how to use live view and playback in LumiCloud.

