Cameras/Dewarping Mode via WebGUI
Dewarping Fisheye Cameras Live View via WebGUI
Description
This tutorial will go over how to dewarp fisheye cameras live view in webGUI.
Prerequisites
- Access the camera via web browser.
Video Instructions
Step by Step Instructions
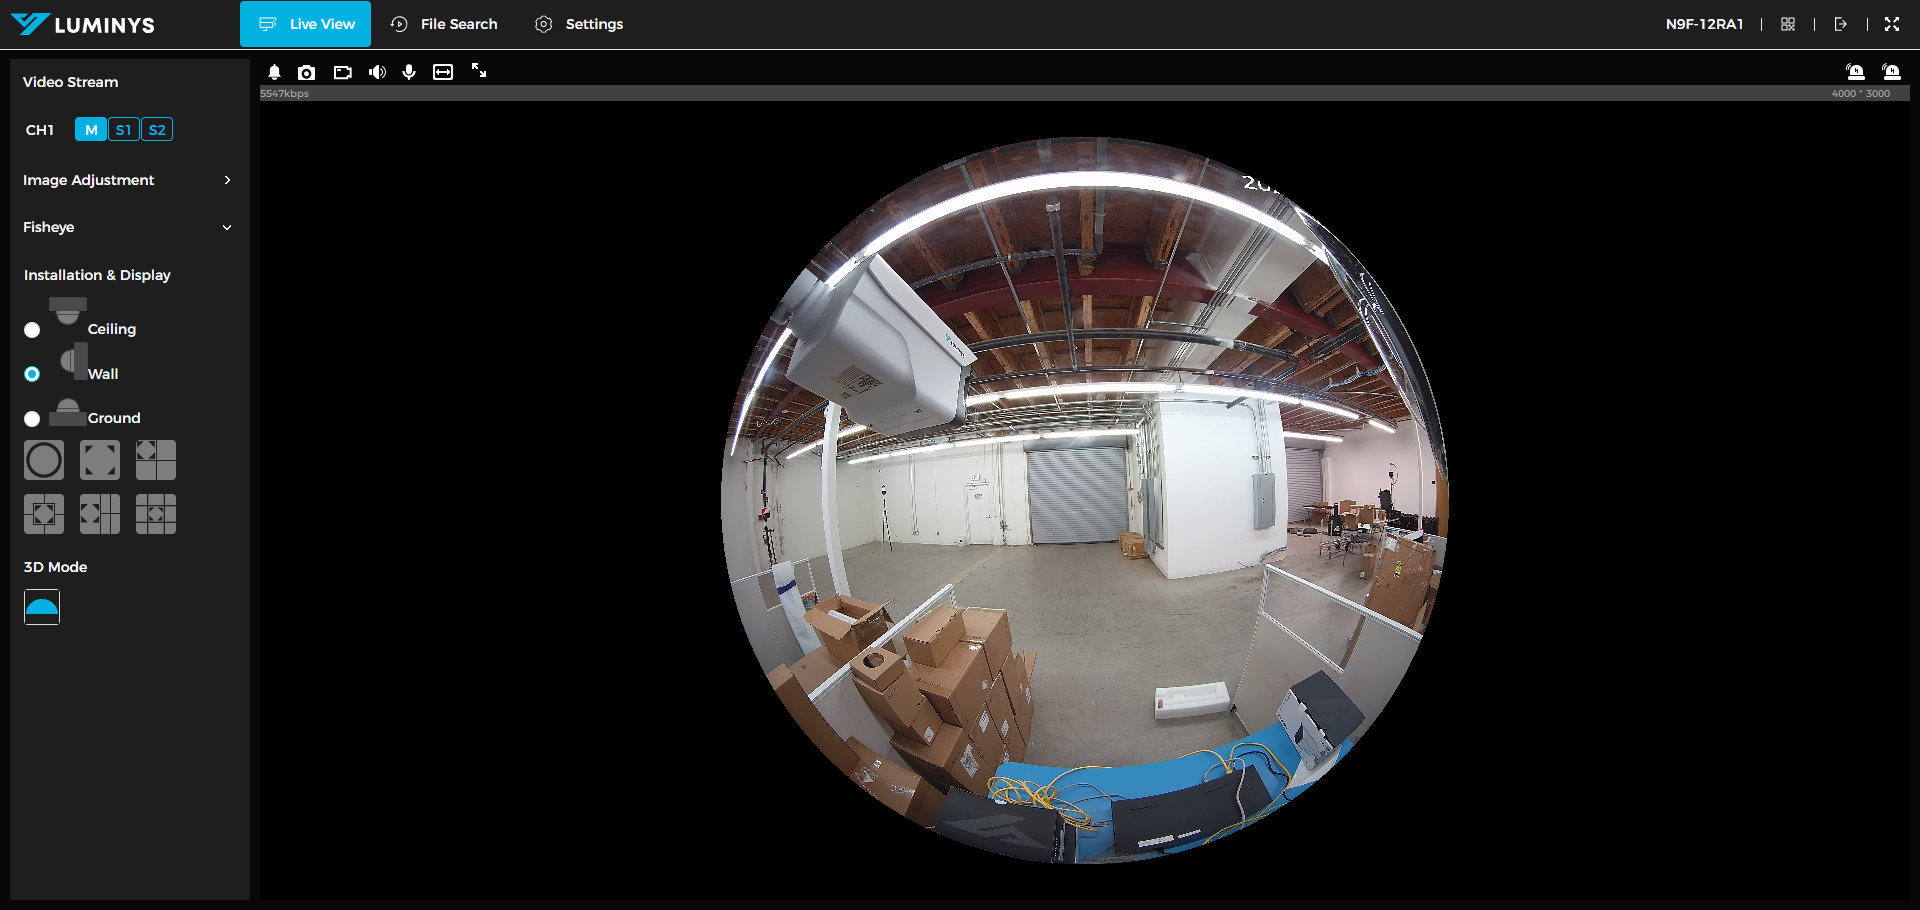
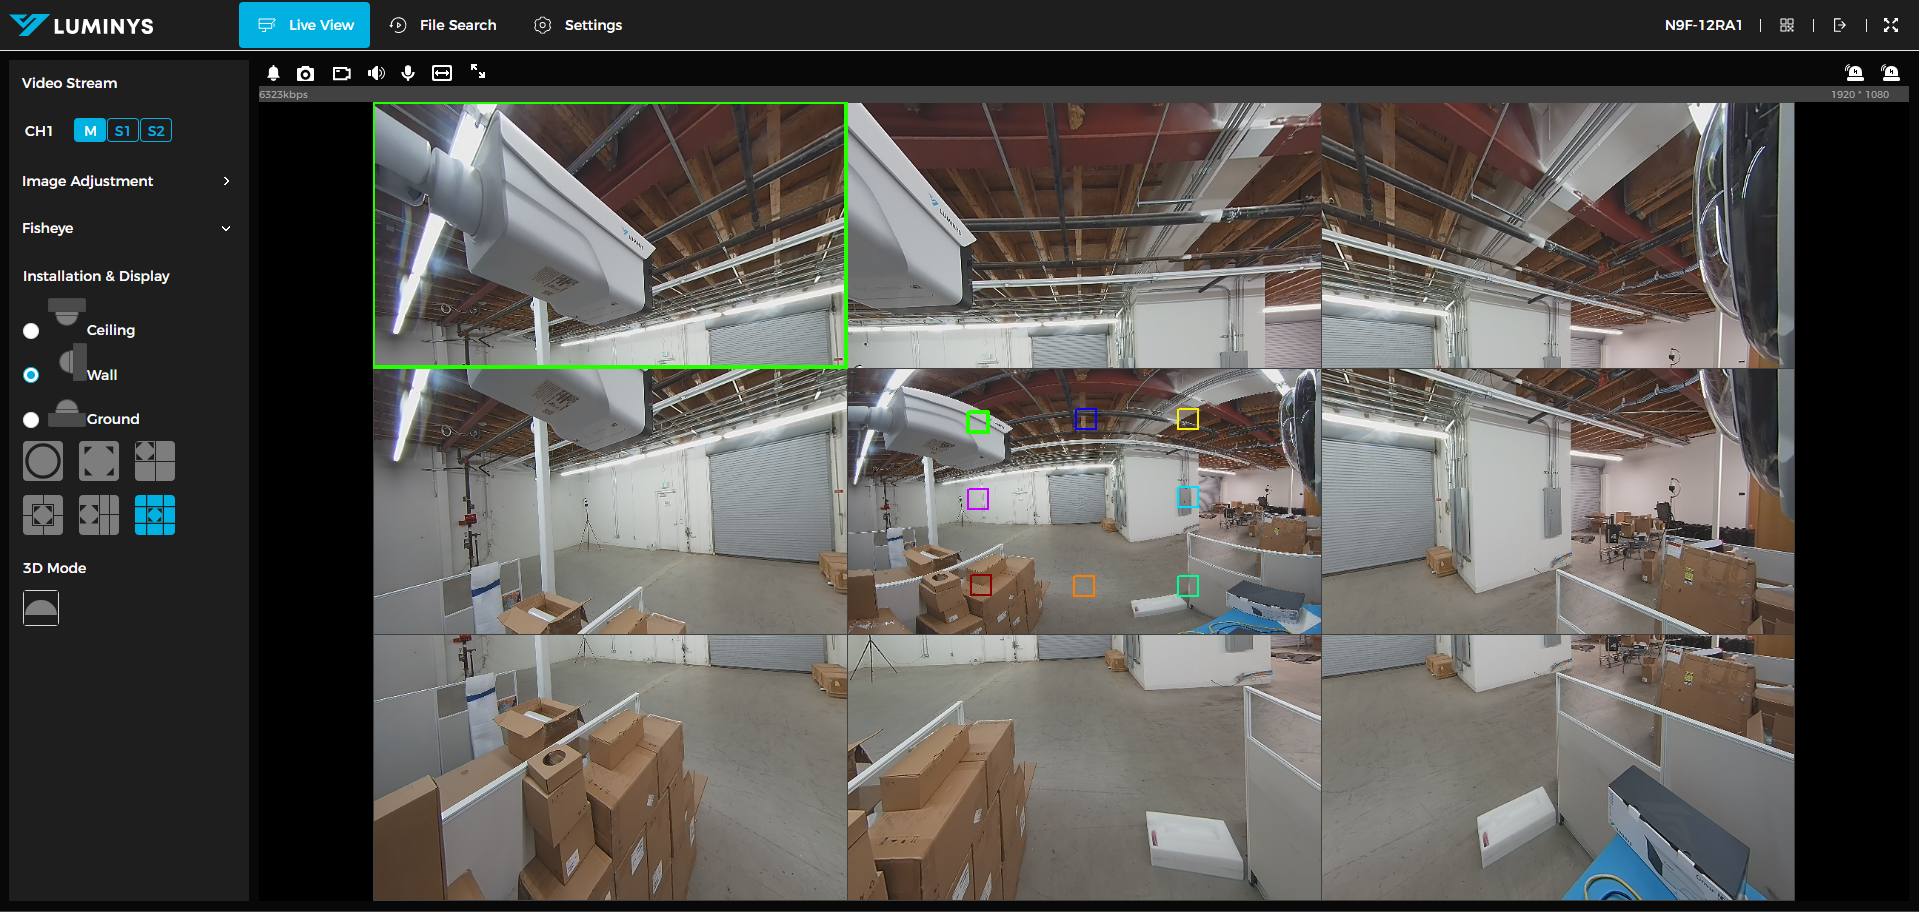
Note: Fisheye typically provides three dewarping modes: Ceiling, Wall, and Ground. Each mode includes multiple options for selecting a sub-image, which can be repositioned by dragging with the mouse. Thus, depending on how the fisheye is installed (ceiling, wall, or ground), the appropriate type should be selected.
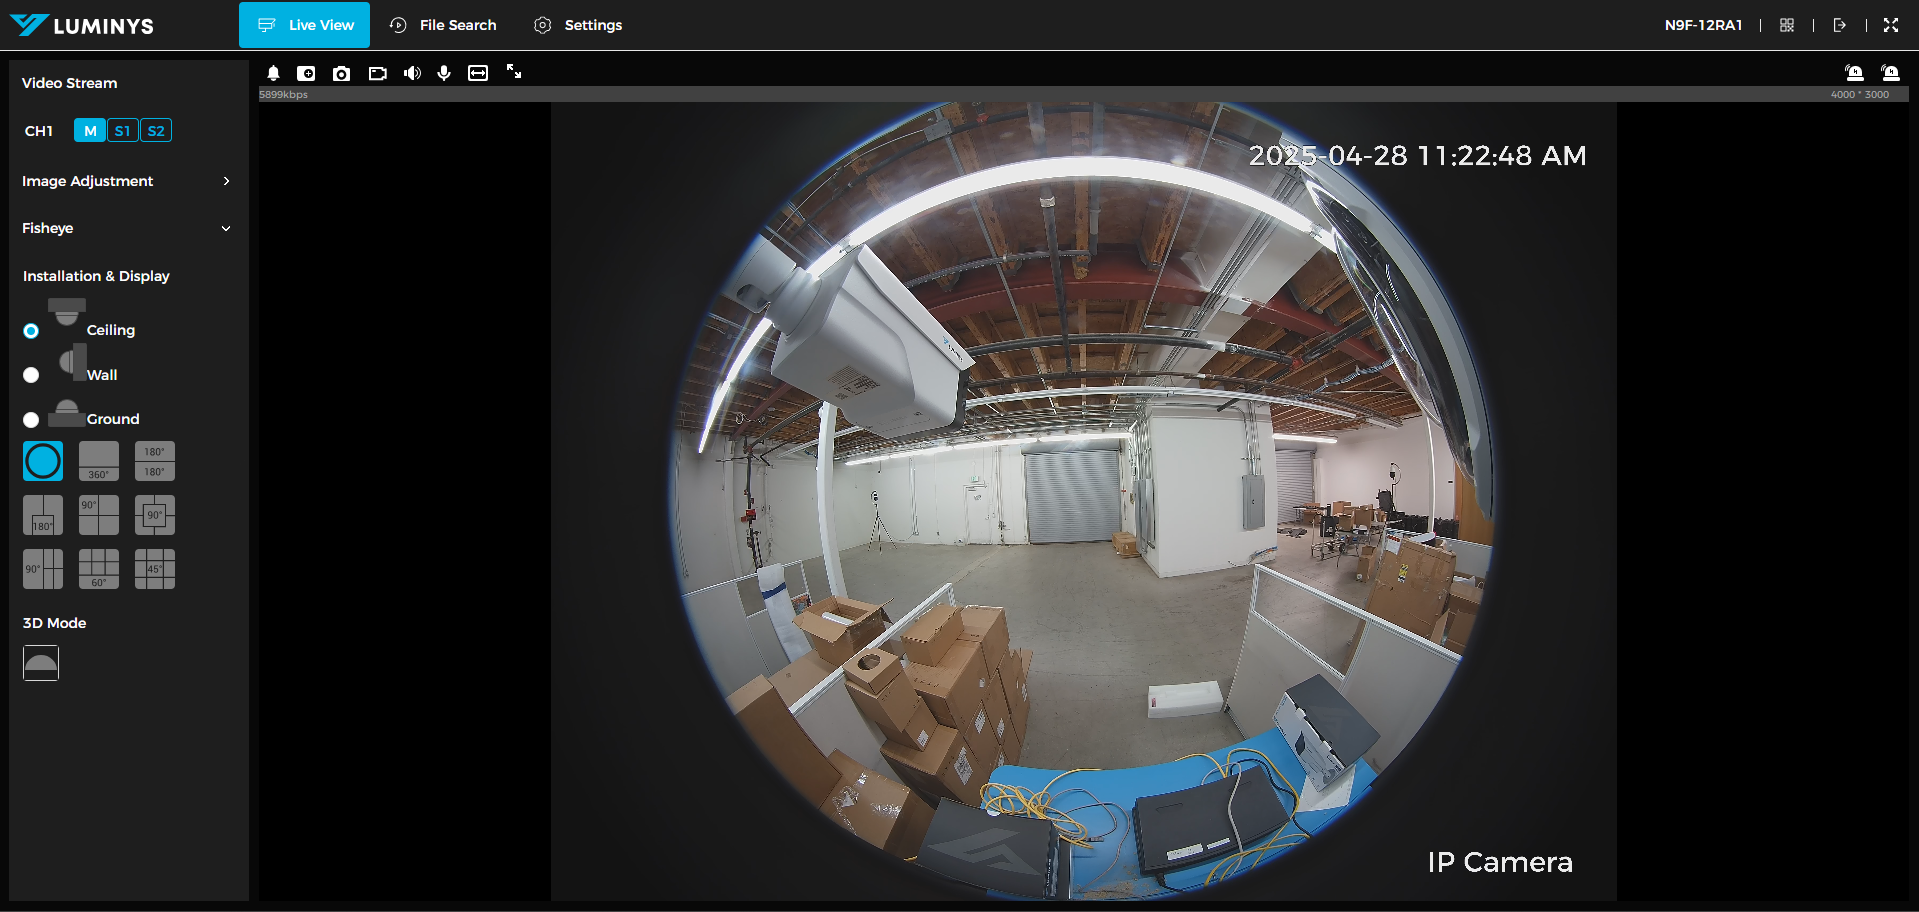
Ceiling
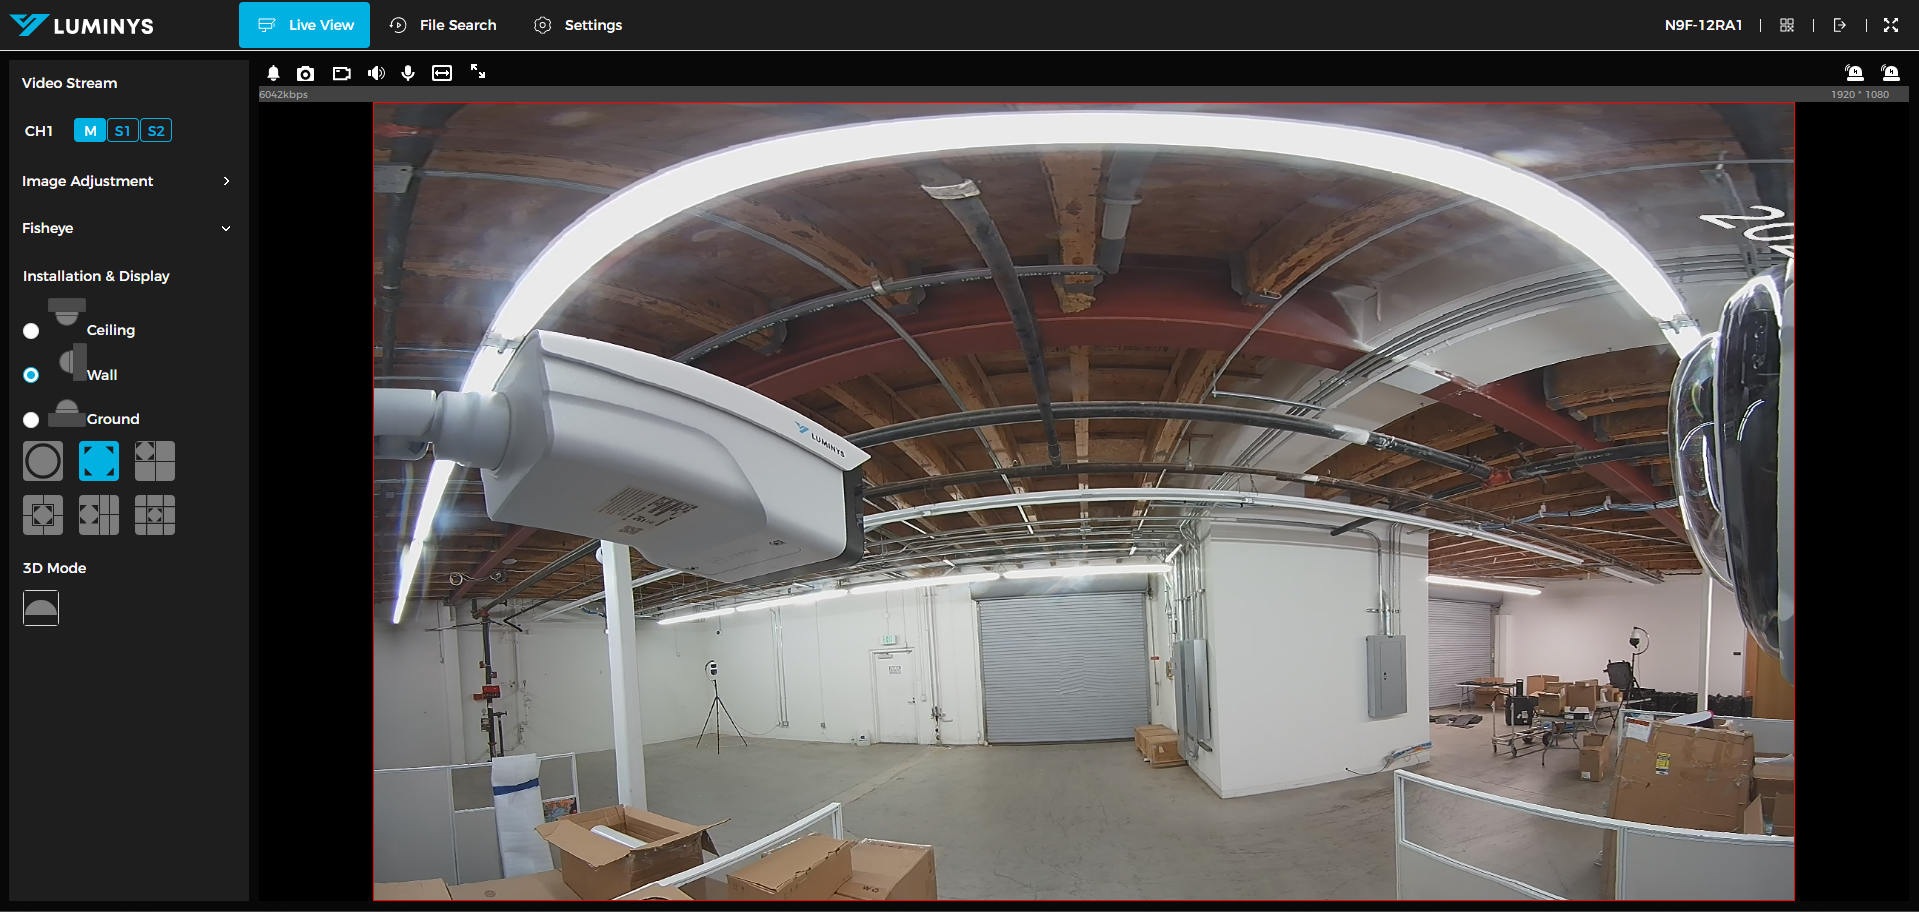
1. This is the default image or view of the fisheye before dewarping is applied.
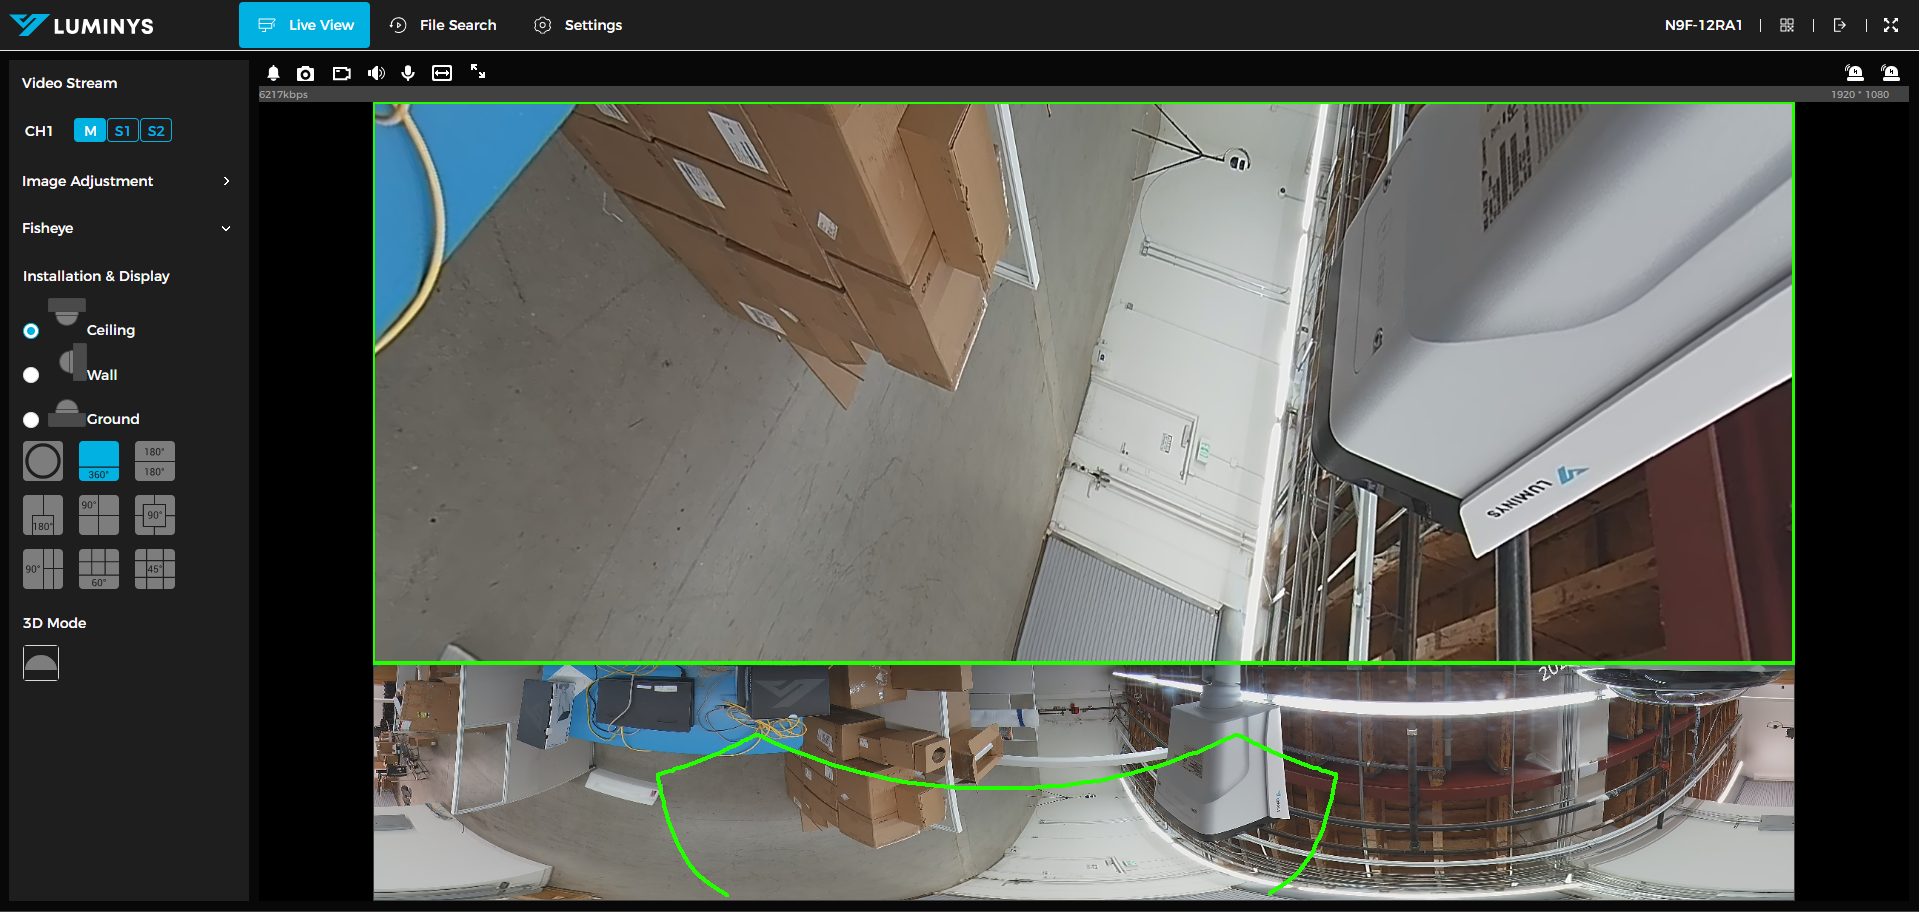
2. 360-degree view displayed at the bottom with the sub-image positioned at the top.
3. This is divided into two 180-degree sub-images.
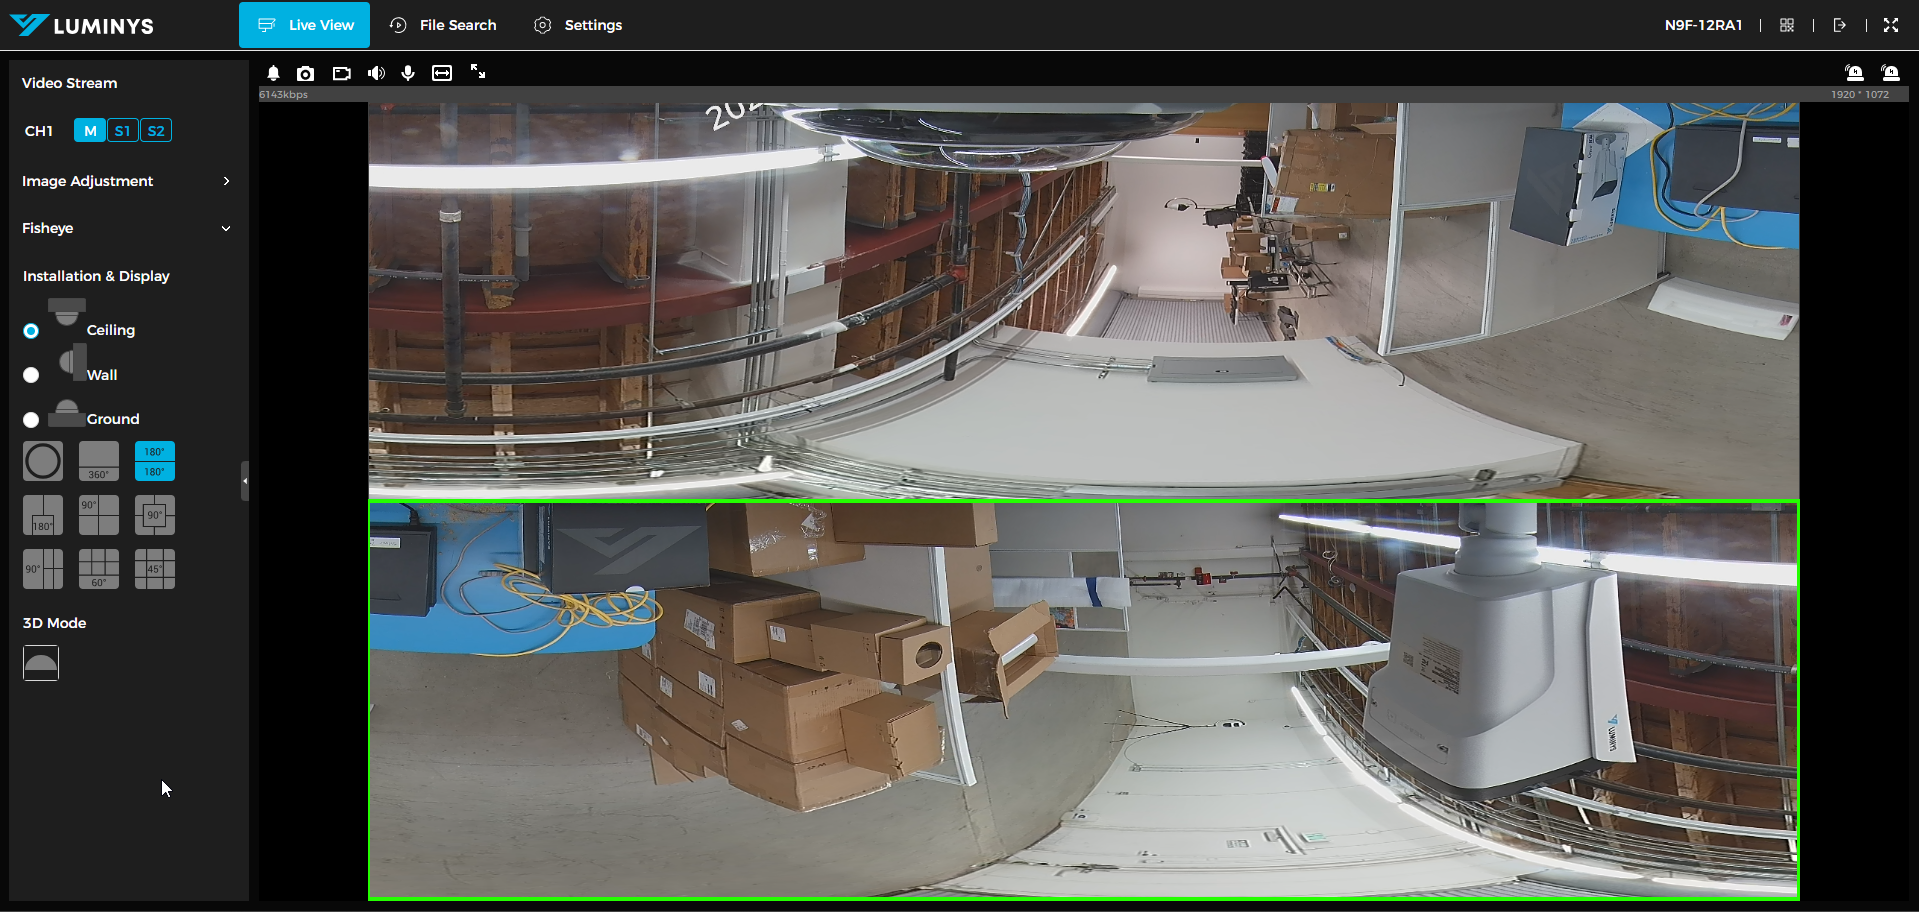
4. This is divided into two 180-degree sub-images.

5. 90-degrees with 3 sub-images.
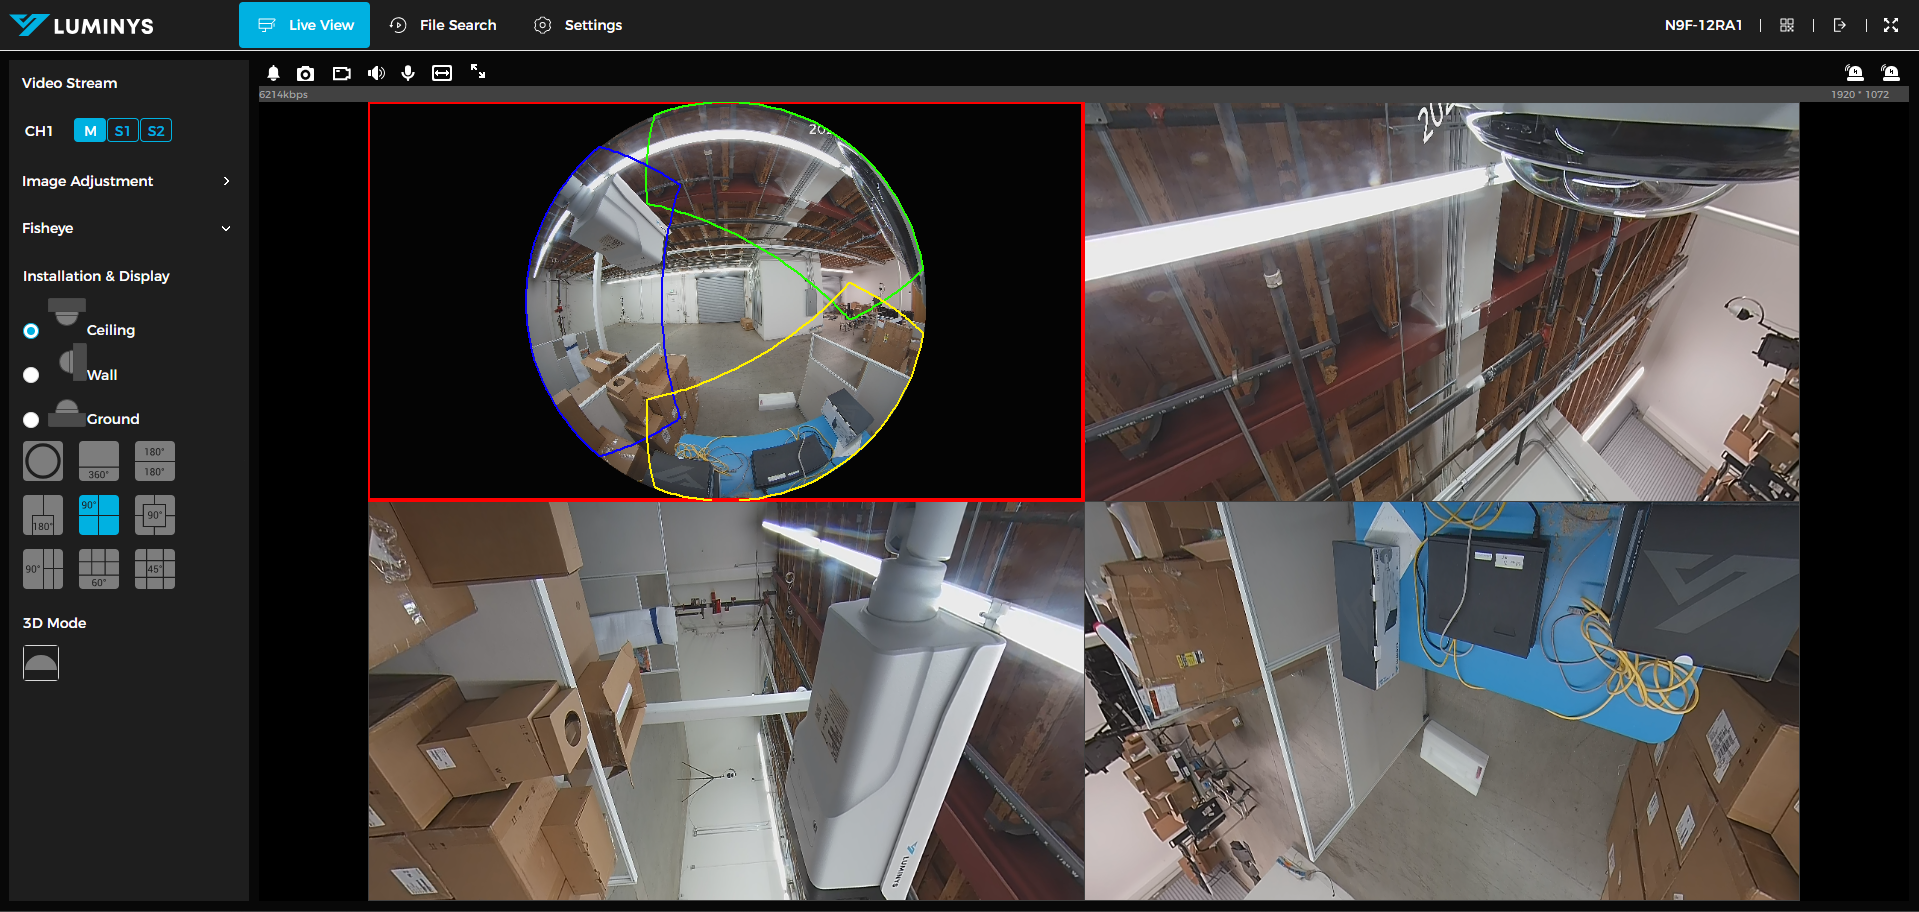
6. Displays four 90-degree sub-images with the original image positioned in the center.

7. 90-degrees with 4 sub-images with original image on the left side.
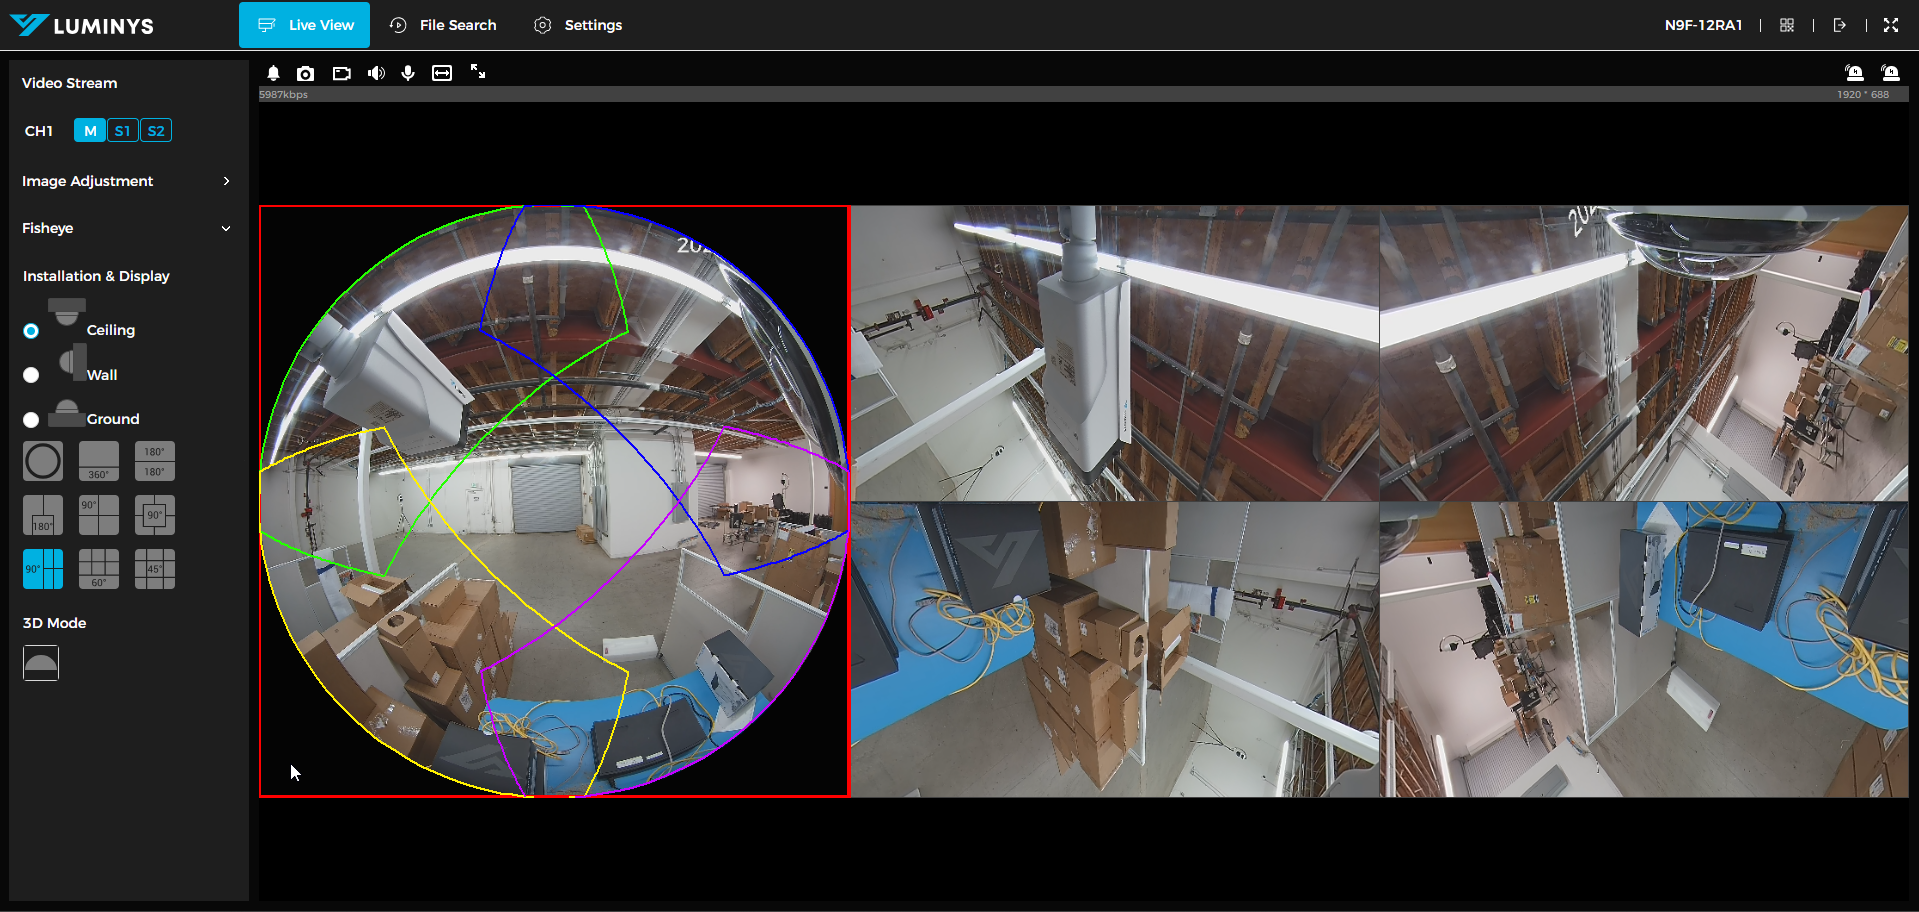
8. 60-degrees with 4 sub-images with warp image on the bottom.
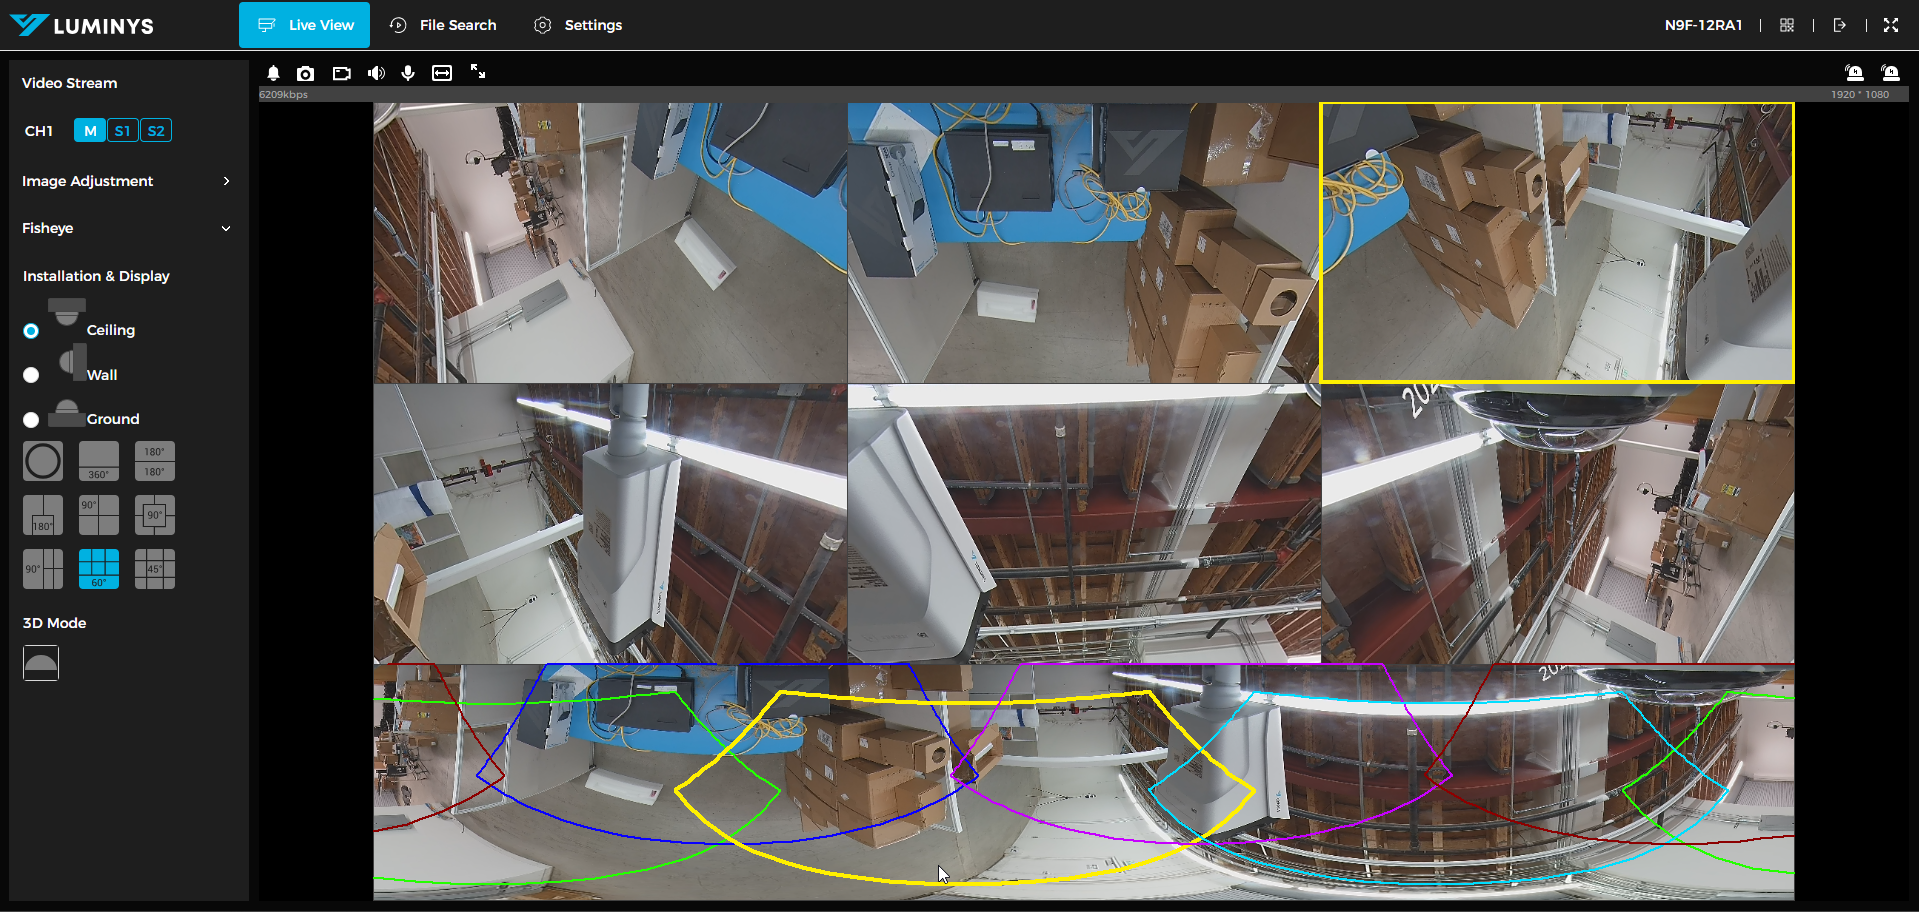
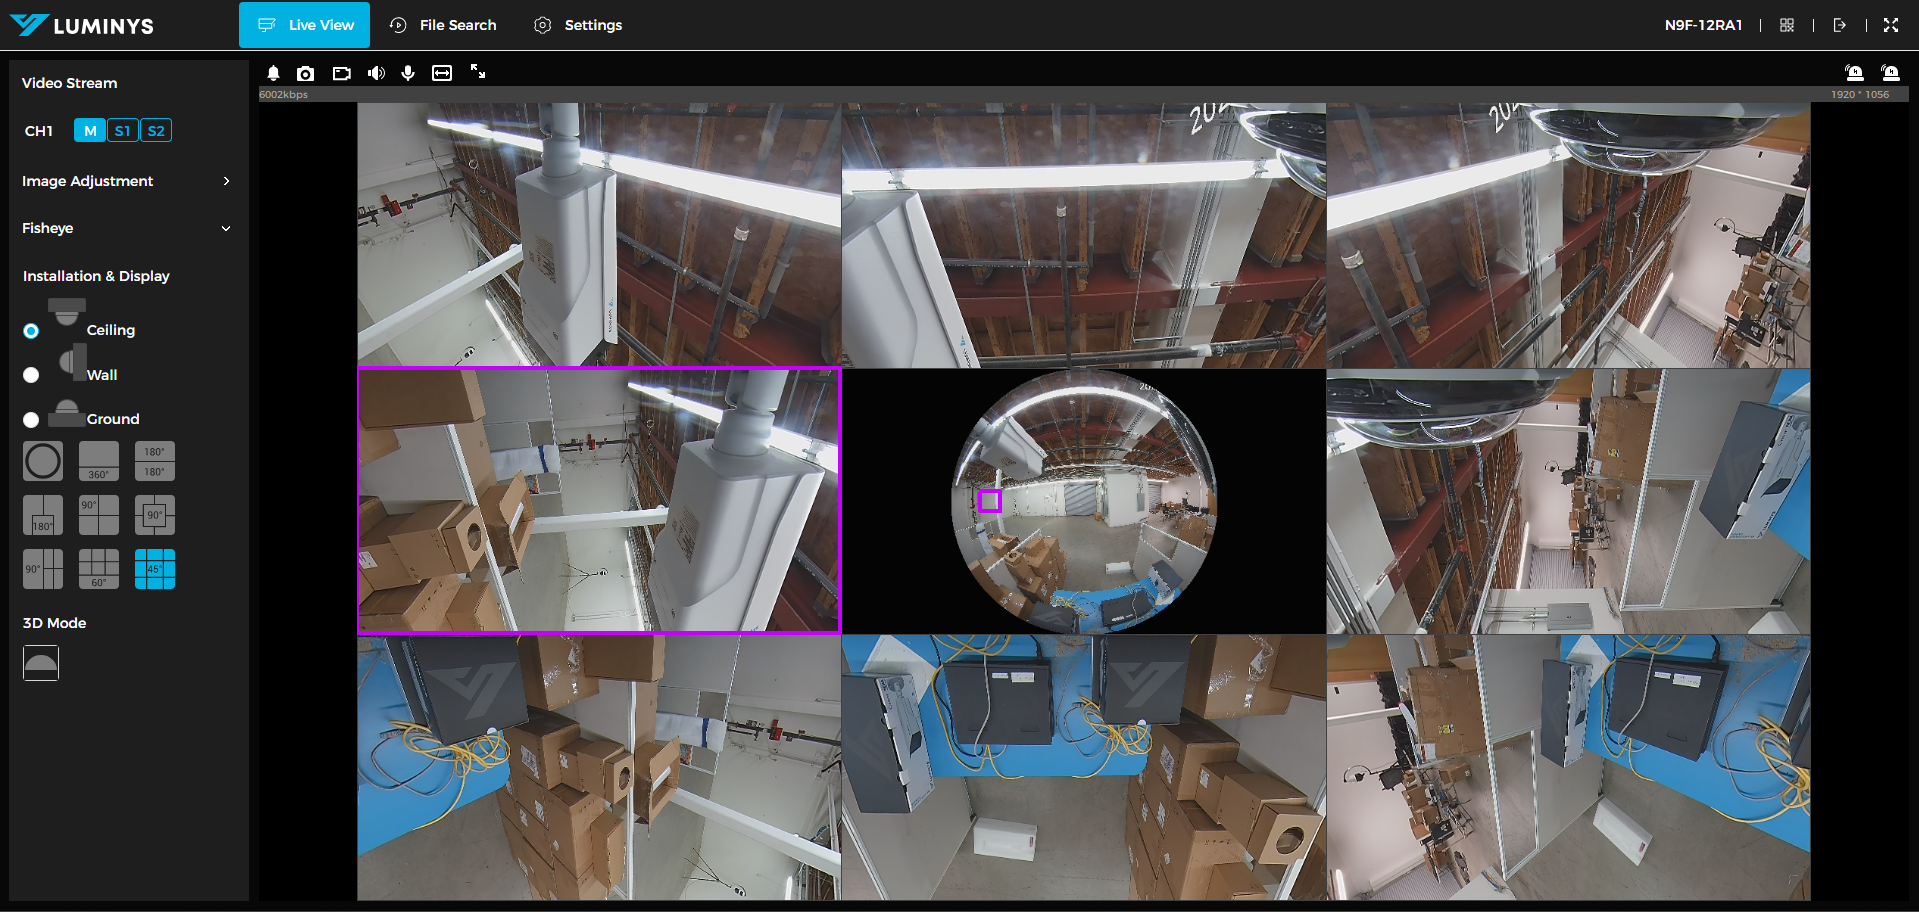
9. 45-degrees with 9 sub-images with original image in the middle.
Wall
10. This is dewarp mode for wall.
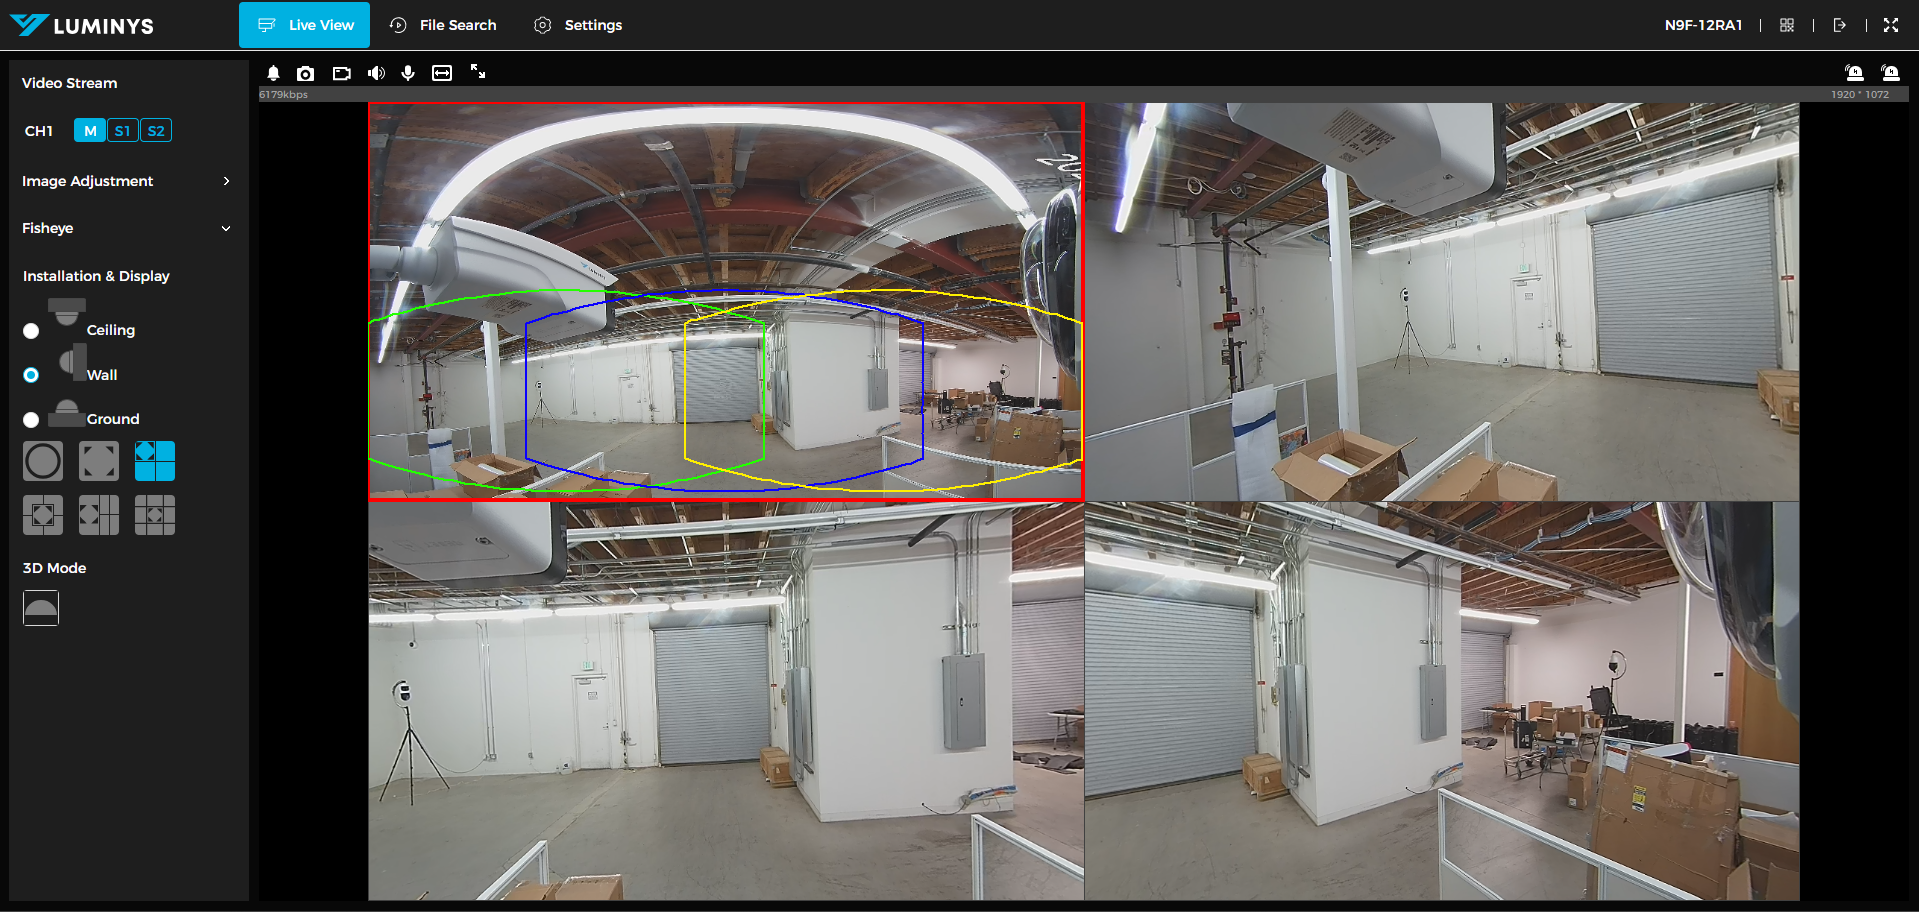
11. Dewarp mode on the top left corner with 3 sub-images.
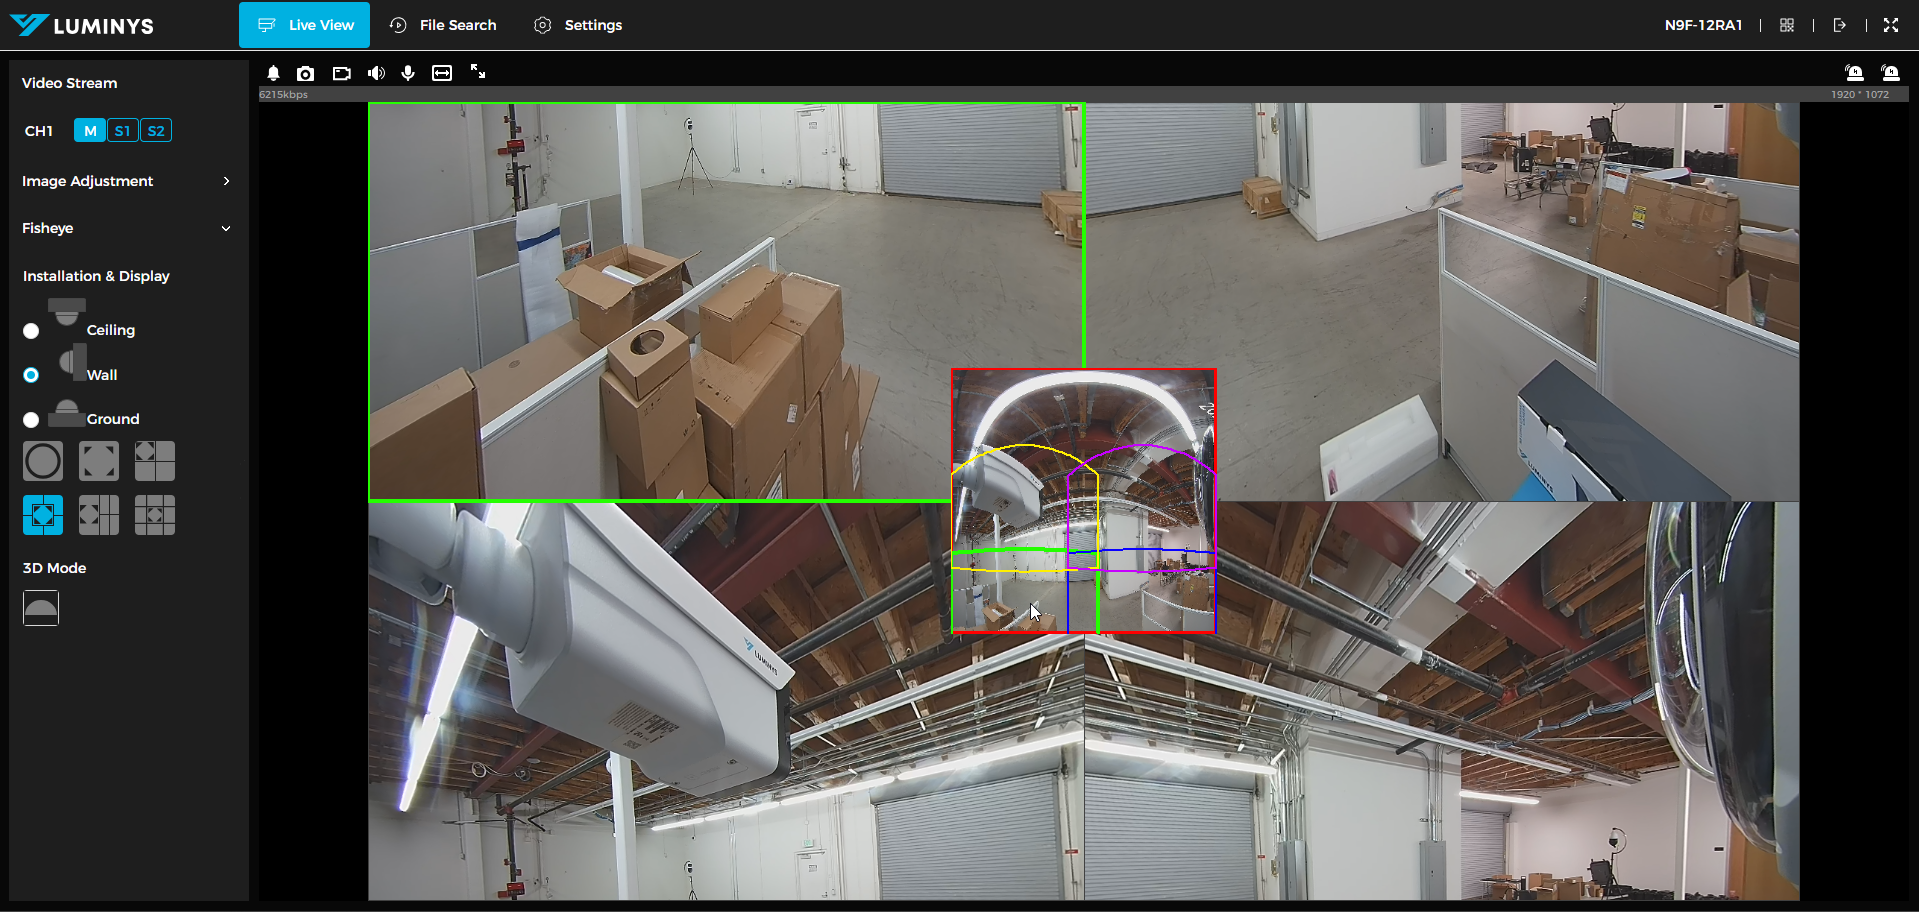
12. Dewarp mode in the middle with 3 sub-images.
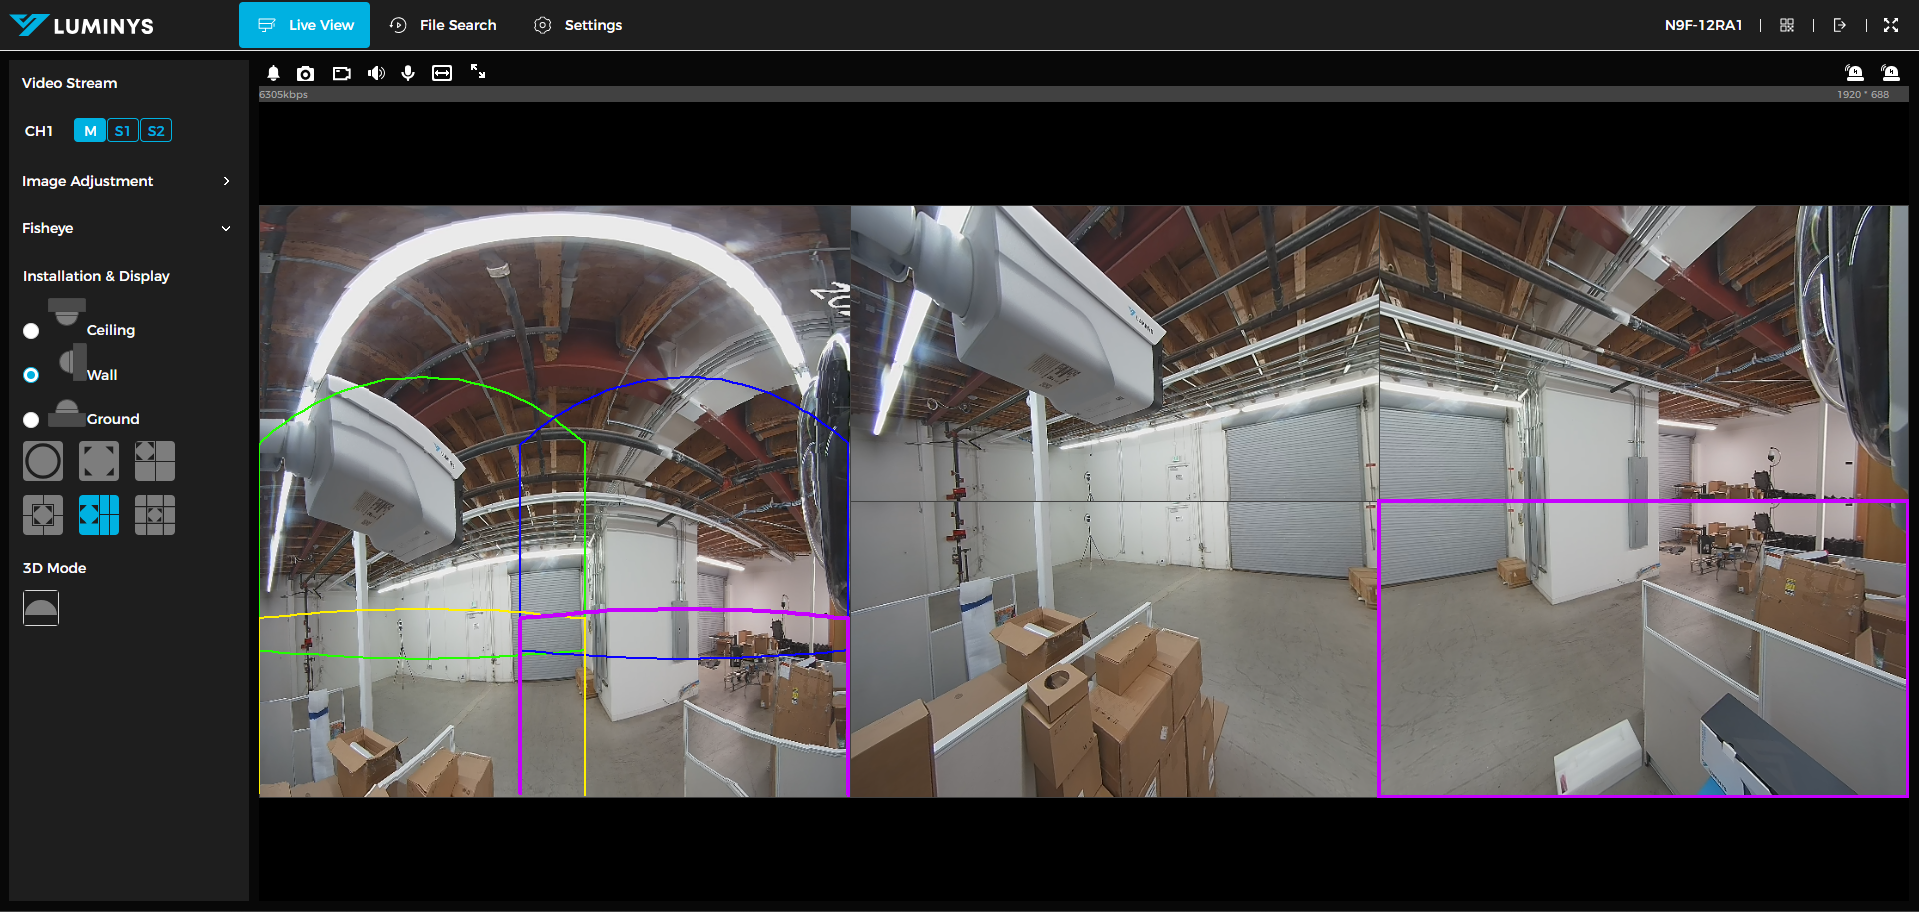
13. Dewarp mode on the left with 4 sub-images.
14. Dewarp mode in the middle with 9 sub-images.
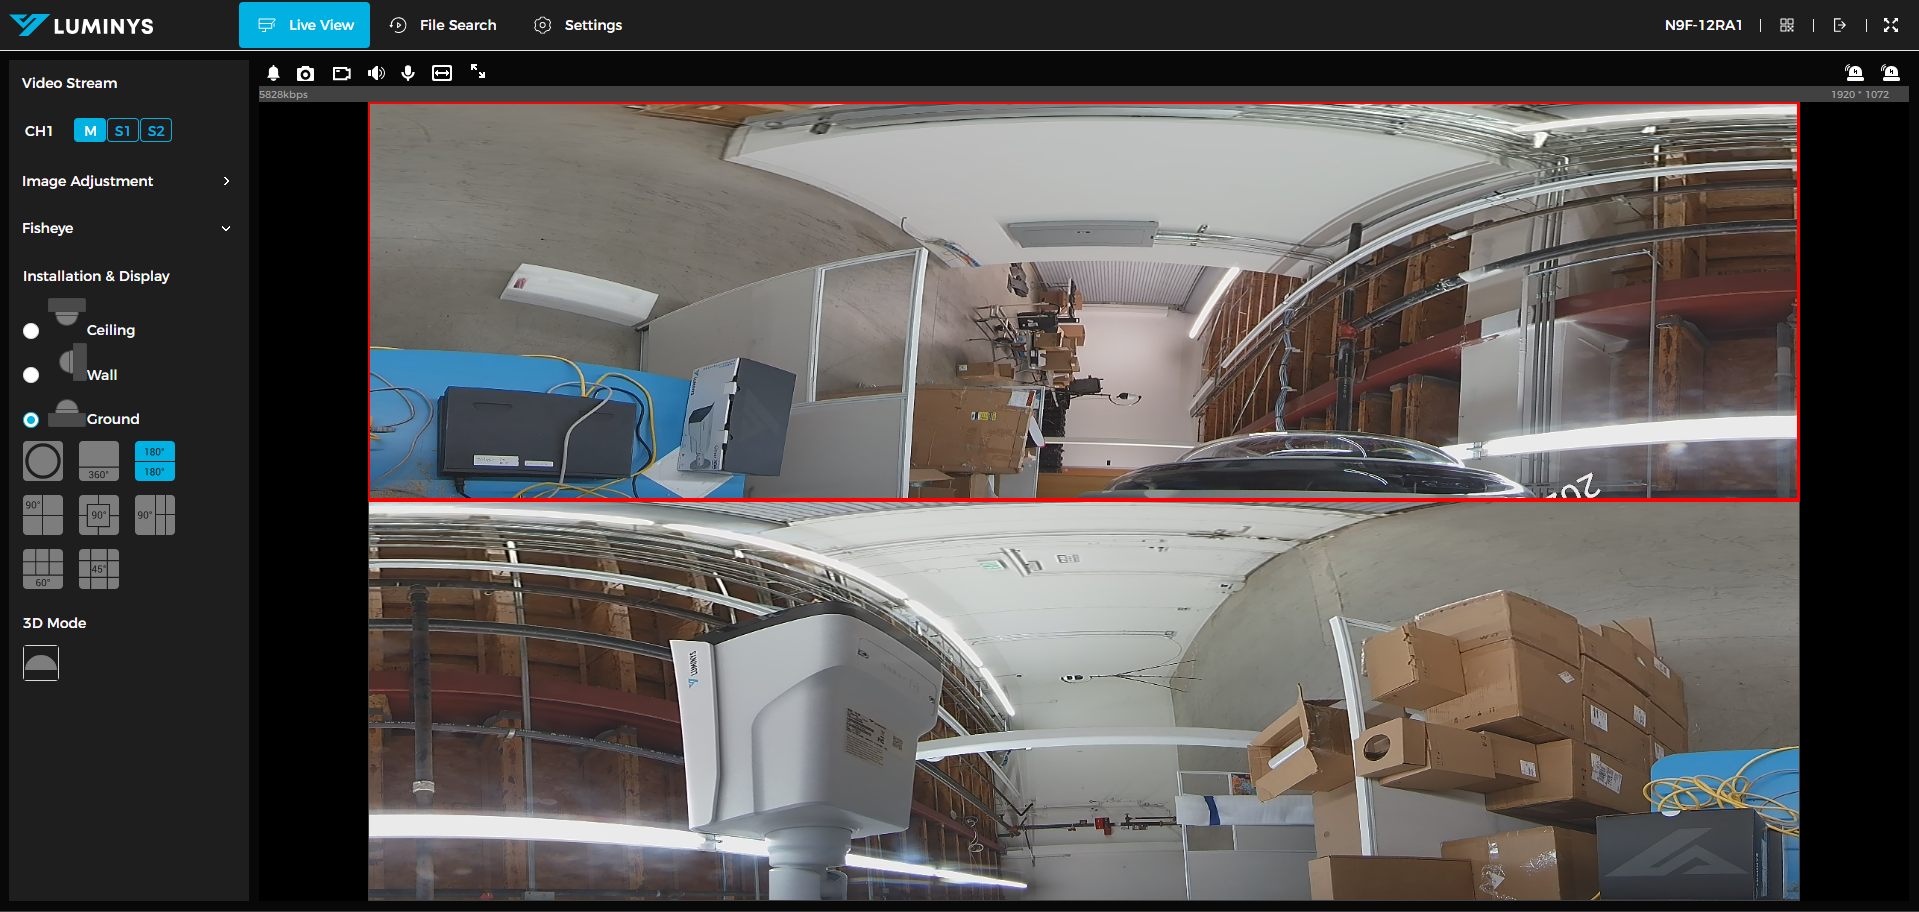
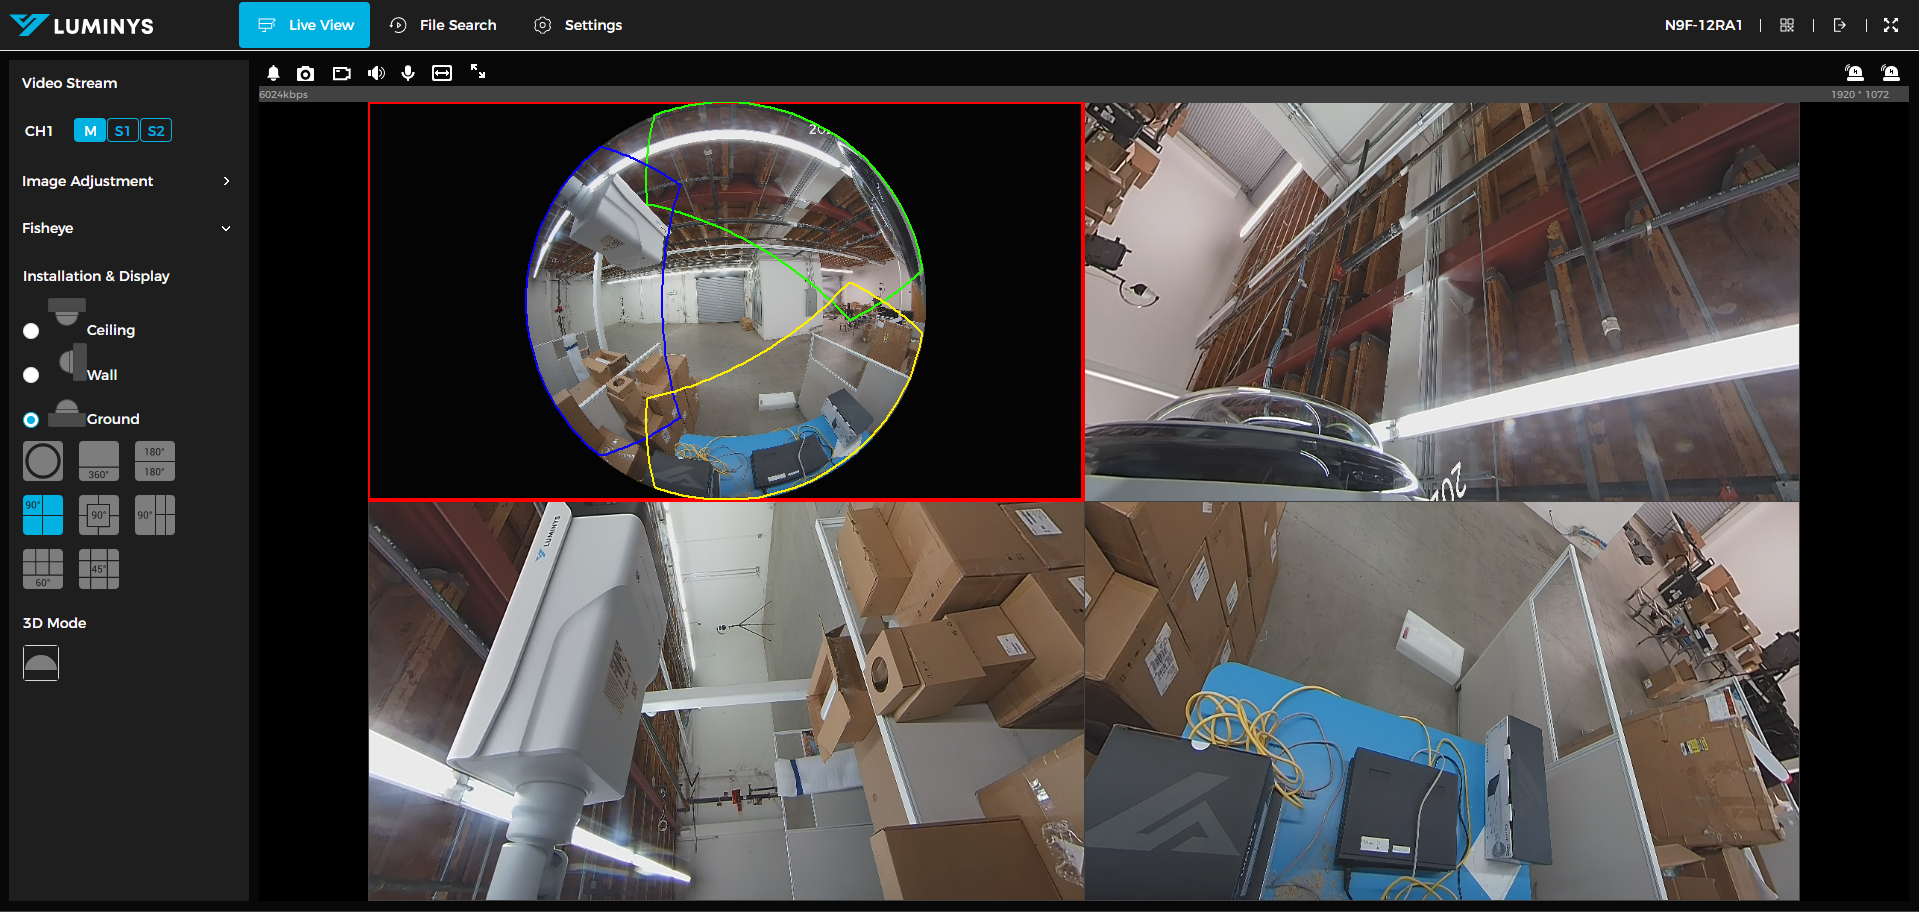
Ground
15. 360-degrees with 1 sub-image on top.
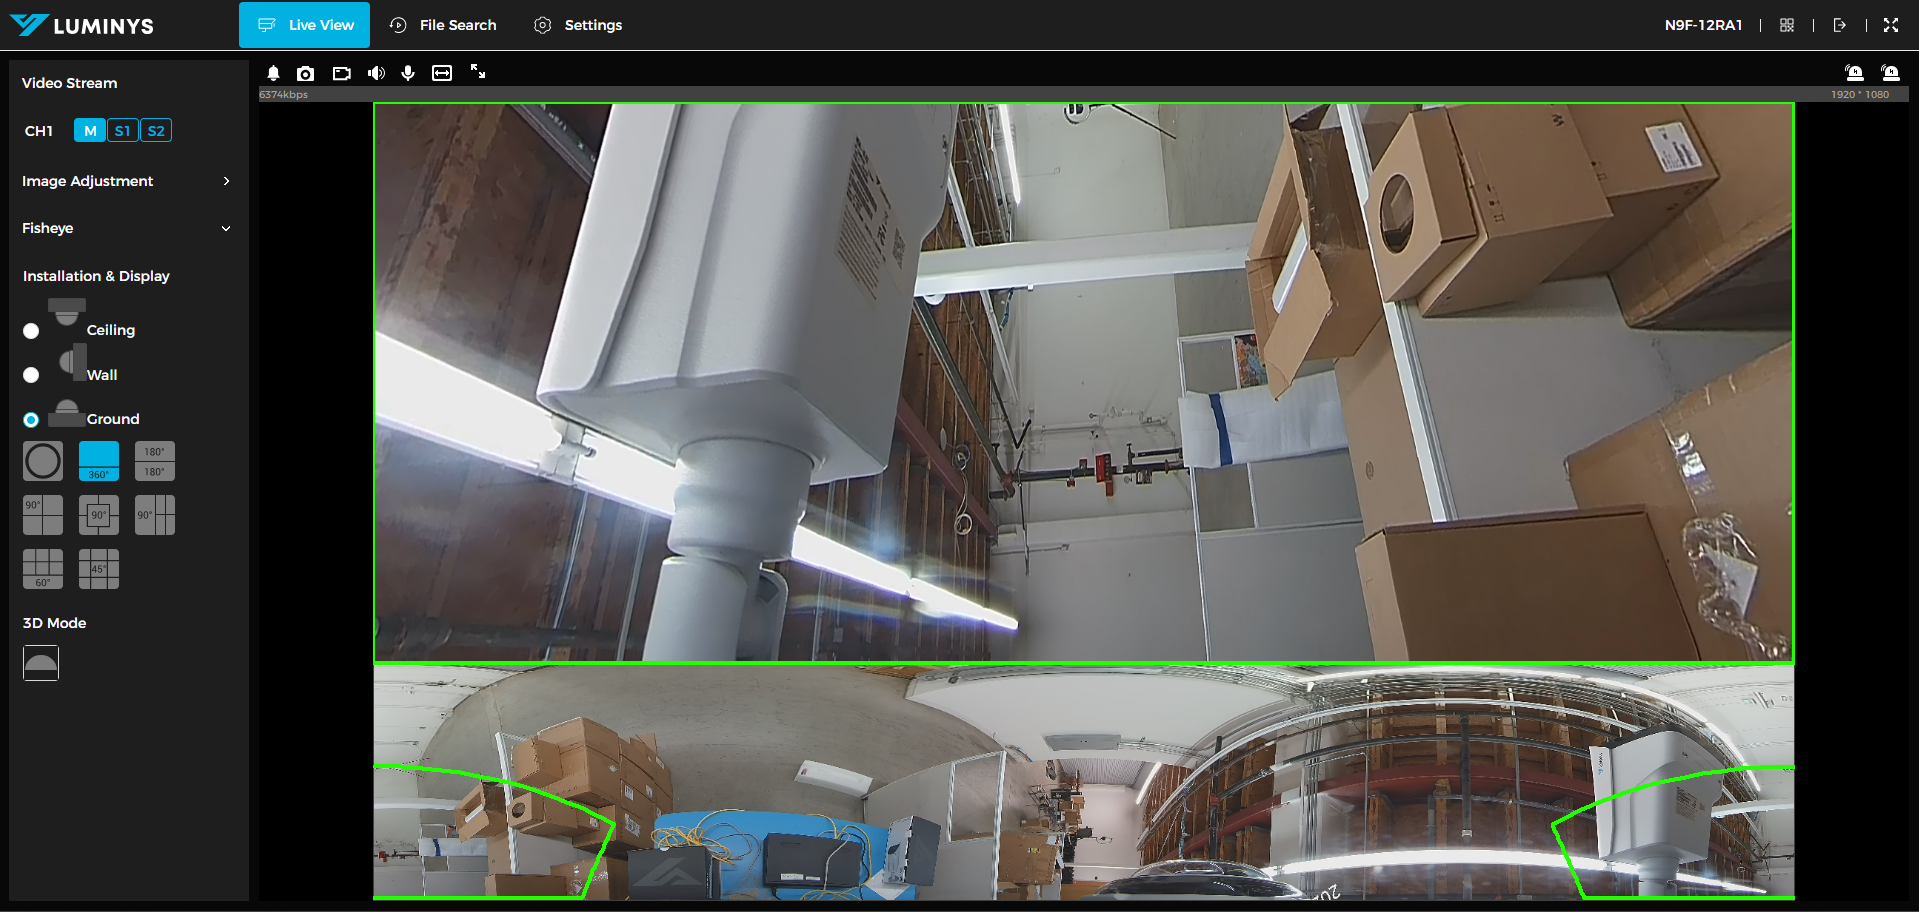
16. 2 180-degrees (sub-images).
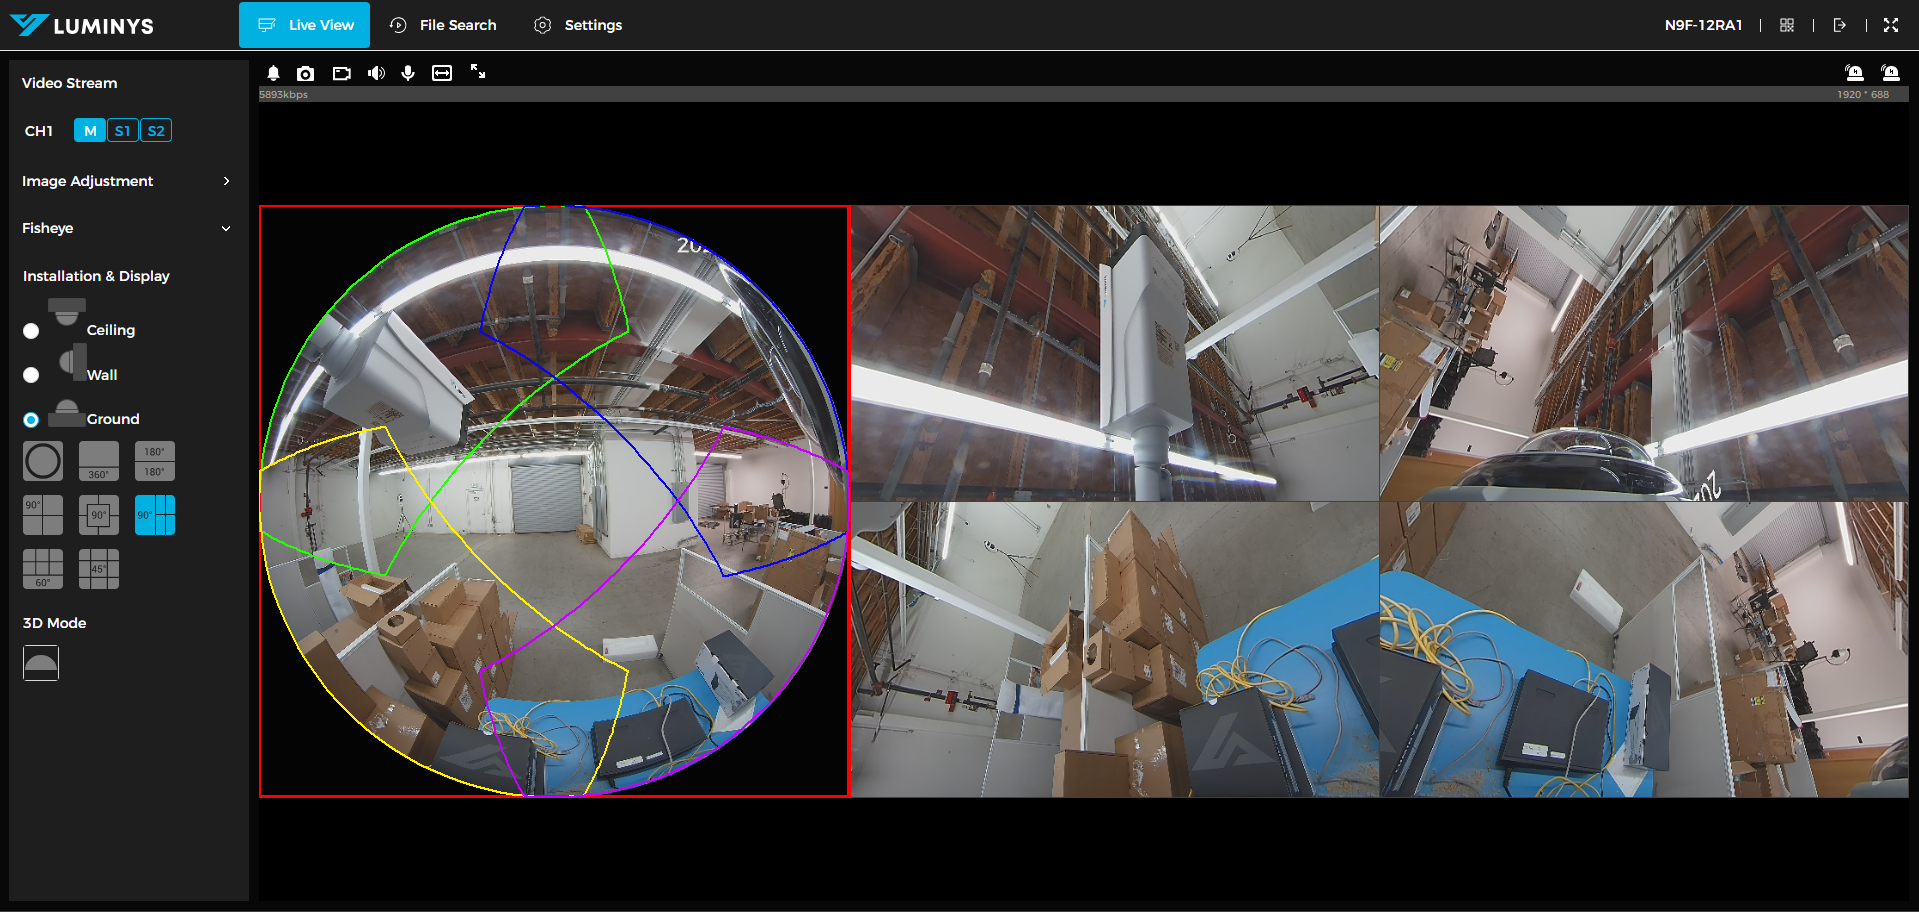
17. 90-degrees with 3 sub-images with original image on the top left corner.
18. 90-degrees with 4 sub-images with original image in the middle.

19. 90-degrees with 4 sub-images with original image on the left side.
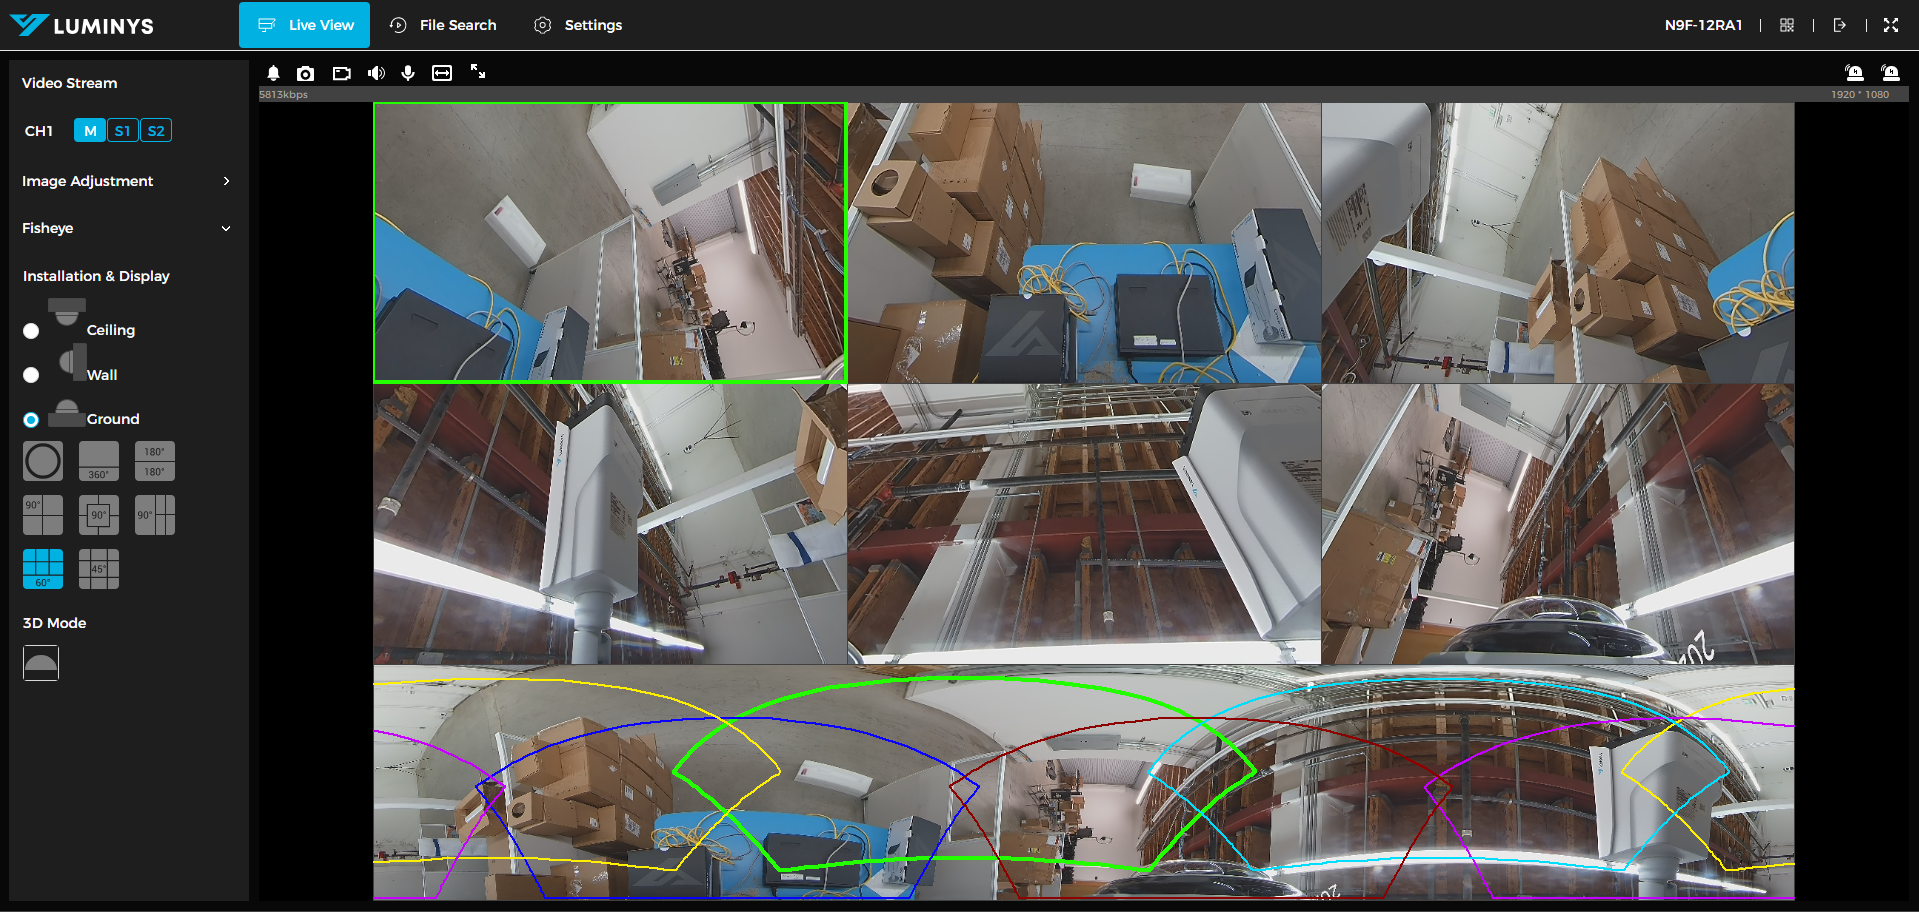
20. 60-degrees with 6 sub-images.
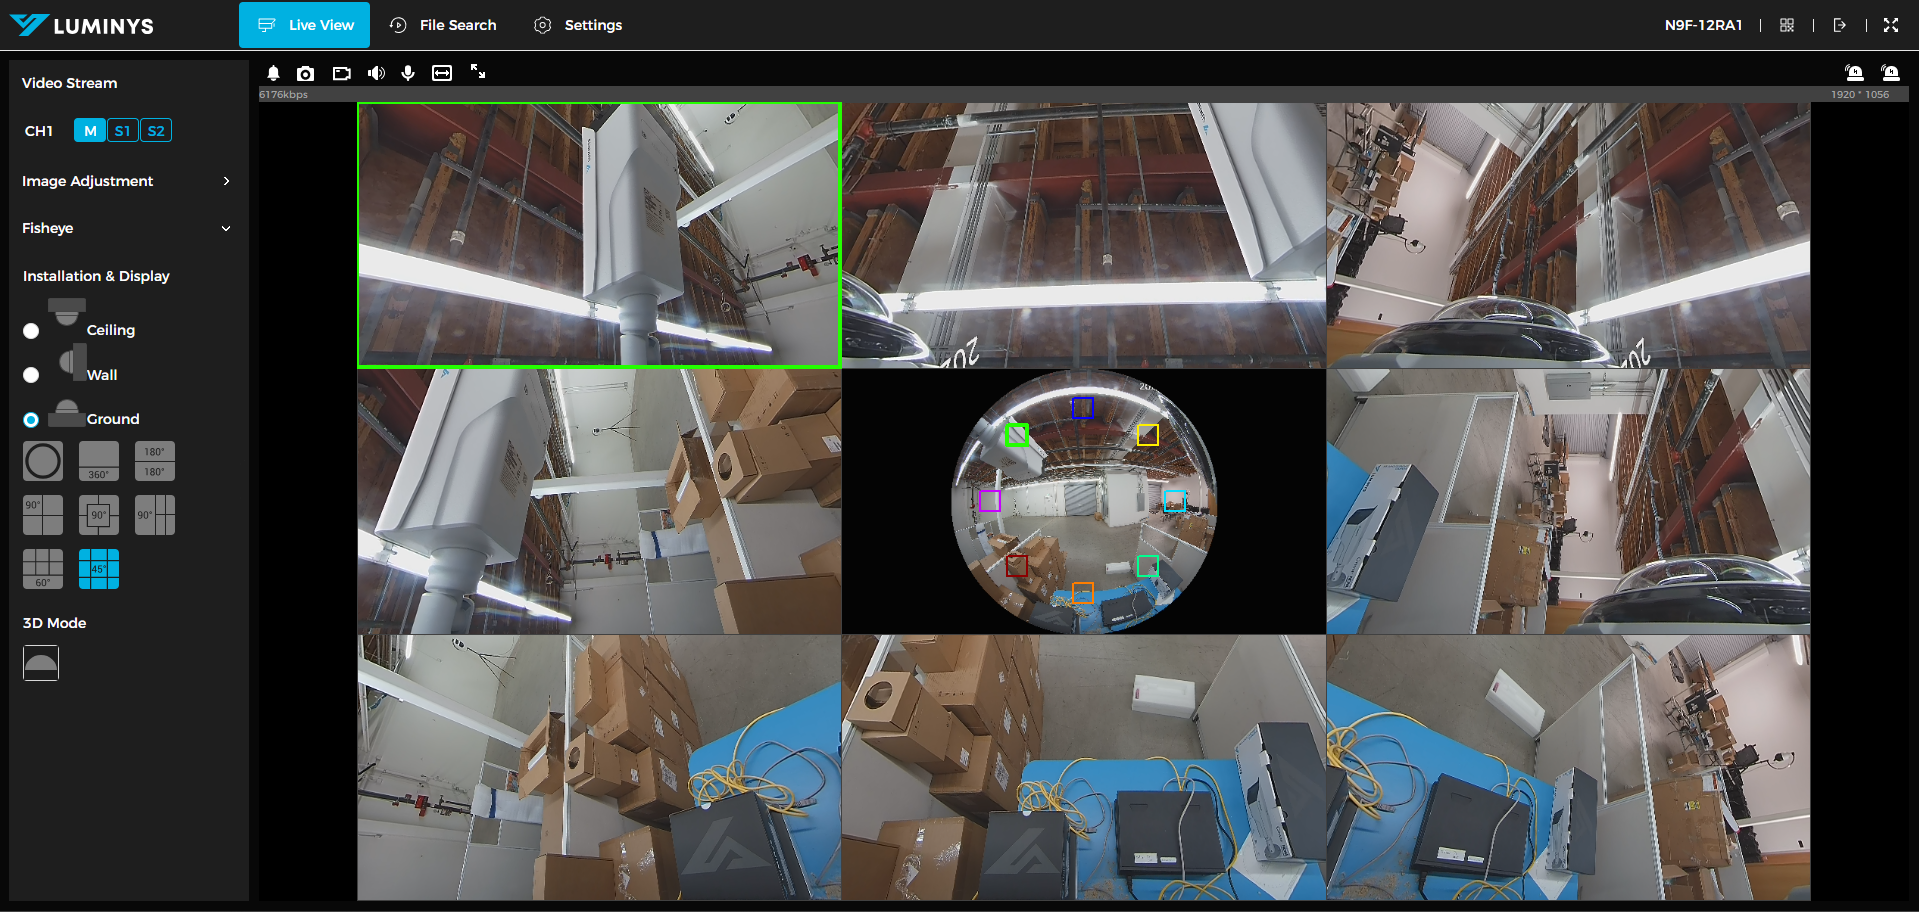
21. 45-degrees with 8 sub-images with original image in the middle.
22. 3D mode allows the user to stay in warp mode, and be able to move the image around.