Cameras/LPR Initial Setup

License Plate Recognition Camera Initial Setup
Description
This tutorial will go over how to configure License Plate capturing on the LPR camera.
Prerequisites
- Cameras already initialized.
Video Instructions
Step by Step Instructions
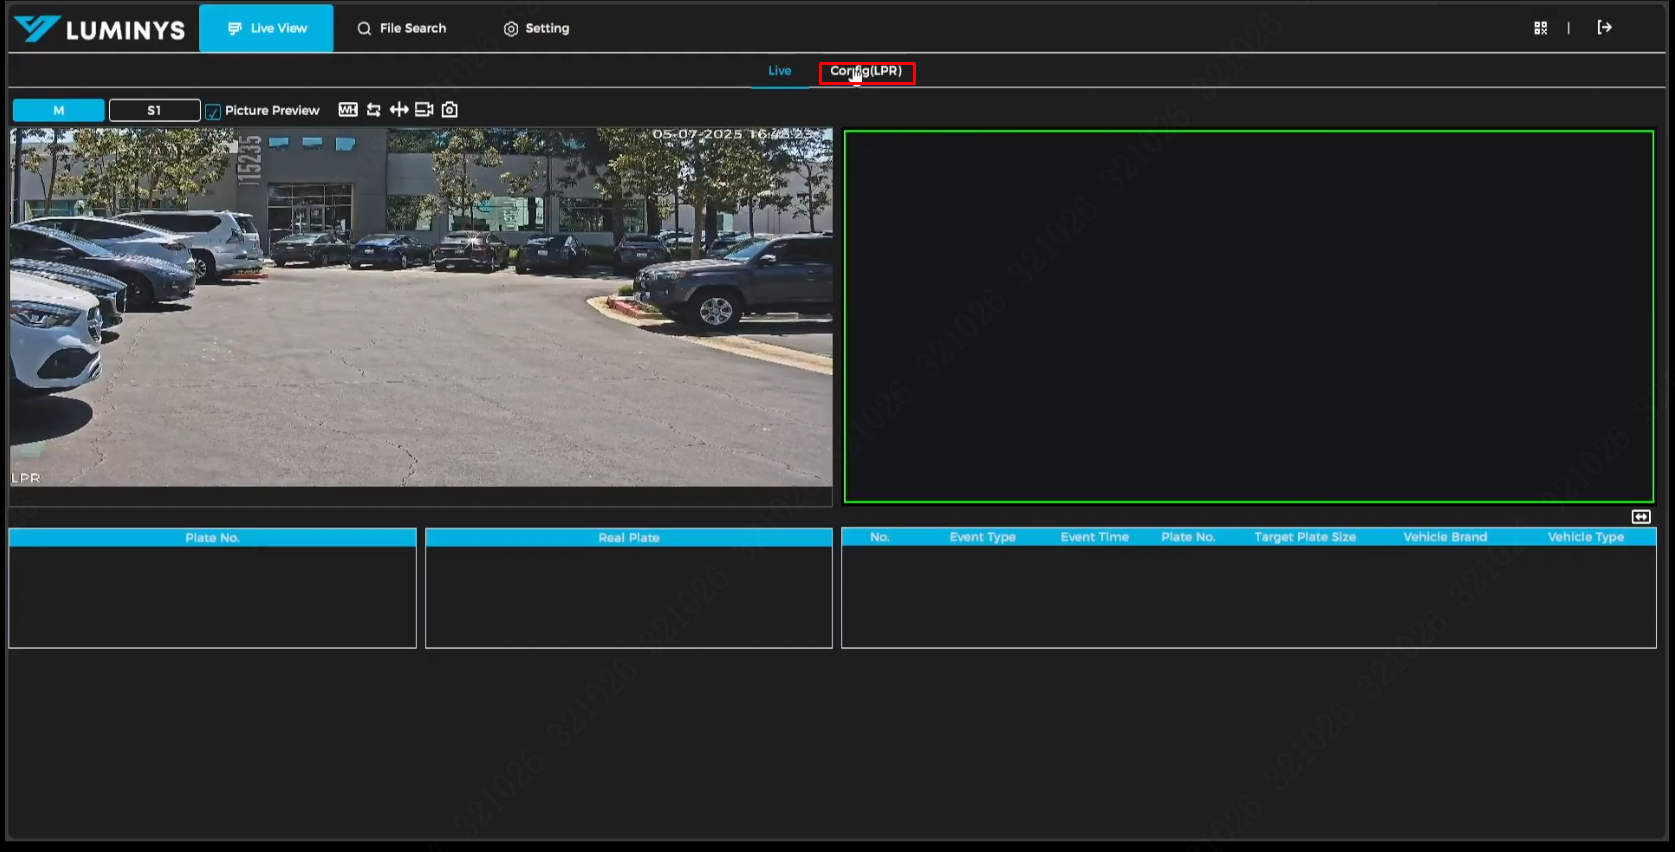
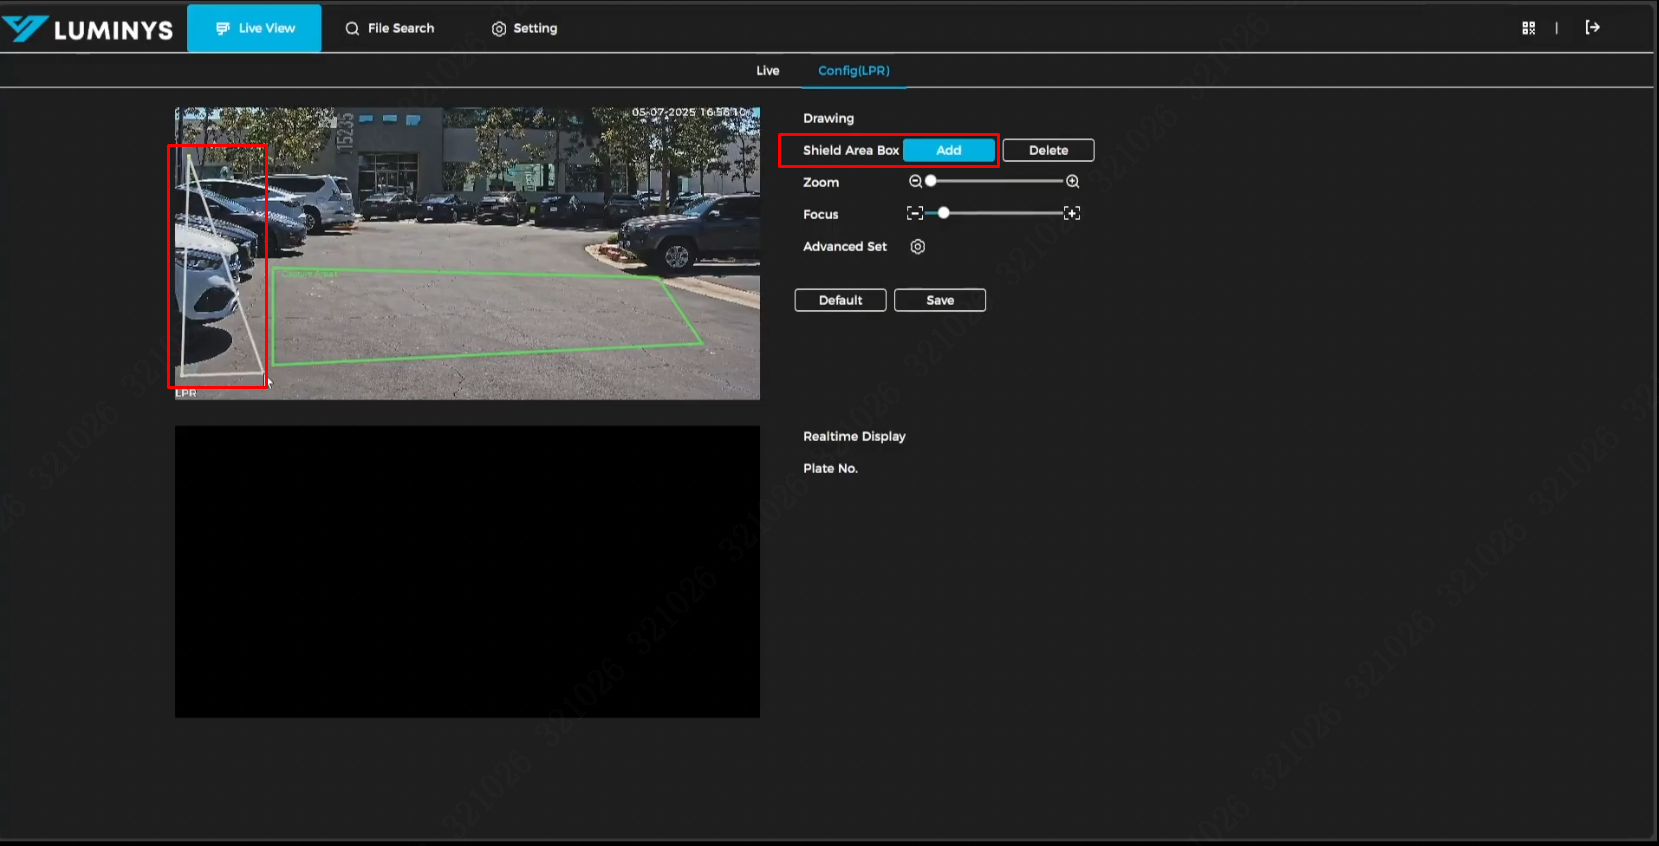
1. Begin by logging into the camera's WebUI. After accessing the interface, click 'Config (LPR)' at the top..
2. The first thing to do in this menu is to adjust the zoom setting; the focus should adjust automatically after you move the zoom slider. If it doesn't focus correctly, adjust the Focus slider manually..
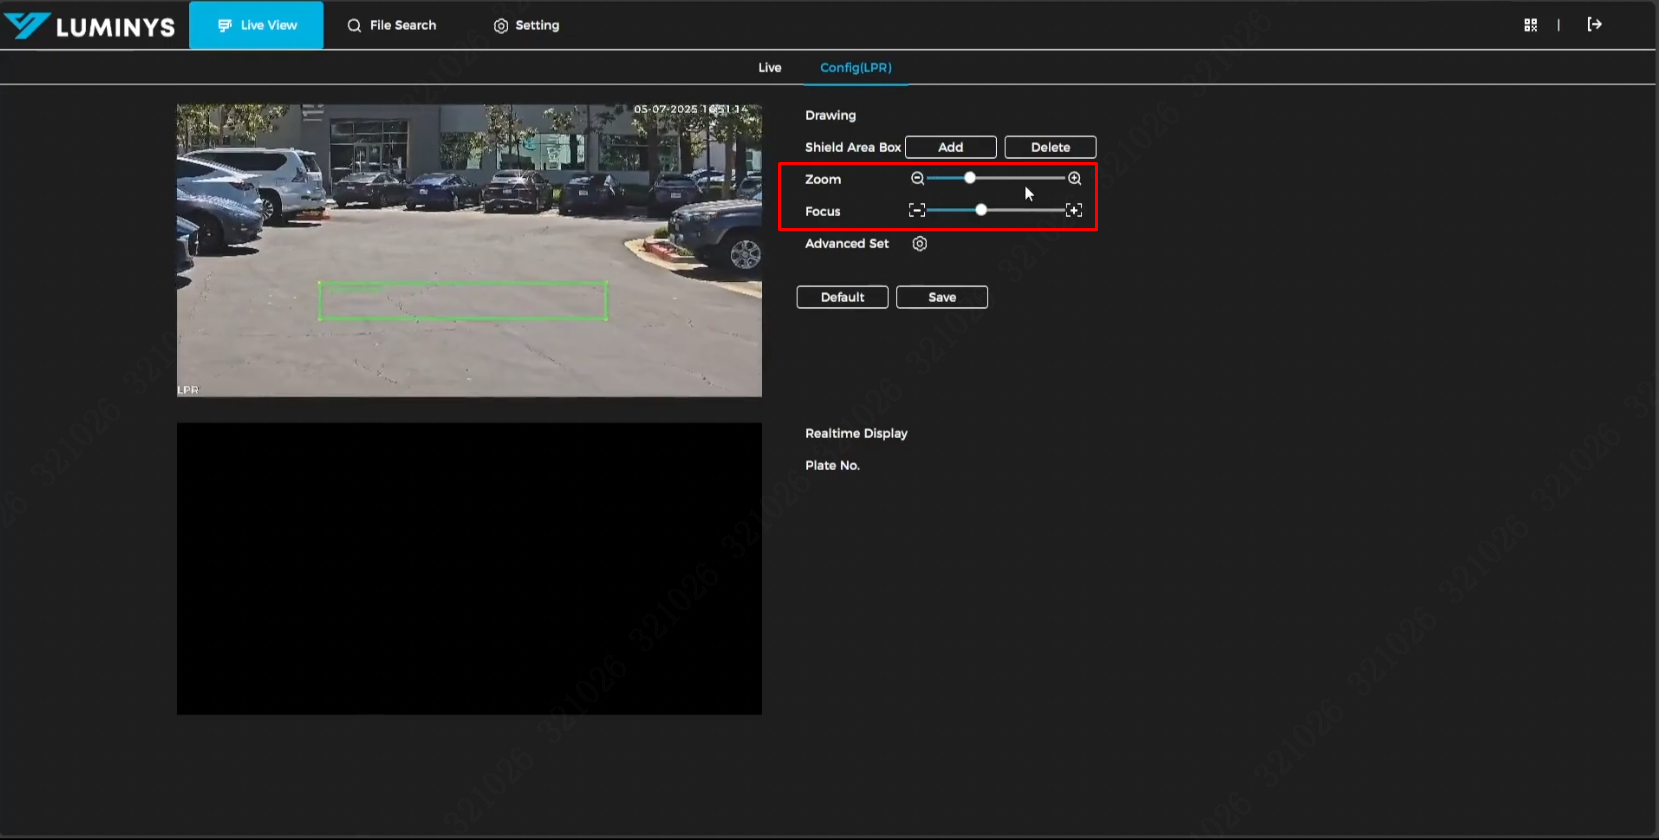
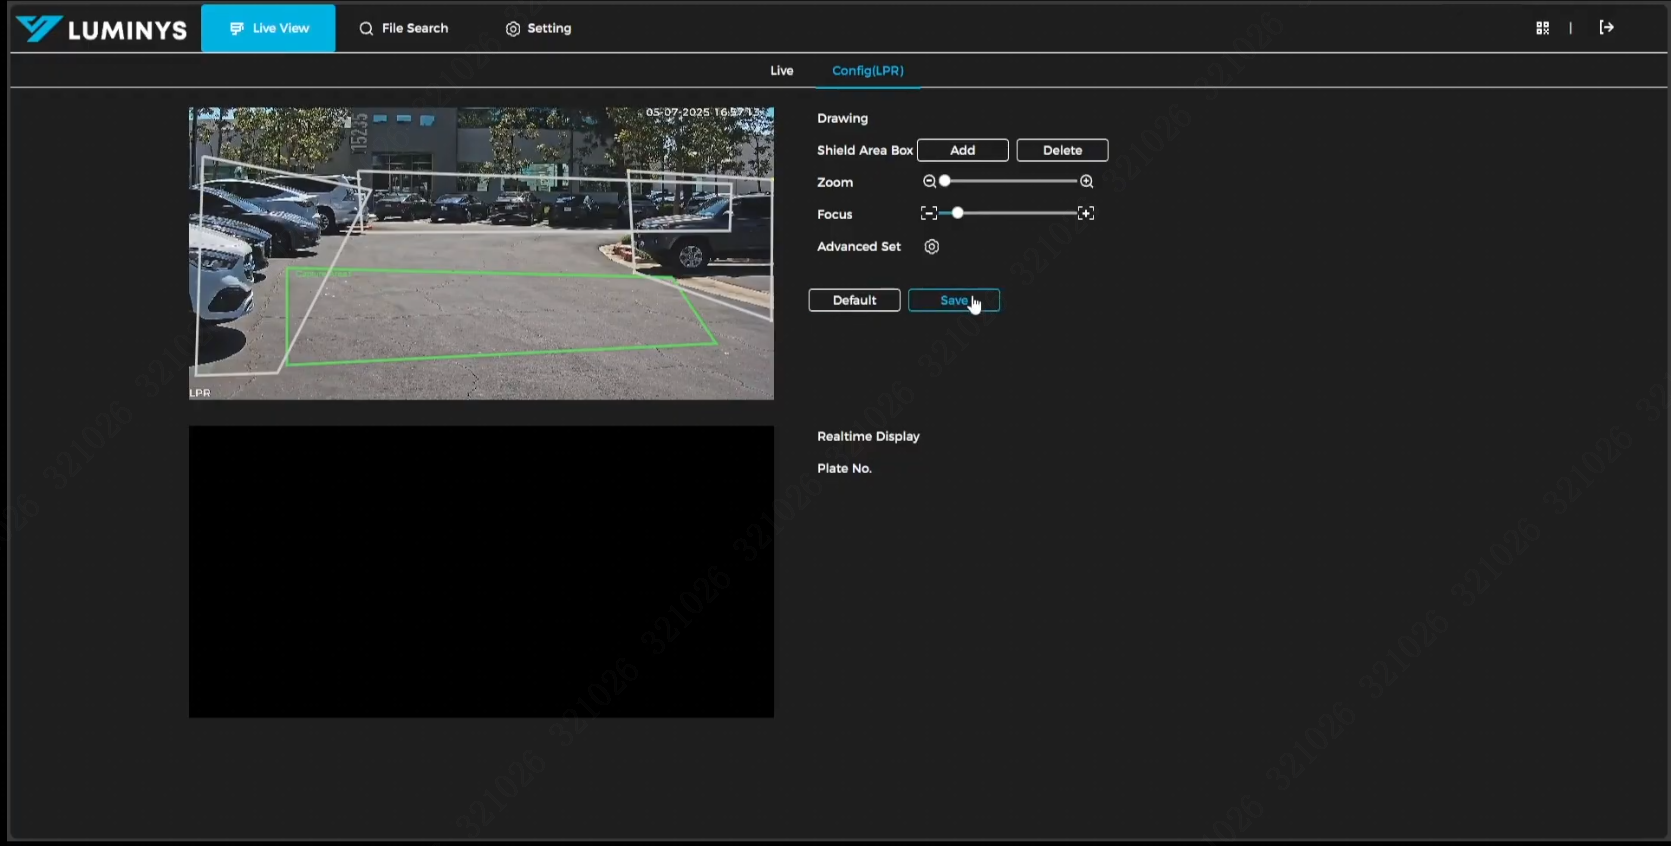
3. The next step is to adjust the capture area. By default, a green detection box appears in the middle of the screen. You can move this box by clicking and dragging it to the desired location, or resize it by dragging the four green dots at its corners.
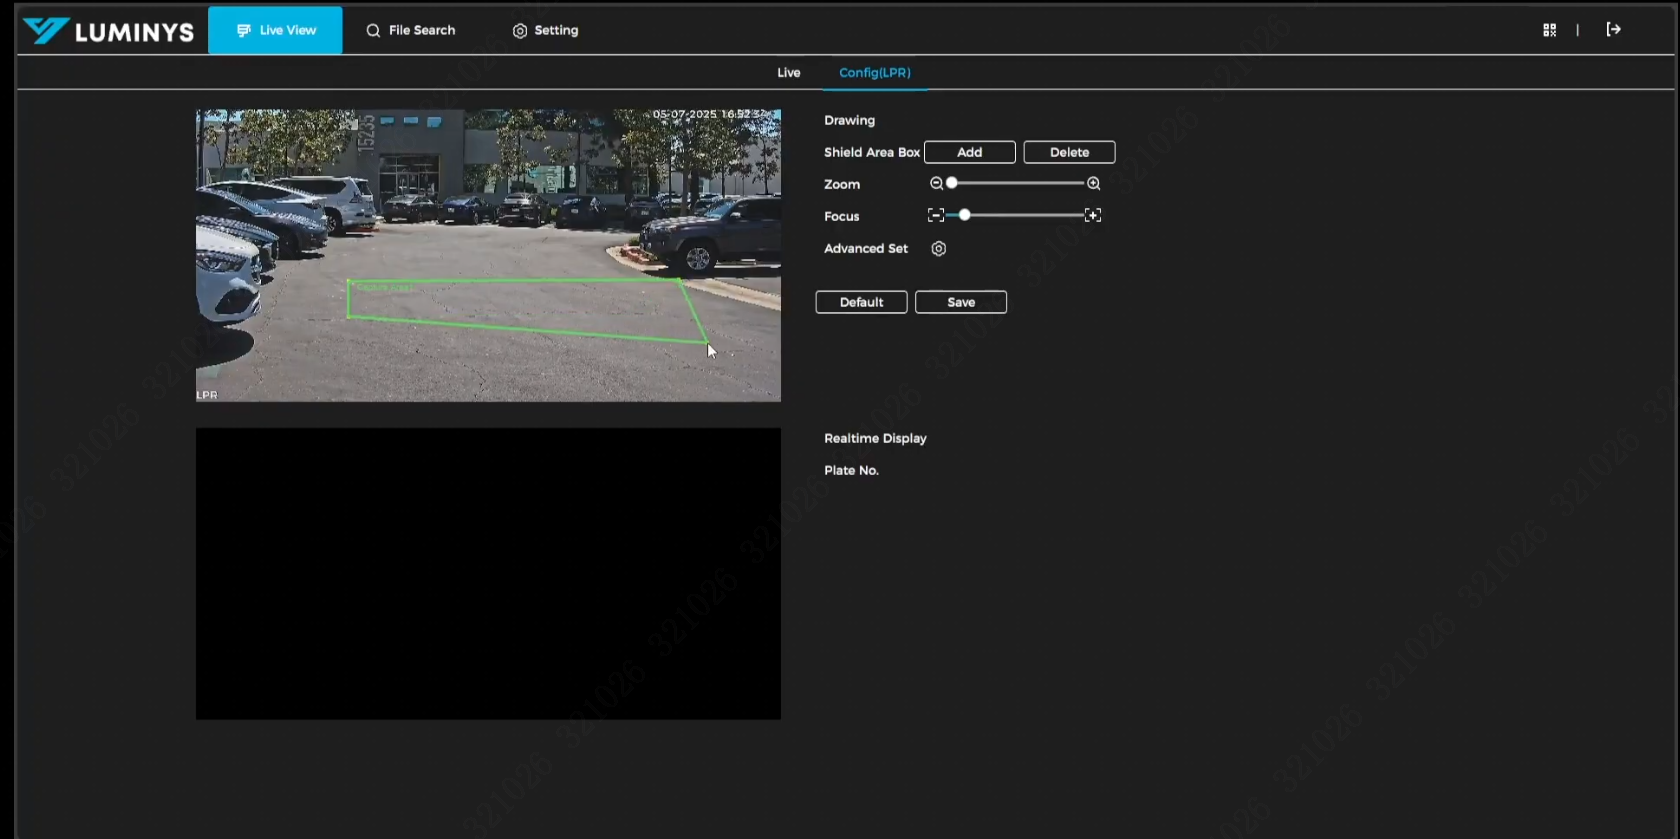
4. Additionally, you can define shield areas where license plates should not be detected. Click Add next to Shield Area on the right panel, then left-click on the live view image and drag to draw a shape that covers the unwanted region. You can create up to three shield areas.
5. Please click 'Save' after you have finished configuring the zoom setting, detection area, and shield area.
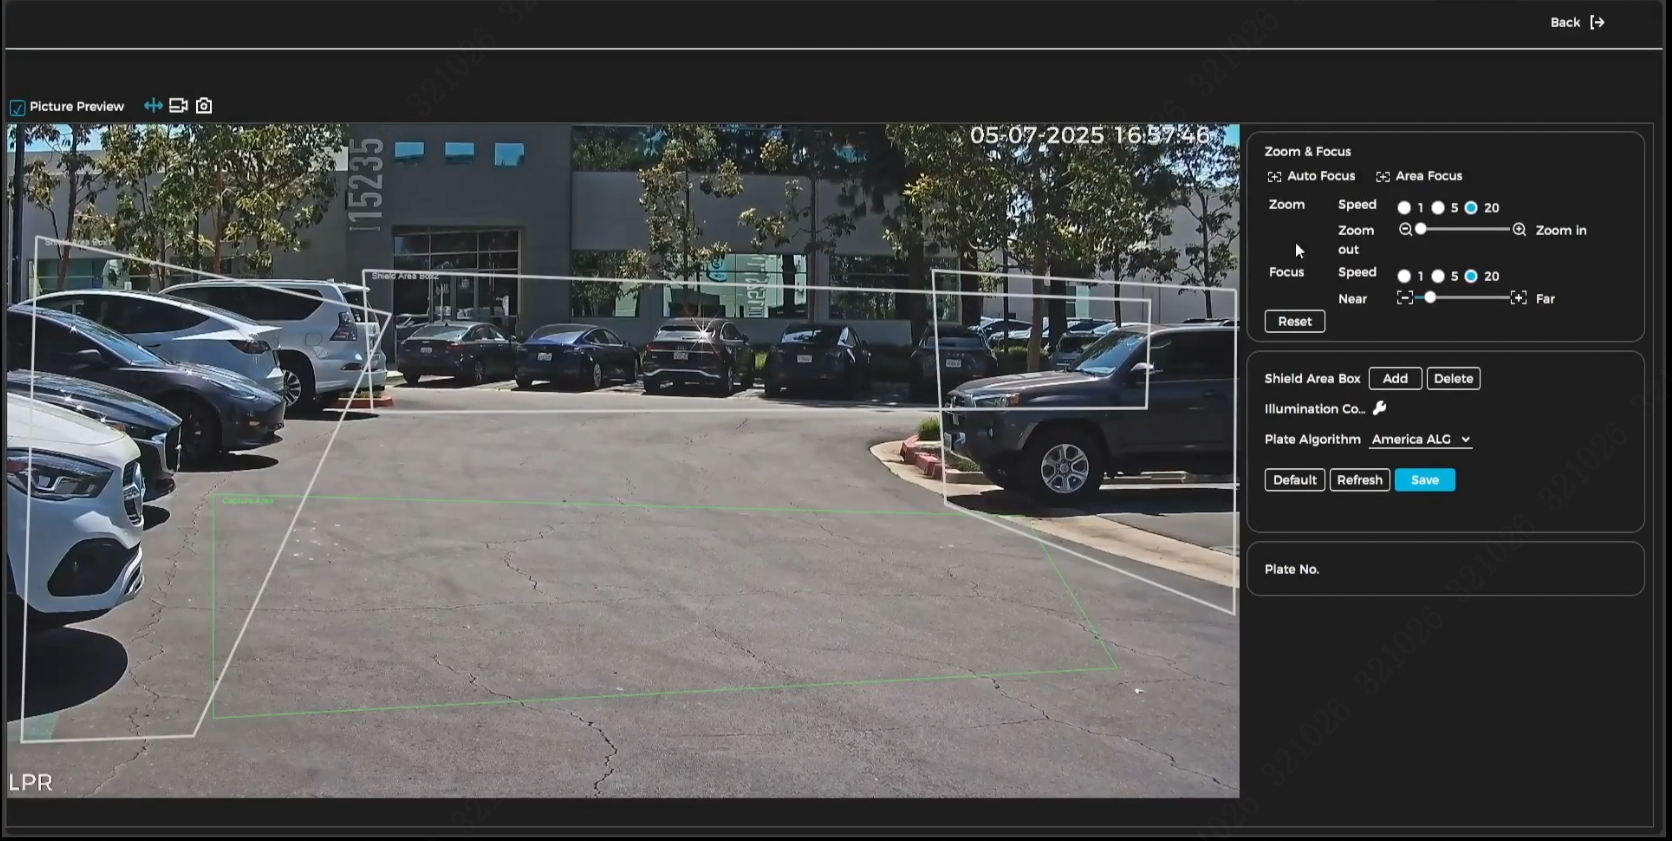
6. If you want to perform more advanced configuration, click the gear icon next to 'Advanced Set' and the options will appear as shown below.
7. To perform a live test, click the 'Live' button at the top..
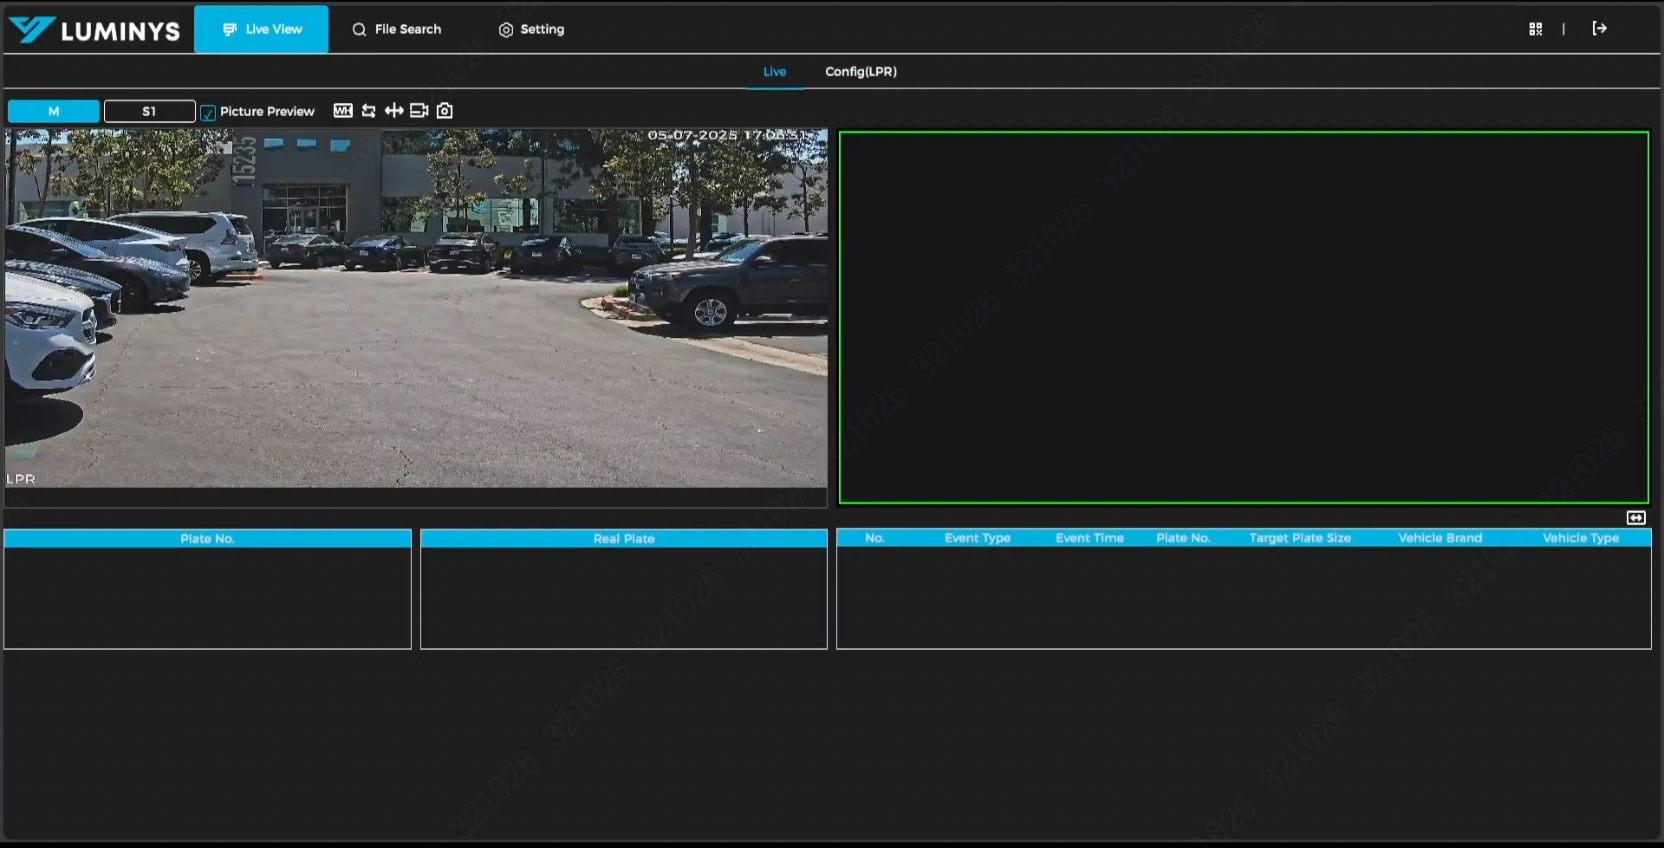
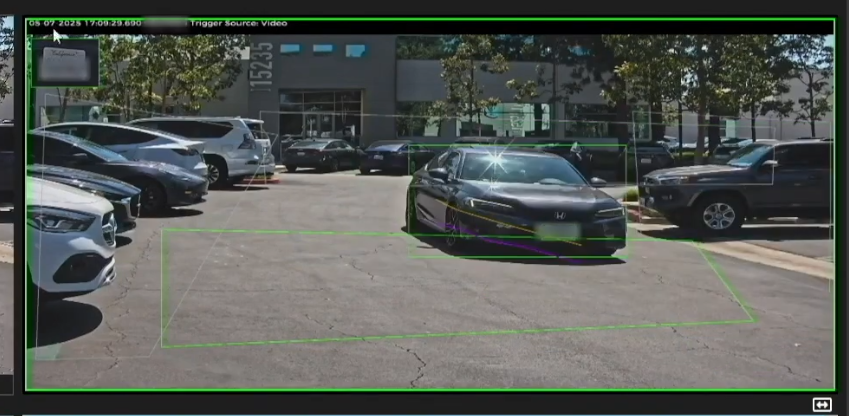
8. On the live test view, when a vehicle travels through the detection area, the system will capture the license plate information and display it as shown in the image below:
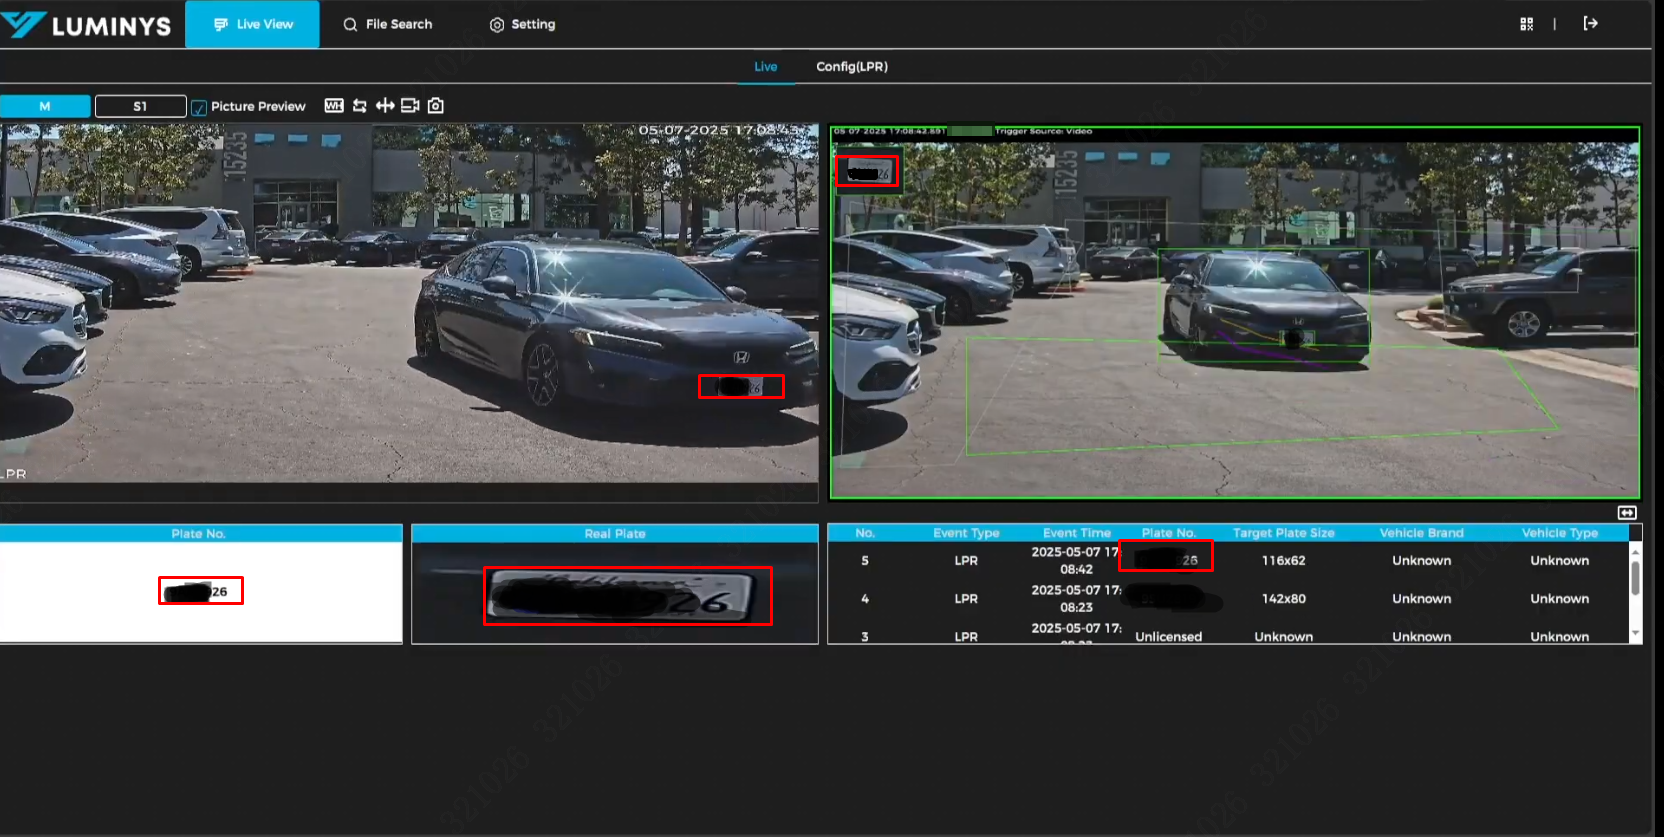
9. LumiTrajectory (with two colored lines) displays the movement paths of the license plate (yellow) and the vehicle (purple).