LumiCenter/How to Add User Comments
How to Add User Comments
Prerequisites
- LumiCenter server and client installed on a computer.
Video Guide
Steps
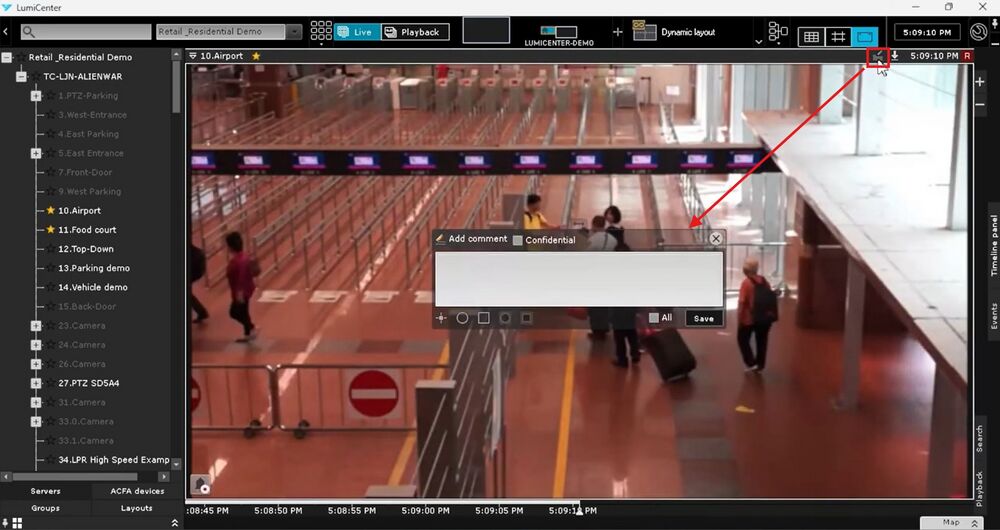
1. This document will help you to learn how to use and add comments to either live view or playback. To start off you will want to be in the layout view where you are viewing your cameras. In the top right of LumiCenter you will see the icon to add a comment.
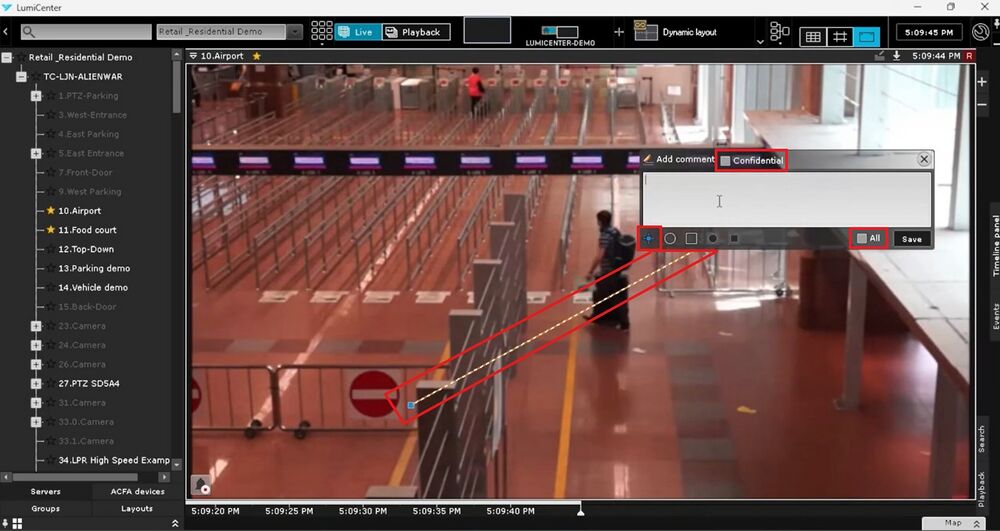
2. Once you have your comment box you can also click the pointer icon in the bottom left corner to point to a specific location to mark to help indicate what the comment is referring to. There is also a “confidential checkbox at the top of the comment box. If you check that, the comment will only be viewable by other users that have access to view confidential comments. If you put a check in the “All” checkbox, it will add the comment to every camera in the current view layout. You can then click save, to save the comment.
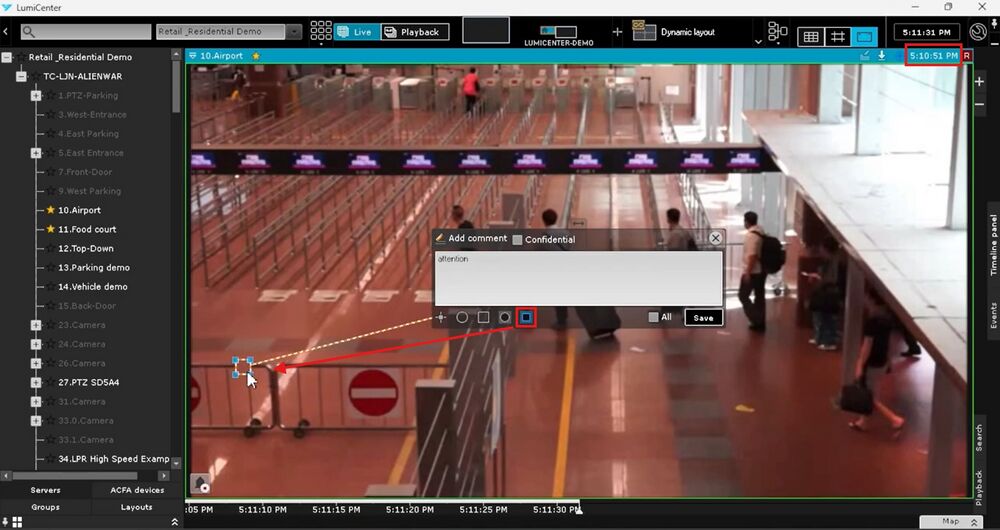
3. You can also add a privacy mask in the comment. To do this, the first thing you need to do is click on the time indicator in the top right of the camera view, this will pause the live view. Then from there create a comment box as normal. You will want to drag the 5th icon from the bottom left of the comment box to the location where you want the privacy mask and extend the privacy mask boundaries over the thing you want to mask. You can then add your comment and save.
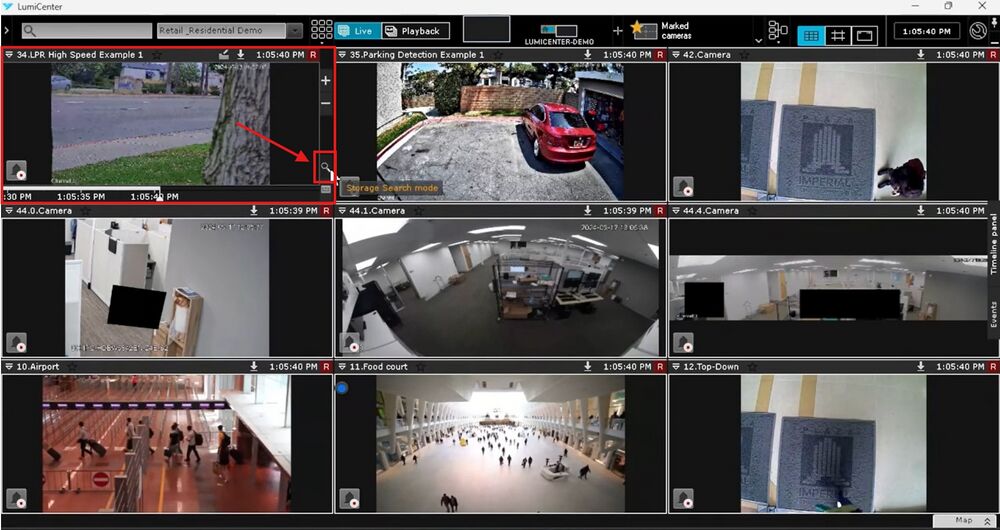
4. To search for comments, the first thing you want to do is click on the camera cell that you want to search on, then click the search icon to the right of the cell.
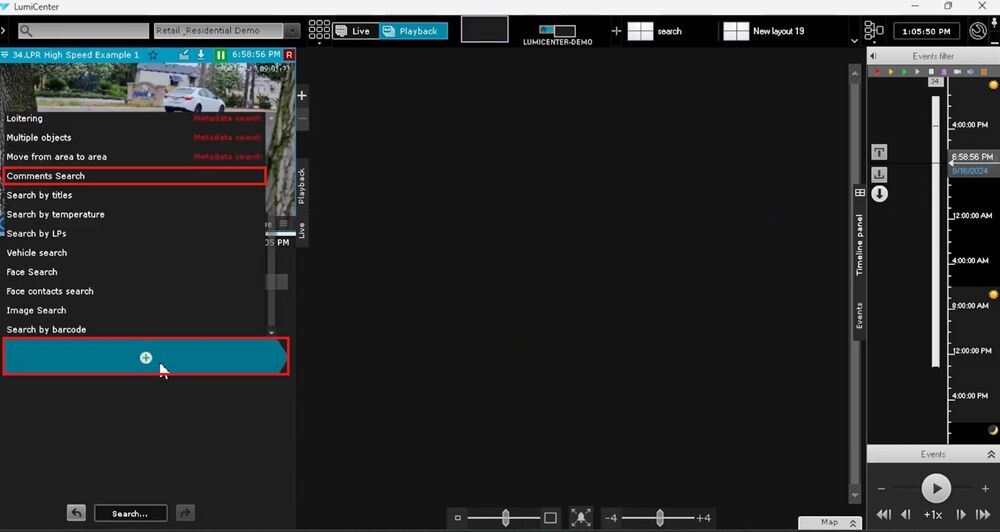
5. Once on the search page, you will want to click the (+) on the blue bar, which will give you your options of what you want to search for. In this case we will be choosing the comments search option.
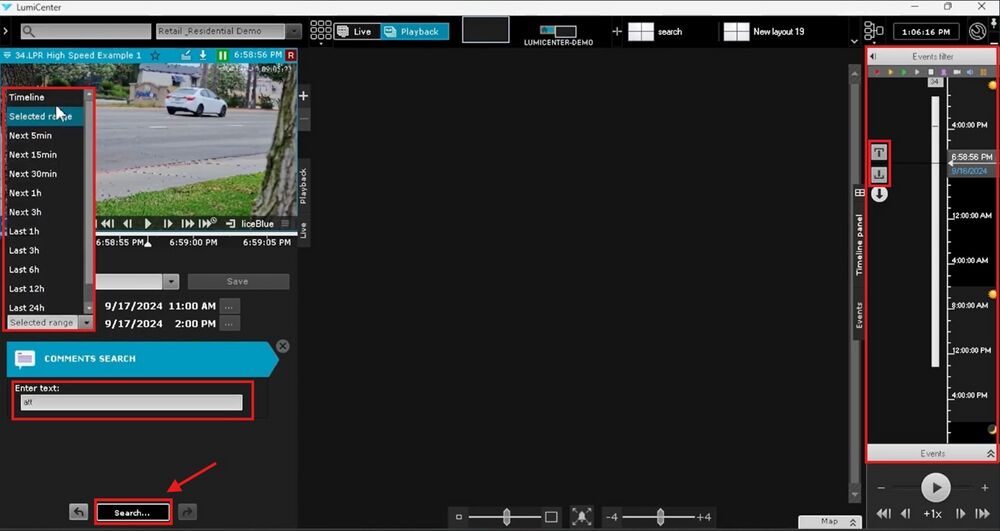
6. Next you will need to enter a minimum of 3 letters in the text field to perform the search. As well you can specify the timeframe that you are looking to search using the selected range drop down just above the blue bar. If you choose “Timeline” it will search the entire timeline, you can also specify the time frame search from the list of options, or if you choose “Selected Range” on the far right hand side, you will use the “T” shaped icons to drag the area that you want to search. The blue highlighted area will be the time that it performs the search. Click the search button at the bottom to perform the search.
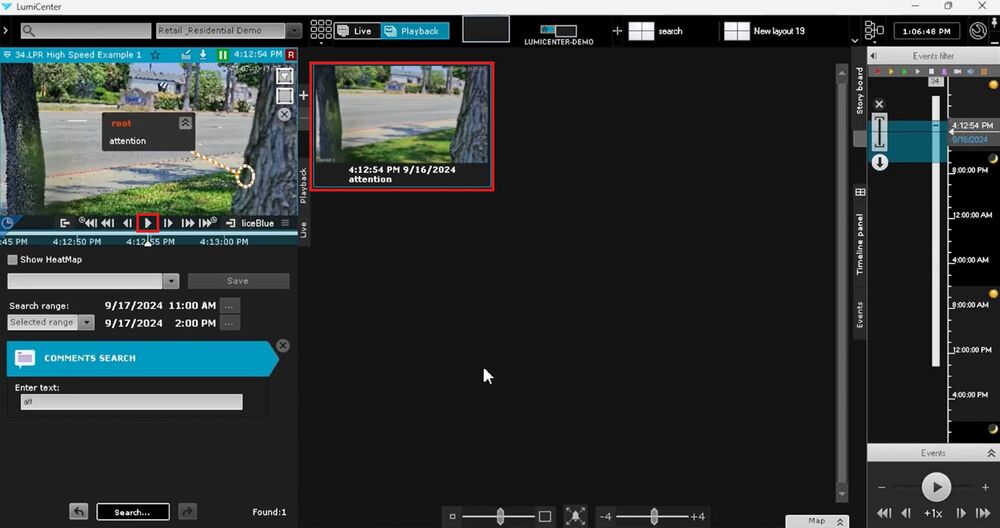
7. After performing the search, to the right of your search, you will see the recordings that match the time frame you searched as well as the matching text you input for the search. Click on the result you want to view and then click the play button to watch the footage from the time you selected. This concludes adding and playing back comments.

