LumiCenter/How to Configure Macros
How to Configure Macros
Description
This tutorial will go over how to configure macros.
Prerequisites
- Cameras already added to LumiCenter.
Video Instructions
Step by Step Instructions
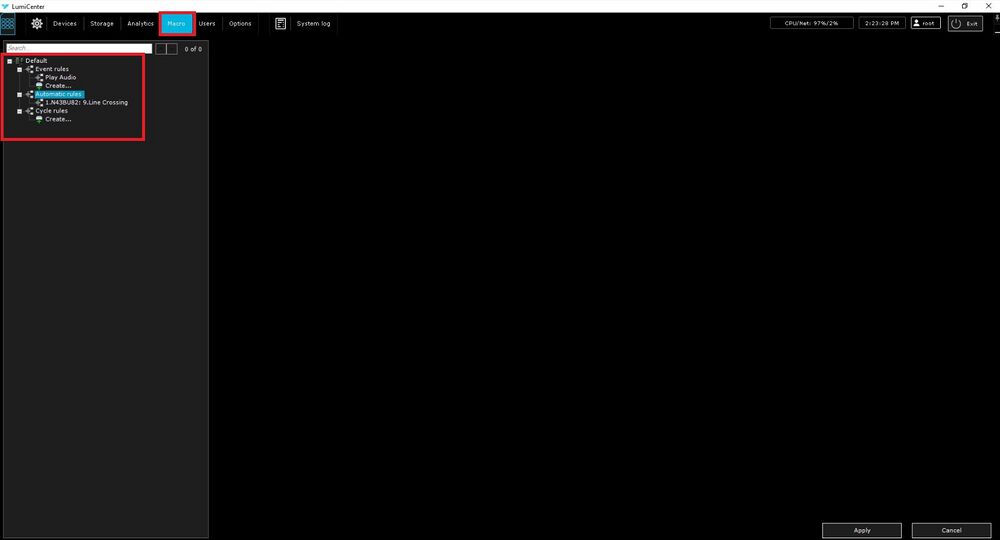
1. Macros can be set up in multiple ways. The first method is through the Macros menu in the settings area. Alternatively, while setting up analytics, a macro can be created to associate with an event. First, let's cover "Automatic Rules." If events have already been created and recording is set up for those events, an automatic rule will be generated under Macros, as shown in the picture.
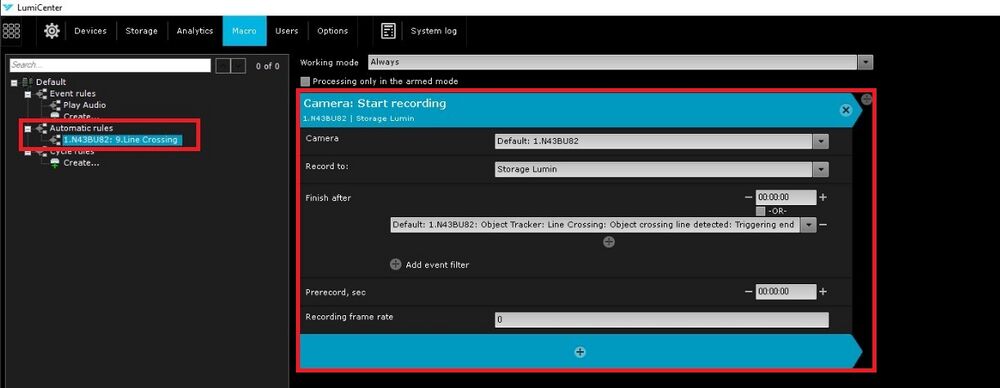
2. Selecting the automatic rule listed for the N43BU82 camera reveals the parameters created on the left. In this instance, the rule is configured to record events when the Line Crossing rule is triggered.
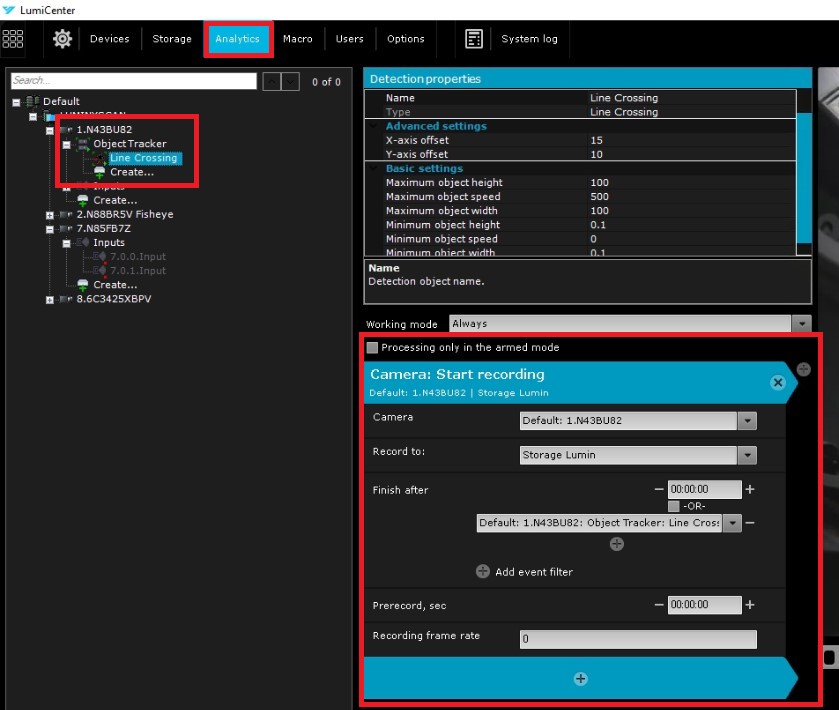
3. Navigate to the analytics page using the button at the top to review the Line Crossing rule created for recording. The information displayed here matches what is shown under automatic rules on the Macro page. It’s essential to note that creating an event in analytics and then setting up a Macro within that event will generate an automatic rule. This concludes the information on automatic rules.
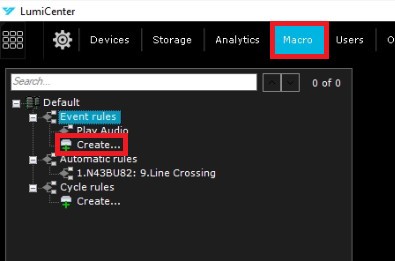
4. Next, let’s go over creating an event macro, starting from the Macro page in step 2. Begin by expanding the "Event Rules" section. To create a new Macro, select "Create." *Important Note*: If an existing rule is highlighted before clicking "Create," the new Macro will inherit the settings of that rule. To start a blank Macro, make sure to highlight "Event Rules," as shown in the picture below, before clicking "Create." This will open a new Macro with default settings for customization.
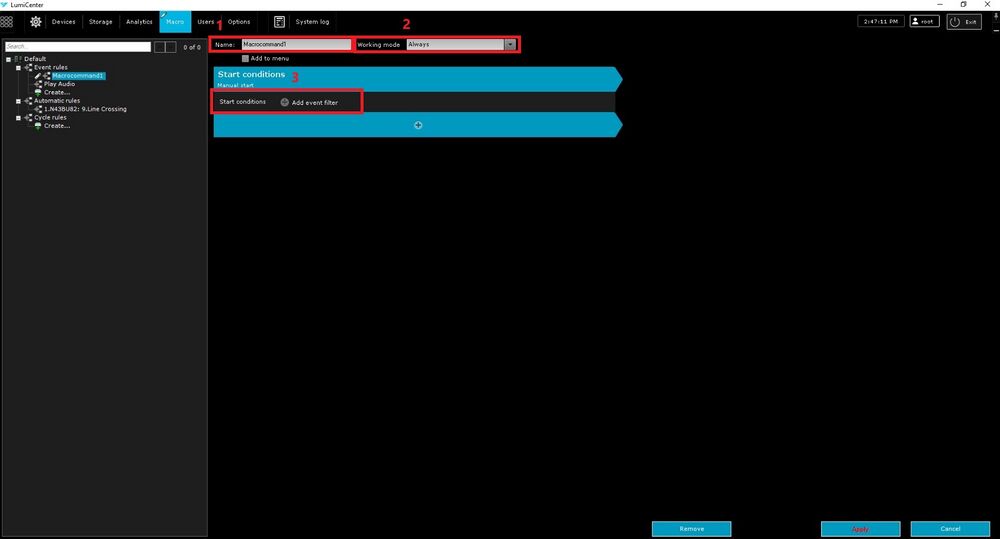
5. After clicking "Create," if any existing rule was previously selected, it may have copied the conditions from that rule into the new Macro. To clear these and start fresh, click the (X) next to each condition. Once the rule is ready, consider the following steps: (1) Name the Macro, (2) Set the "Working Mode" to define when the Macro should activate (for example, setting it to "Always"), and (3) Begin configuring conditions by first setting up the event filter.
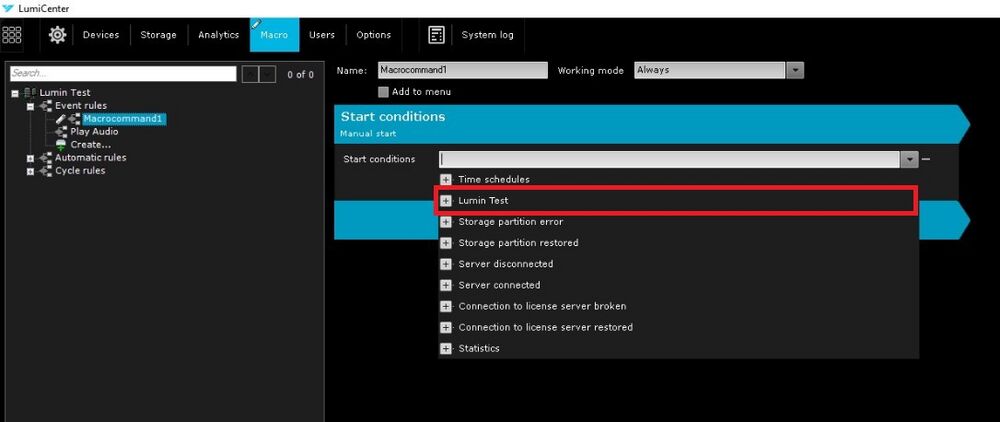
6. Clicking "Add Event Filter" will open a dropdown menu with an extensive list of options that can trigger the Macro. Select "Lumin Test," which corresponds to the domain name being used.
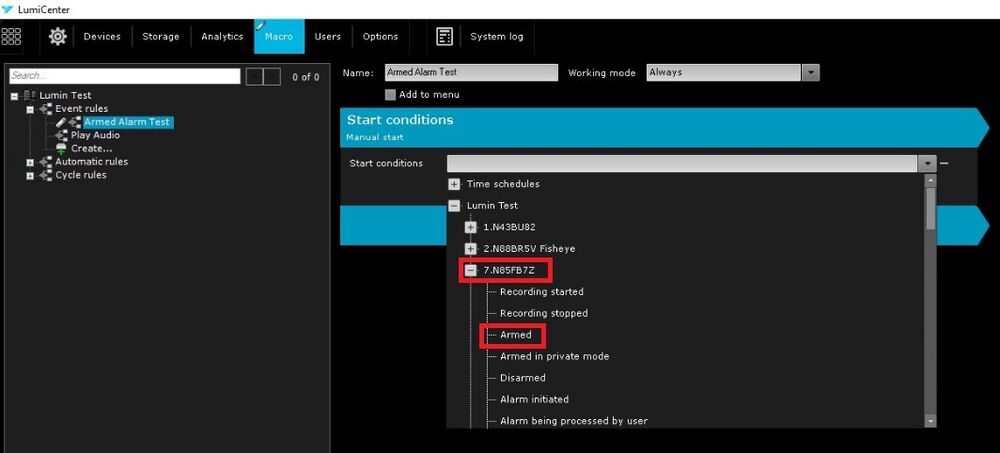
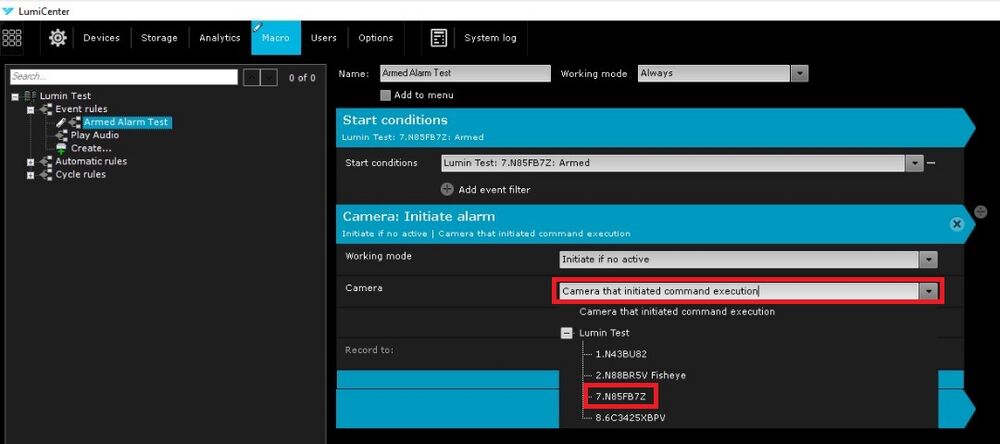
7. After expanding the "Lumin Test" option, a list of cameras and other options will appear. For this example, select the "N85FB7Z" camera and then choose the "armed" option.
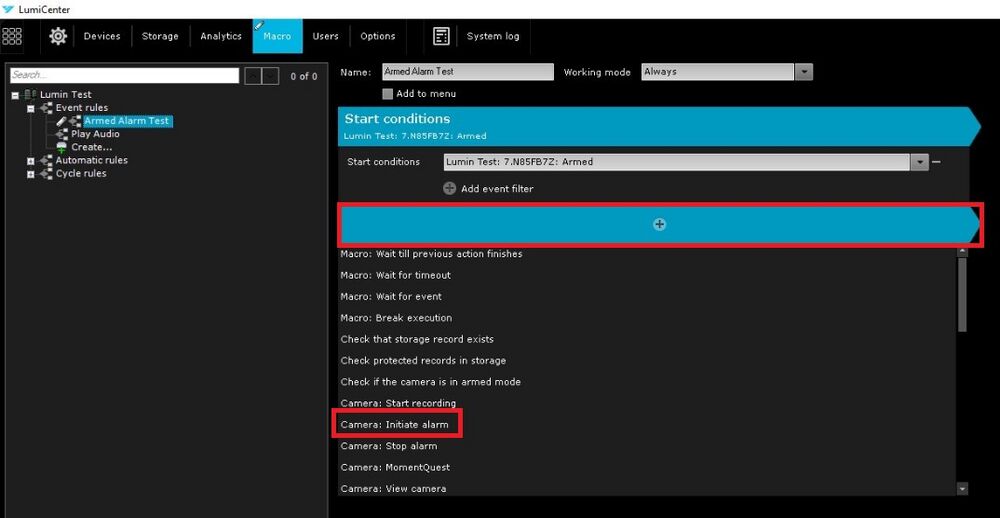
8. After selecting the camera and the "Armed" filter, the next step is to define the action triggered by the filter. Click the large blue bar with the "+" icon to open a list of options. From this list, select "Camera: Initiate Alarm."
9. After selecting the action, additional settings will appear. The "Working Mode" specifies that the alarm will initiate only if no alarm is currently active, but an option is available to trigger the alarm even if one is already occurring. Next, choose the camera for the alarm initiation. By default, it uses the event-triggering camera, but a specific camera can also be selected from the dropdown menu, as shown in the example. Once all options are set, click "Apply" in the bottom right of LumiCenter to save the Macro.
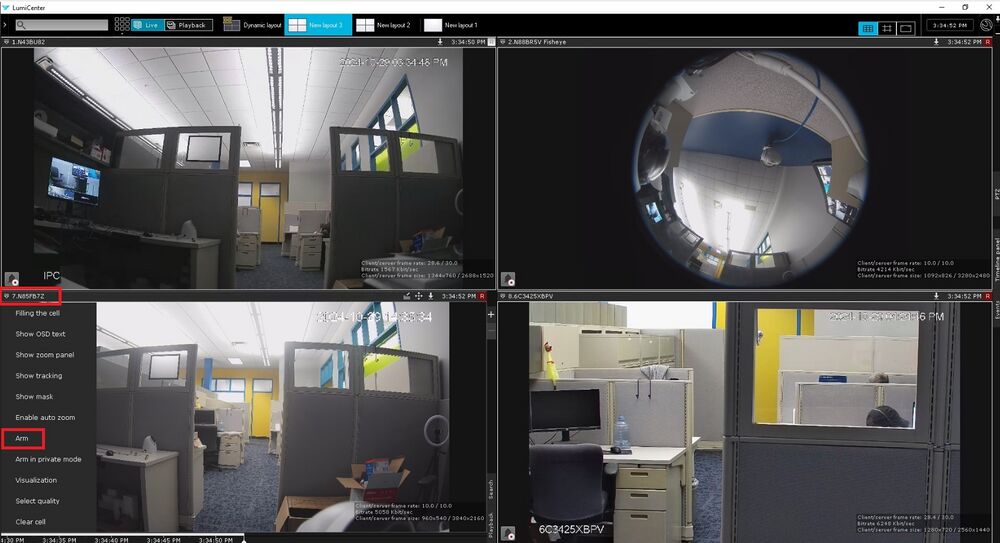
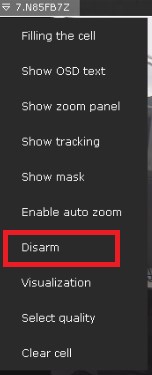
10. To test the Macro, go to the live view window. In the live view for the specific camera configured with the Macro, click the context menu located just above the live view. This will open a dropdown menu with various options. Select the "Arm" function manually to verify that it triggers the camera alarm as expected.
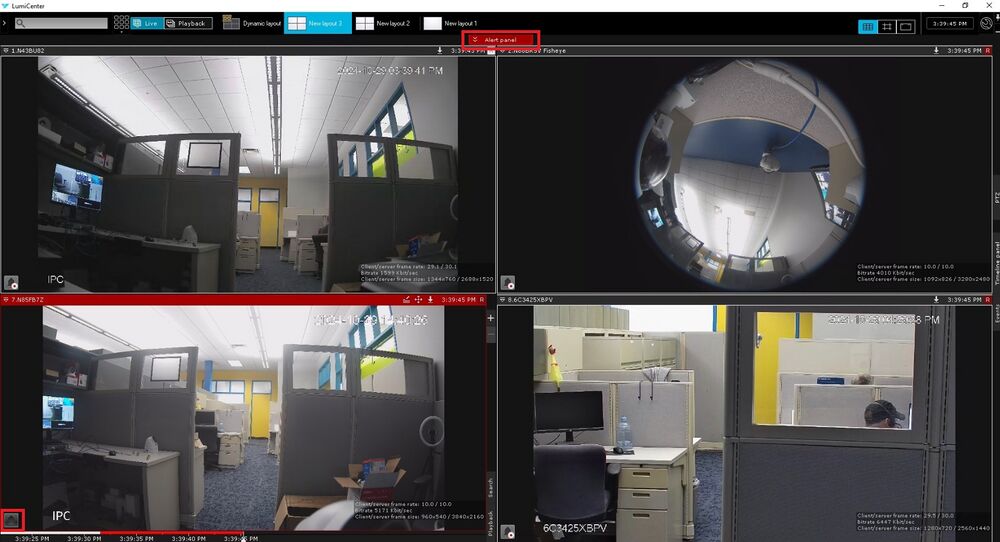
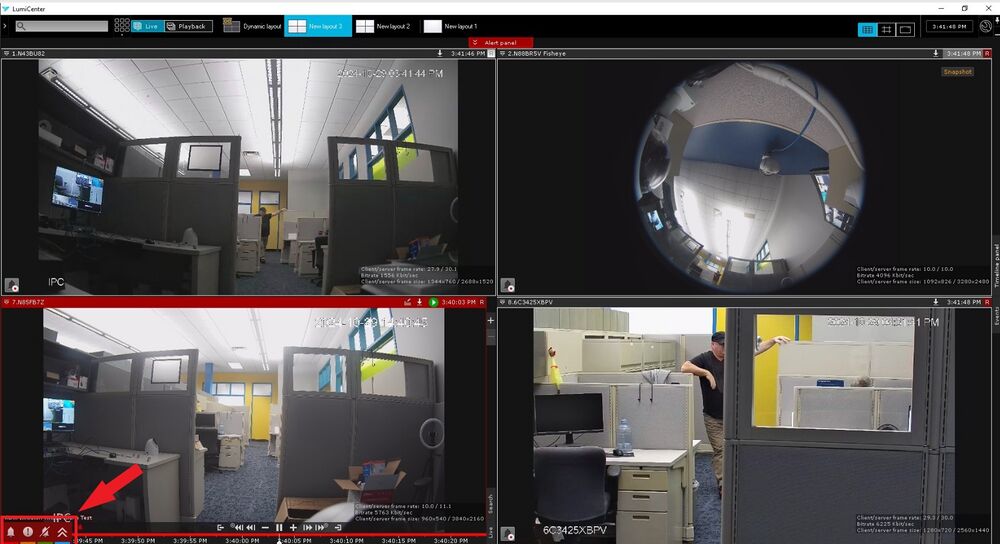
11. After selecting the "Arm" option, a red bar will appear around the camera window, indicating that an alarm has been triggered. Additionally, clicking the alert panel at the top will allow you to view and playback the event. To stop the alarm, look for a flashing bell icon in the bottom left of the camera window; it may appear gray in screenshots, but it signifies the alarm status.
12. After clicking the bell icon, options will appear to categorize the type of event. For this test event, select the third icon from the left, labeled "False Alarm," to clear the event. Additionally, return to the context dropdown to disarm the camera, as it will not automatically disarm after being manually armed. This concludes the information on Event Rules.
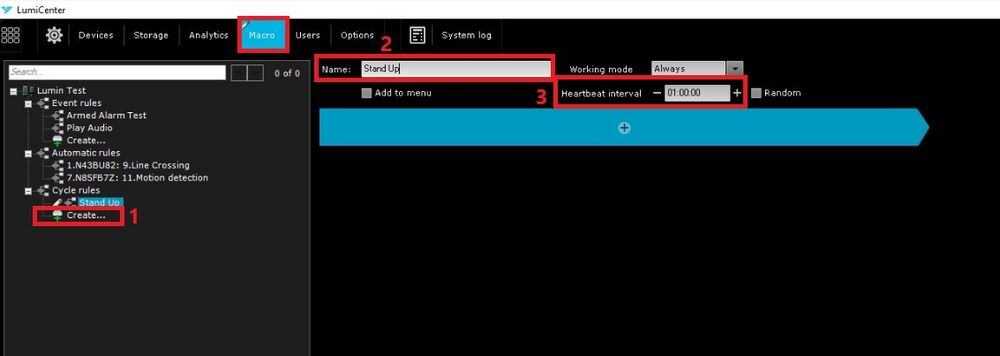
13. Next, we will focus on cycle rules, which are designed to occur at specific intervals. In this scenario, the setup will send a notification every hour reminding the person monitoring to “Stand up.” Begin at the Macros page, as done previously.
First, click (1) "Create" to initiate the Macro, (2) name the Macro, and (3) configure the time interval for the Macro's occurrence, set to 1 hour in this case. If the random checkbox is selected, the notification will be sent at a random time within that 1-hour interval.
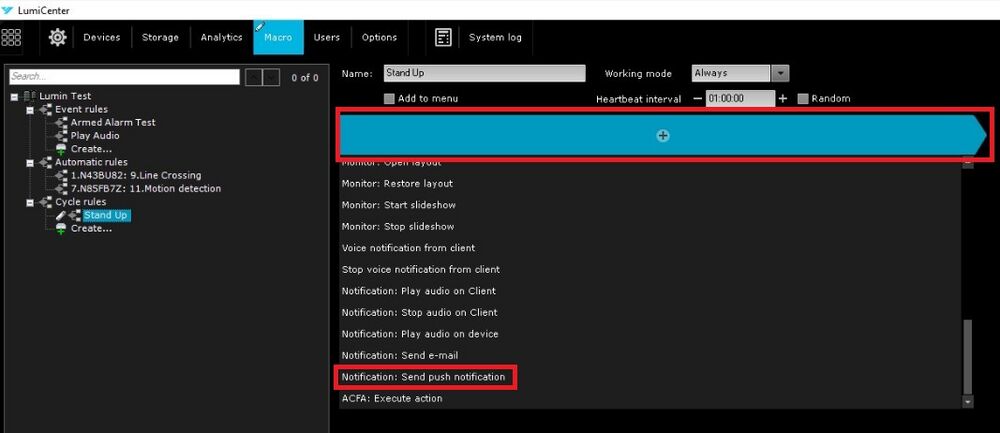
14. Next, click the blue bar with the "+" icon to select the type of event that will occur every hour. In this instance, choose “Notification: Send push notification.”
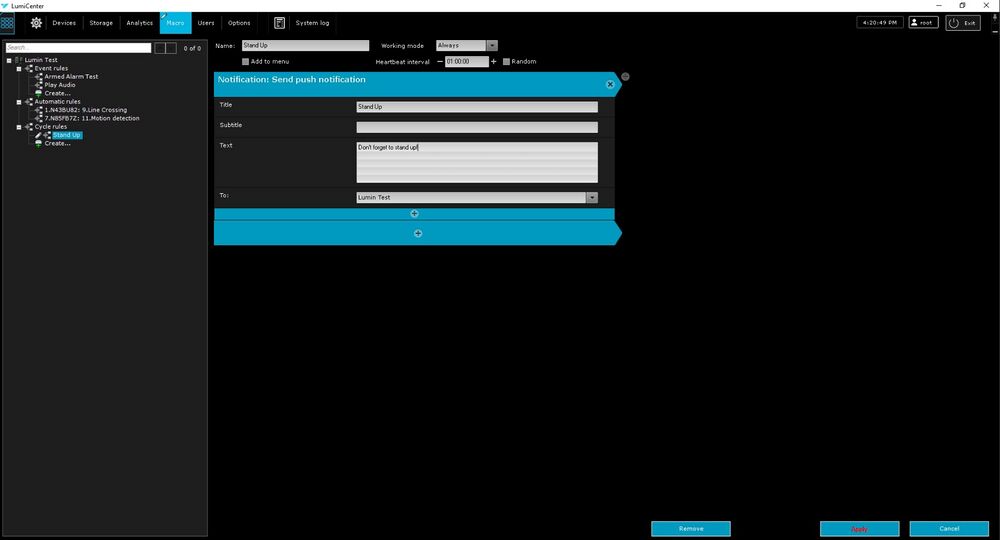
15. After selecting the push notification option, you can specify the content and recipients of the notification. The "Title" field is for naming the push notification, while the "Text" field contains the message to be sent. In the "To:" section, you can select specific users or choose the entire domain to ensure that everyone receives the notification.
16. This concludes the overview of the various Macro types.

