LumiCenter/How to Create Time Schedules
From Luminys WIKI
How to Create Time Schedules
Prerequisites
- LumiCenter server and client installed on a computer.
Video Guide
Steps
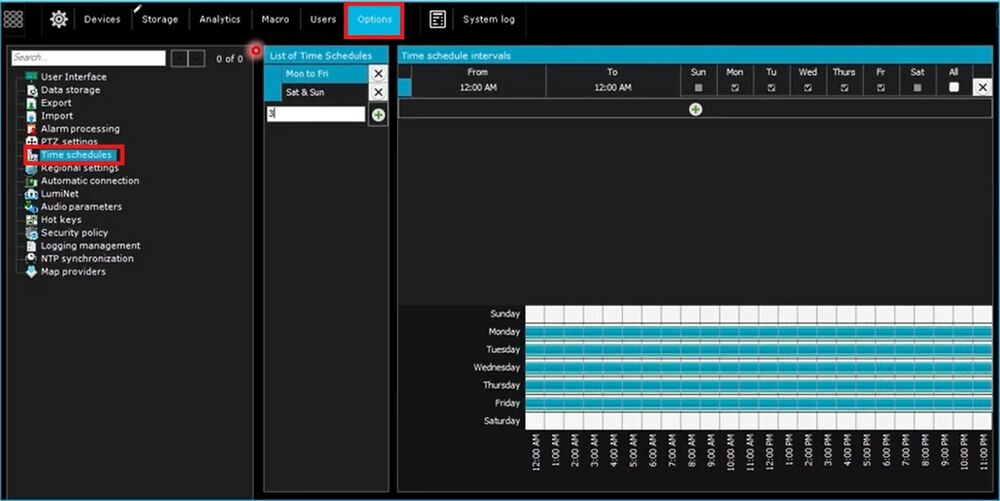
1. The first thing you will want to do is navigate to the options menu within LumiCenter, then on the left you want to choose “Time Schedules”
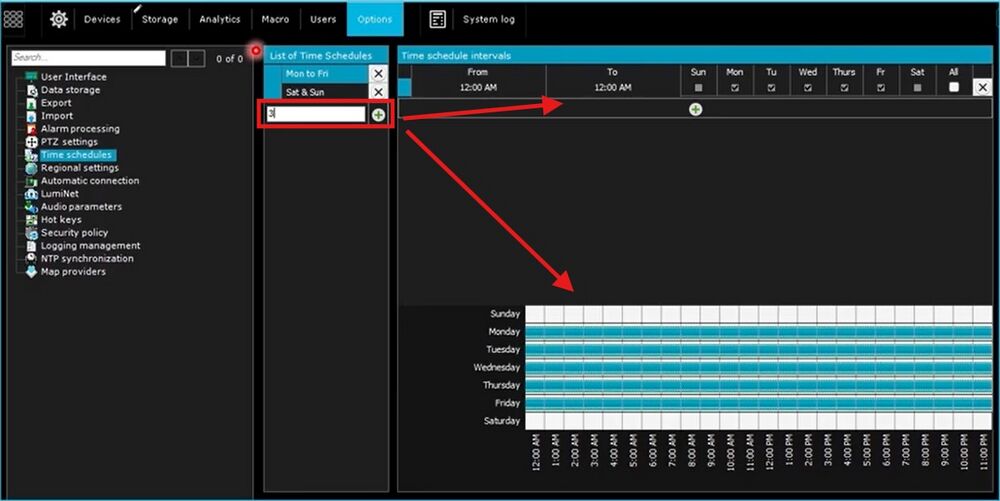
2. Once you have the time schedules in front of you, in the middle area, you will see a white box to type in with a (+) button. Type in whatever name you want to use for the schedule and then click the (+) to add the schedule. Next you will want to select that newly created schedule, and then on the far right, choose the days you want to use for the schedule and then down at the bottom right, set the times you want to use for those days. Once you have set all of that, you can then click Apply to save the time schedule.


