LumiCenter/How to Export a Picture
How to Export Pictures
Description
This tutorial will go over how to export screenshots from the devices.
Prerequisites
- Extract the screenshots via playback section of the cameras.
Video Instructions
Step by Step Instructions
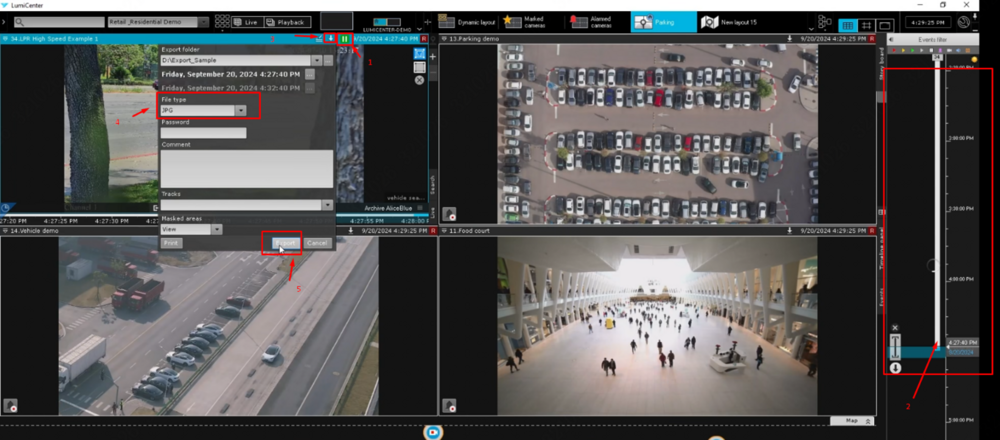
1. To export a scene or picture, follow these steps:
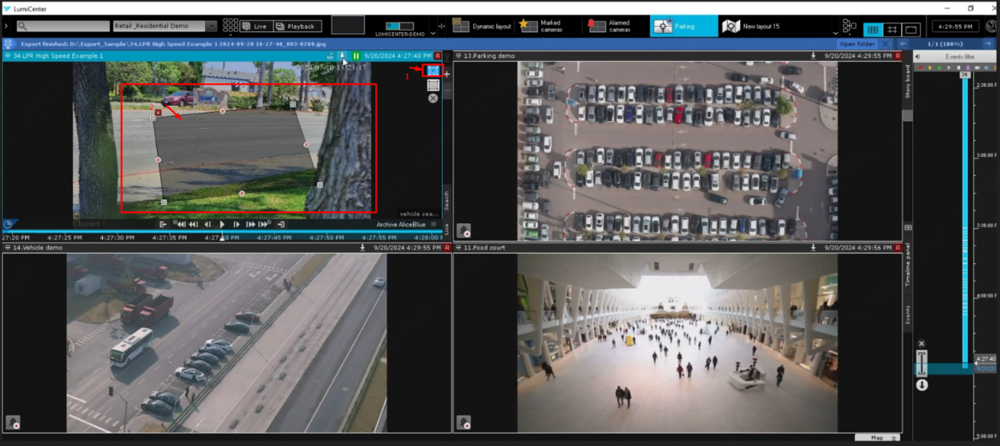
- Pause the Video: Click the “pause” icon to stop the video at the desired scene.
- Adjust the Timeline: Use the timeline on the right to fine-tune the scene selection.
- Download the Image: Click the “download” icon next to the “pause” icon.
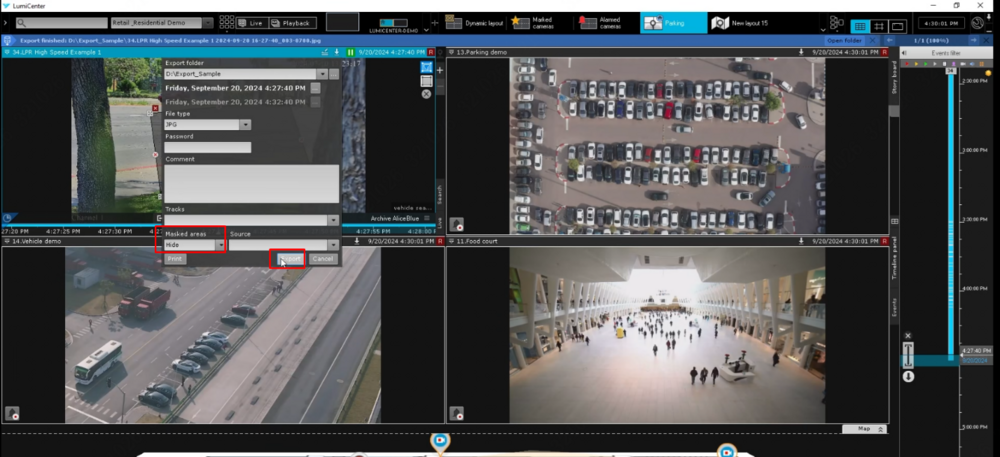
- Select File Format: Choose your desired file format (e.g., JPG).
- Complete the Export: Click the “Export” button to finalize the process.
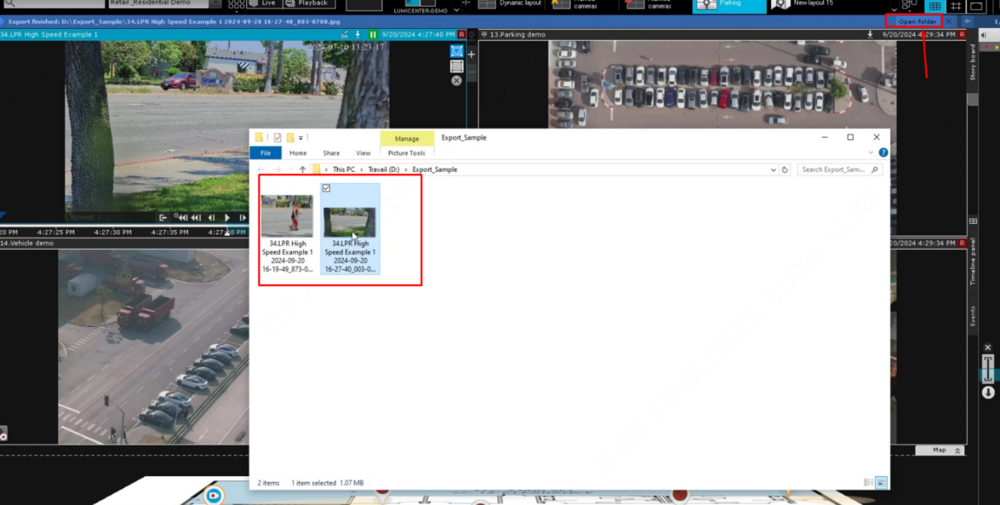
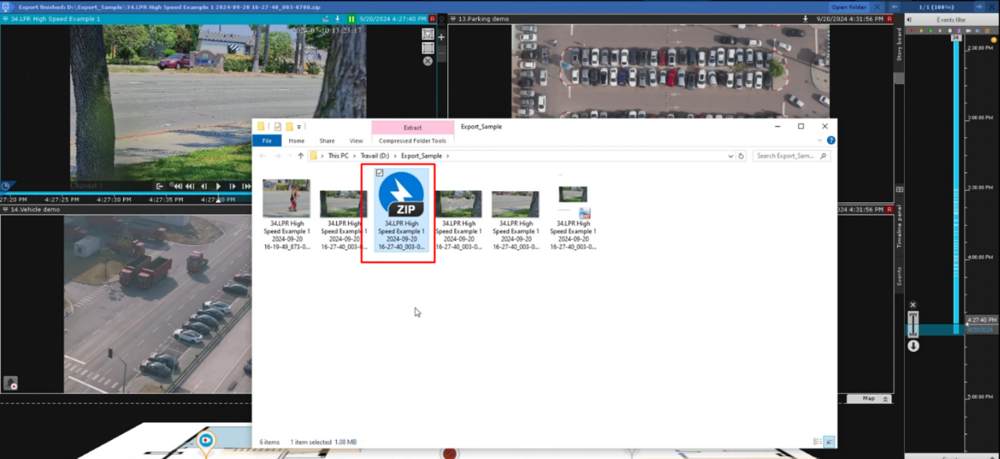
2. To find your exported file, click the “open folder” option.
3. To export a picture while maintaining privacy:
- Select the “Privacy Mask”on the right, if the “Privacy Mask” option didn’t appeared, please click the “download” (down arrow) icon once, then it will show up.
- Use your cursor to outline the area you want to mask for privacy
Click the “download” (down arrow) icon to open the export menu. Choose “Hide” option and click “Export” to finalize the process.
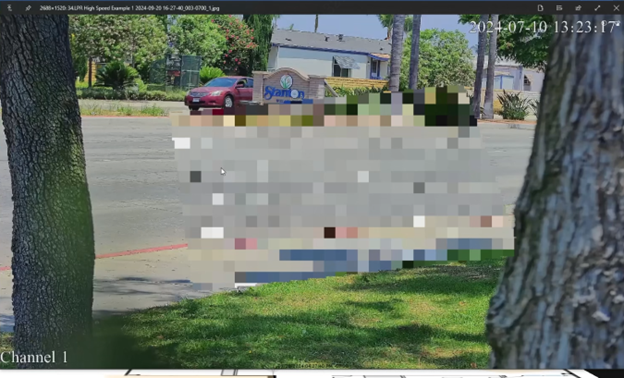
Privacy mask area will show as below:
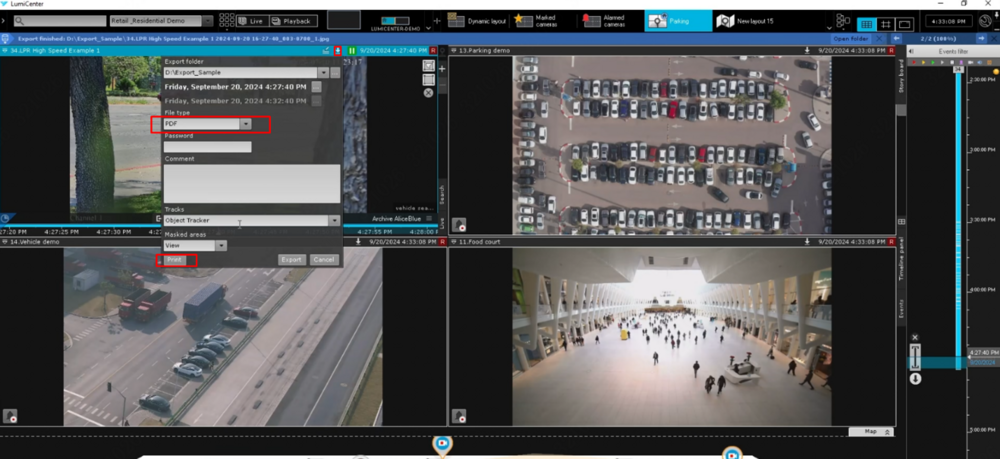
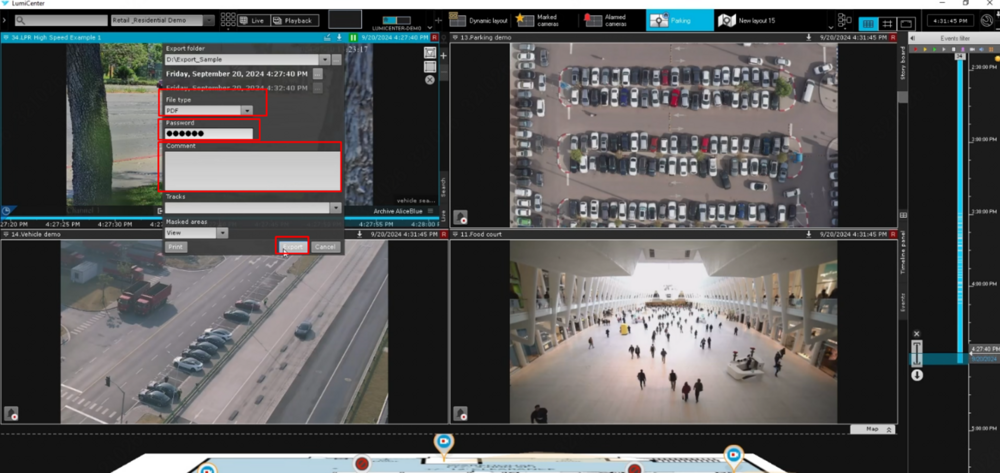
4. Export a PDF file with comments and set a password for the exported file:
Below is an example of a file with password protected:
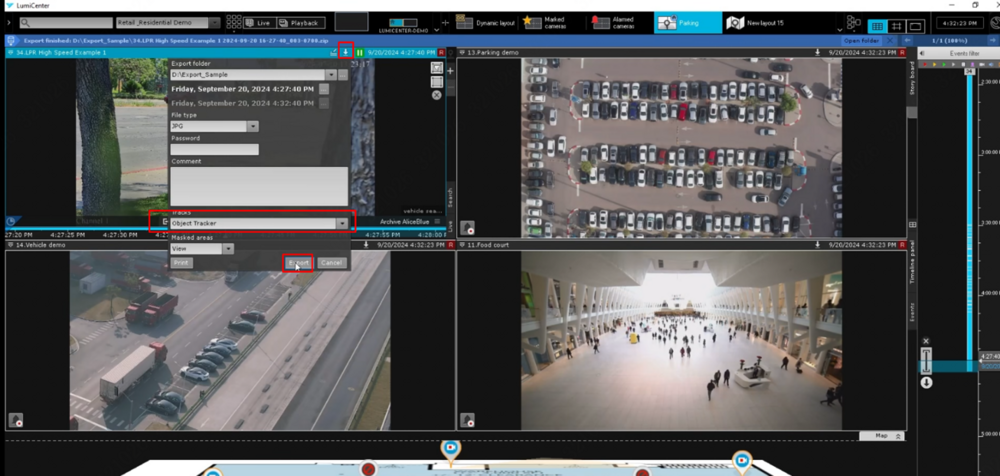
5. To export the picture with Object Tracker displayed on the picture, select the “Object Tracker” option when exporting the image:
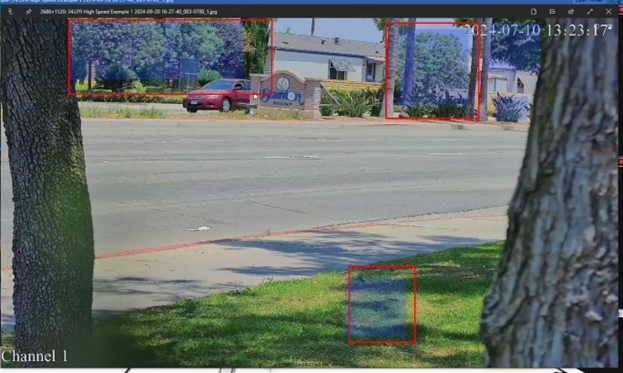
Below is an example of an image showcasing the Object Tracker:
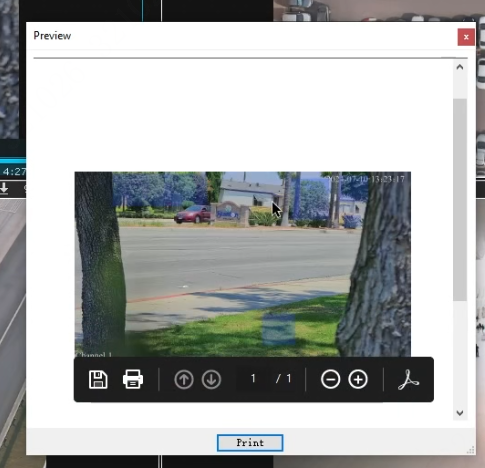
6. To print a picture directly without saving it on your computer:
Choose the print option and it will open the print function of the computer.
