LumiCenter/How to Set Video Streams, OSD Text, and Privacy Mask
How to Set Video Streams, OSD Text, and Privacy Mask
Description
Today we will look at the video streams, the OSD text, as well as the privacy masking.
Prerequisites
- LumiCenter server and client installed on a computer.
Video Guide
Video Streams
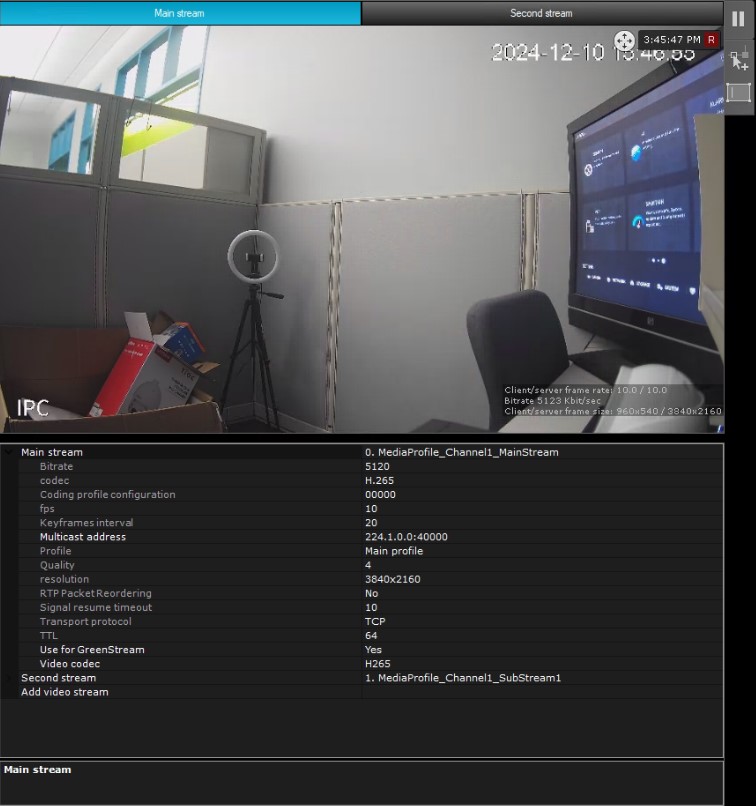
On the right side of the device configuration panel, you will have the device video stream operation panel. If the camera supports multiple streams, when you add the device the stream with the highest resolution will be selected as the main stream. LumiCenter will also pick another stream as the second stream if there is one available. LumiCenter will only add two streams by default, however If the camera has additional streams, you can add those through the stream operation panel and they will appear up top (1). Each stream can be configured individually. In most cases, the following parameters are set for each stream: bitrate, compression rate, frame rate, and resolution. This may vary depending on models.
Video Stream Options
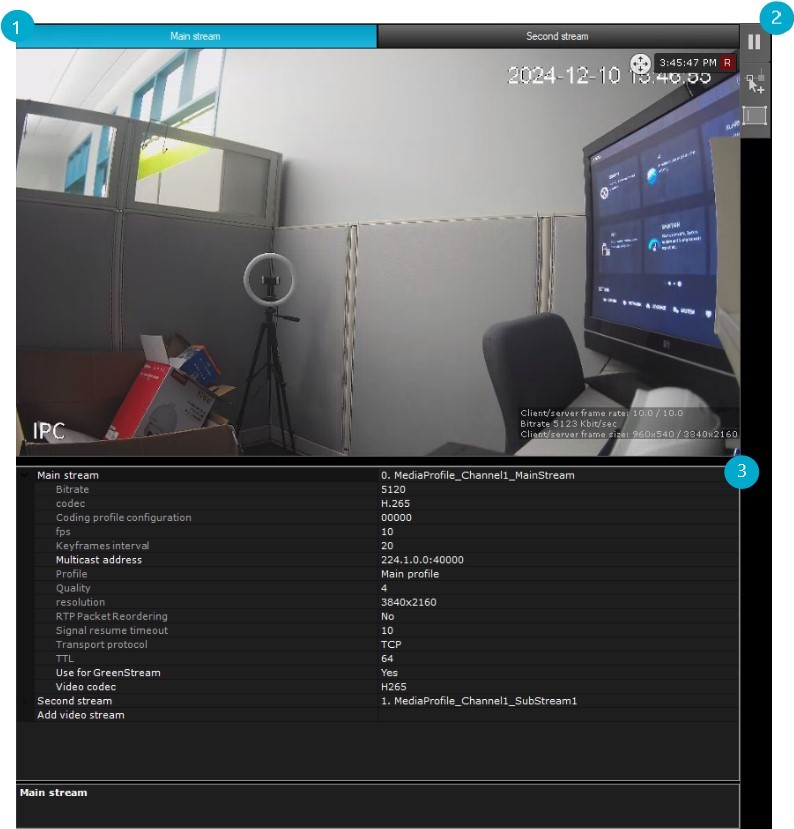
Let’s look at the different options on this panel. Section 1 shows the streams that are available, if you click on different streams, you can switch between them so you can view the streams one by one. Section 2 is the pause button which you can click to freeze the stream on a specific frame. Section 3 is the stream parameter configuration. You can only change the parameters from this section if you are using “keep current settings mode”, if you are not using this mode and instead using the device settings, then most of the parameters in this section cannot be changed from here. There is one setting that can always be changed here which is the “Use for GreenStream”. This will determine if you want to use this stream for the GreenStream feature. GreenStream is an intelligent algorithm with which LumiCenter decides which stream to be displayed in the video surveillance window. (More information about this will be available in other chapters) Please Note the camera may automatically restart after making changes, in that case the camera may become unavailable for viewing temporarily.
Privacy Masking
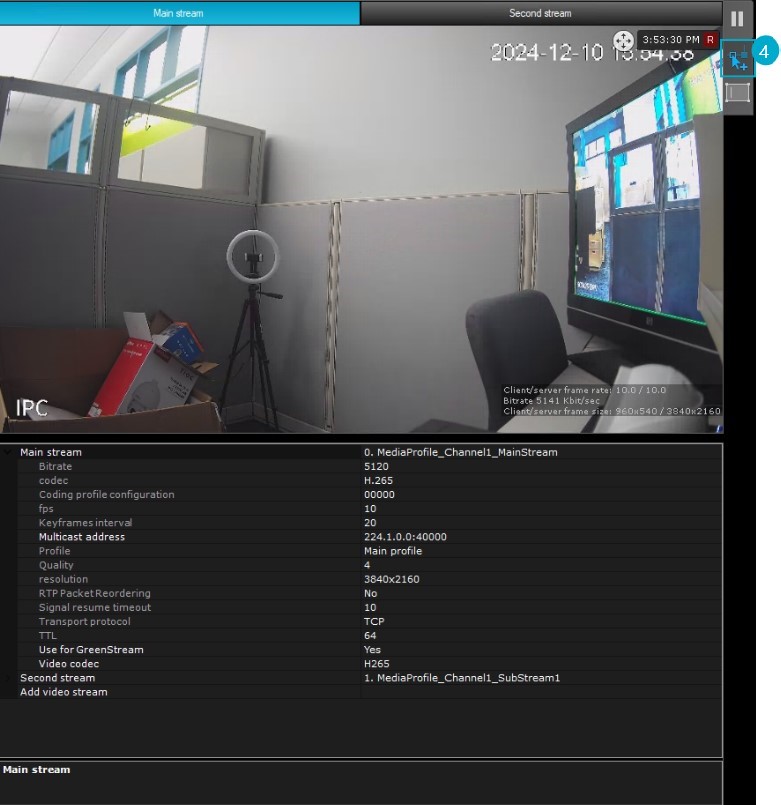
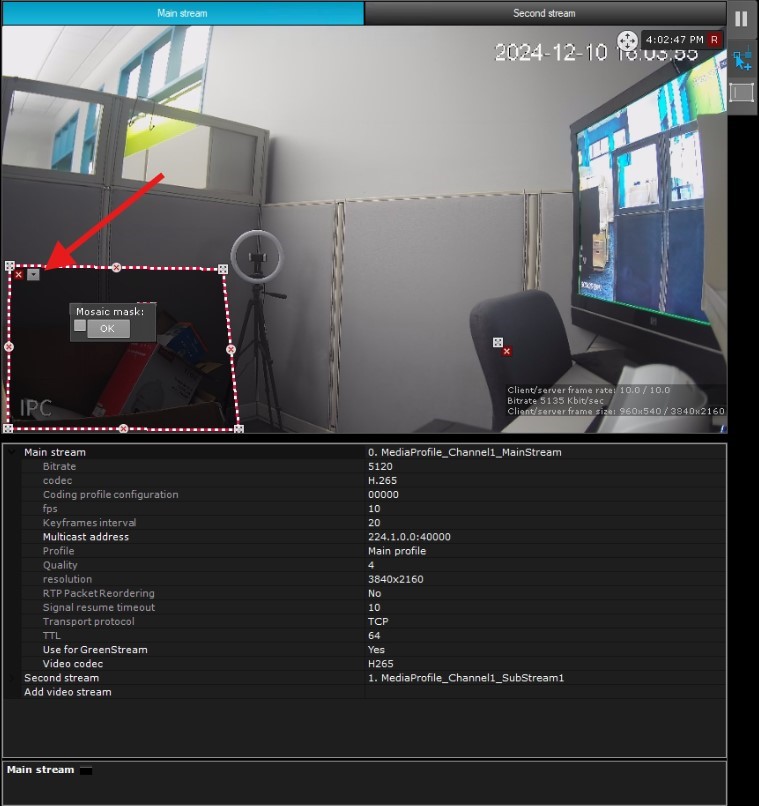
Next we will look at privacy masking. The first thing you may want to do is to pause the stream as mentioned in the prior step so it is easier to concentrate on the configuration. It is possible to apply a privacy mask to hide certain parts of the frame. You can also specify multiple areas if needed. (The privacy mask will be applied to all users who do not have permission to view masked video) The privacy mask will continue to exist when exporting videos. To start click the privacy mask button (4) to begin setting your anchor points of the closed area you would like to hide. Make sure to fully enclose the area until you see a 2 color dotted line that outlines the areas border. The area is by default masked with a black color, however you can also mask it with a mosaic mask. In the second picture below, there is a little drop down arrow where the red arrow is pointing, if you click on that it will show the mosaic mask option, if you add a check box it will use the mosaic instead.
OSD Text
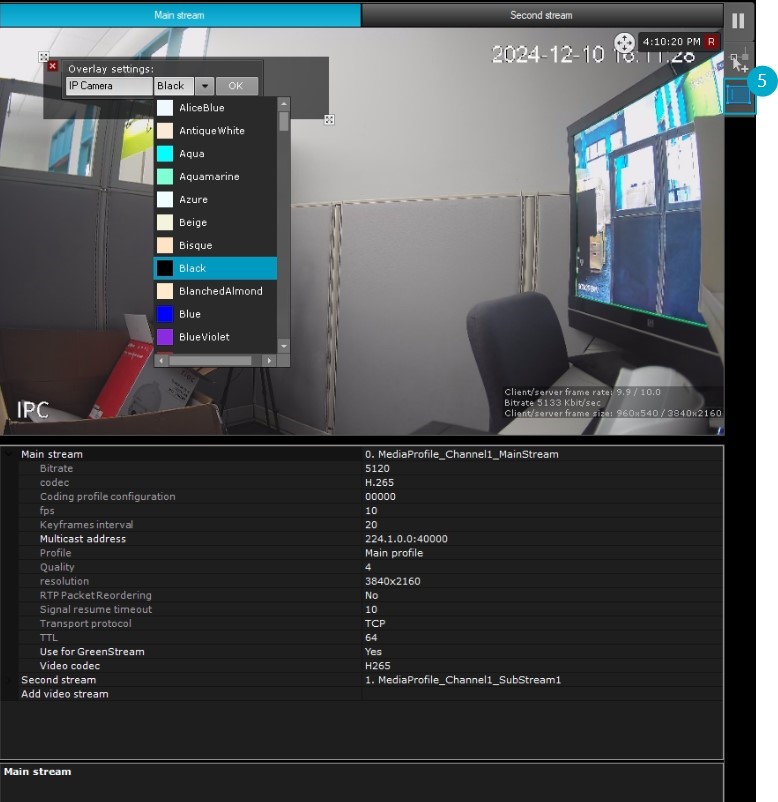
Next we will learn about the OSD Text function. This allows you to superimpose text overtop of the video in the camera window. The text will be shows to all users in monitoring modes but will not be present on exported video clips. To start, click on the OSD Button (5) and then create 2 anchor points to create a rectangular area where the text will be displayed, by default it will use the camera name, but you can change it to what you want. There will also be a little drop down arrow in the top right of the box, click that and it will allow you to specify a color from the drop down list in which the text will be displayed. This concludes the steps for the video stream options.

