LumiCenter/How to Use Motion Detection Tool
How to Use Motion Detection Tool
Description
This tutorial will go over how to use Motion Detection Tool.
Prerequisites
- Cameras already added on LumiCenter.
Video Instructions
Step by Step Instructions
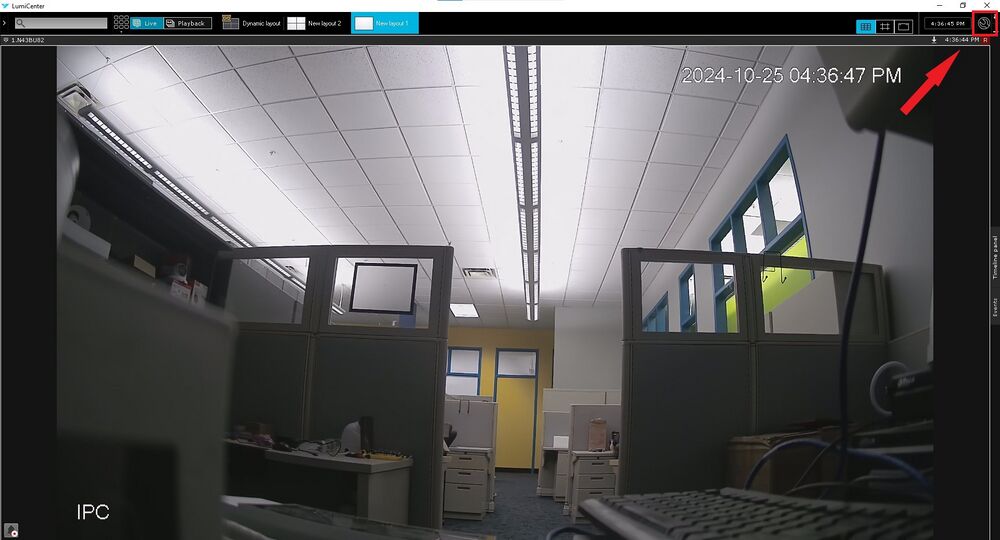
1. Upon initially opening LumiCenter, the live view may appear. To access various options, start by clicking on the settings icon.
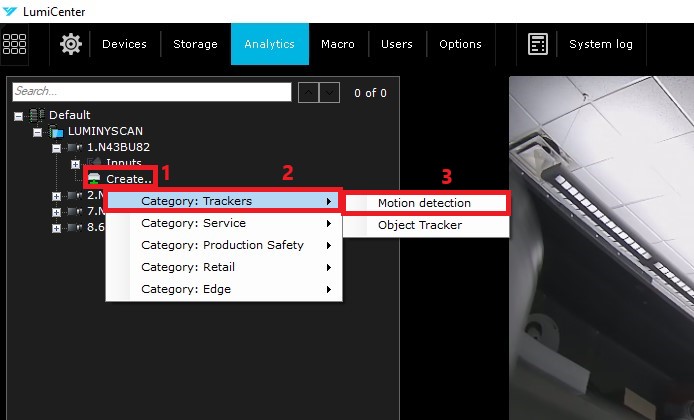
2. In the settings area, select the analytics section, then choose the camera and expand it using the "+" button. A "create" option should now appear, which initiates the process for setting up the motion detector.
3. Click the "create" button to access a dropdown menu with various options. Select "Trackers," then choose "Motion Detection" from the list.
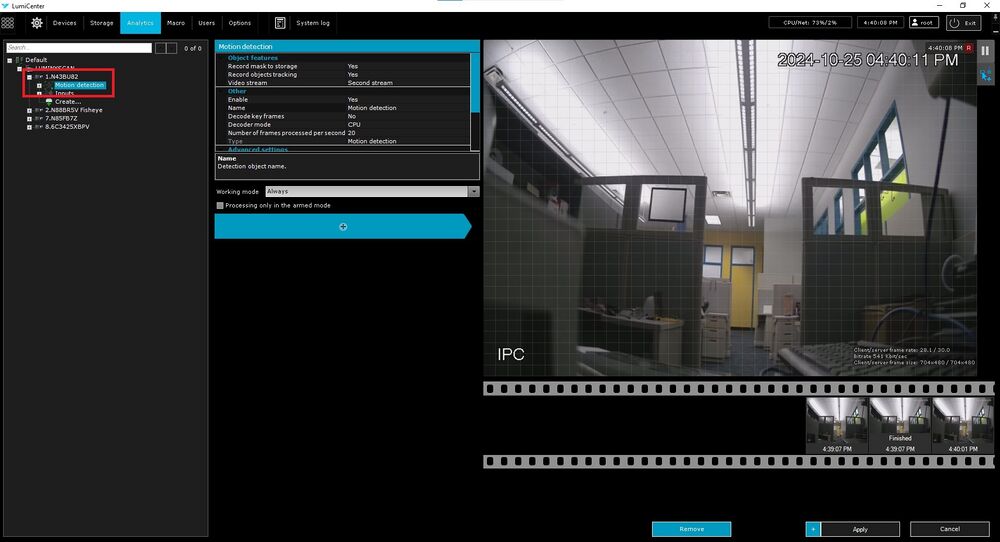
After selecting "Motion Detection," the system will process briefly and then display the motion detection setup applied to the camera, along with settings on the right. Once the rule is created, any motion events will trigger small preview alerts in the bottom right.
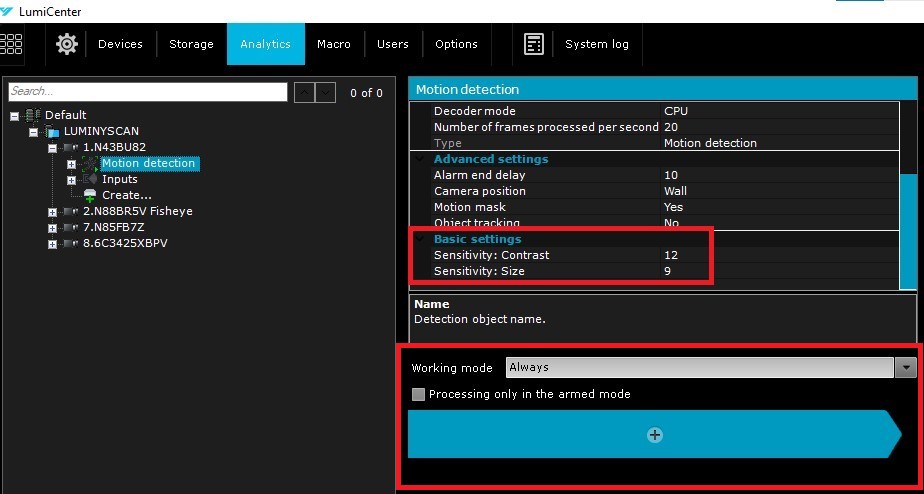
Additional settings, such as motion detection sensitivity, can be adjusted. Below this, there is an option to set the rule's active period. By default, it is set to "Always," but a custom schedule can be created to activate the rule at specific times instead of continuously running 24/7.
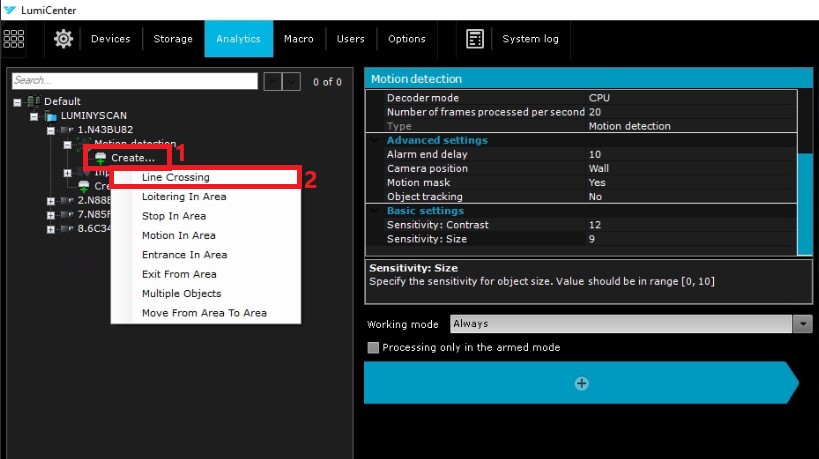
4. At this point, additional "Sub Detector" options, like Line Crossing, can be added for greater event control. By expanding the motion detection option under the camera with the "+" icon, a new "create" option will appear. This enables the creation of an event based on the existing motion event; in this case, select the Line Crossing option.
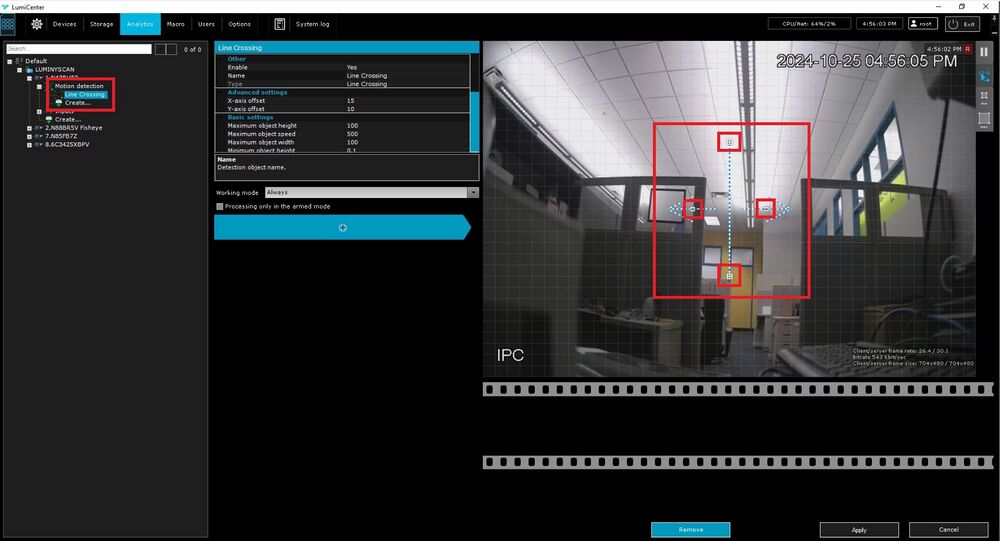
5. After selecting the Line Crossing option, it will appear beneath the original motion detection setting. A line will also display on the right side, designed to capture objects crossing it. Use the mouse to adjust the line’s length and position by dragging the control boxes. By default, the line tracks in both directions, but clicking the small boxes on the arrows allows specific directions to be disabled if needed.
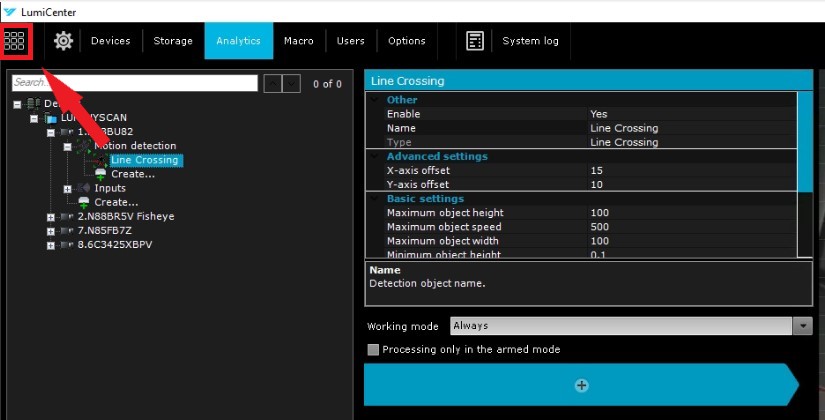
6. With analytics now configured, events can be searched for as they occur. To access this, click the icon in the top left, which returns to the live view section.
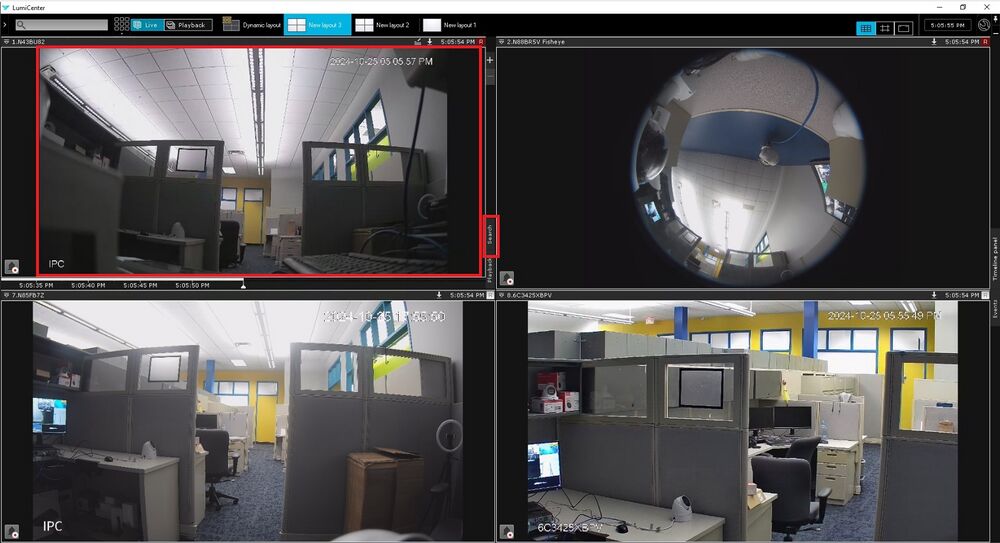
7. On the live view screen, select the camera with the configured analytics (for example, the top left camera). Begin by right-clicking on the live view window; this action will slightly reduce the window size and display two options on the right: "search" and "playback." Choose the "search" option to proceed to the next page.
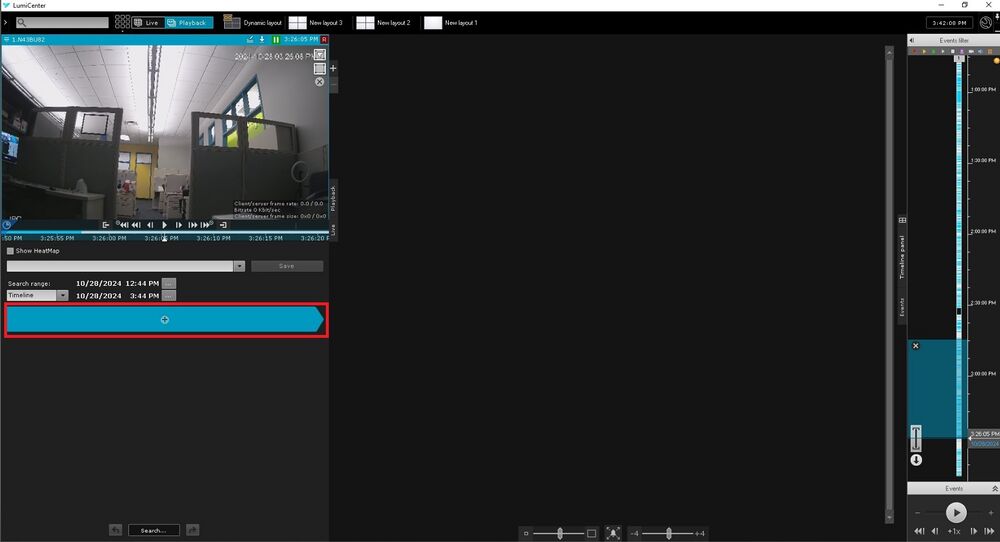
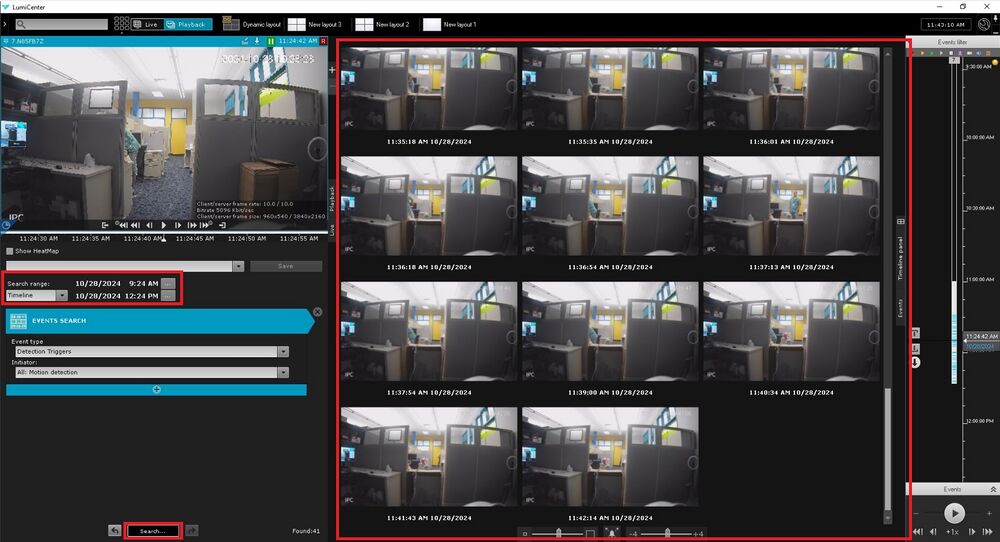
8. The search page for various analytics types will load next. Start by clicking the blue bar with the "+" symbol to access different search options.
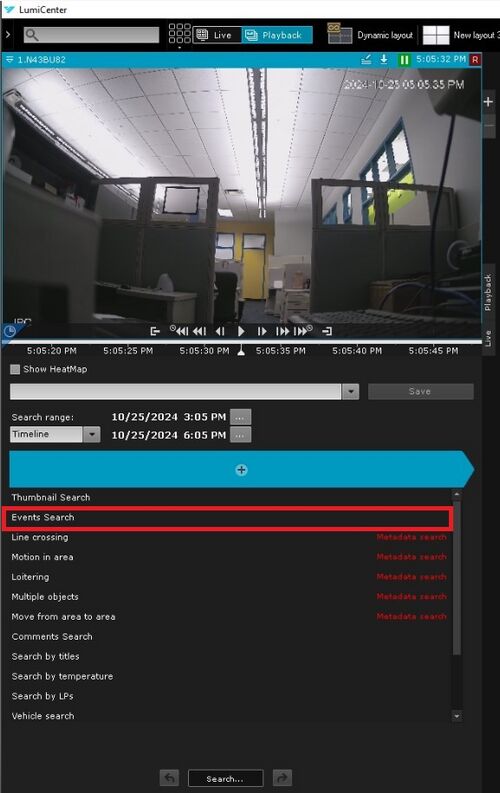
9. The first option to select is "Events Search."
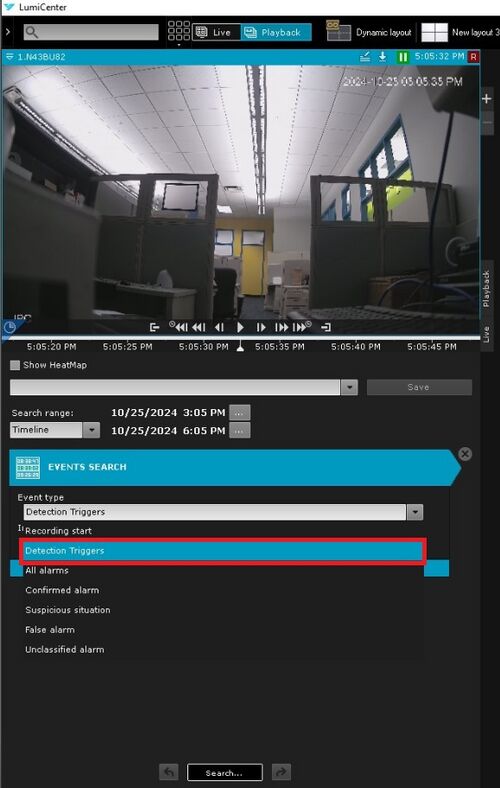
10. After selecting "Events Search," a dropdown menu for "Event Type" will appear directly below. Choose "Detection Triggers" from this menu.
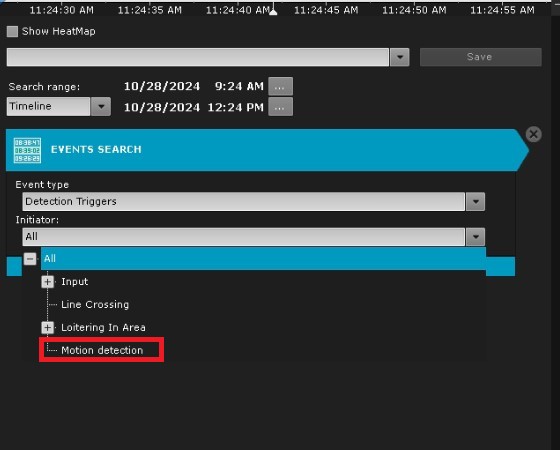
11. After selecting "Detection Triggers," another dropdown titled "Initiator" will appear. Choose "Motion Detection" from this option.
12. Next, set the date and time search range, then click "search" at the bottom. The search results will display on the right side. From here, different events can be selected for review.

