LumiCenter/How to Use the Camera Button
How to Use the Camera Button
Prerequisites
- LumiCenter server and client installed on a computer.
Video Guide
Steps
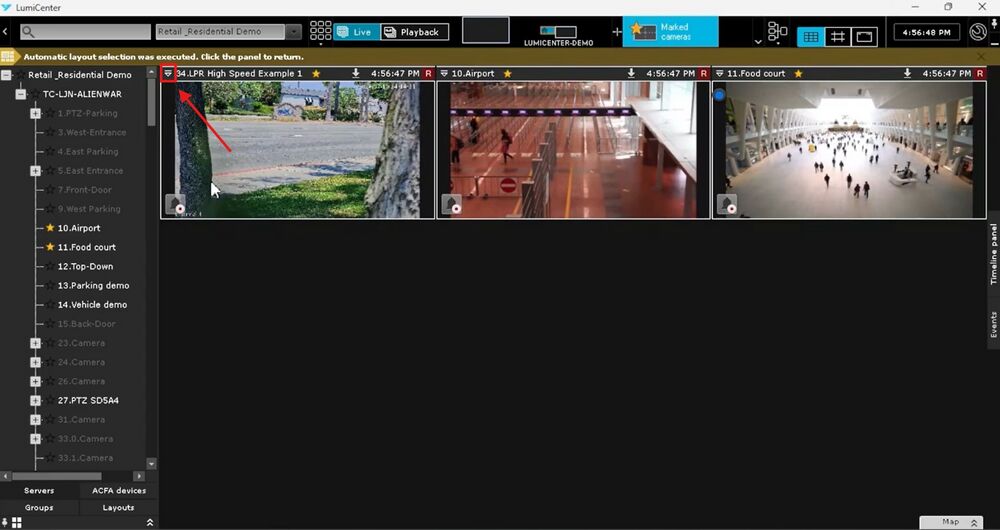
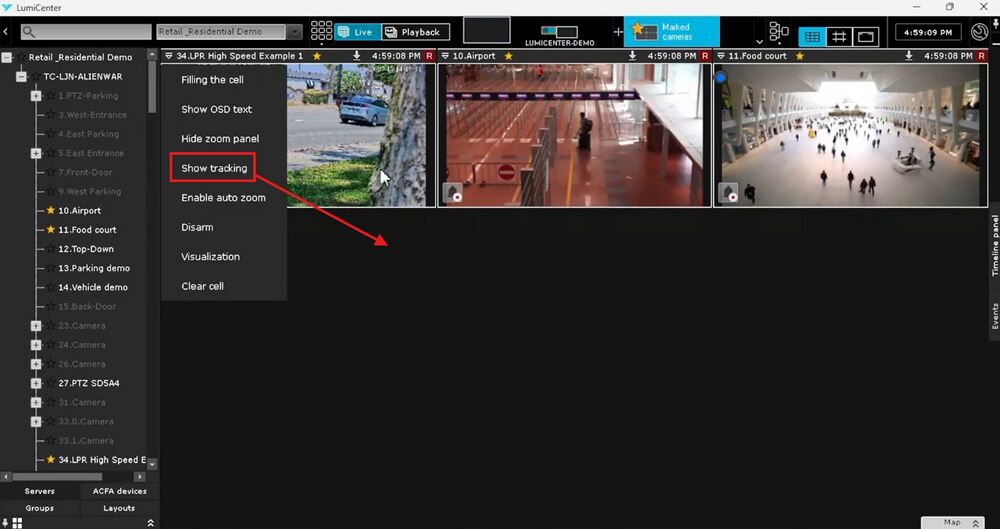
1. On the layouts page where you can view your cameras, you will find the camera button in the top left corner of the camera display.
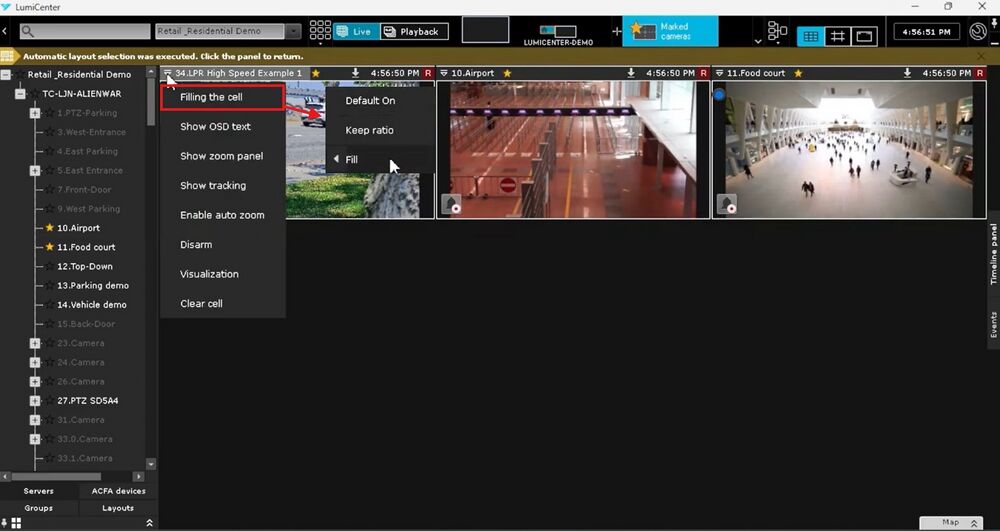
2. The first option you will see is “Filling the cell”. After clicking on it you will have 2 options.
a. Keep Ratio – This will keep the original aspect ratio that the camera is providing.
b. Fill – This will ignore the cameras aspect ratio and instead fill the box that the camera is displaying in.
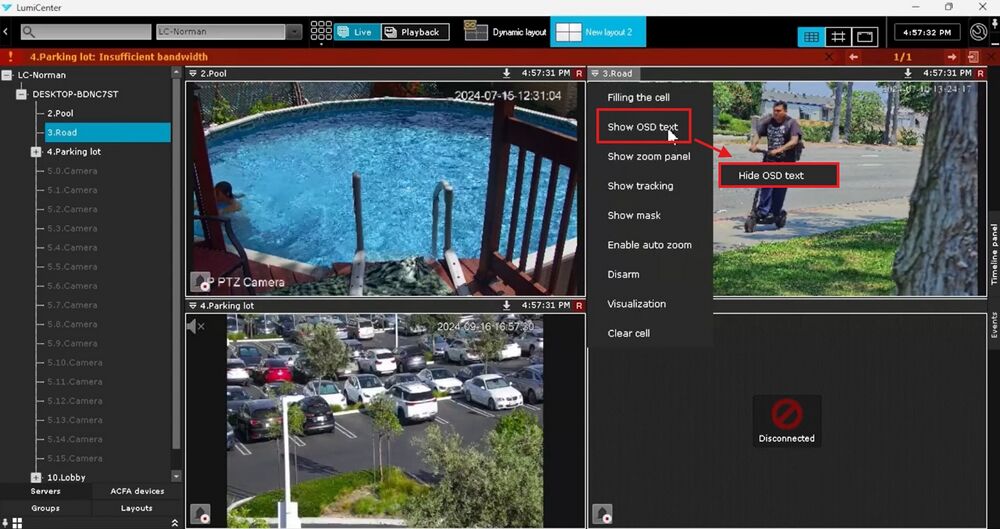
3. The next option is “Show OSD text”. If the camera has OSD text set up in the settings of the camera, this will allow LumiCenter to display that text in the live view. After clicking on show OSD text, the option will flip to Hide OSD text to remove the text if you wish to do so.
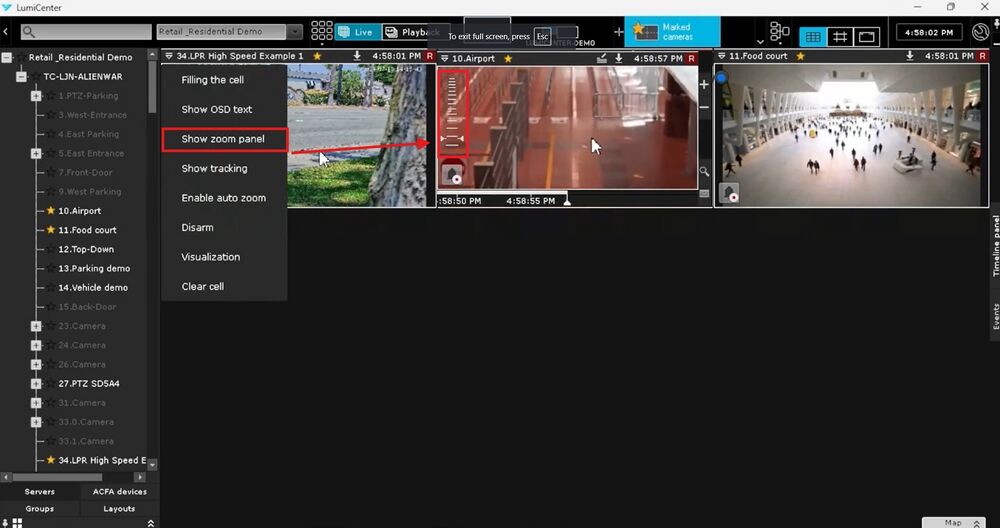
4. The next option is “Show Zoom Panel”. If you select this option it will display the zoom indicator, you can use the mouse to slide the zoom indicator to zoom in, or once the camera is selected, you can use your mouse scroll wheel to zoom in and out. Once this option is enabled, you can also select other cameras and zoom them.
5. The next option is “Show Tracking”. If you have object trackers enabled, enabling this option will show the objects that LumiCenter is currently tracking. After enabling the option, the button will change to “Hide Tracking”.
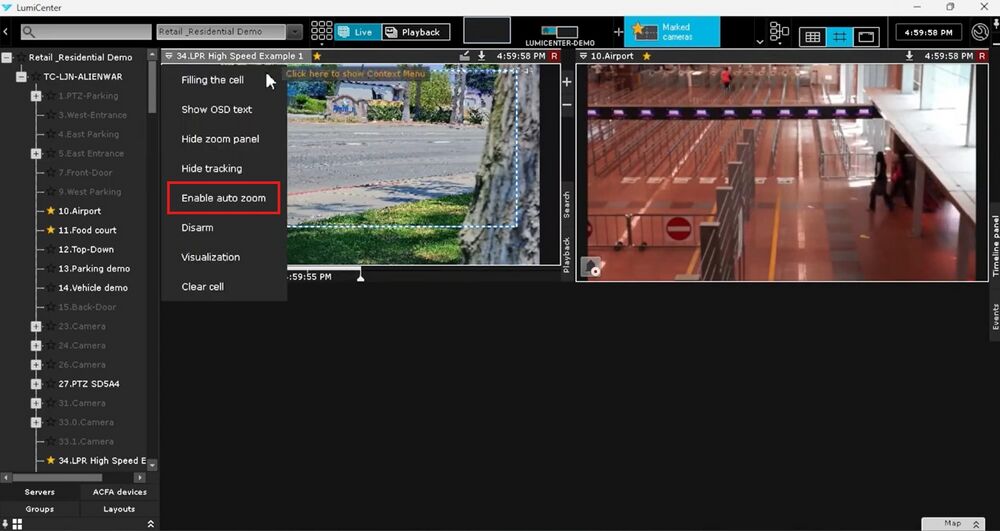
6. The next option is “Enable Auto Zoom”. This allows LumiCenter to automatically zoom an area where an object is detected. You can then click “Disable Auto Zoom” to turn off the function.
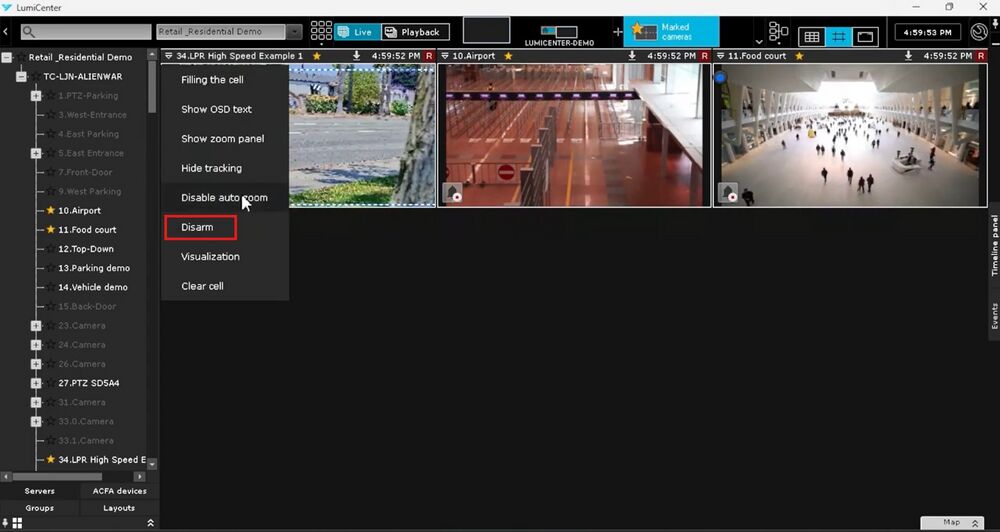
7. The next option is “Disarm”. You can manually arm or disarm the camera as you wish. You can also configure macros based upon this operation. As an example you want this video channel to record as soon as the camera is armed, by manually selecting arm, it will start to record the channel. After choosing “Disarm” the option to “Arm” will appear.
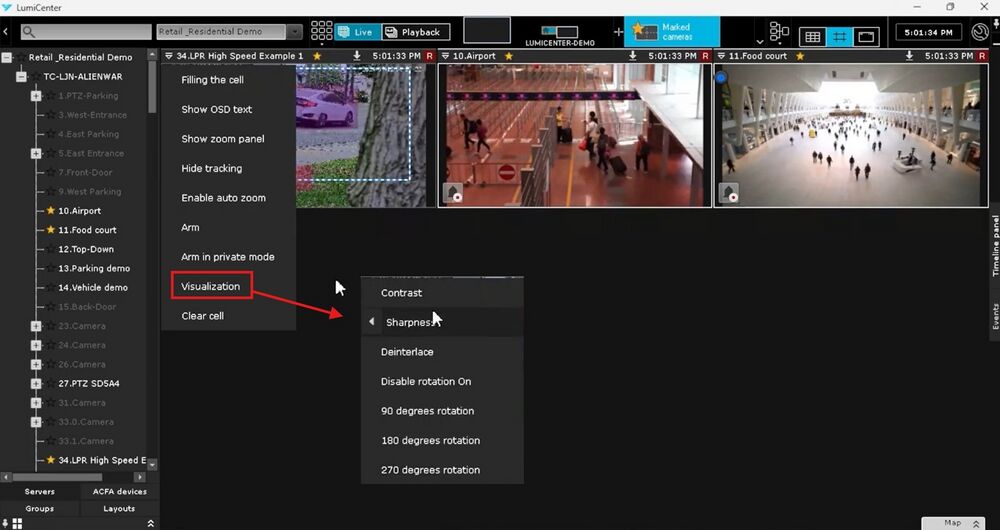
8. The next option is “Visualization”. This option allows you to modify the image of the camera. As an example it will allow you to rotate the image of the camera 90 degrees.
9. The final option is “Clear Cell”. When clicked, this will remove the camera from the cell you are selected on.

