LumiViewer PC/Adding Devices to LumiViewer
Adding Devices to LumiViewer PC App
Description
This tutorial will go over how to add devices to LumiViewer PC app.
Prerequisites
- LumiViewer application installed on the computer.
Video Instructions
Step by Step Instructions
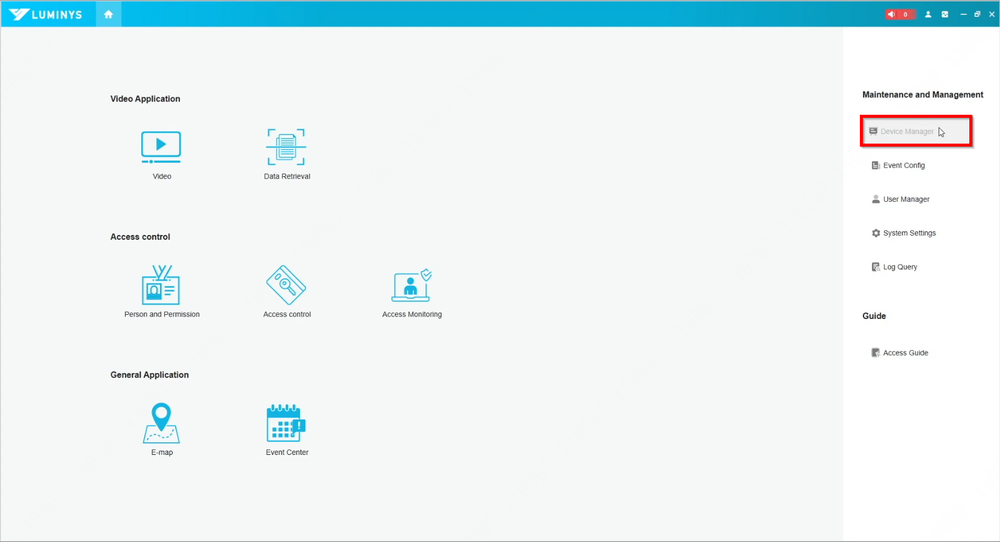
1. After launching the LumiViewer software, access “Device Management” to begin adding devices.
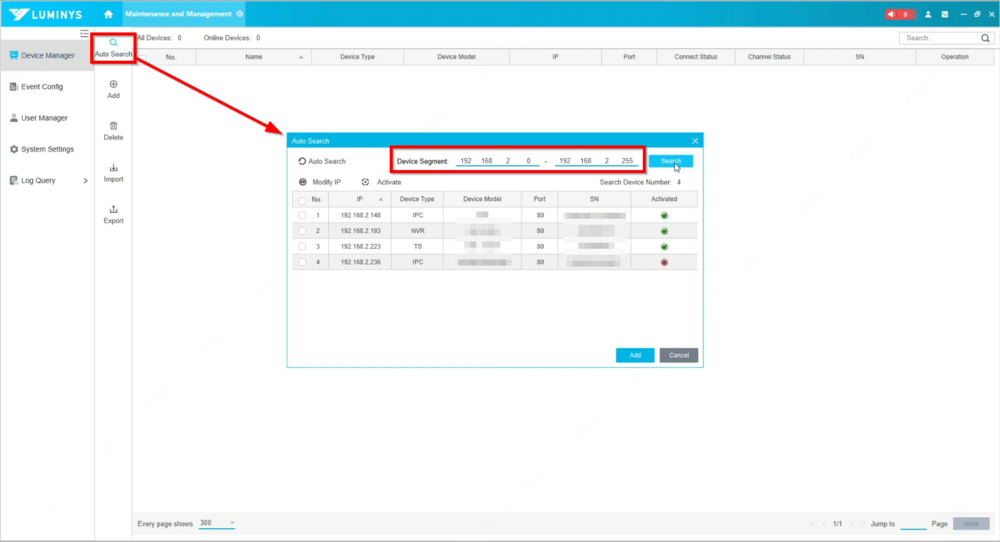
2. Select “Auto Search” to allow the LumiViewer software to locate all devices within the local network. To search for devices on other networks, specify the IP address range if the computer is connected to multiple networks.
Note: A green check mark next to a device indicates it has been initialized, while a red X signifies it is uninitialized.
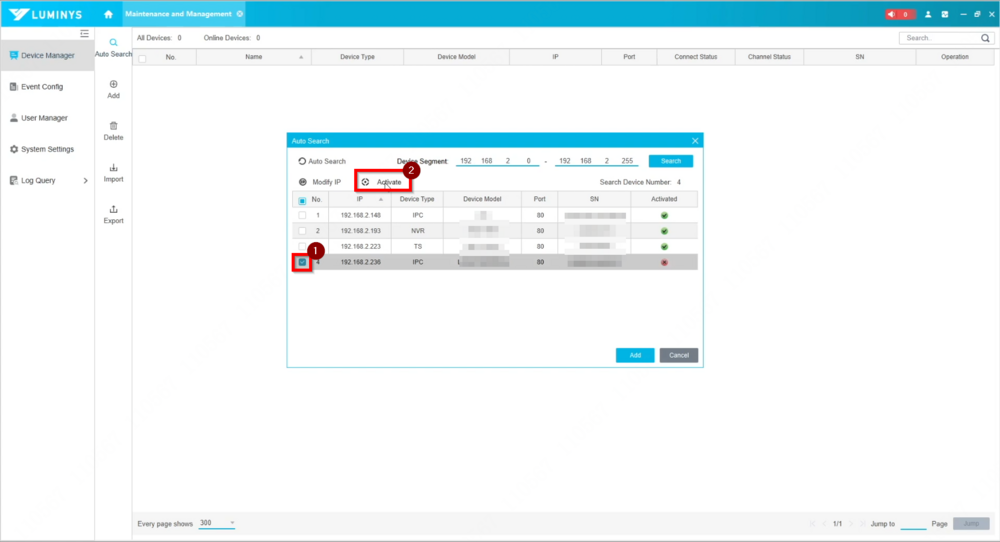
3. To initialize a device in LumiViewer, click the box to the left of the device and select “Activate.”
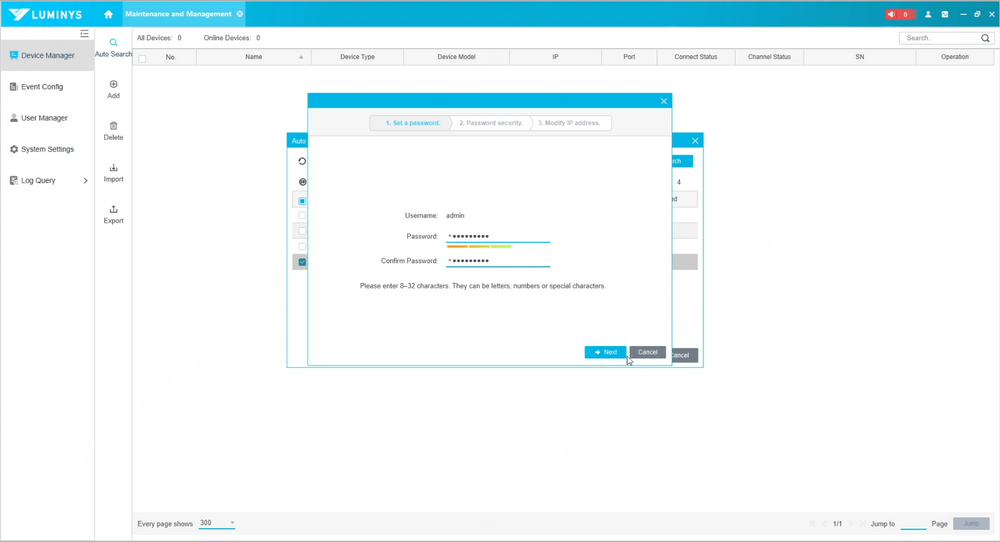
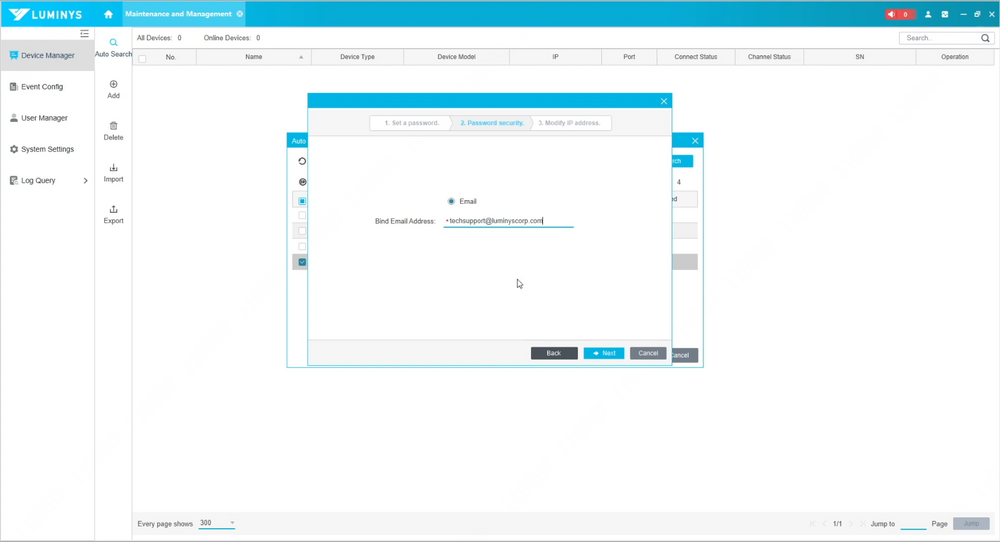
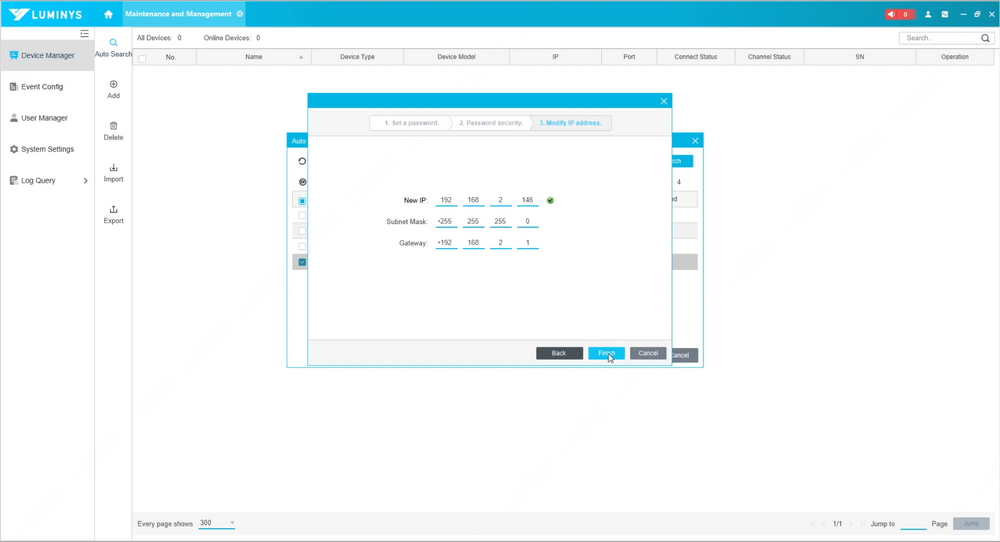
4. Initializing a device involves three steps. Begin by setting a password for the device. Next, configure an email address for password recovery. Finally, adjust the network information, including the IP address, subnet mask, and gateway, if needed.
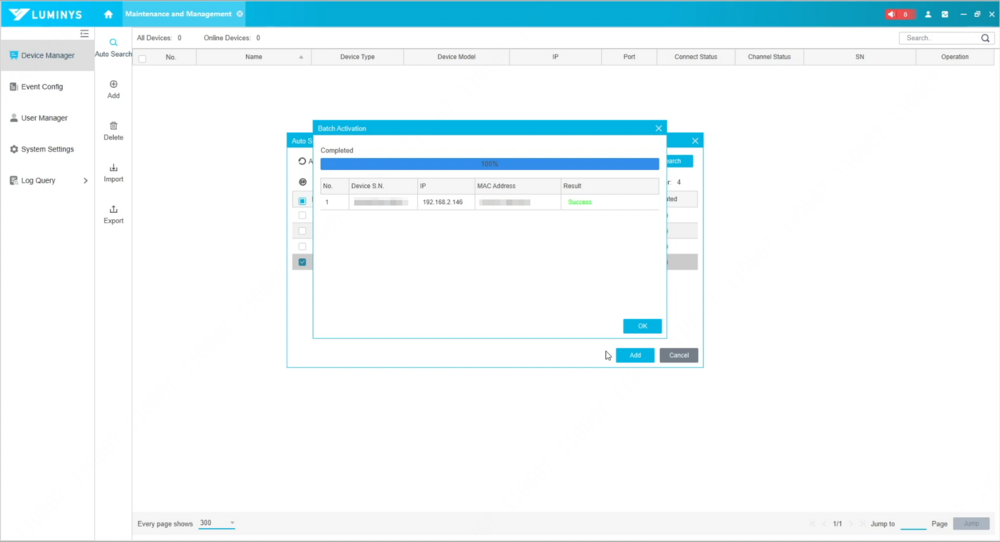
5. A confirmation message will appear once the device has been successfully initialized.
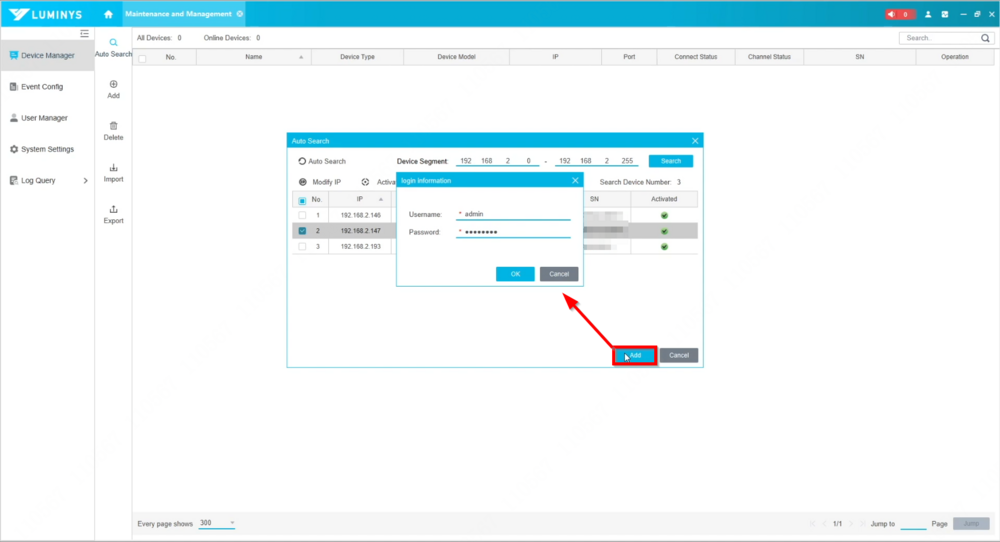
6. To add the device to LumiViewer, select the device by clicking the checkbox on the left, then click “Add” at the bottom. Enter the device password when prompted.
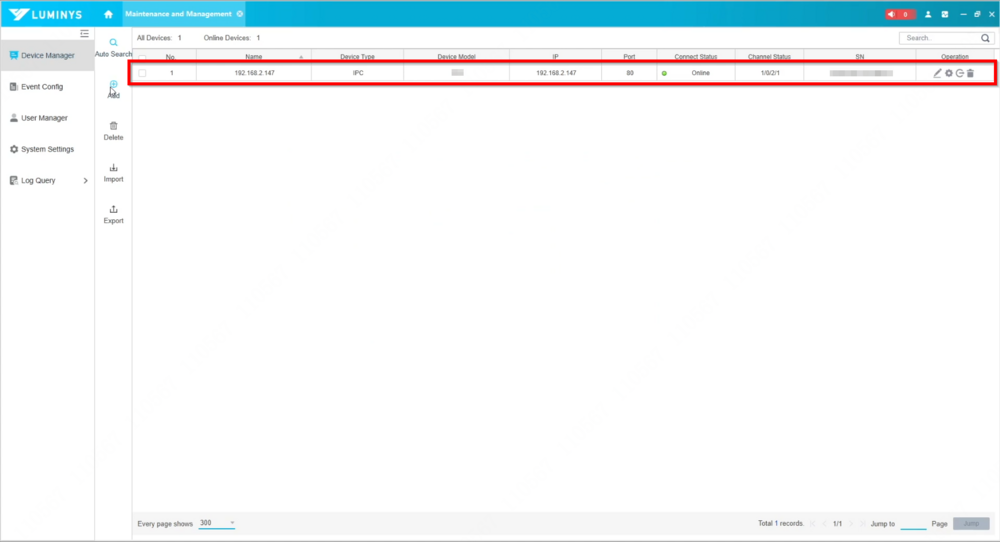
7. After the device is added, it will appear in the list.
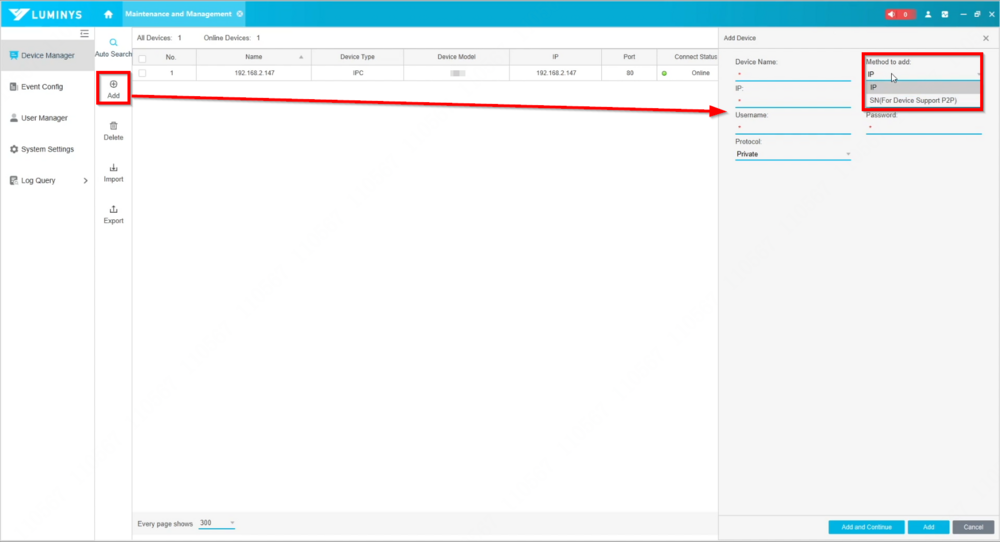
8. A device can also be added manually by clicking the “Add” button on the left-side panel under “Auto Search.” Choose to add the device using its IP address or serial number (SN).
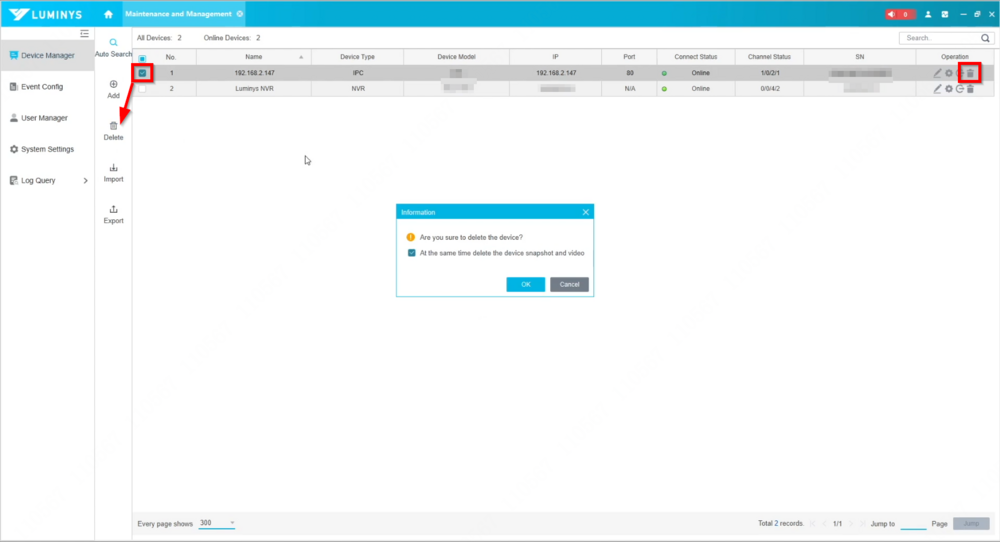
9. To remove a device, select the checkbox next to the desired device and click the “Delete” button on the left-side panel, or click the trash can icon located on the far right of the device entry.
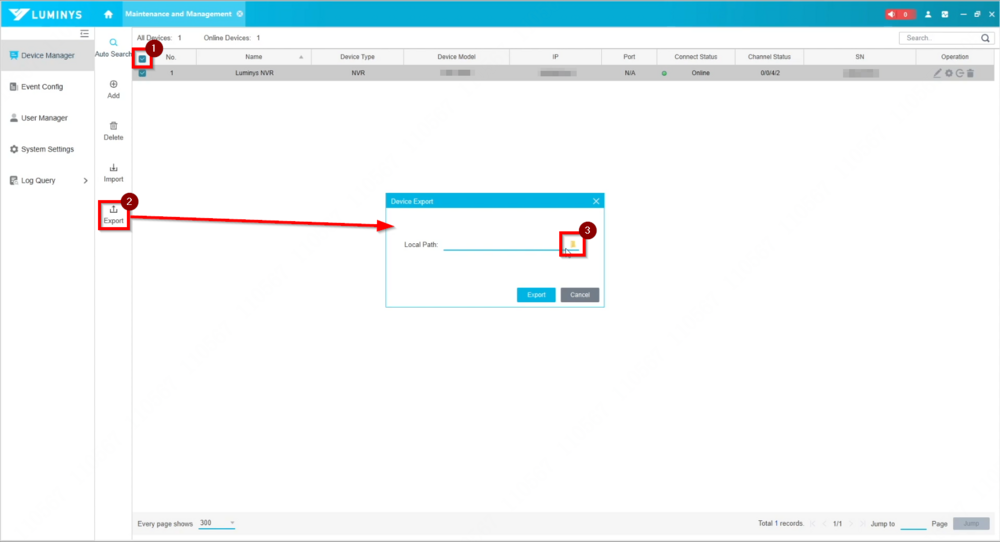
10. To export the device list from LumiViewer, select all the devices to be exported and click the “Export” button on the left-side panel. When the pop-up window appears, click the folder icon on the right to choose the save location on the computer. An Excel file named “device.xml” will be generated upon saving.
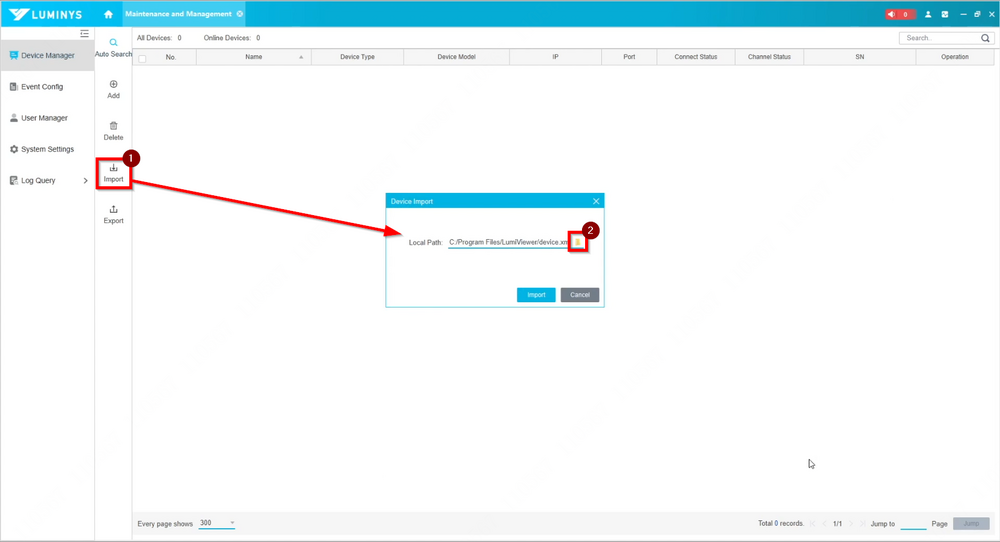
11. To import the device list, click the “Import” button on the left-side panel. Click the folder icon, select the device.xml file, and proceed to initiate the import process.
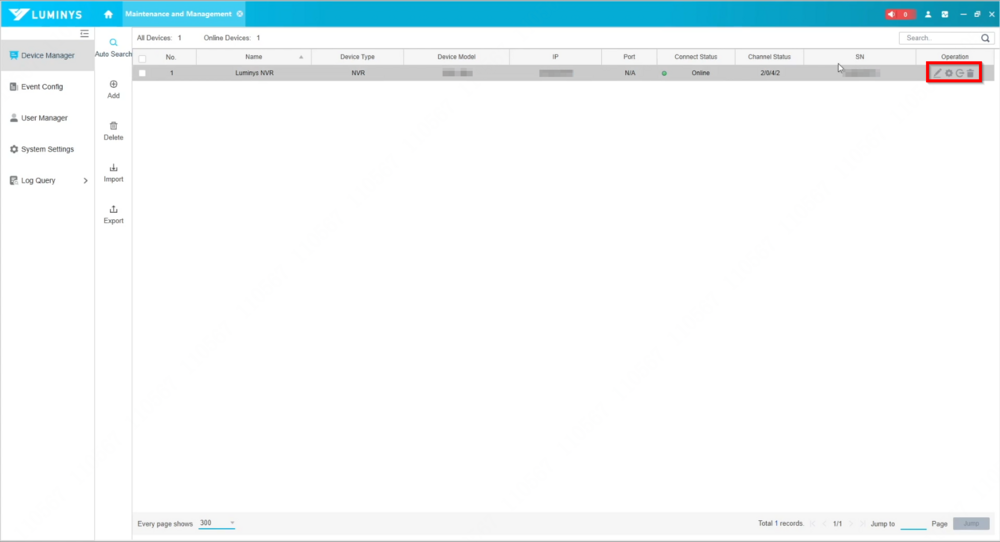
12. For each device added, four operations/settings are available on the right side:
- Pencil icon: Allows manual editing of information such as Device Name, method of addition (IP or SN), Username, Password, and Protocol.
- Gear icon (Go to device config): Provides access to the device’s webGUI for configuration.
- Manually logout/login: Enables manual logging in or out of the device.
- Trash can icon: Allows deletion of the specific device.

