LumiViewer PC/How to Live View in LumiViewer
How to Live View in LumiViewer
Description
This tutorial will go over how to live view LumiViewer desktop app.
Prerequisites
- LumiViewer application installed on the computer.
Video Instructions
Step by Step Instructions
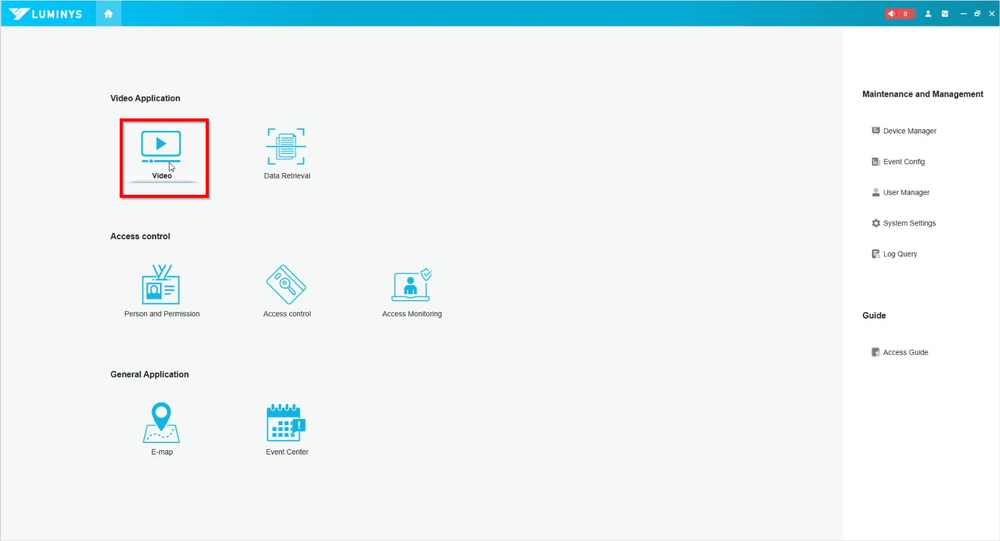
1. Launch the LumiViewer software and select "Video" under Video Application to initiate the live view process.
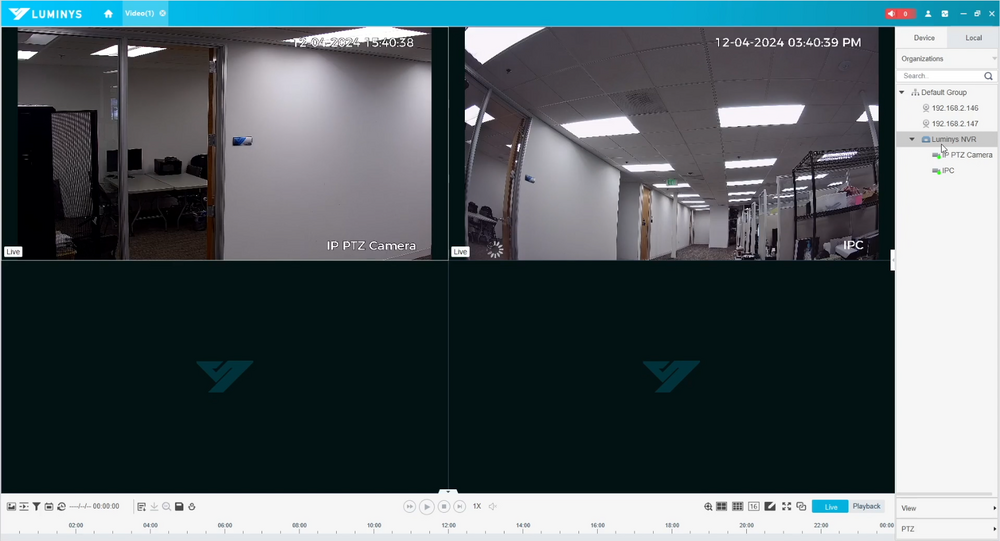
2. Devices that have been added will appear in the right-hand panel. Double-click on a device or drag and drop it into one of the empty grids on the left.
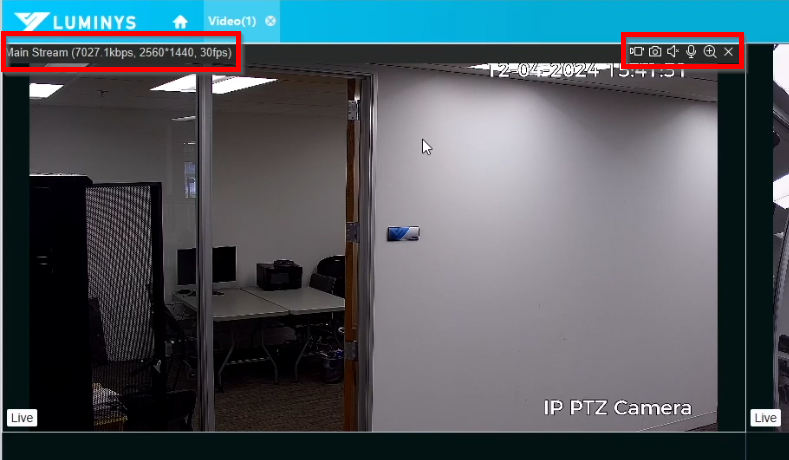
3. Hovering over the live view of a camera displays options at the top of the view. These options provide details about whether the camera is using the main-stream or sub-stream and include encoding information such as bitrate, resolution, and frame rate. Additional options are available on the right, starting from the left:
- Local Record: Records the current live view of the camera.
- Snapshot: Captures a manual snapshot of the current live view.
- Audio: Enables audio playback from the computer for the specific camera. This function works if the camera has audio input and audio is enabled on the camera.
- Audio Talk: Allows two-way communication. This function works when both the computer and the camera have microphones.
- Zoom In: Provides digital zoom functionality. Activate the zoom feature and use the mouse scroll button to zoom in or out. Clicking the button again exits the zoom process.
- Close Video: Exits the current live view for the specific camera.
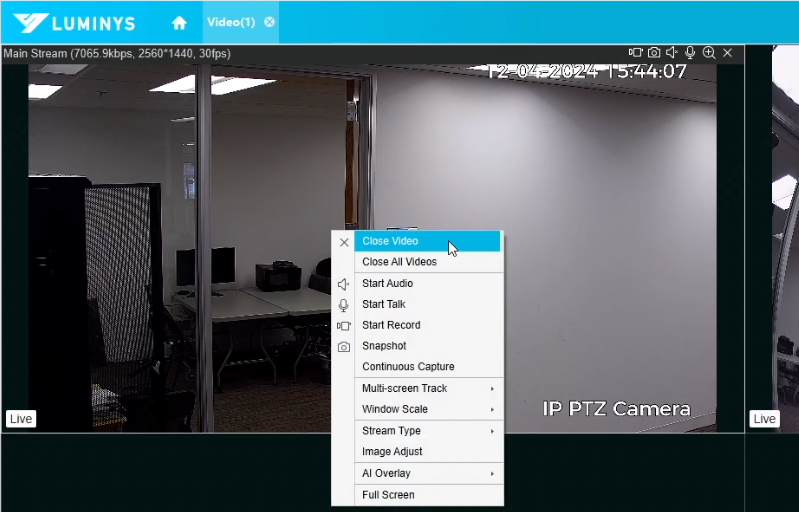
4. Right-clicking on the camera's live view opens a menu with additional options:
- Close Video: Closes the current live view.
- Close All Videos: Closes all live views.
- Start Audio: Activates audio playback on the computer if the camera supports audio input and audio is enabled on the camera.
- Start Talk: Enables two-way communication between the computer and the camera, provided both have microphones.
- Start Record: Initiates manual recording of the current live view.
- Snapshot: Captures a manual snapshot of the current live view.
- Continuous Capture: Takes snapshots at specified intervals.
- Multi-screen Track: Divides the current live view into smaller focus sections to concentrate on specific areas.
- Window Scale: Adjusts the live view display scaling, such as 4:3 or 16:9.
- Stream Type: Switches between main-stream and sub-stream.
- Image Adjust: Provides controls to modify brightness, contrast, saturation, and hue settings for the camera.
- AI Overlay: Displays AI-generated rules from the camera, such as VCA (Video Content Analysis).
- Full Screen: Expands the live view grids to fill the entire monitor. Press "ESC" on the keyboard to exit full-screen mode.
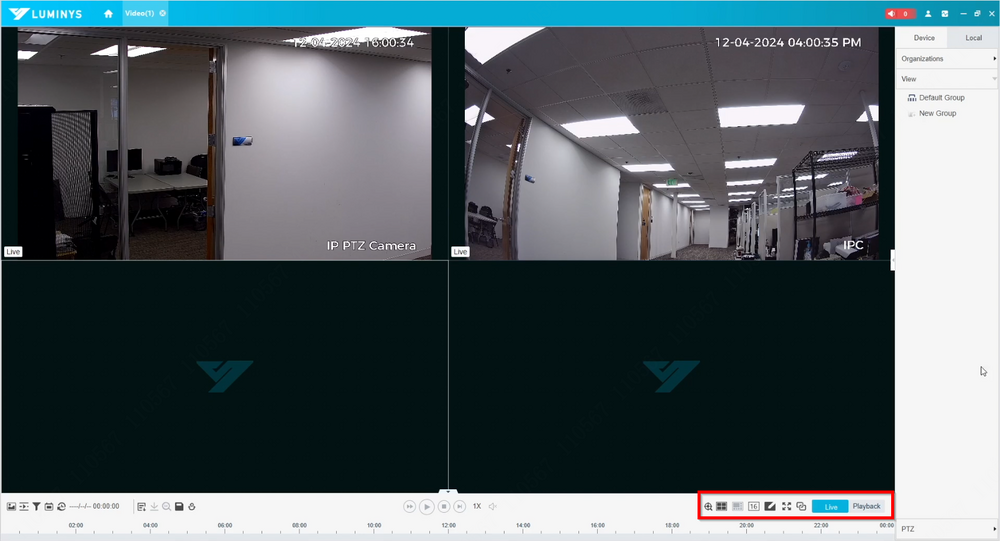
5. The bottom-right menu offers additional options for managing the live view layout. By default, the live view opens in a 4-grid layout, with options to switch to 9-grid, 16-grid, or custom layouts of up to 64 grids on the same monitor.
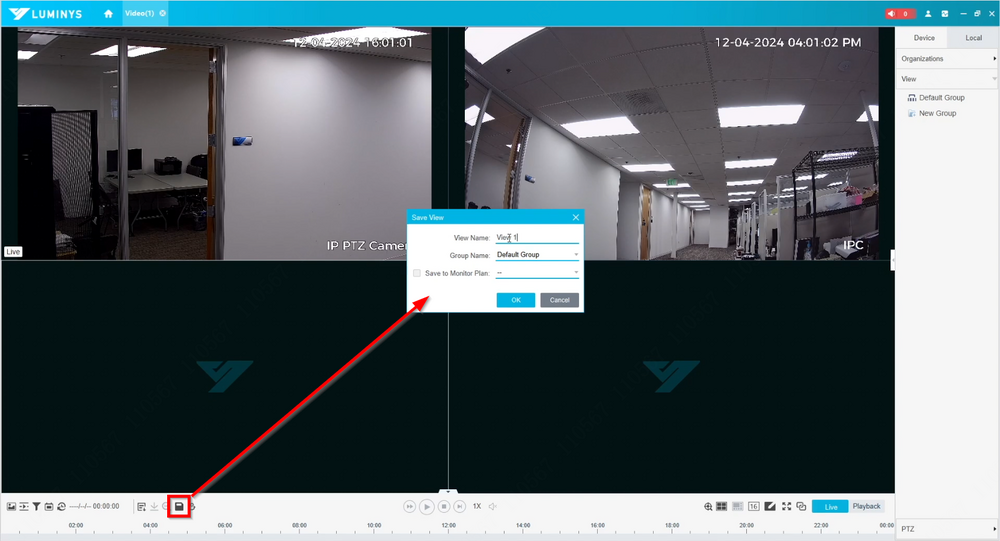
6. To save a desired view, select "View" in the bottom-right corner. This action reveals the "View" panel, displaying the "Default Group." Custom groups can be created as needed, but the "Default Group" is used in this example.
Select the floppy disk icon at the bottom left to open the "Save View" window. Assign a name to the view and specify the group it belongs to, such as the "Default Group" in this case.
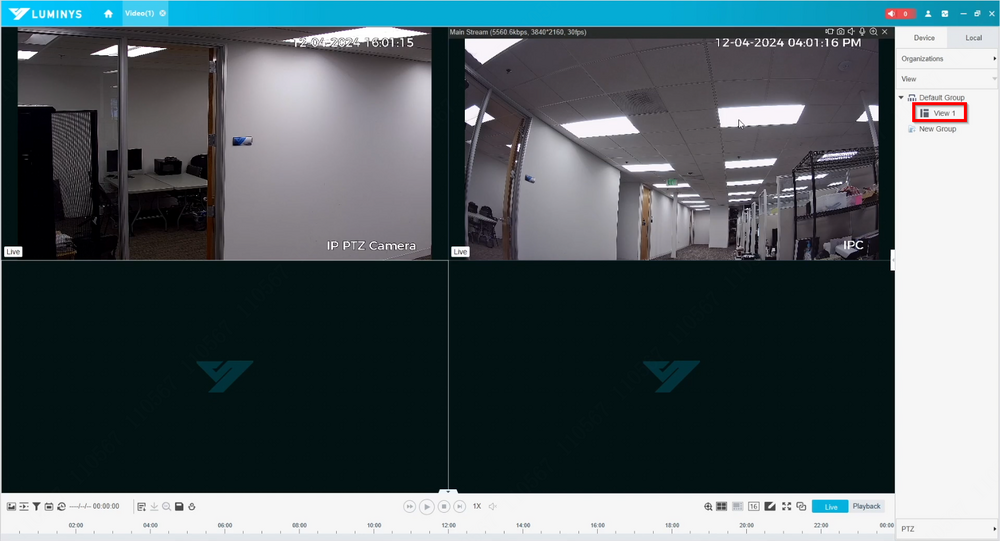
7. After creating the view, expand the "Default Group" under the View panel to locate the newly created view. Double-clicking on "View 1" will display the same two cameras saved in this view.
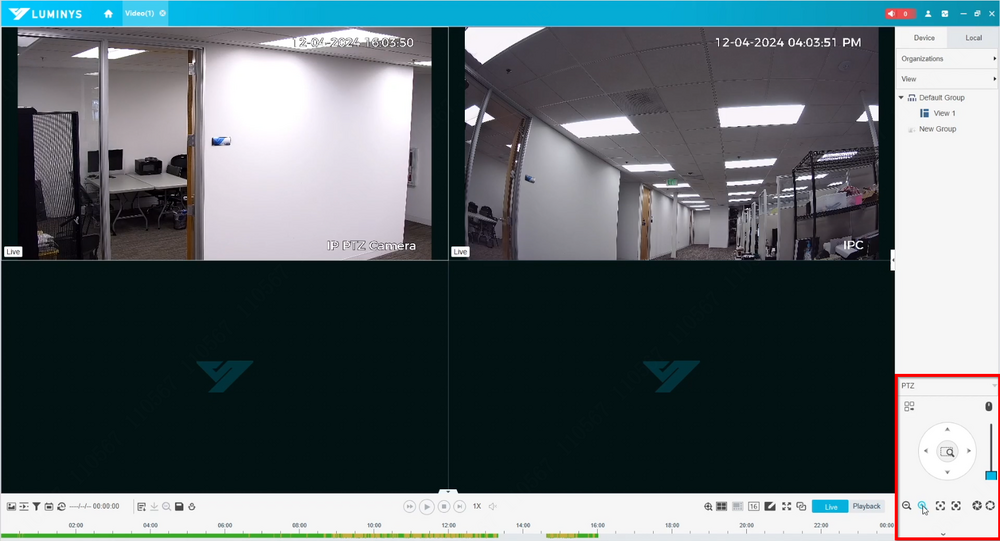
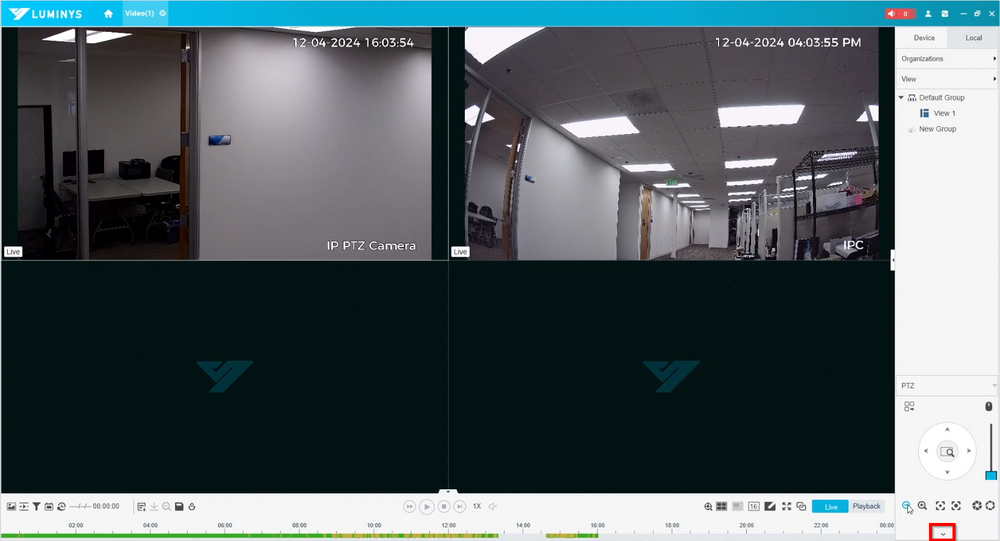
8. Selecting "PTZ" opens the PTZ control menu, designed primarily for PTZ cameras.
- Circle Joystick: Moves the PTZ camera view in up, down, left, and right directions.
- Slider: Adjusts the movement speed of the PTZ camera.
- Magnifying Glass Icons: Control zoom in and zoom out functions.
- Dotted Squares with a Circle: Adjust the focus by increasing or decreasing it.
- Iris Adjustment Buttons: Modify the iris settings.
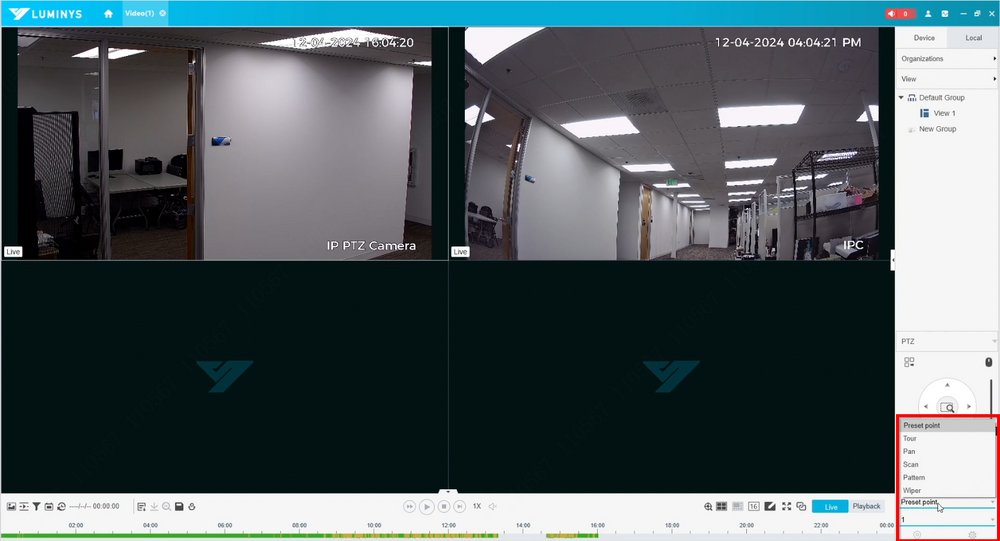
9. Clicking the down arrow below the PTZ control menu reveals additional options, including Preset Point, Tour, Pan, Scan, Pattern, and Wiper.

