Network Switches/Configuration via WebGUI
Configuration via WebGUI
Description
This tutorial will go over the configurations of network switches via webGUI
Prerequisites
- Network switch powered on and is connected to the network.
Video Instructions
N/A
Step by Step Instructions
1. Front view of the device: connect the power and Ethernet cables. The LED indicator on the right side of the switch will illuminate, indicating a successful power connection.
2. Connect the switch to the dedicated network. The switch should automatically obtain a DHCP IP address. If it does not, enter the default IP address: 192.168.1.100 to access the initialization screen. Ensure the computer is on the same subnet as the switch for proper access.
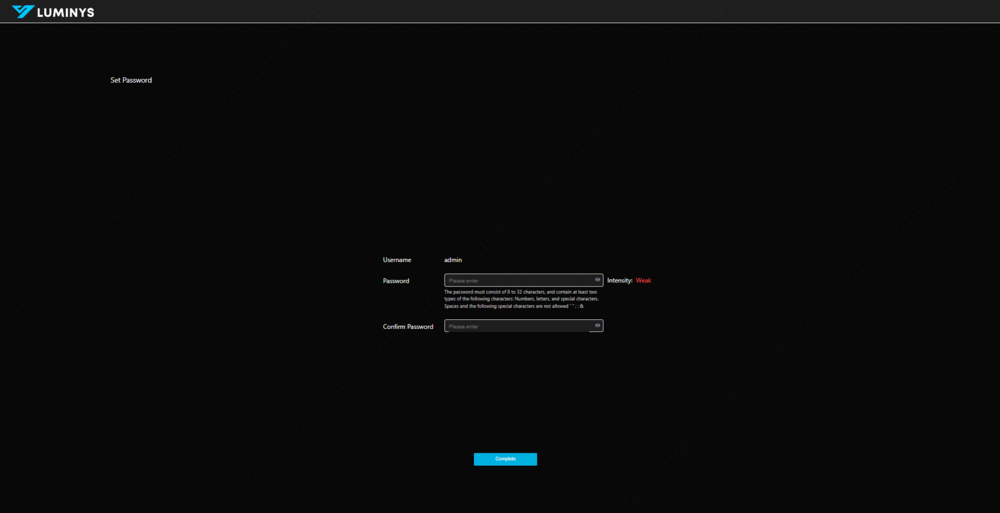
3. Set a password and finish the initialization process.
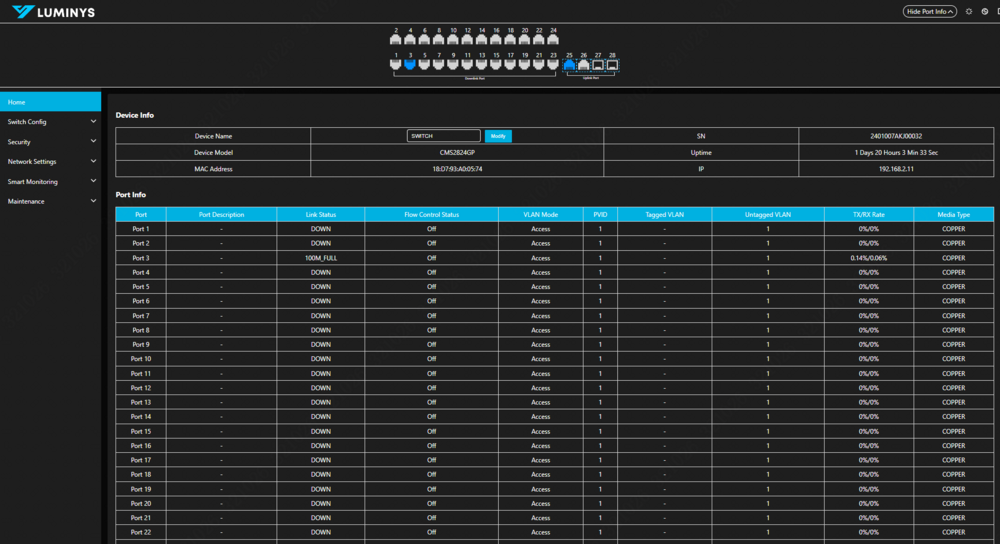
4. After logging in, the main screen will display the status of the ports and their usage.
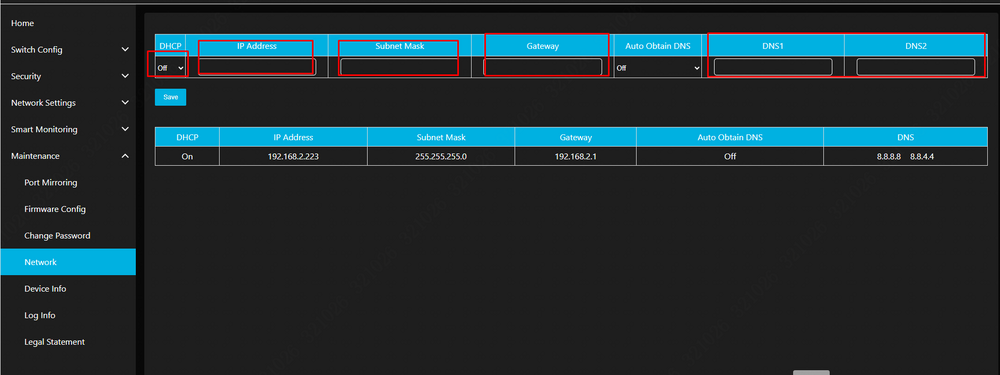
5. To change the IP from DHCP to Static, go to “Maintenance” > “Network.” Set the DHCP dropdown to “Off,” then manually enter the static IP address, Subnet Mask, Default Gateway, and DNS. Click “Save” to complete the process.
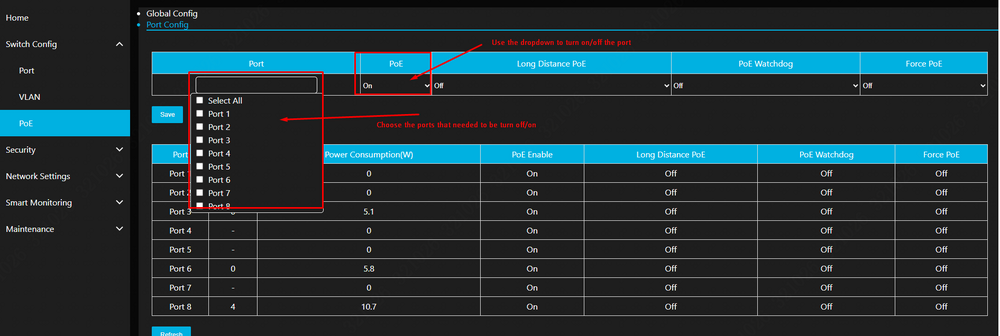
6. Turn specific ports on or off to power cycle any device connected to a PoE port.
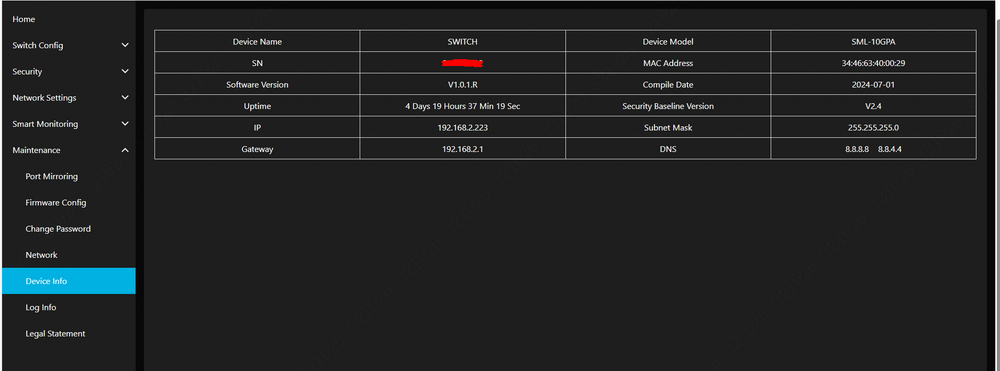
7. To access device information, navigate to “Maintenance” > “Device Info.”
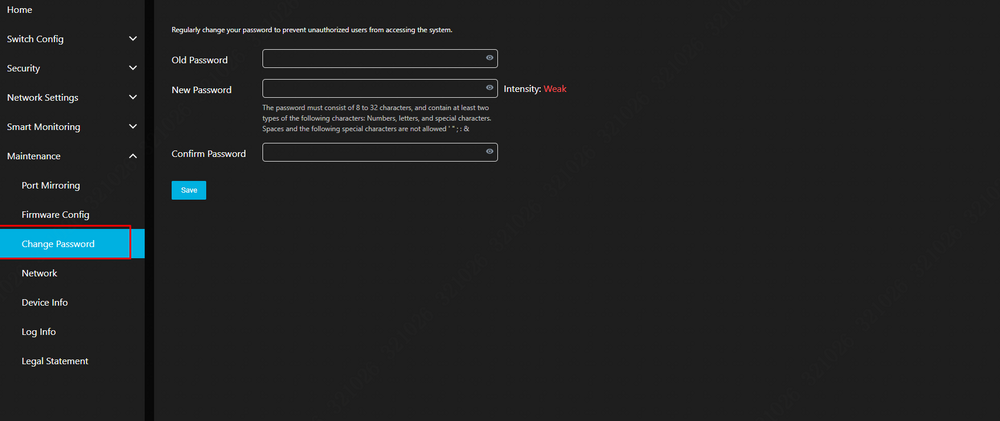
8. To change the password, select “Maintenance” > “Change Password.”
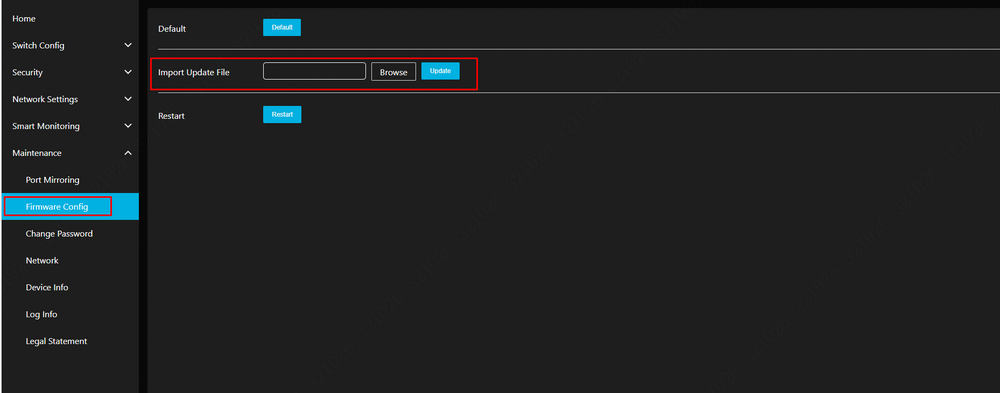
9. To update the firmware and restore factory defaults, select “Maintenance” > “Firmware Config.”


