Video doorbell/Initial Setup Instructions: Difference between revisions
From Luminys WIKI
Techsupport (talk | contribs) |
Techsupport (talk | contribs) |
||
| Line 16: | Line 16: | ||
[[File:Vdb_config_1a.jpg|256px|link=https://wiki.luminyscorp.com/images/3/39/Vdb_config_1a.jpg]] | [[File:Vdb_config_1a.jpg|256px|link=https://wiki.luminyscorp.com/images/3/39/Vdb_config_1a.jpg]] | ||
[[File:Vdb_config_1b.jpg|256px|link=https://wiki.luminyscorp.com/images/3/36/Vdb_config_1b.jpg]] | [[File:Vdb_config_1b.jpg|256px|link=https://wiki.luminyscorp.com/images/3/36/Vdb_config_1b.jpg]] | ||
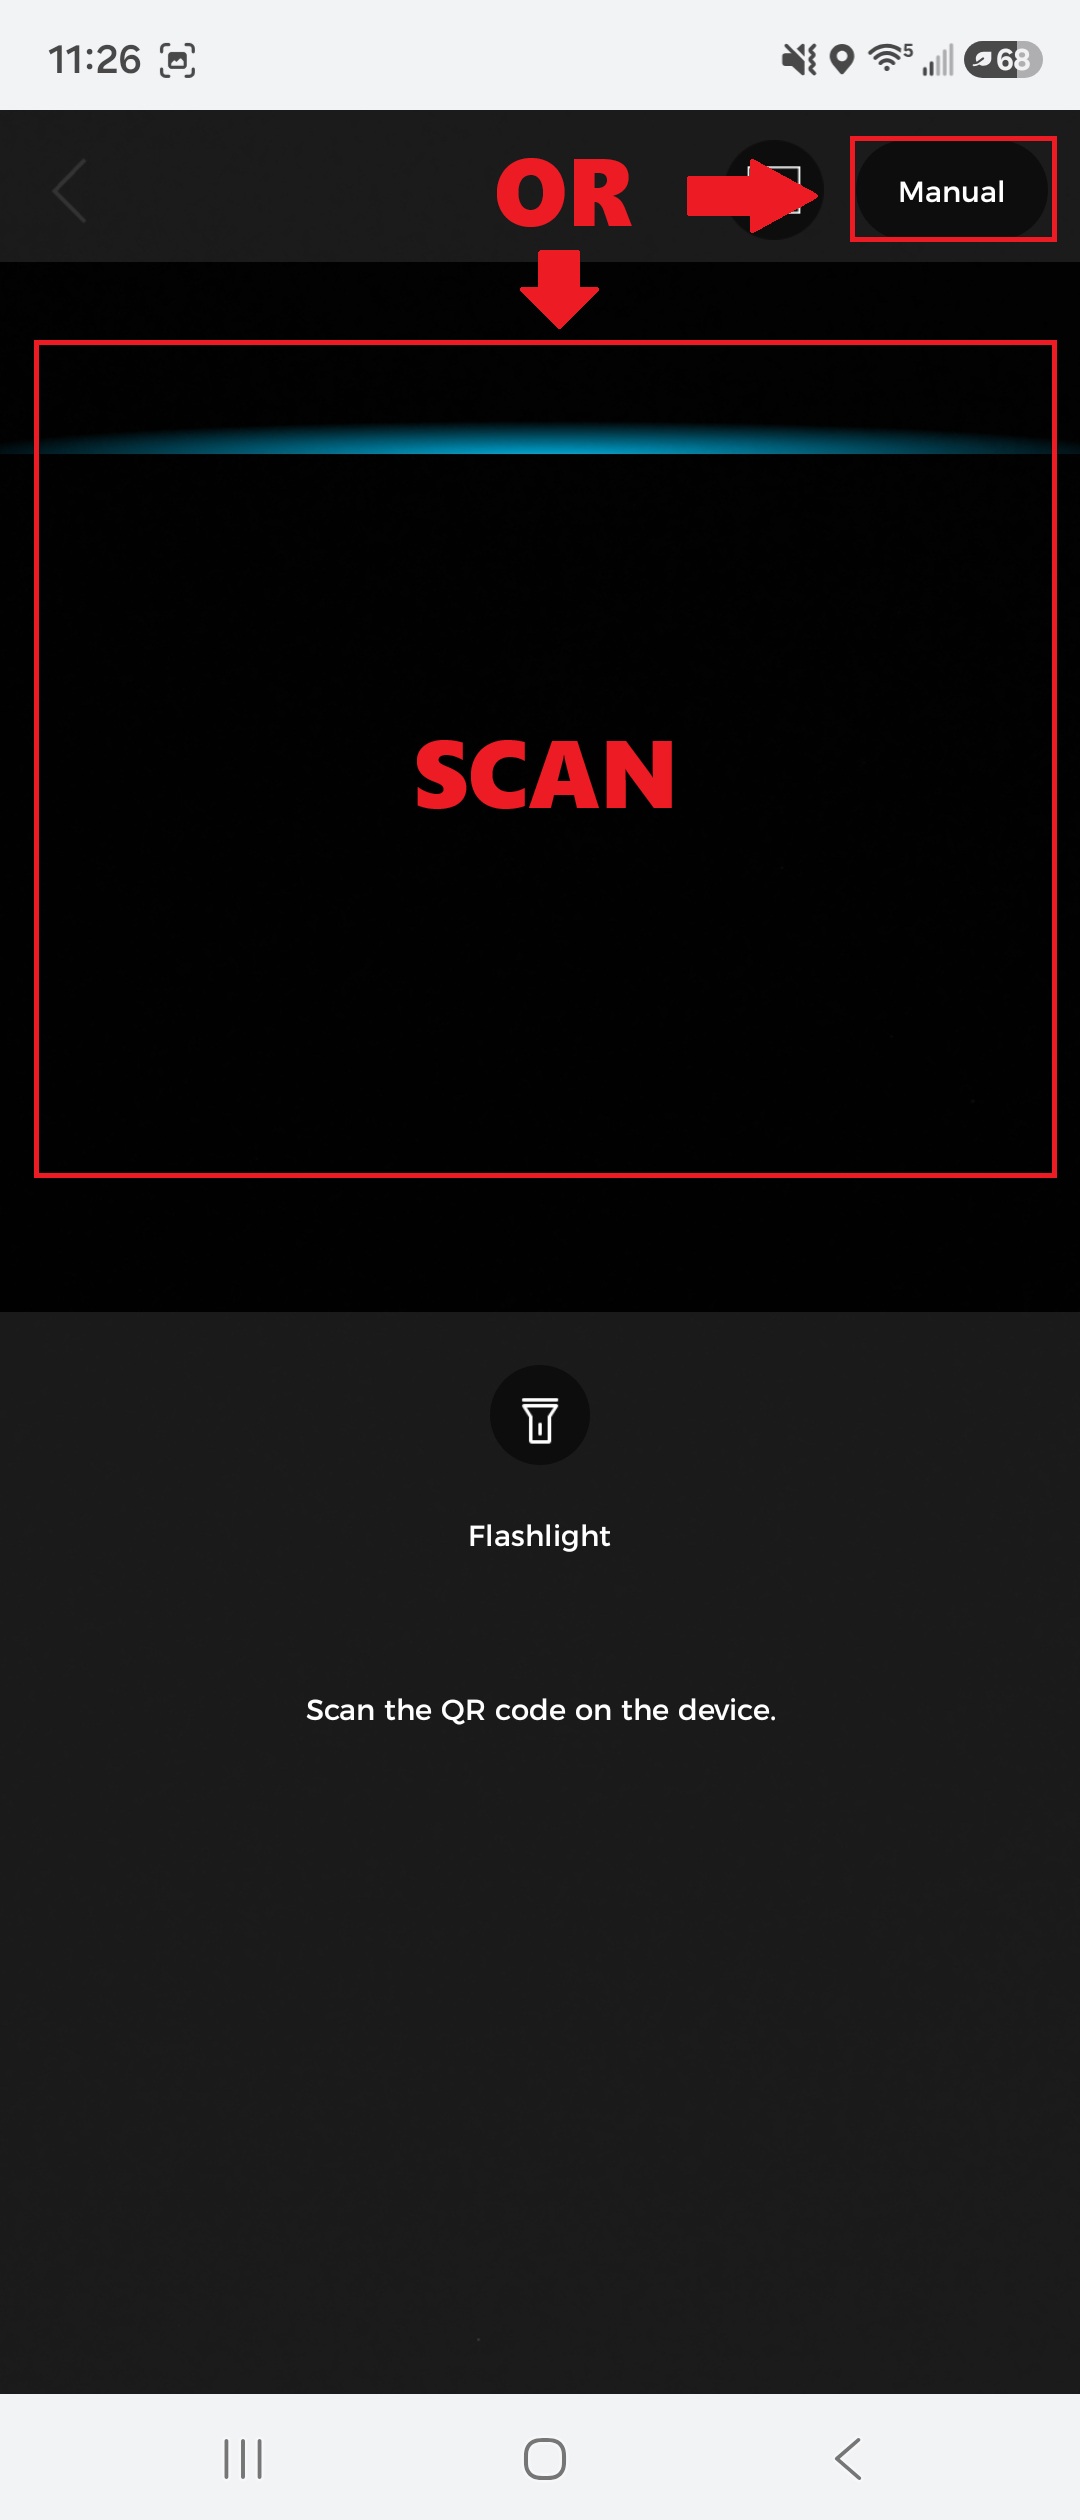
2. Scan the QR code on the product’s serial number (SN). Alternatively, tap the “Manual” button in the top-right corner to enter the SN manually. | |||
[[File:Vdb_config_2.jpg|256px|link=https://wiki.luminyscorp.com/images/1/1d/Vdb_config_2.jpg]] | |||
Revision as of 15:31, 8 June 2026

Description
This guide provides instructions for configuring your video doorbell for first-time use.
Prerequisites
- Installation instruction
- Register an account in LumiViewer
- Power on the doorbell and wait for the blue LED indicator to begin flashing.
- Download and open LumiViewer app
Step by Step Instructions
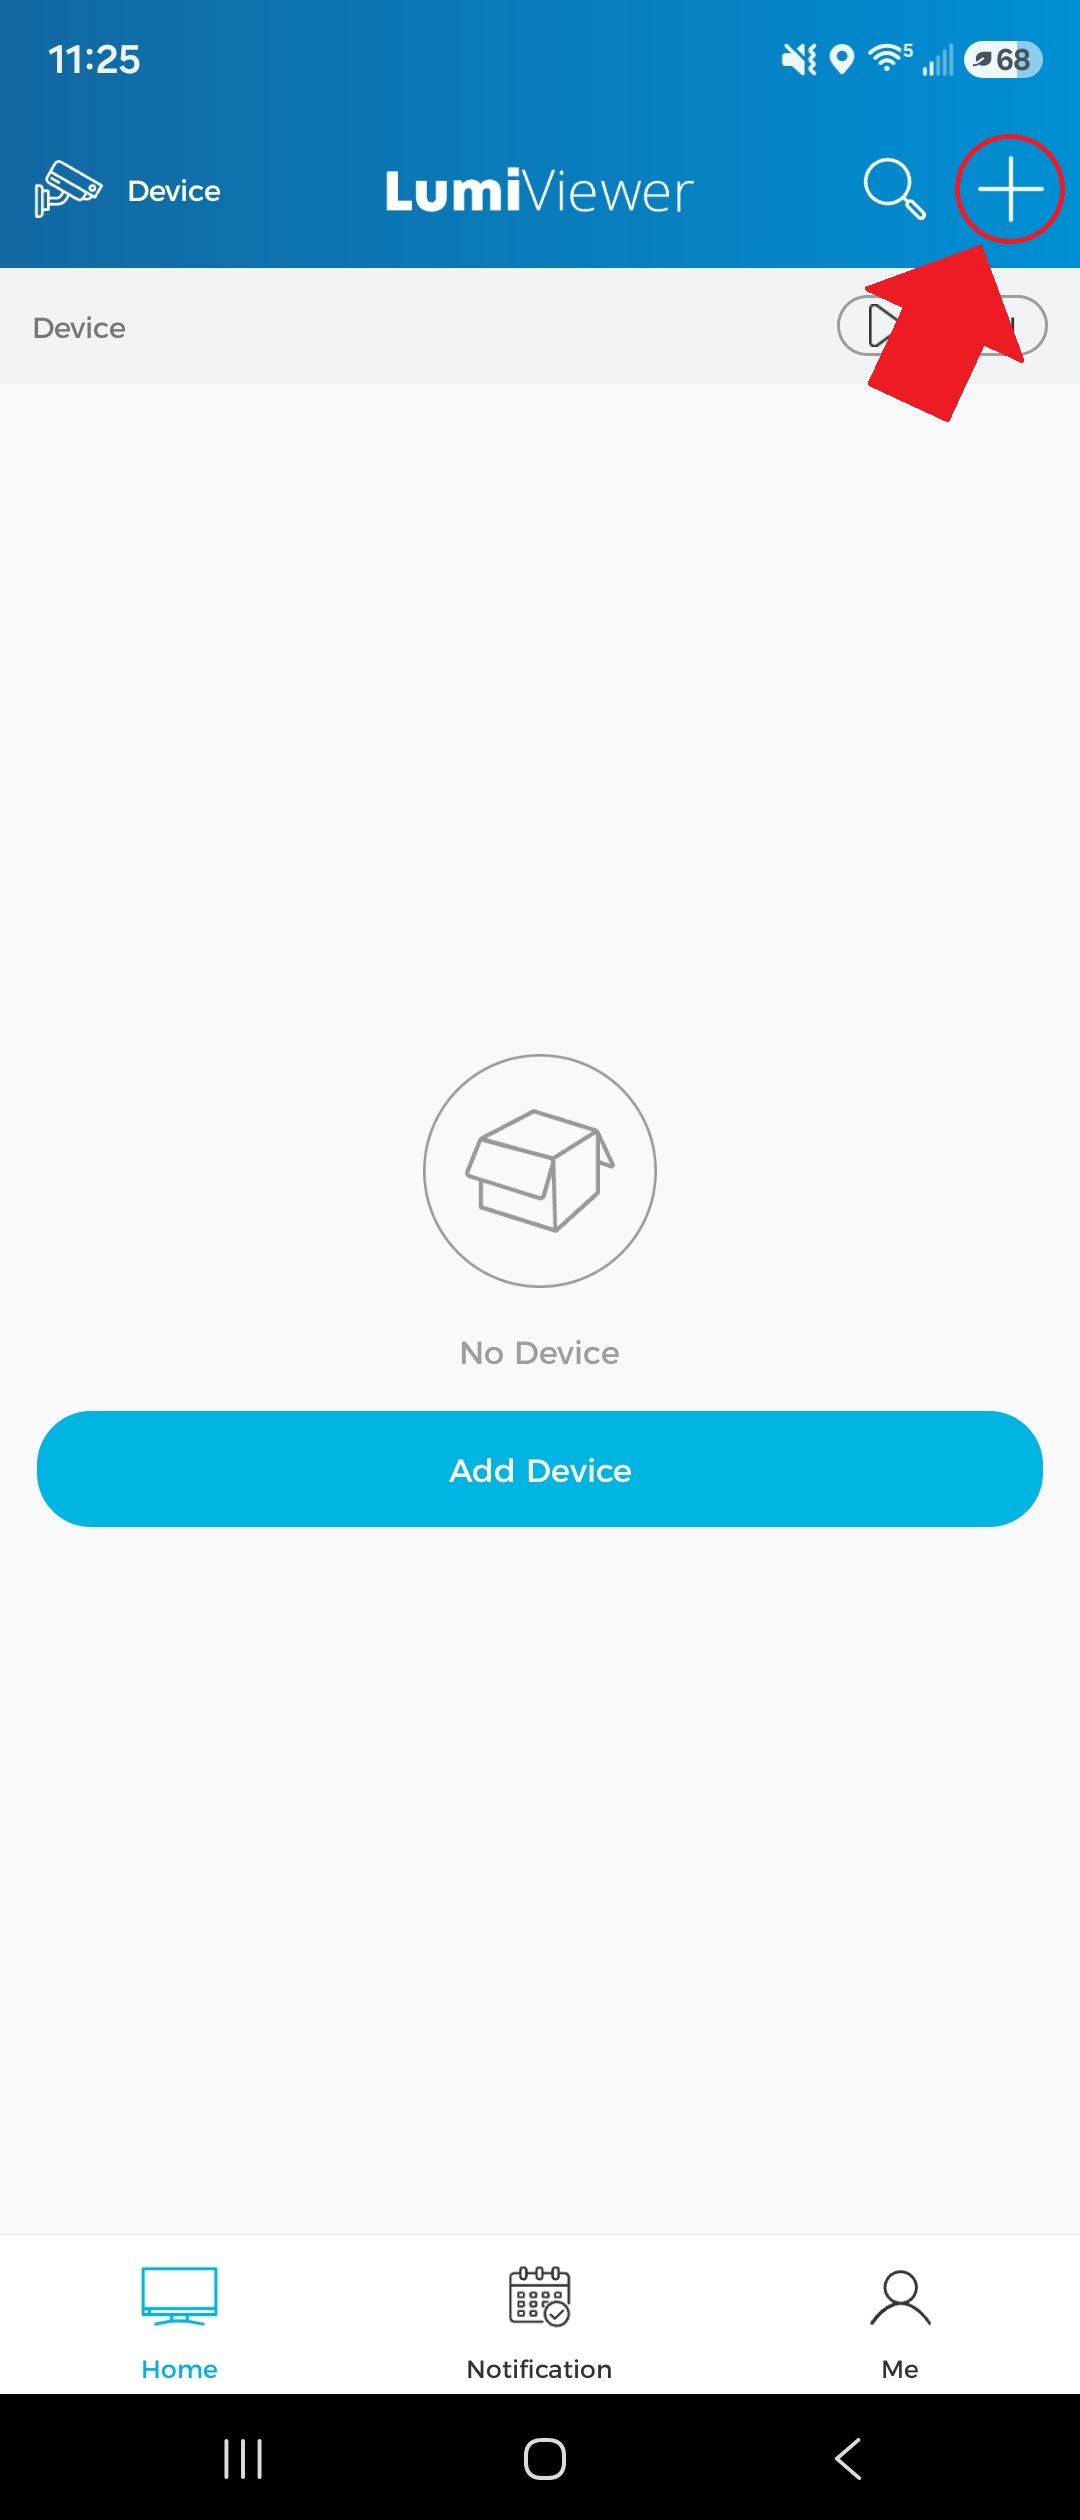
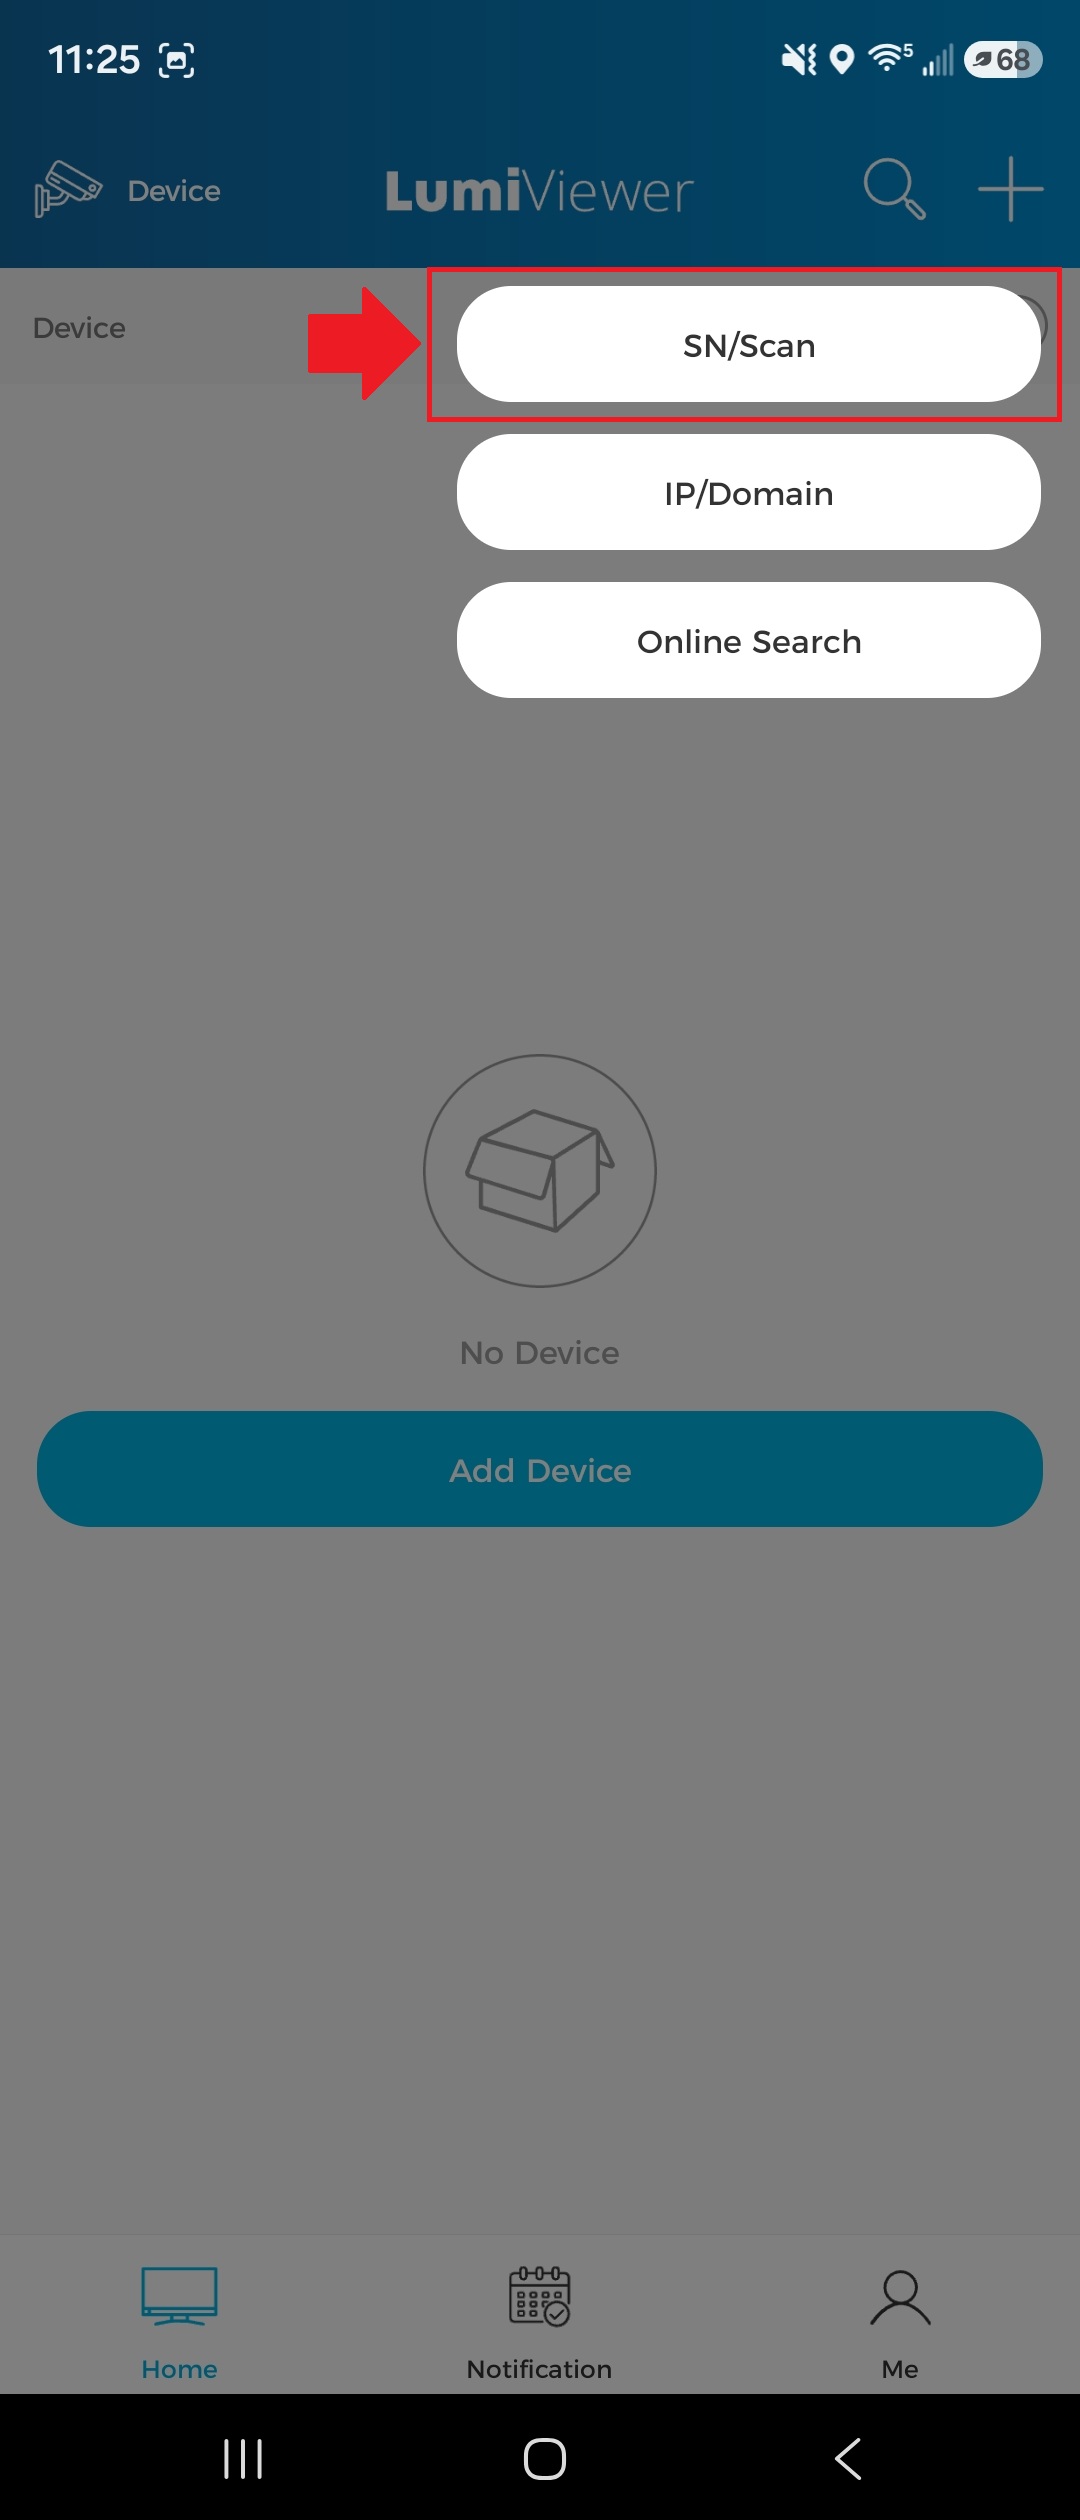
1. Tap the "+" icon in the top-right corner of the app, then select “SN/Scan.”
2. Scan the QR code on the product’s serial number (SN). Alternatively, tap the “Manual” button in the top-right corner to enter the SN manually.