|
|
| Line 11: |
Line 11: |
| ==Step by Step Instructions== | | ==Step by Step Instructions== |
|
| |
|
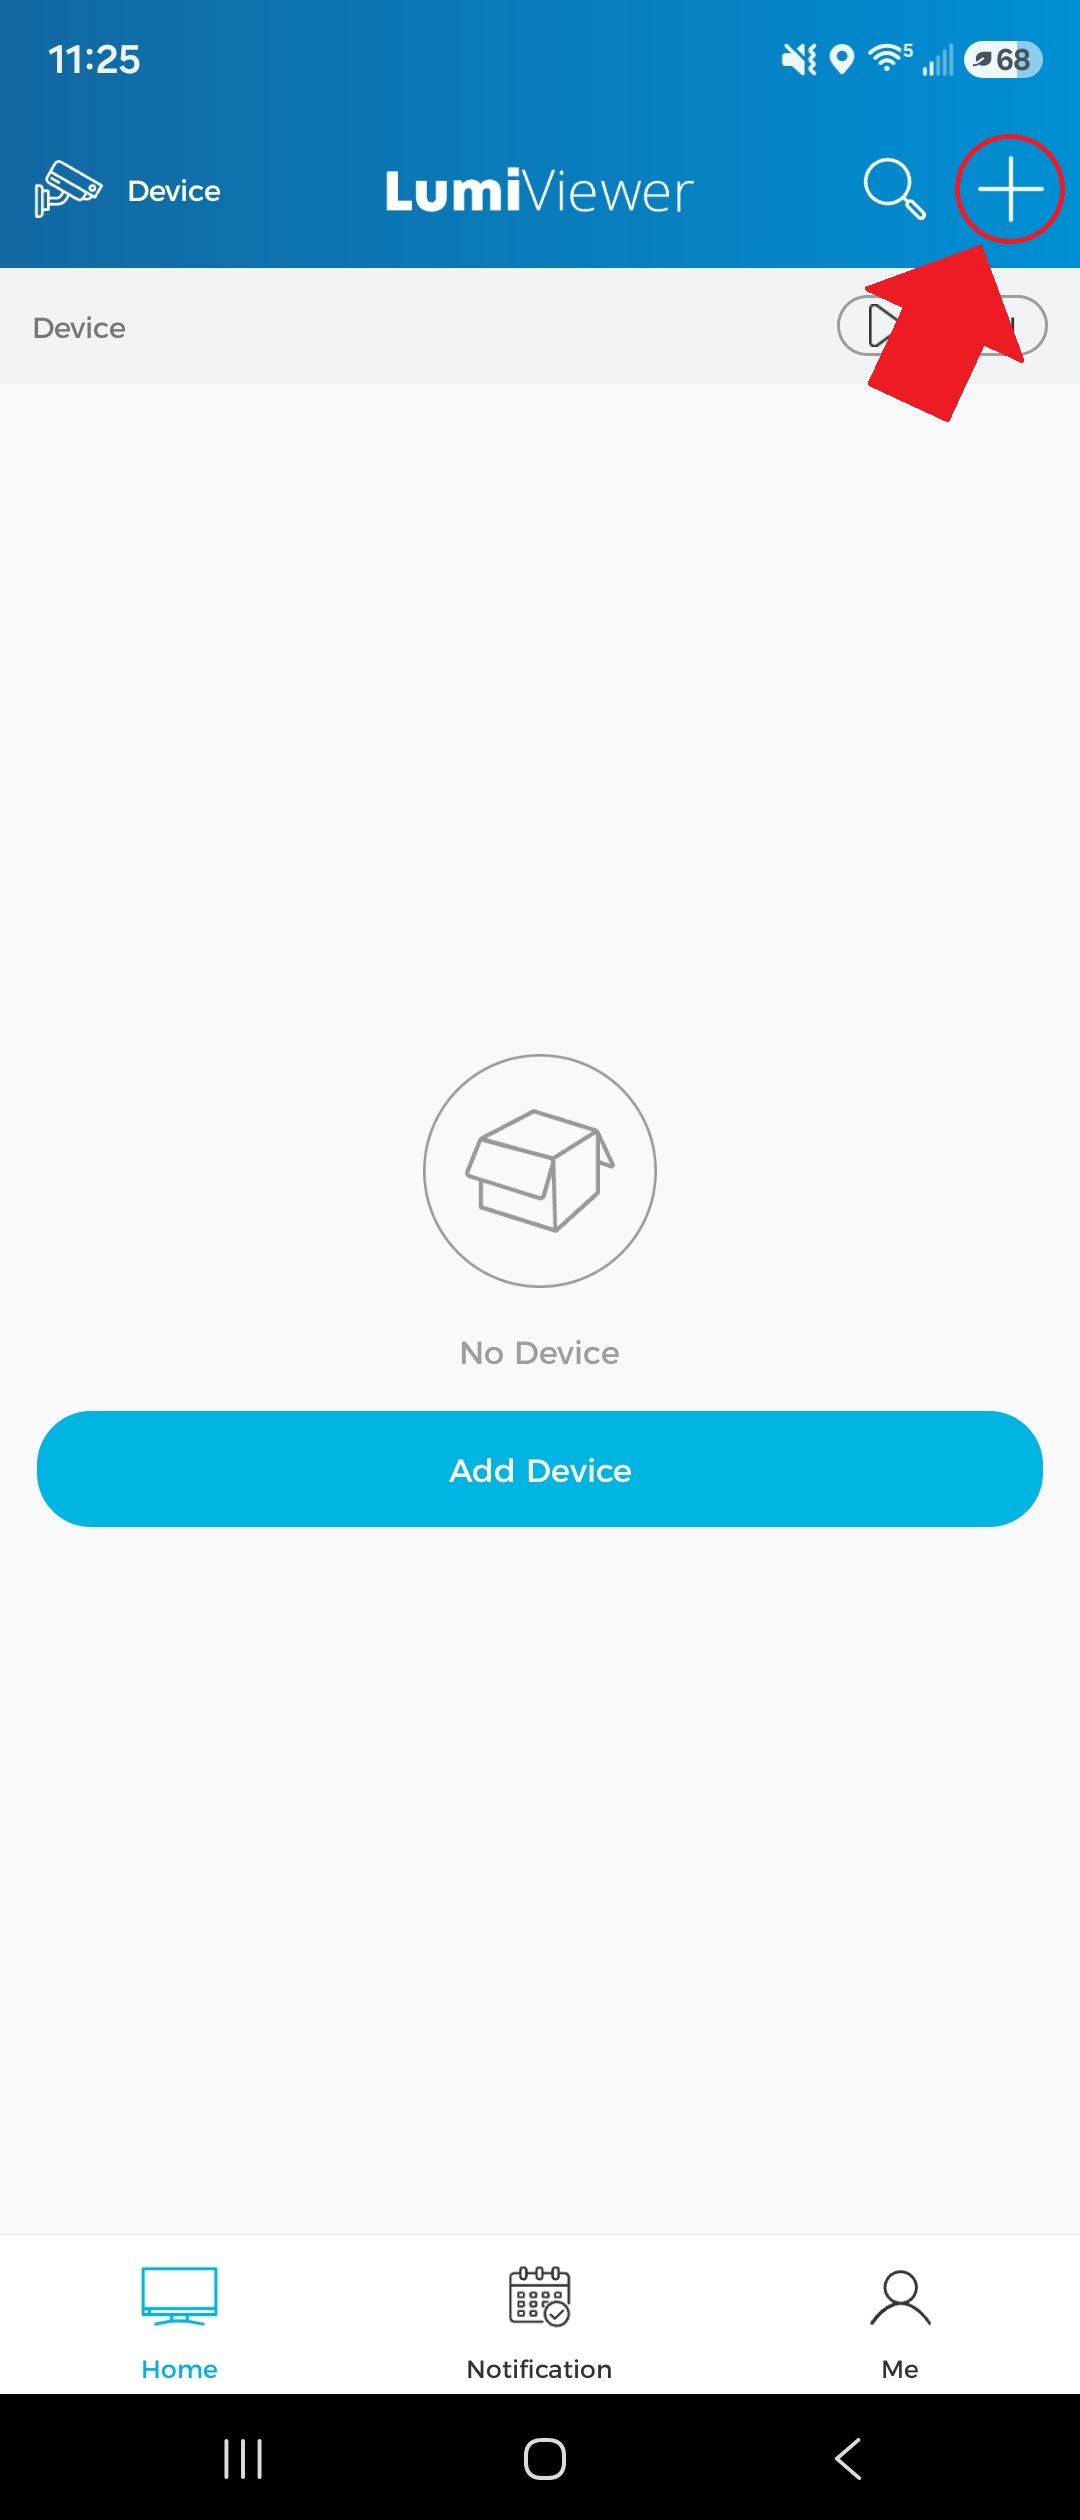
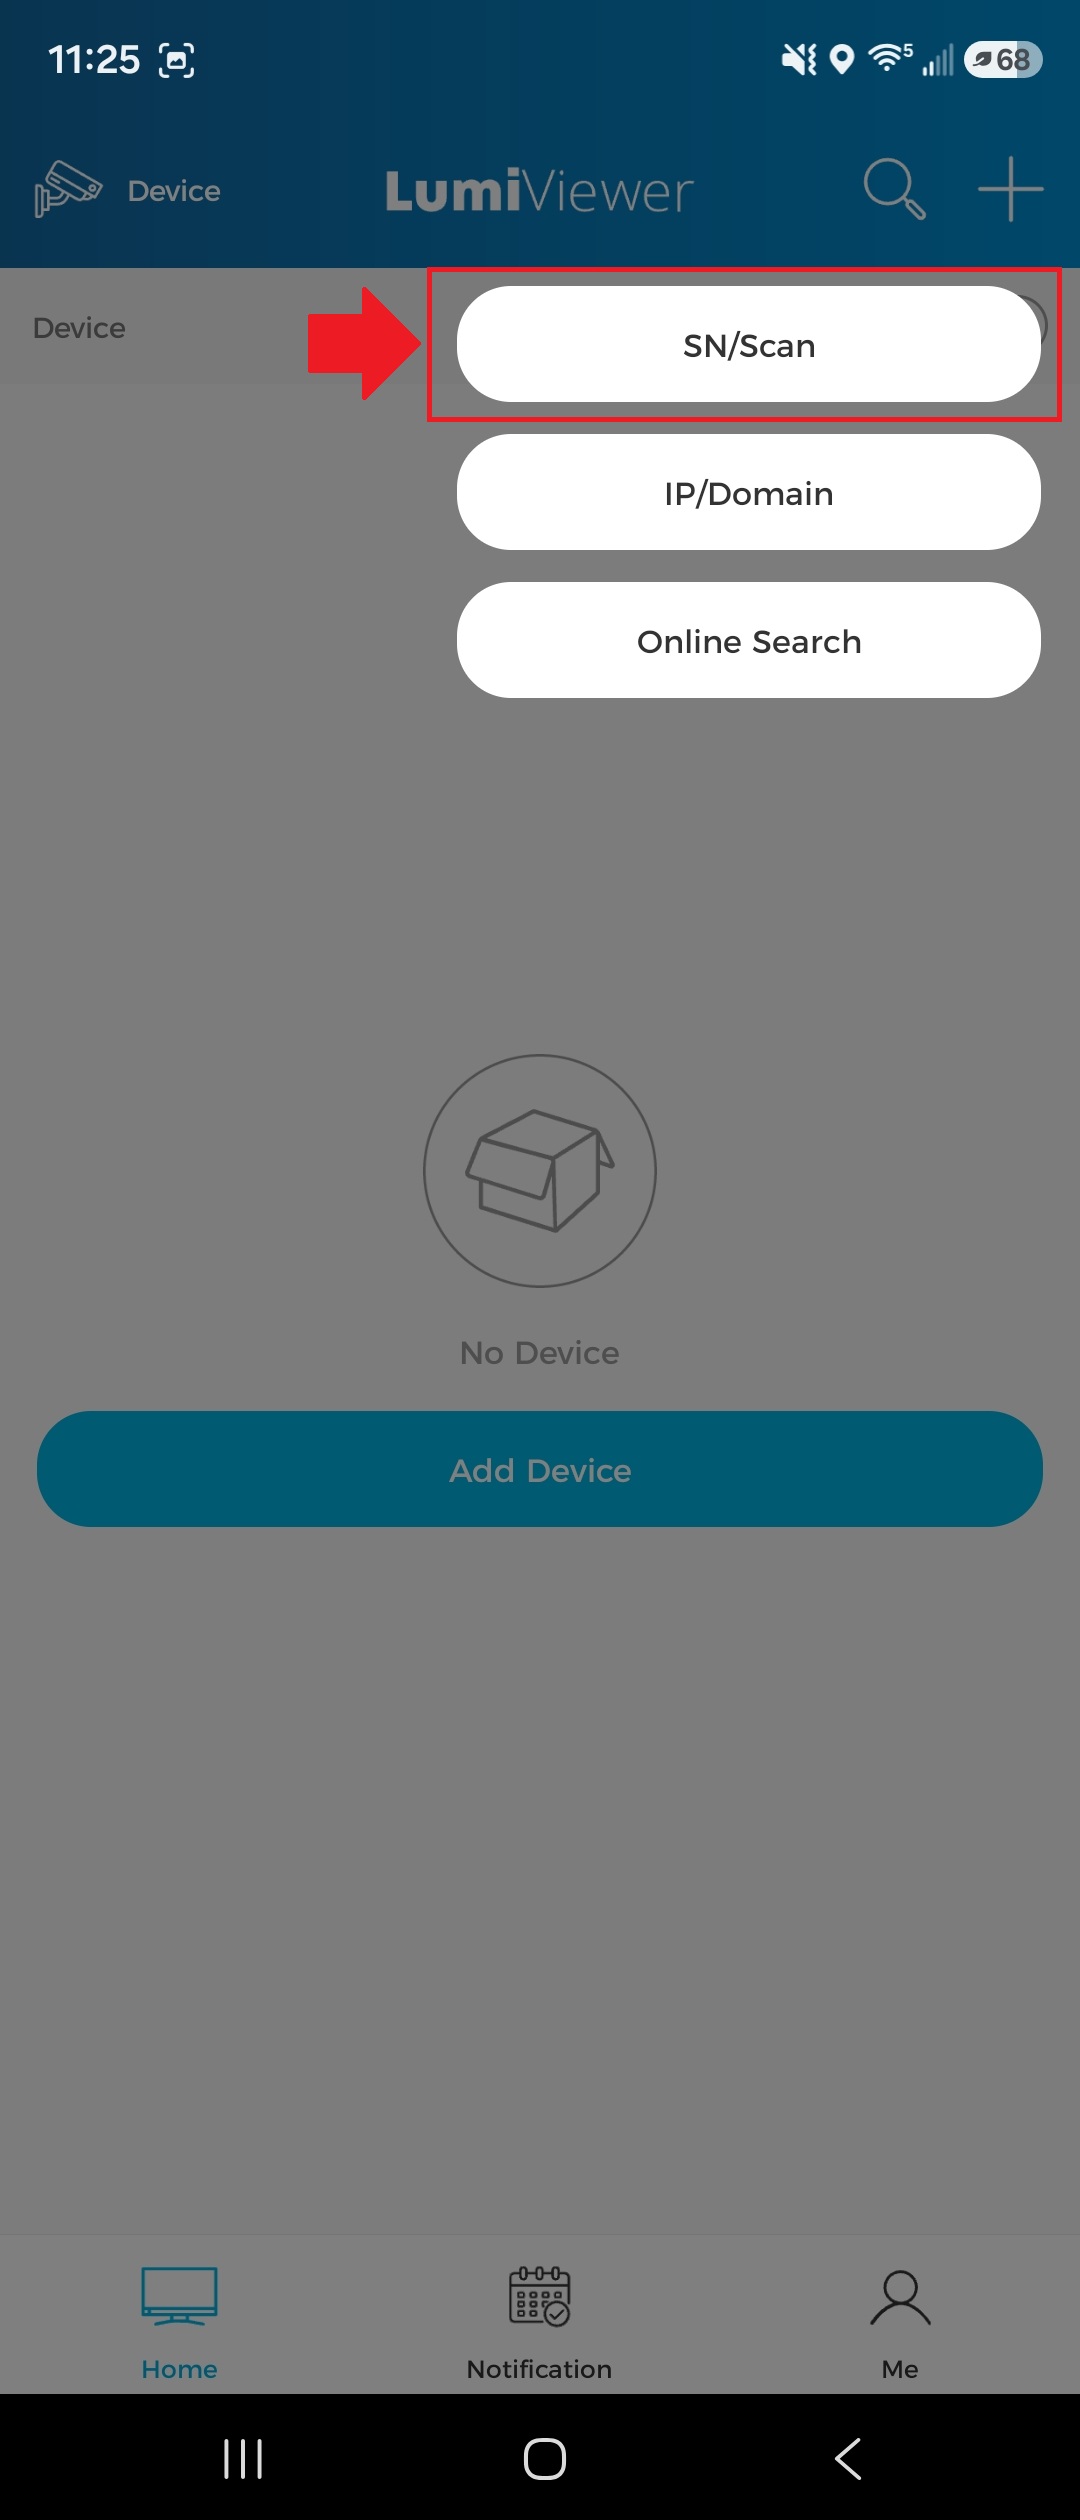
| 1. Remove any existing doorbell system(s). Position and level the mounting template on the wall and drill 5 mm holes at the marked points for your selected bracket. | | 1. Tap the "+" icon in the top-right corner of the app, then select “SN/Scan.” |
|
| |
|
| [[File:Vdb_installation_1.png|1080px|link=https://wiki.luminyscorp.com/images/3/3e/Vdb_installation_1.png]] | | [[File:Vdb_config_1a.jpg|1080px|link=https://wiki.luminyscorp.com/images/3/39/Vdb_config_1a.jpg]] |
| | | [[File:Vdb_config_1b.jpg|1080px|link=https://wiki.luminyscorp.com/images/3/36/Vdb_config_1b.jpg]] |
| 2. Use the mounting template to drill a ≥20 mm wiring hole, then tap the wall anchors into the holes until flush. If using the flat bracket, proceed to Step 3. If using the angle-adjustable bracket, go to Step 4.
| |
| | |
| [[File:Vdb_installation_2.png|1080px|link=https://wiki.luminyscorp.com/images/e/e2/Vdb_installation_2.png]]
| |
| | |
| 3. For flat bracket installations, remove and retain the two locking tabs. Align the flat bracket with the wall anchors. Secure the bracket with the supplied flat-head Phillips head screws.
| |
| | |
| [[File:Vdb_installation_3.png|1080px|link=https://wiki.luminyscorp.com/images/8/8f/Vdb_installation_3.png]]
| |
| | |
| 4. For angle-adjustable bracket installations, remove and retain the two locking tabs. Align the angle-adjustable bracket with the wall anchors and secure it using the supplied flat-head Phillips screws. Align the flat bracket on top and fasten it with the supplied round-head Phillips screws.
| |
| | |
| [[File:Vdb_installation_4.png|1080px|link=https://wiki.luminyscorp.com/images/9/9c/Vdb_installation_4.png]]
| |
| | |
| 5. Check the power-supply wire length. If sufficient, proceed to Step 6 and skip step 7. If too short, proceed immediately to Step 7.
| |
| | |
| [[File:Vdb_installation_5.png|1080px|link=https://wiki.luminyscorp.com/images/e/e9/Vdb_installation_5.png]]
| |
| | |
| 6. If the power supply wires are of sufficient length, connect them to the doorbell terminals and tighten the terminal screws.
| |
| | |
| [[File:Vdb_installation_6.png|1080px|link=https://wiki.luminyscorp.com/images/5/51/Vdb_installation_6.png]]
| |
| | |
| 7. If the power supply wires are too short, add the supplied extension using the wire nuts. Connect the extended wires to the doorbell terminals and tighten the terminal screws.
| |
| | |
| [[File:Vdb_installation_7.png|1080px|link=https://wiki.luminyscorp.com/images/c/c2/Vdb_installation_7.png]]
| |
| | |
| 8. Slide the doorbell onto the bracket. Turn the circuit breaker back on. Plug the wireless chime into a wall outlet.
| |
| | |
| [[File:Vdb_installation_8.png|1080px|link=https://wiki.luminyscorp.com/images/5/53/Vdb_installation_8.png]]
| |
| | |
| 9. Insert the locking tab into the gap between the flat bracket and the wall (or angle-adjustable bracket).
| |
| | |
| [[File:Vdb_installation_9.png|1080px|link=https://wiki.luminyscorp.com/images/3/31/Vdb_installation_9.png]] | |
Description
This guide provides instructions for configuring your video doorbell for first-time use.
Prerequisites
Step by Step Instructions
1. Tap the "+" icon in the top-right corner of the app, then select “SN/Scan.”