LumiCloud/Playback: Difference between revisions
From Luminys WIKI
Techsupport (talk | contribs) |
Techsupport (talk | contribs) |
||
| Line 9: | Line 9: | ||
[[File:PTZ_Preset_cloud_1.png|1000px|link=https://wiki.luminyscorp.com/images/b/ba/PTZ_Preset_cloud_1.png]] | [[File:PTZ_Preset_cloud_1.png|1000px|link=https://wiki.luminyscorp.com/images/b/ba/PTZ_Preset_cloud_1.png]] | ||
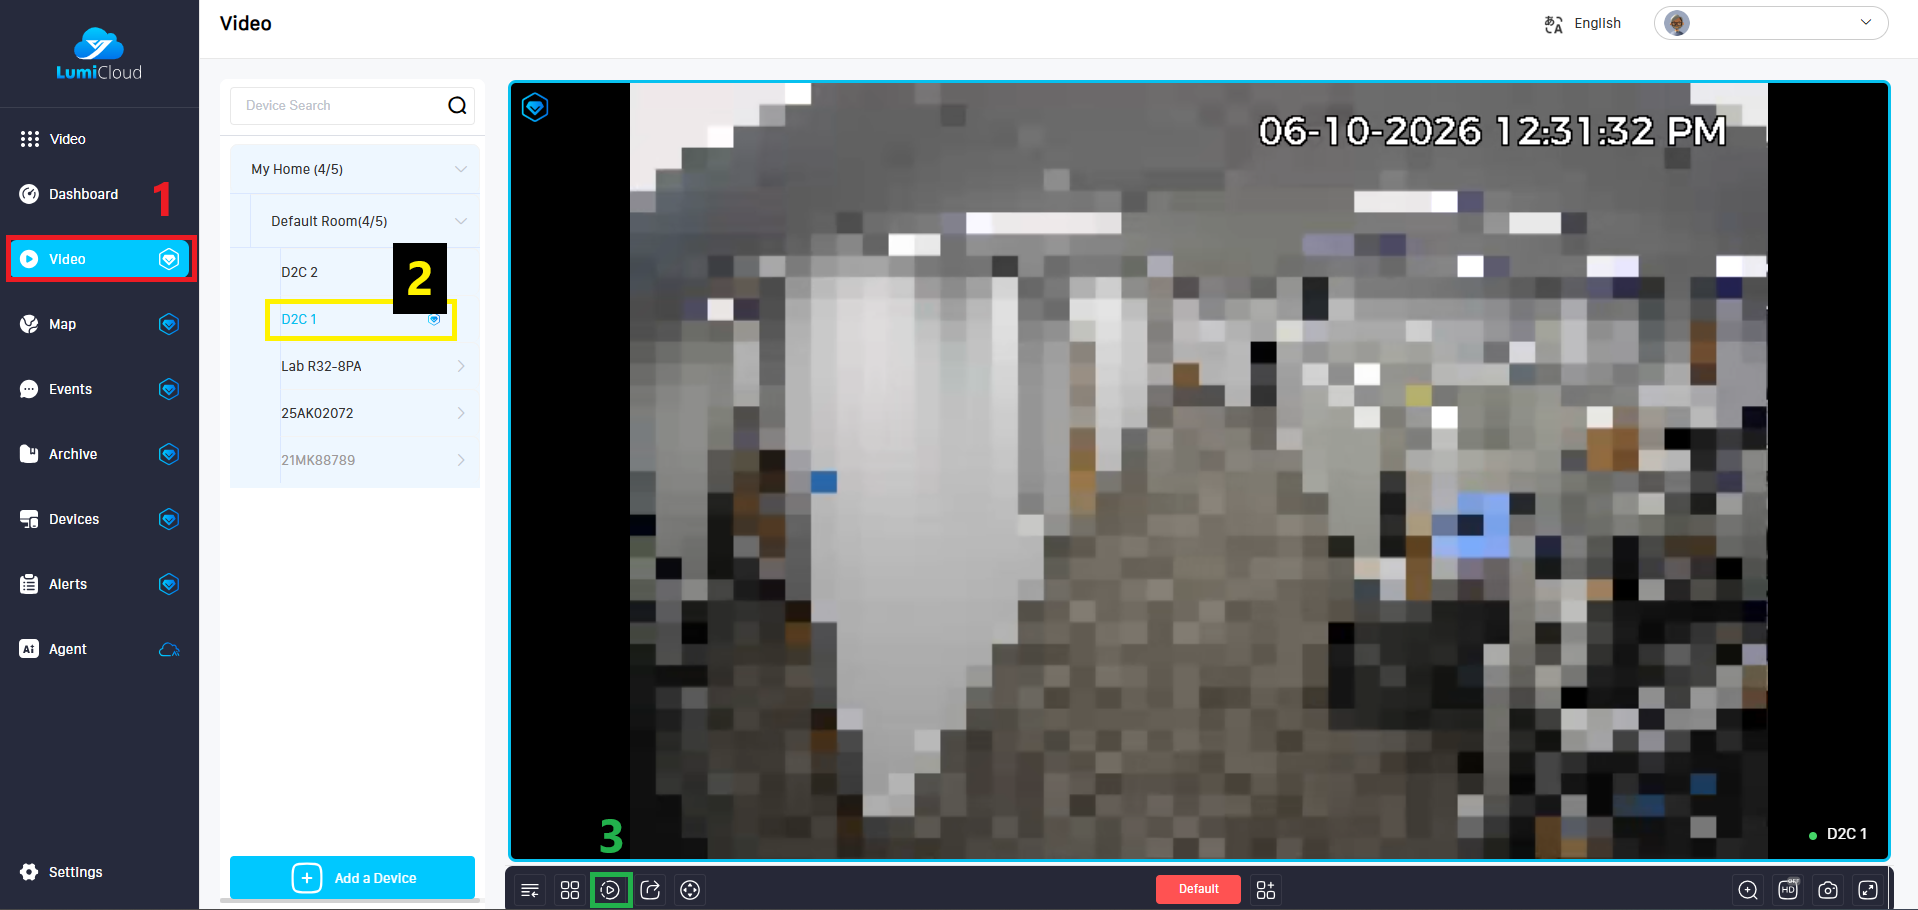
2. Select the “Video” tab <span style = "color: red"> (1) </span> on the left panel, locate the PTZ camera <span style = "color: yellow; background: black"> (2)</span> for which you want to create a preset, and then click the Playback icon <span style = "color: green"> (3) </span> at the bottom. | |||
[[File:D2C_Playback.png|1000px|link=https://wiki.luminyscorp.com/images/e/e7/D2C_Playback.png]] | |||
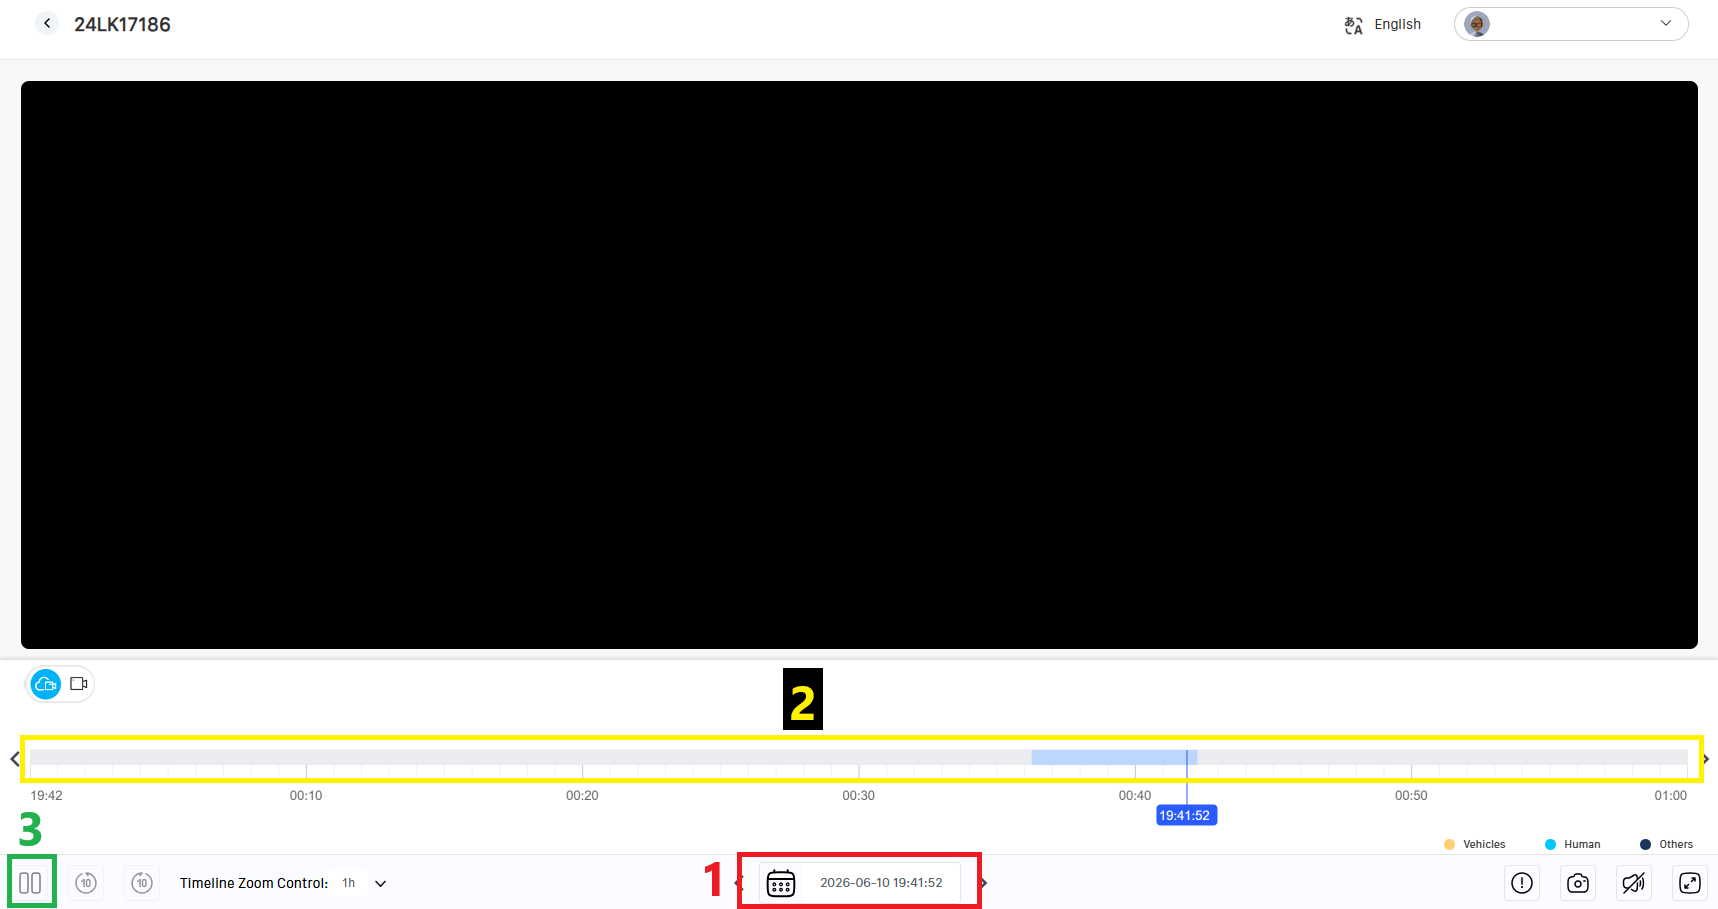
3. On the Playback screen, use the date and time selector <span style = "color:red">(1)</span> to choose the desired date, then use the timeline <span style = "color: yellow; background: black">(2)</span> to select the specific time. After that, use the Play/Pause <span style = "color: green">(3)</span> button to start or pause the playback. | |||
[[File:D2C_Playback_2.png|1000px|link=https://wiki.luminyscorp.com/images/b/bf/D2C_Playback_2.png]] | |||
Revision as of 12:59, 10 June 2026
Description
Prerequisite
Instruction
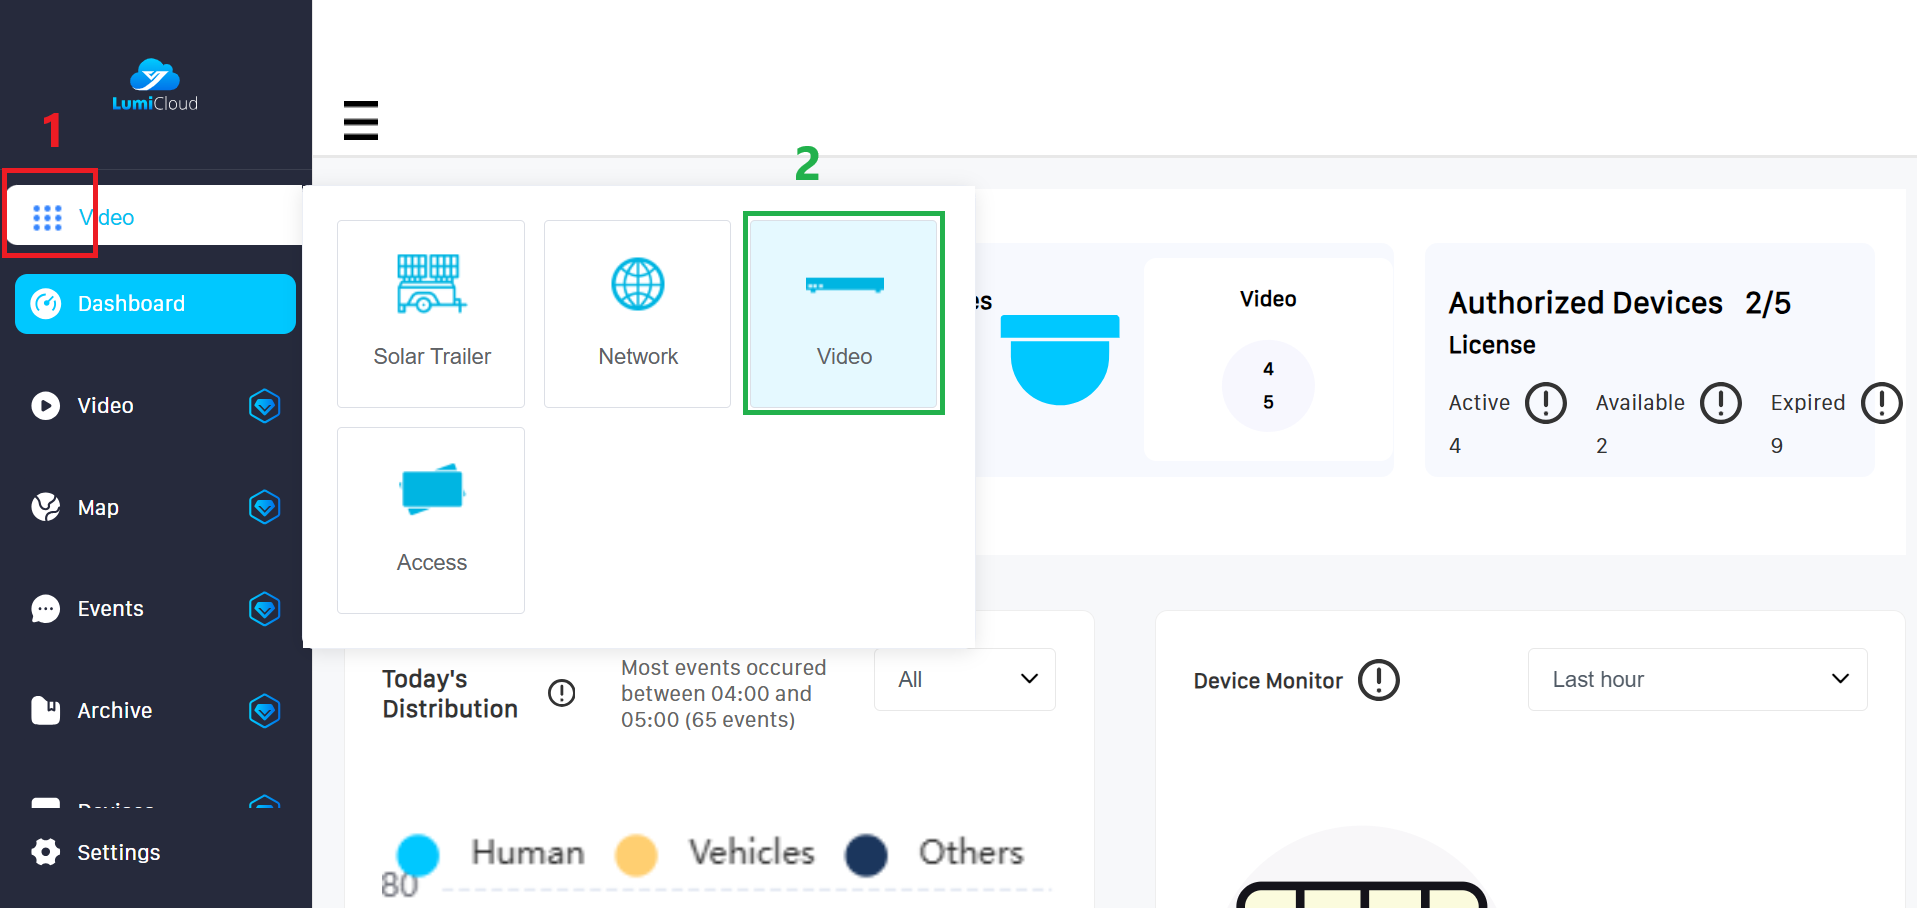
1. After logging in, select launcher (1) icon from the left panel, then choose the "Video" (2) option.
2. Select the “Video” tab (1) on the left panel, locate the PTZ camera (2) for which you want to create a preset, and then click the Playback icon (3) at the bottom.
3. On the Playback screen, use the date and time selector (1) to choose the desired date, then use the timeline (2) to select the specific time. After that, use the Play/Pause (3) button to start or pause the playback.