NVR/NVR LPR Allow and Block List Setup
Setup Allow and Block List via NVR
Description
This tutorial will go over how to setup allow and block list via NVR.
Prerequisites
- Access NVR WebGUI via web browser.
Video Instructions
Step by Step Instructions
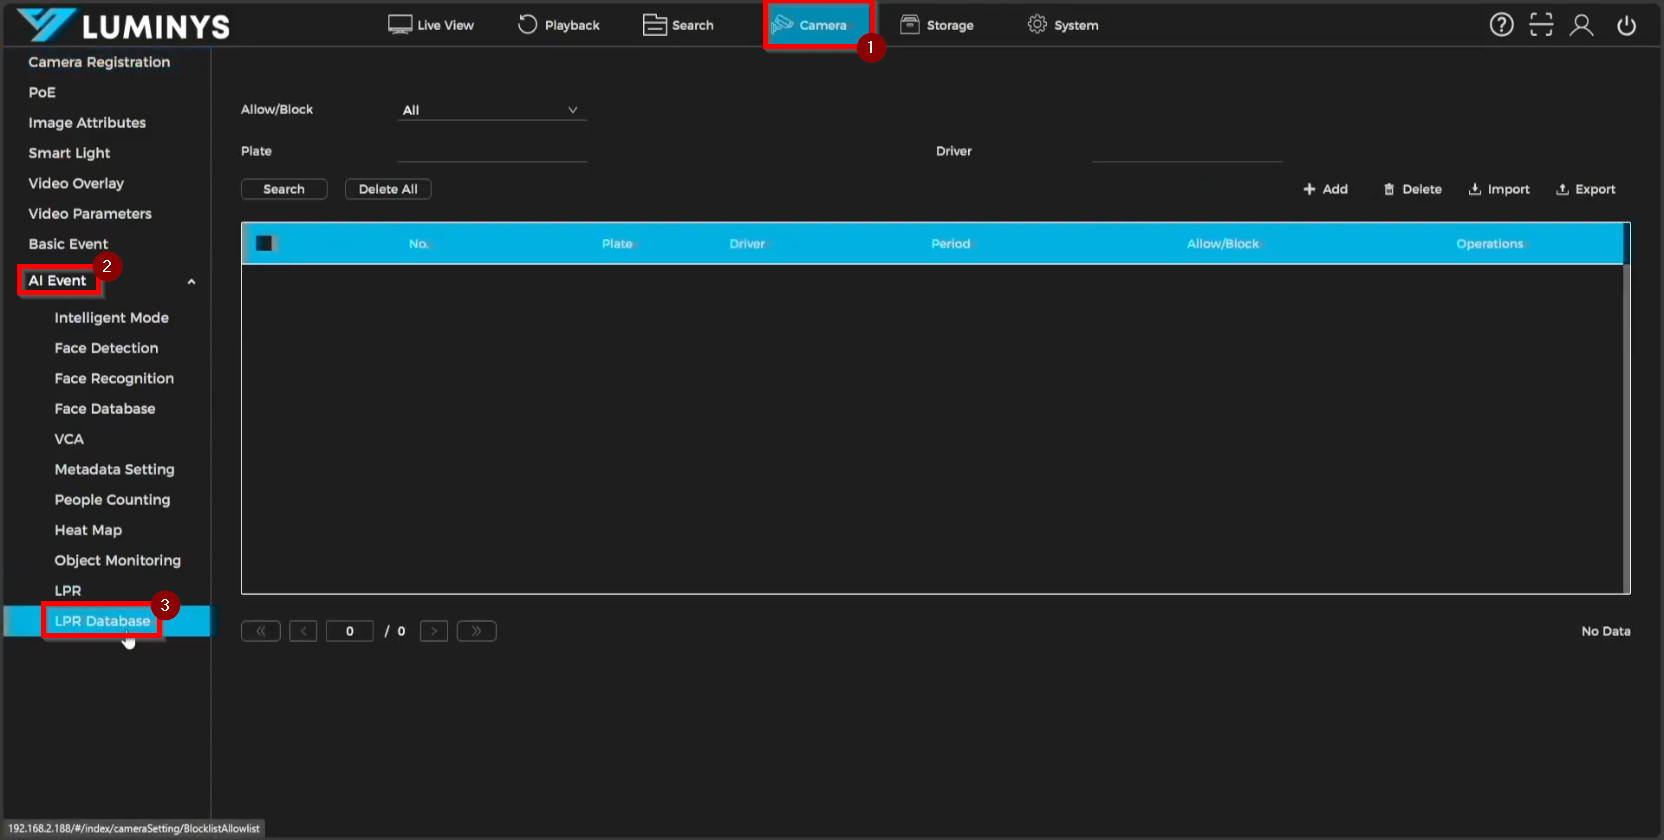
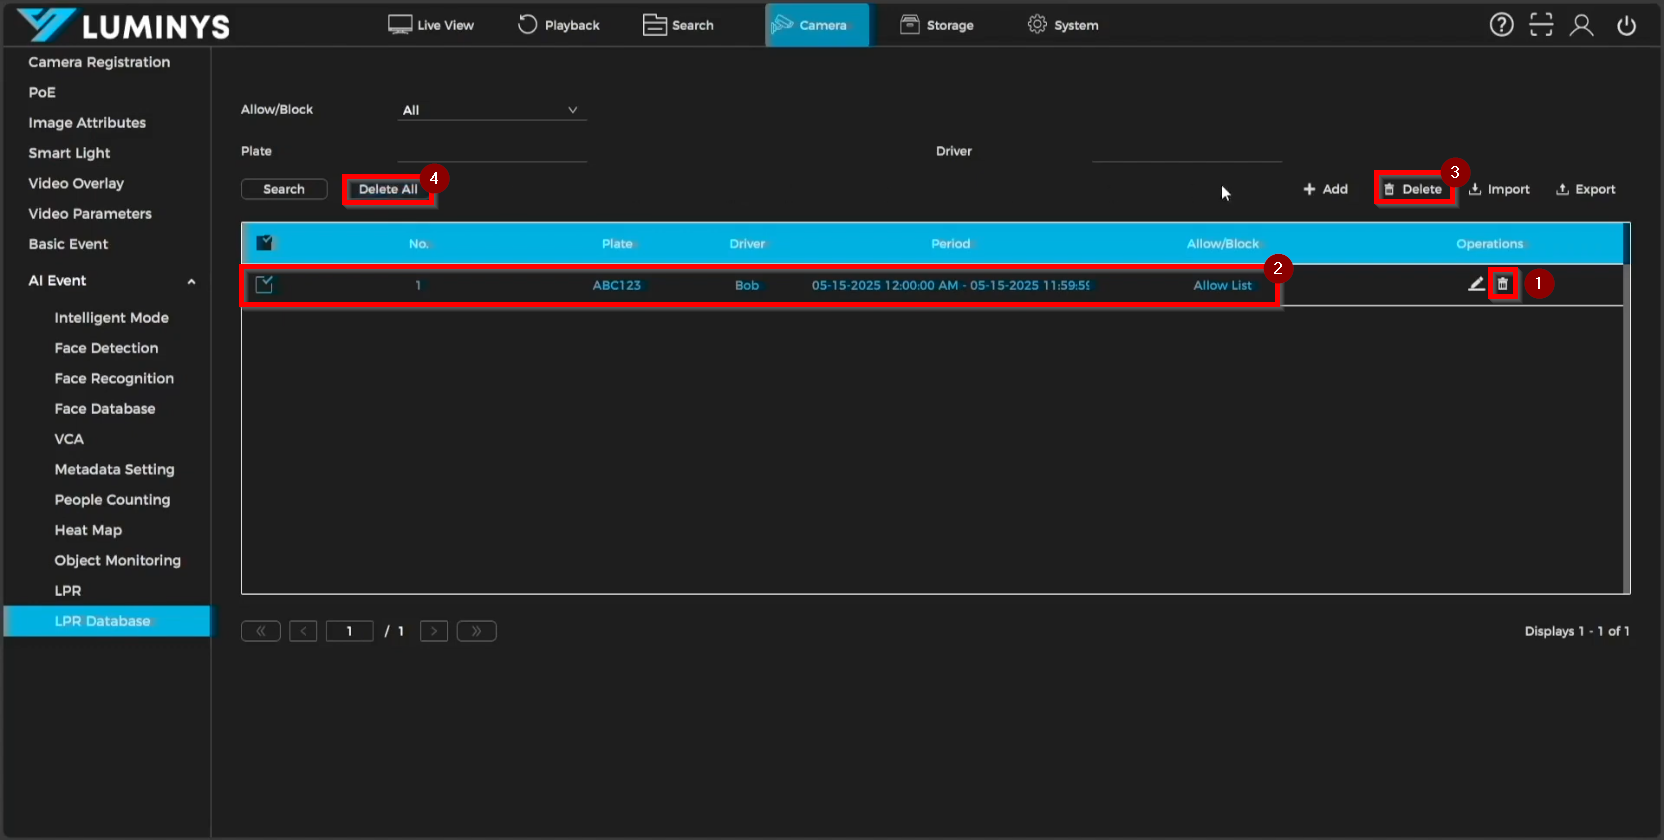
1. To add license plates on the NVR, navigate to Camera > AI Event > LPR Database.
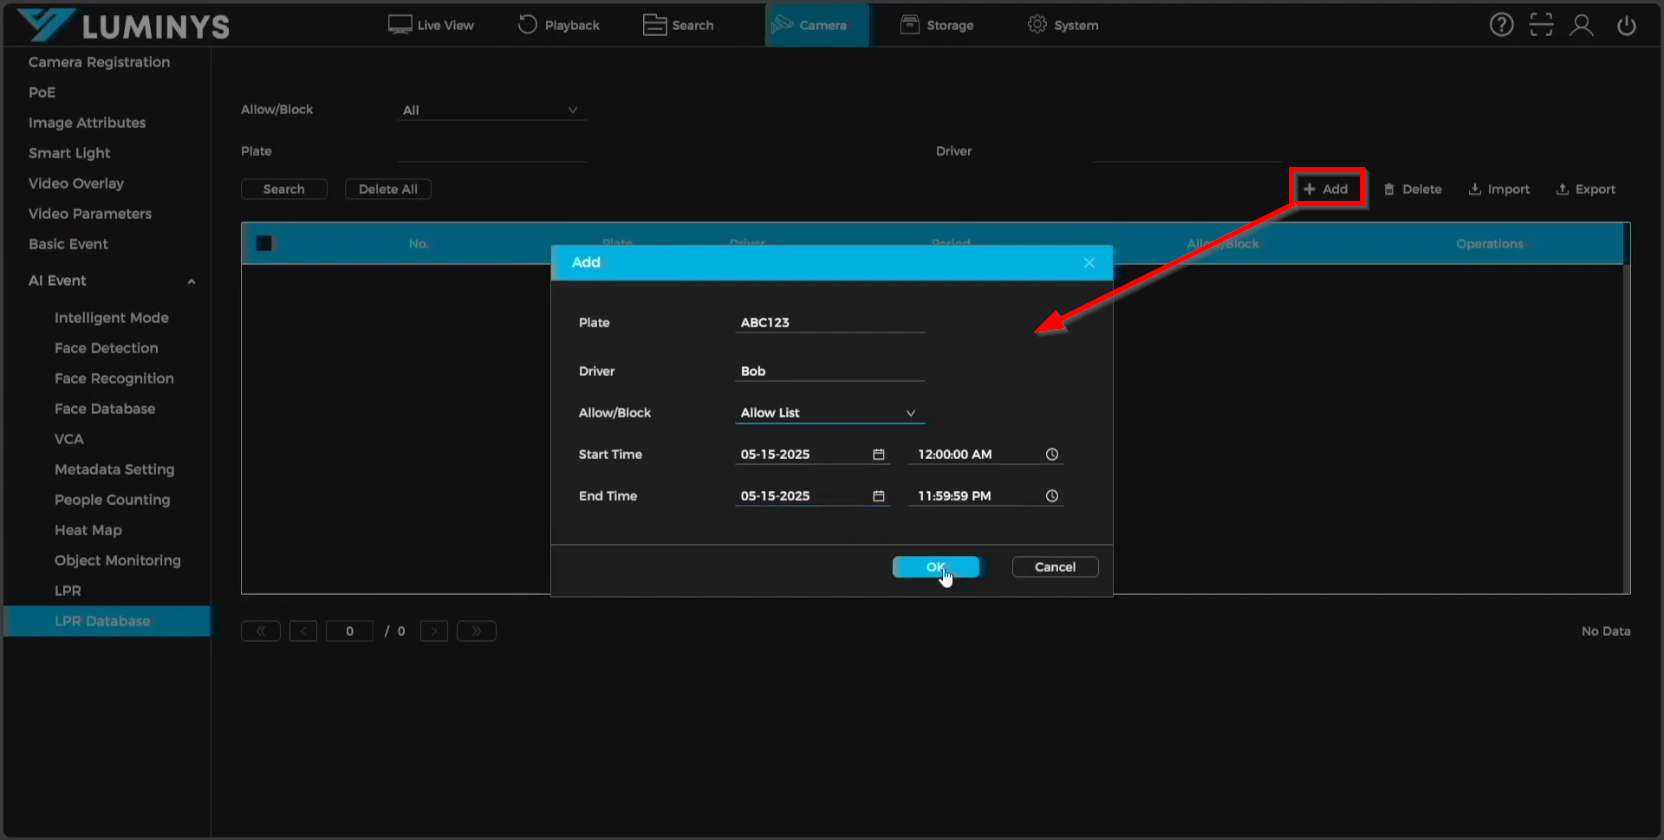
2. Click the + button to initiate the license plate addition process. Details such as Plate, Driver, Allow/Block, Start Time, and End Time can be configured for each entry. To add additional license plates, repeat the same steps.
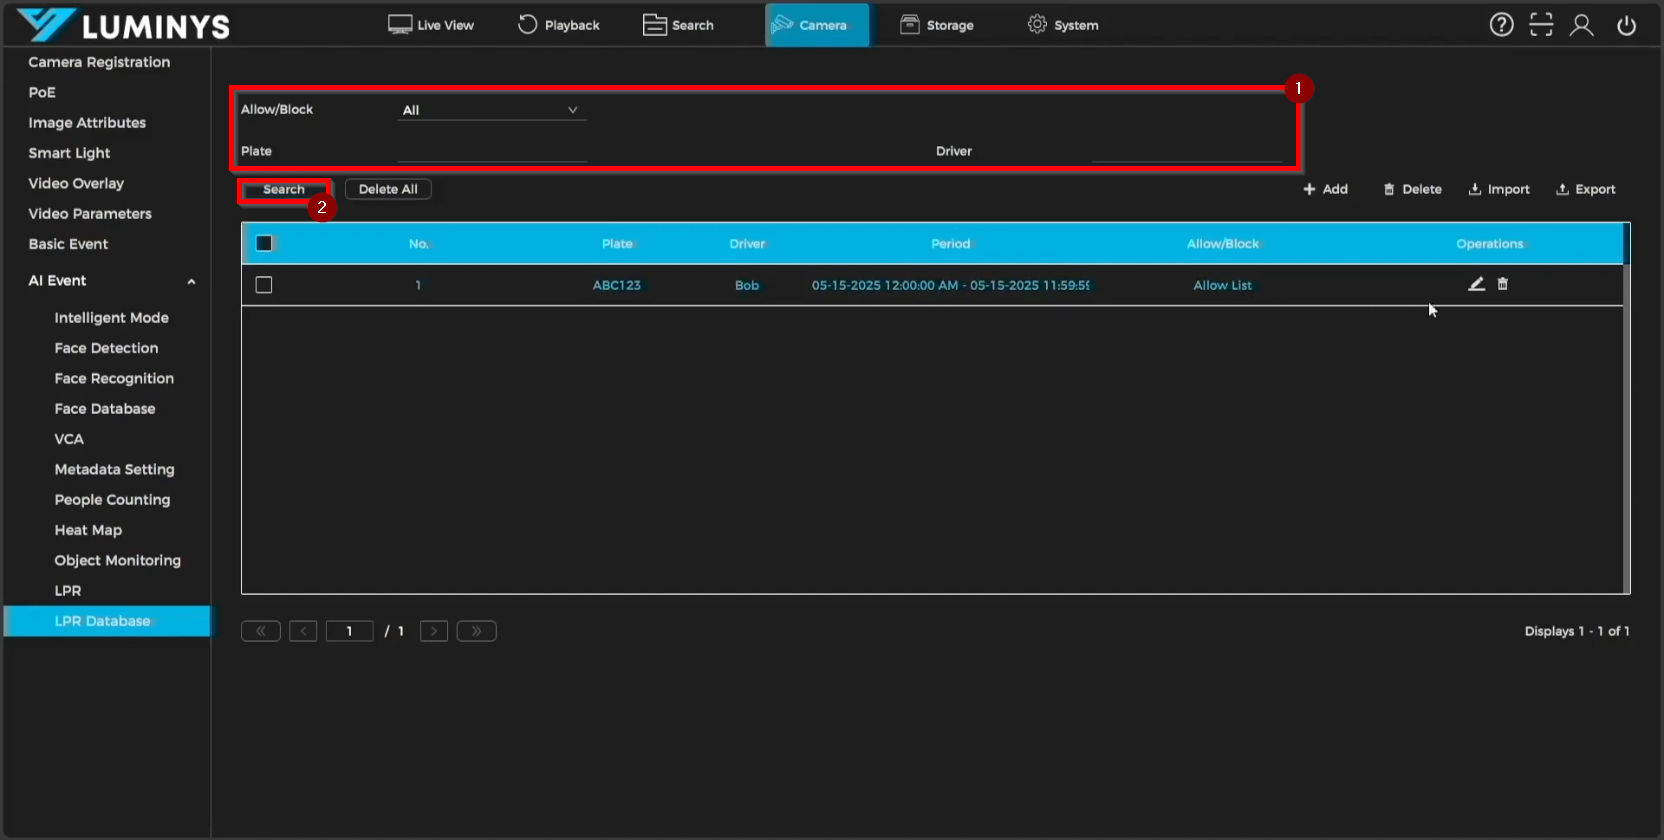
3. To search for added license plates, toggle between All, Allow, or Block list. Filtering can also be done by plate number or driver. After setting the desired criteria, click Search to display the matching license plates.
4. To delete a specific license plate, click the trash can icon (#1) next to the corresponding entry. To delete multiple license plates, select the desired entries and click the Delete icon (#3). To remove all license plates from the database, click the Delete All button.
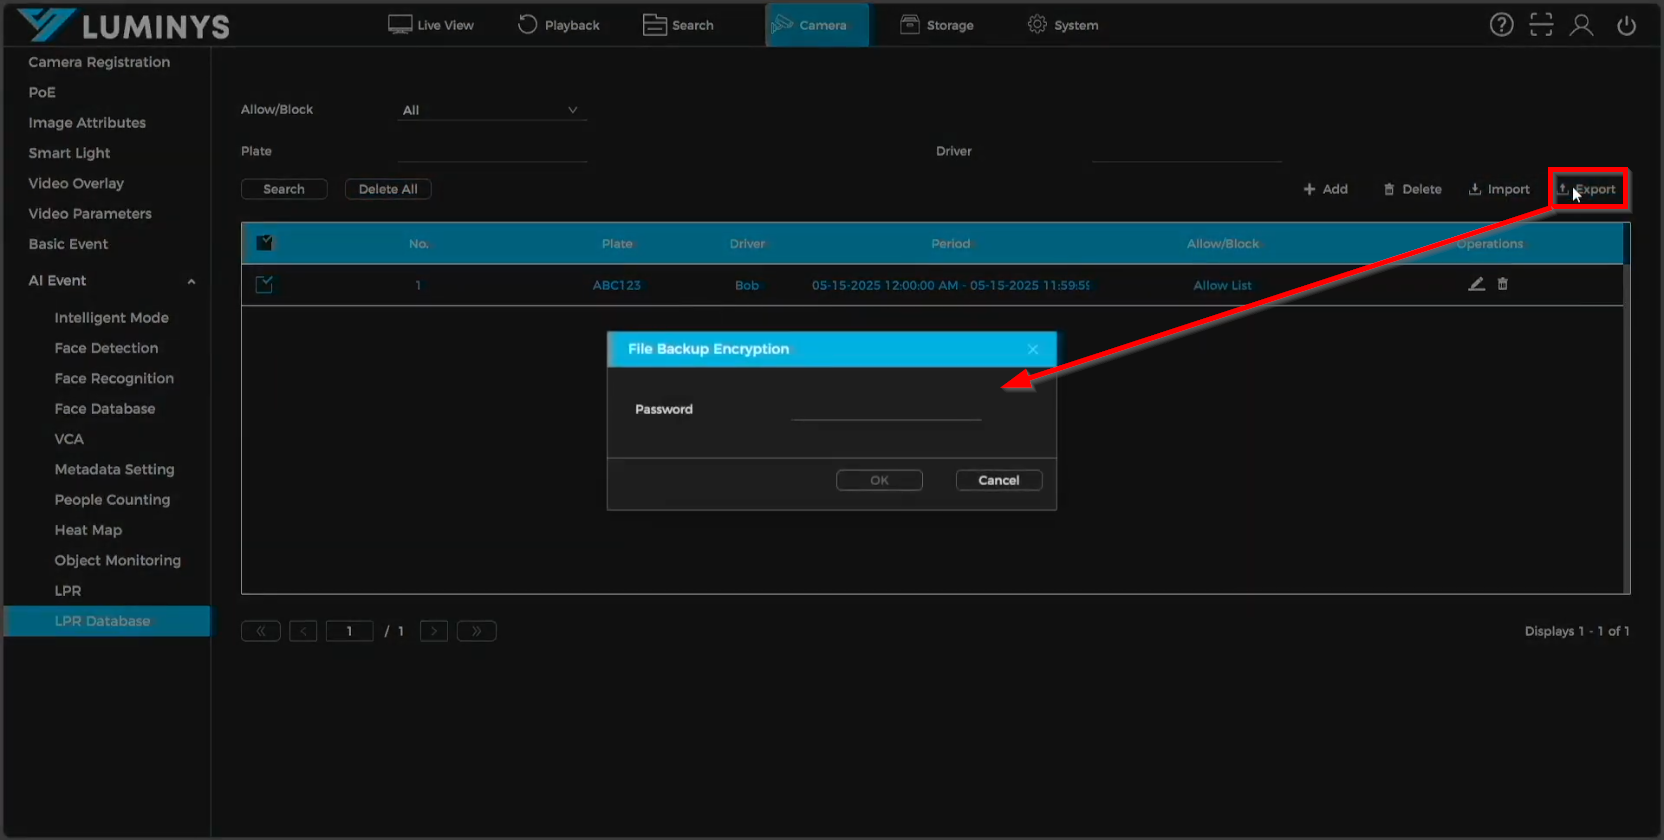
5. License plates can be exported from the NVR, and a password must be entered to encrypt the exported file.
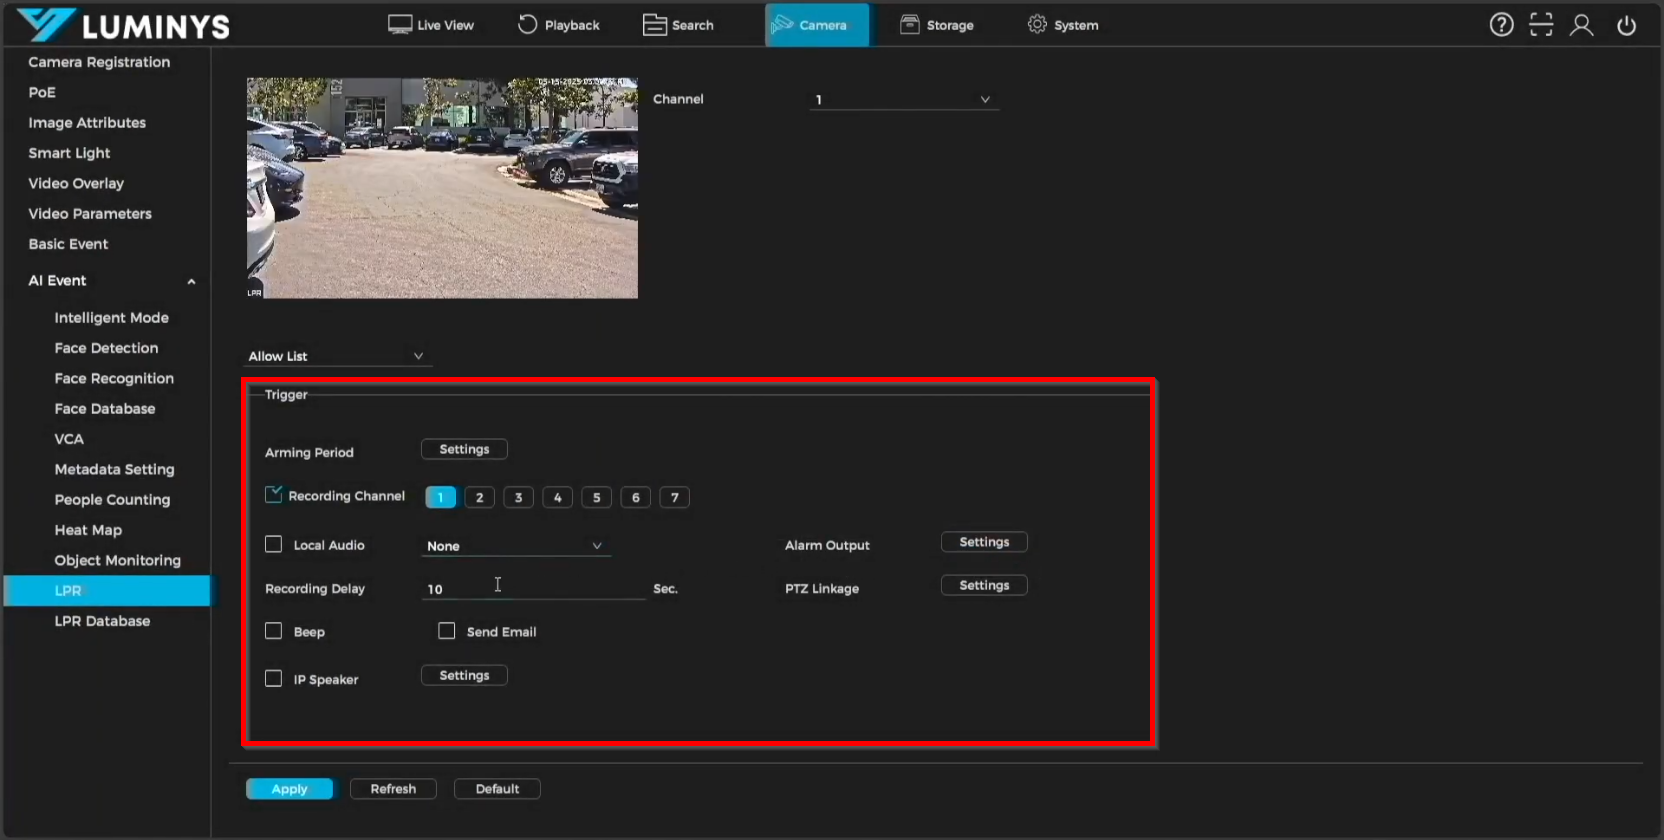
6. To apply the Allow/Block list license plates, navigate to the LPR tab on the left side panel. Three options are available: Standard for general license plates, Block List for license plates that are not permitted, and Allow List for permitted license plates.
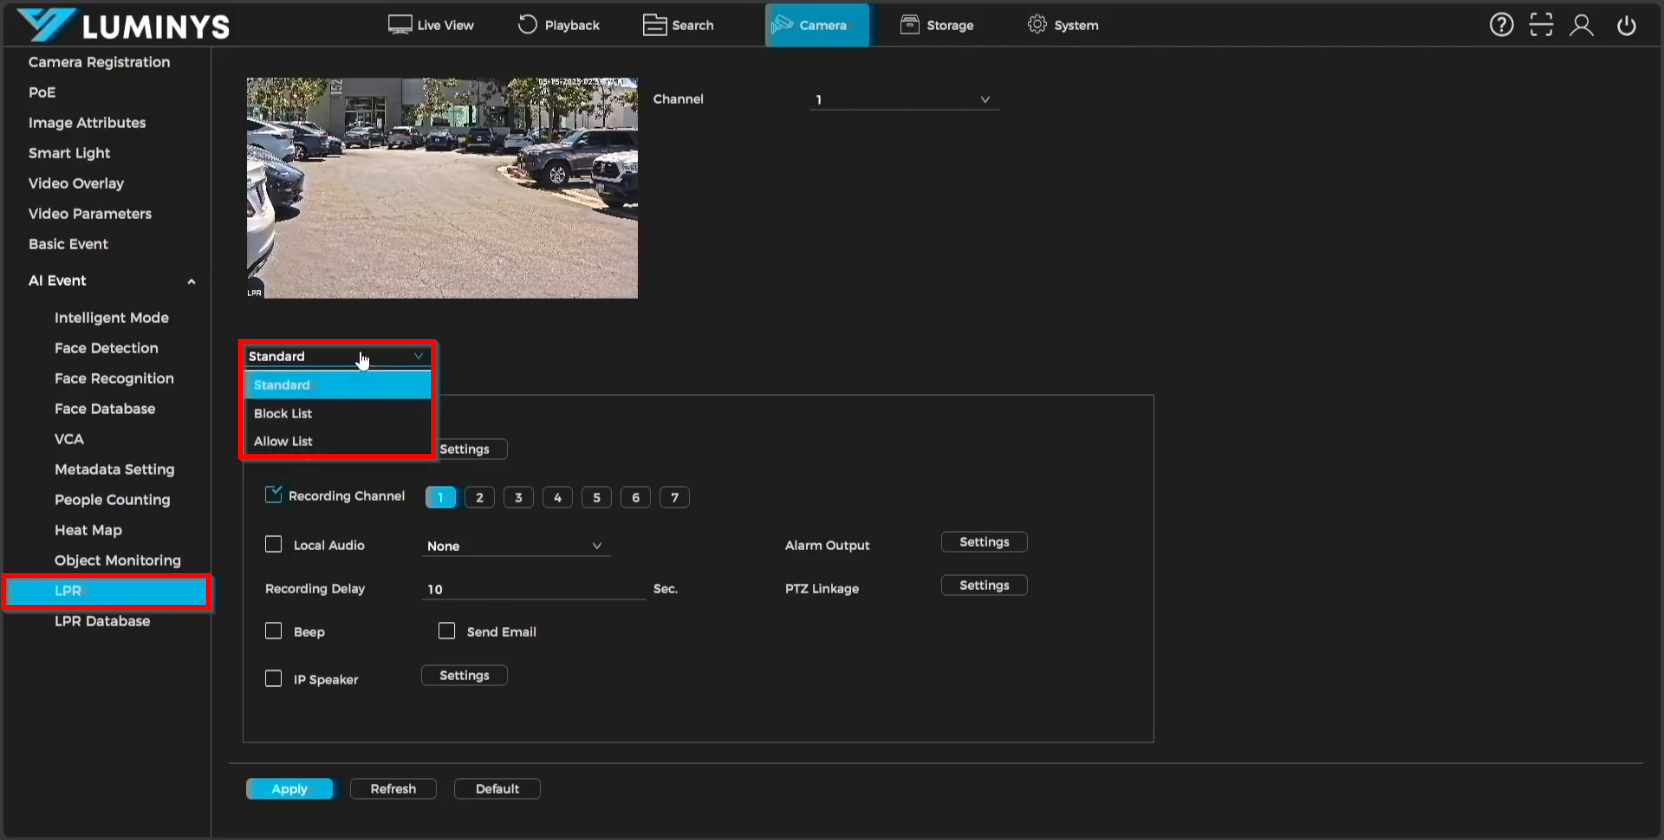
7. Under the Trigger section, various actions can be configured, including Arming Period, Recording Channel, Local Audio, Alarm Output, Recording Delay, PTZ Linkage, Beep, Send Email, and IP Speaker.
- Arming Period defines the schedule during which the list will be active.
- Recording Channel automatically selects the current channel by default but can be changed to another channel if needed.
- Local Audio enables the NVR’s built-in audio function.
- Alarm Output activates when external devices such as speakers or strobe lights are connected to the NVR; the alarm will trigger those devices according to their programmed behavior.
- Recording Delay sets the recording duration for each triggered event.
- PTZ Linkage allows a PTZ camera to perform a preset or patrol action when the list is triggered.
- Beep activates audible beeps from the NVR.
- Send Email uses the configured SMTP settings to notify via email when the list is triggered.
- IP Speaker refers to a Luminys external speaker connected to the NVR, which can broadcast pre-defined voice messages when activated.