LumiGuardian/Connect 4G Modem to Wi-Fi Network
LumiGuardian Connect 4G Modem to Wi-Fi Network
Description
This tutorial will go over how to connect 4G model to wi-fi network.
Prerequisites
- Computer needs to be connected to either Ethernet ports on the 4G modem.
Video Instructions
Coming Soon
Step by Step Instructions
1. Power on the 4G modem/router and plug an ethernet cable from a PC/Laptop to the ETH0 or ETH1 port.
2. Open up a web browser on the PC/Laptop and enter router’s default gateway IP; 192.168.1.1 to access modem login page. Default login credentials are
User: admin
Password: admin

3. At initial login, turn off the WWAN SIM option by going to Network > Link Management > WWAN

4. Once on the WWAN page, Set WWAN option Enabled > "Off" status

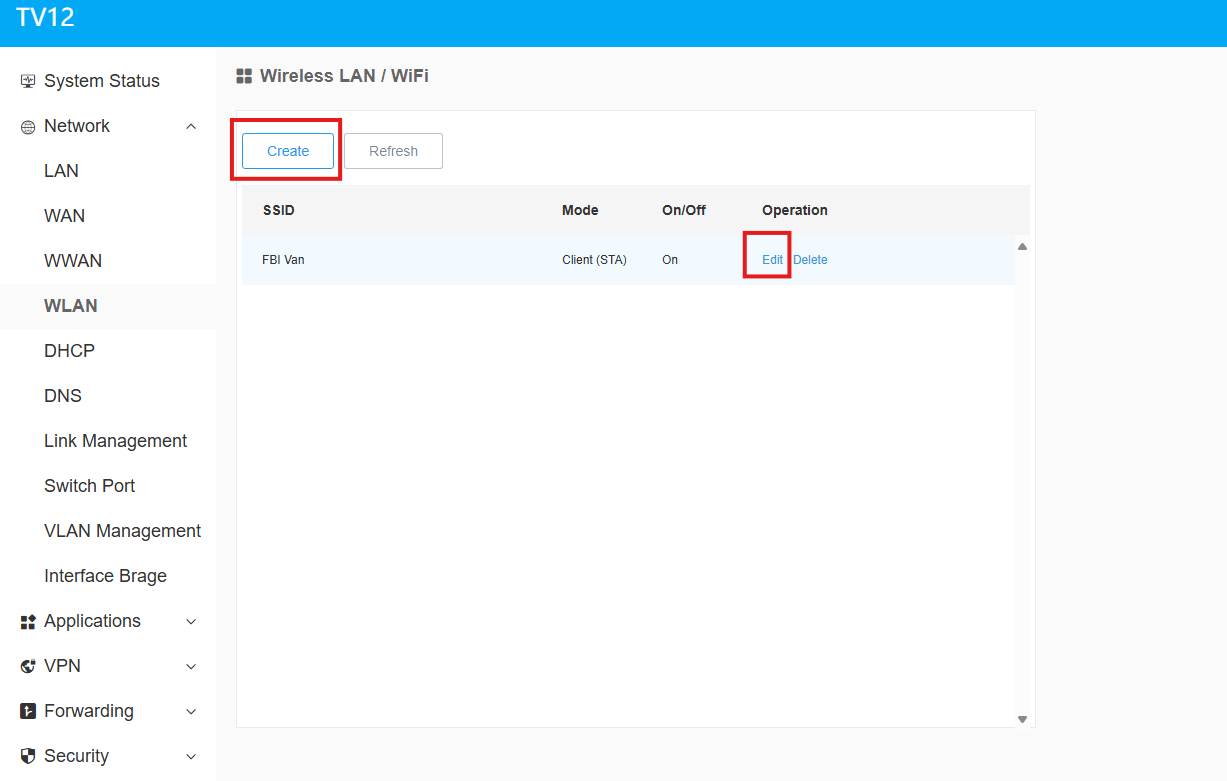
5. From the main menu go to Network > WLAN. Select the Create button to add or select the Edit option of an existing SSID for configuration.
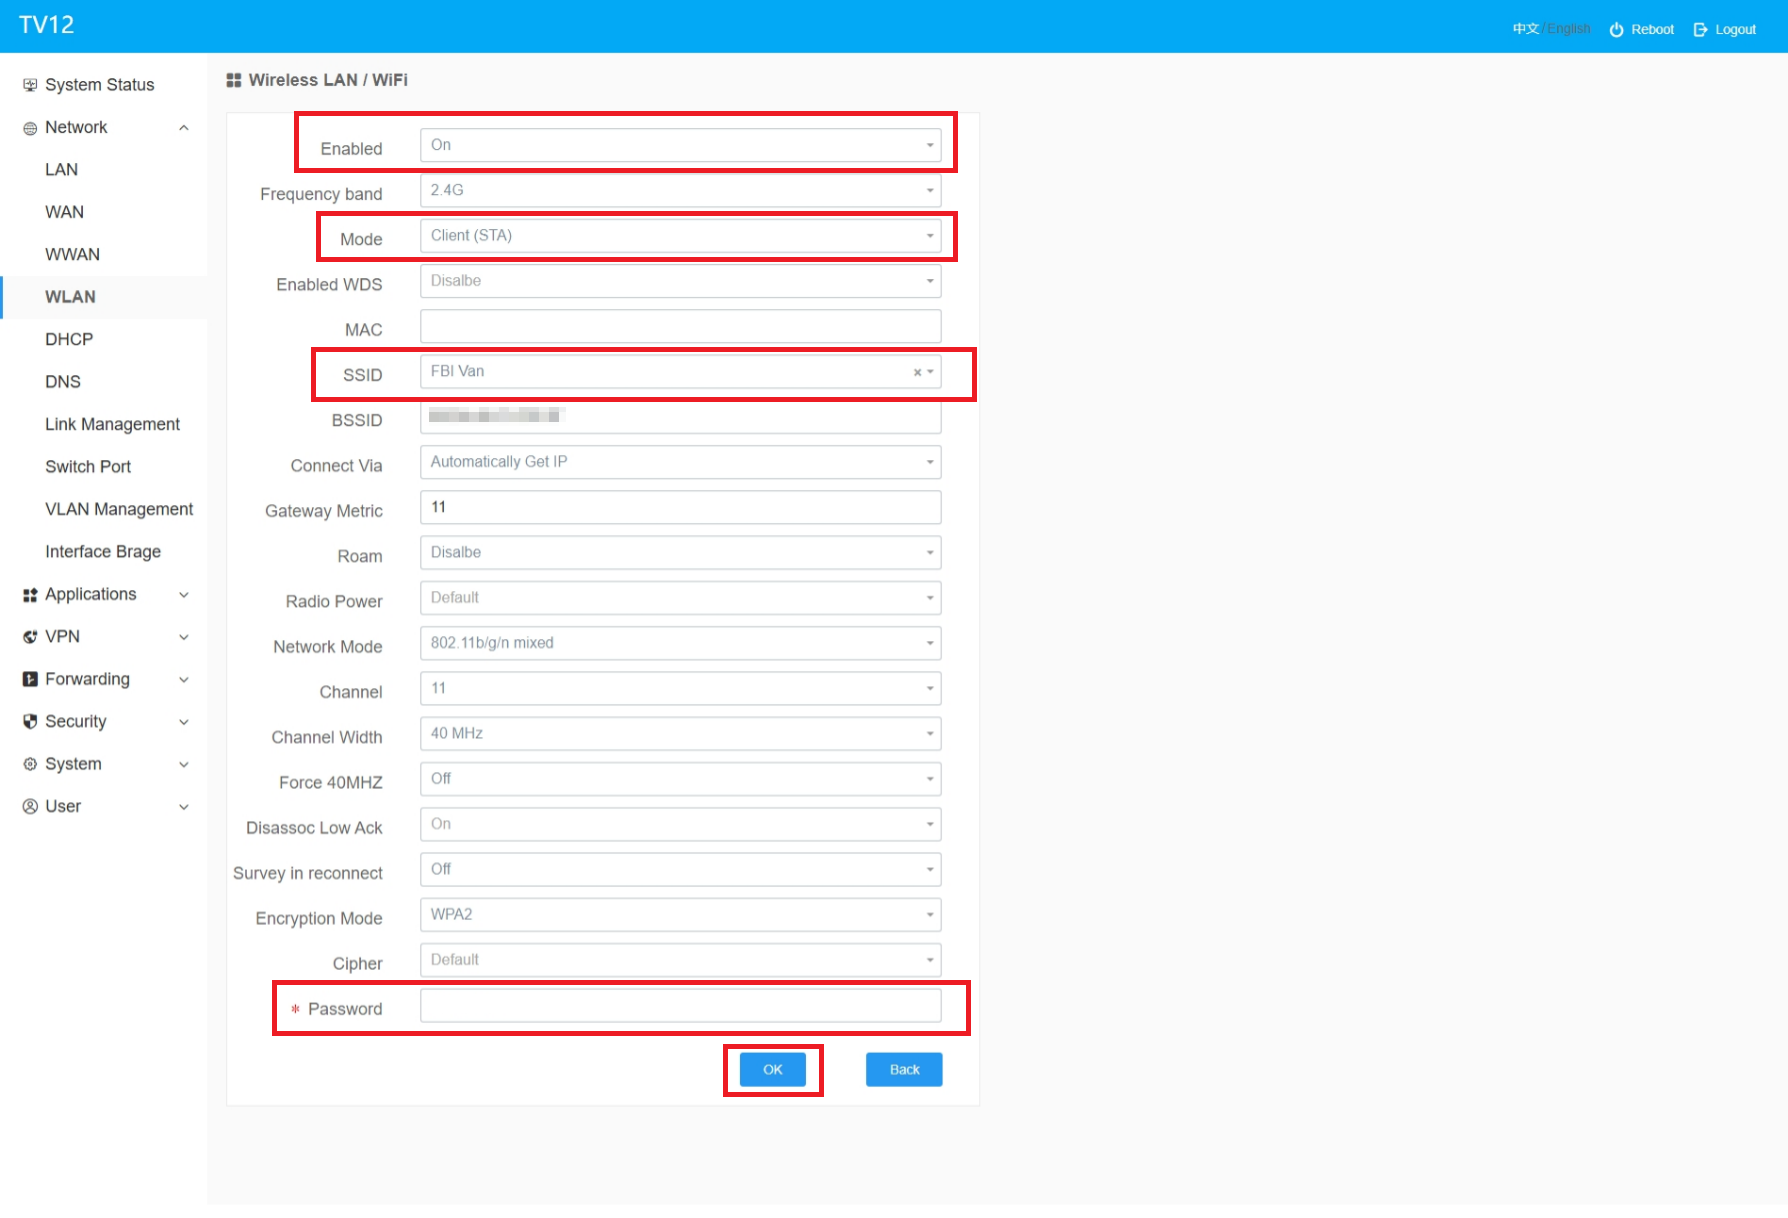
6. In the SSID menu, modify the following options:
- Enabled > set to On
- Mode > set to Client (STA)
- SSID > Select the drop-down menu to choose the desired Wifi SSID to connect with
- Password > Type in the password of the Wifi SSID
- Click the OK button on the bottom right corner of the page to confirm the settings
7. After settings change applied, modem/router will reboot. Login again to check System status. Internet Status should now say Online.

