Access Control/Initialization C-4MA: Difference between revisions
Techsupport (talk | contribs) No edit summary |
Techsupport (talk | contribs) No edit summary |
||
| (2 intermediate revisions by the same user not shown) | |||
| Line 2: | Line 2: | ||
<div class="lm-banner">[[File:LuminysMainPageBanner2.png]]</div> | <div class="lm-banner">[[File:LuminysMainPageBanner2.png]]</div> | ||
= <div class="center">Access Control Initialization and Basic Setup</div> = | = <div class="center">C-4MA Access Control Initialization and Basic Setup</div> = | ||
===Description=== | ===Description=== | ||
| Line 13: | Line 13: | ||
===Step by Step Instructions=== | ===Step by Step Instructions=== | ||
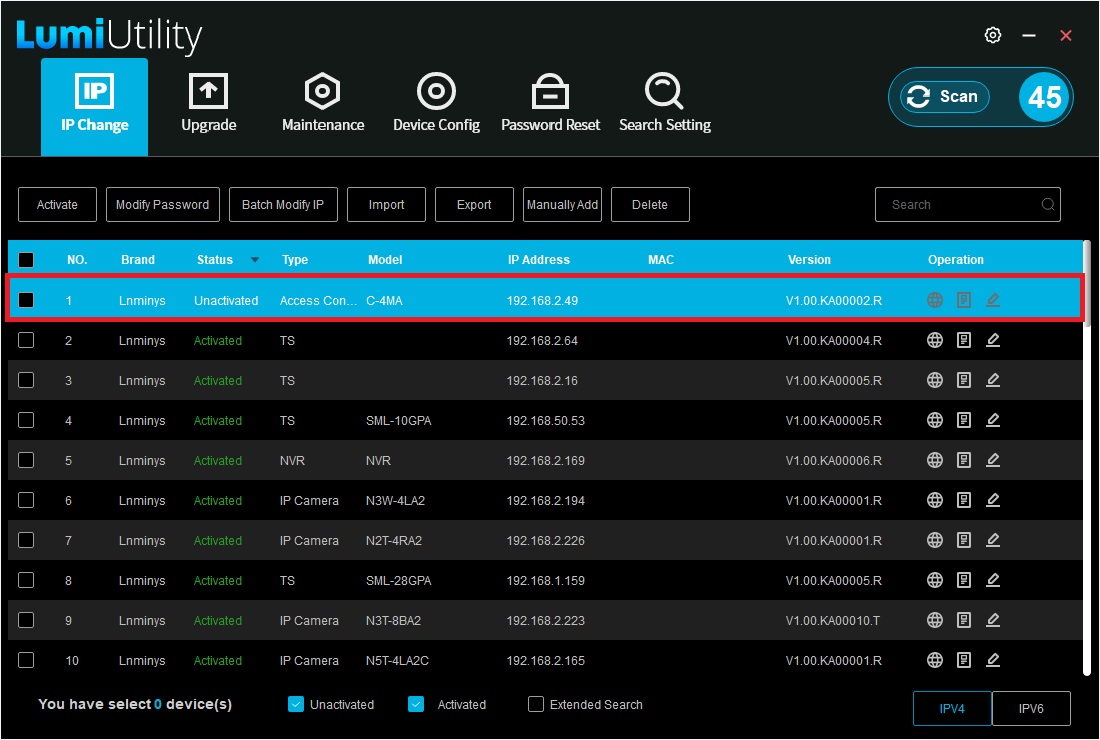
1. Open LumiUtility and locate the local IP address of the access controller. In the example below, the IP address is 192.168.2.49. | 1. Open LumiUtility and locate the local IP address of the access controller. In the example below, the IP address is 192.168.2.49. | ||
[[File:C-4MA_WebUI_Initialization_1.png|1024px|link=https://wiki.luminyscorp.com/images/c/c4/C-4MA_WebUI_Initialization_1.png]] | [[File:C-4MA_WebUI_Initialization_1.png|1024px|link=https://wiki.luminyscorp.com/images/c/c4/C-4MA_WebUI_Initialization_1.png]] | ||
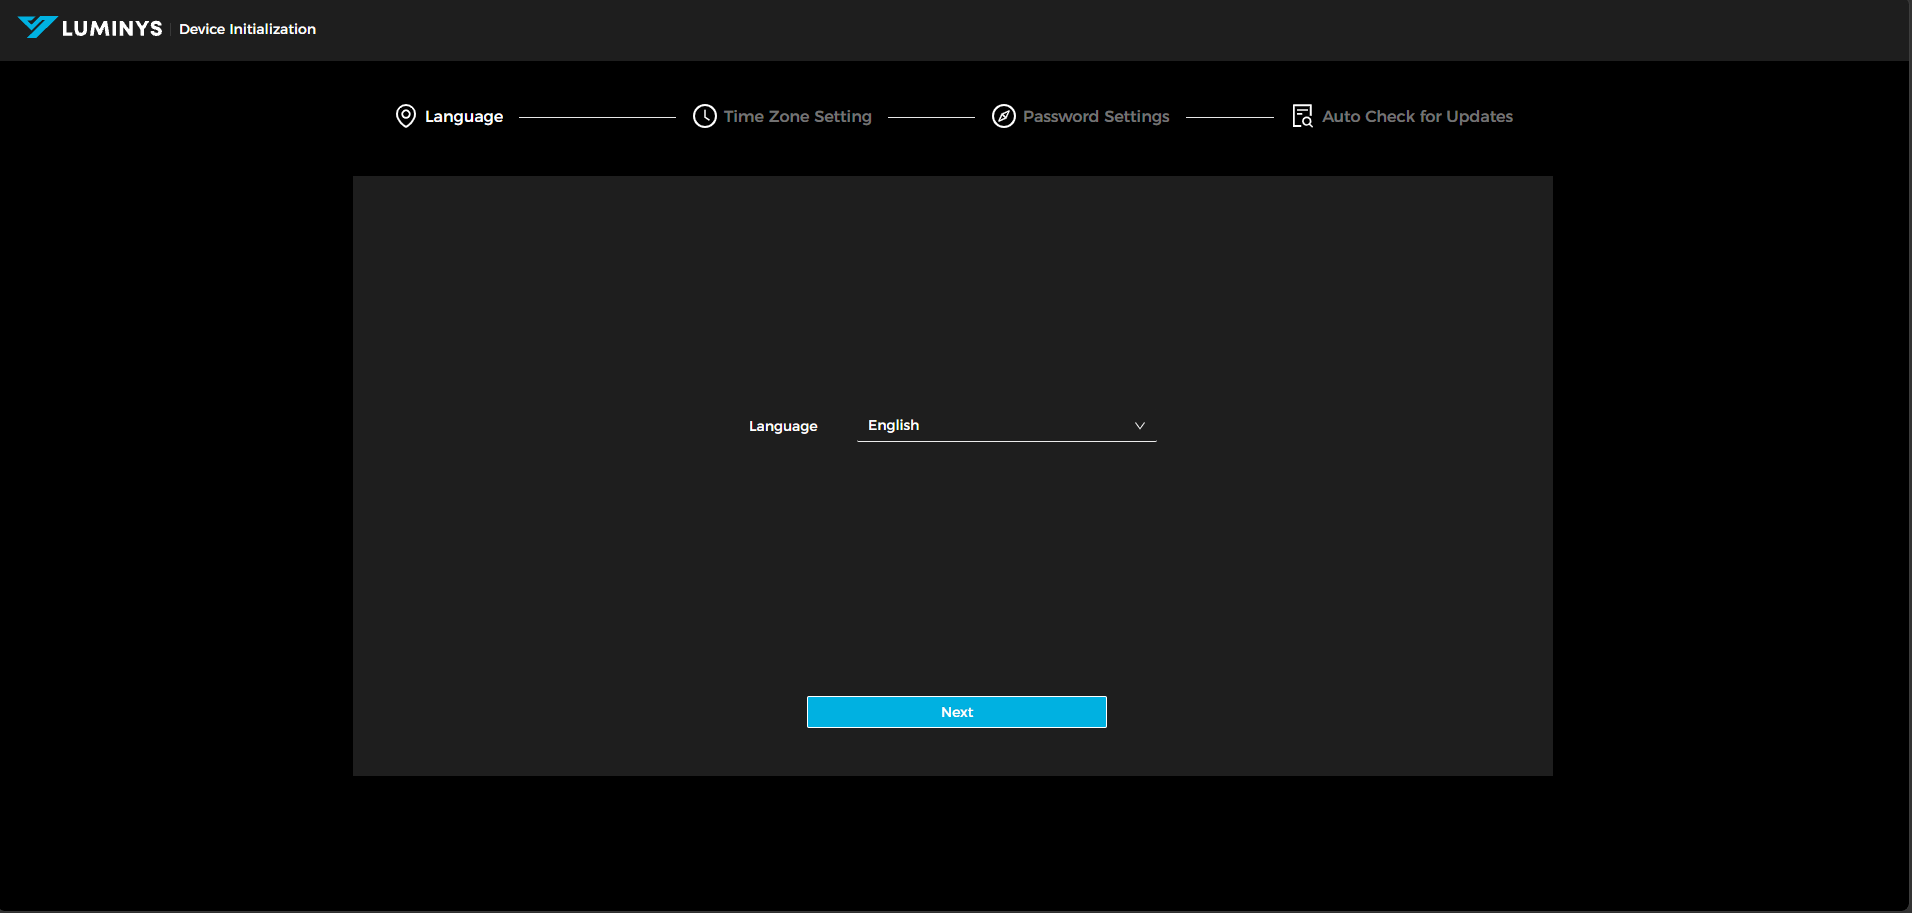
2. After entering the local IP address into a web browser, the screen shown below will appear. Select your preferred language, then click "Next." | |||
[[File:C-4MA_WebUI_Initialization_2.png|1024px|link=https://wiki.luminyscorp.com/images/3/39/C-4MA_WebUI_Initialization_2.png]] | |||
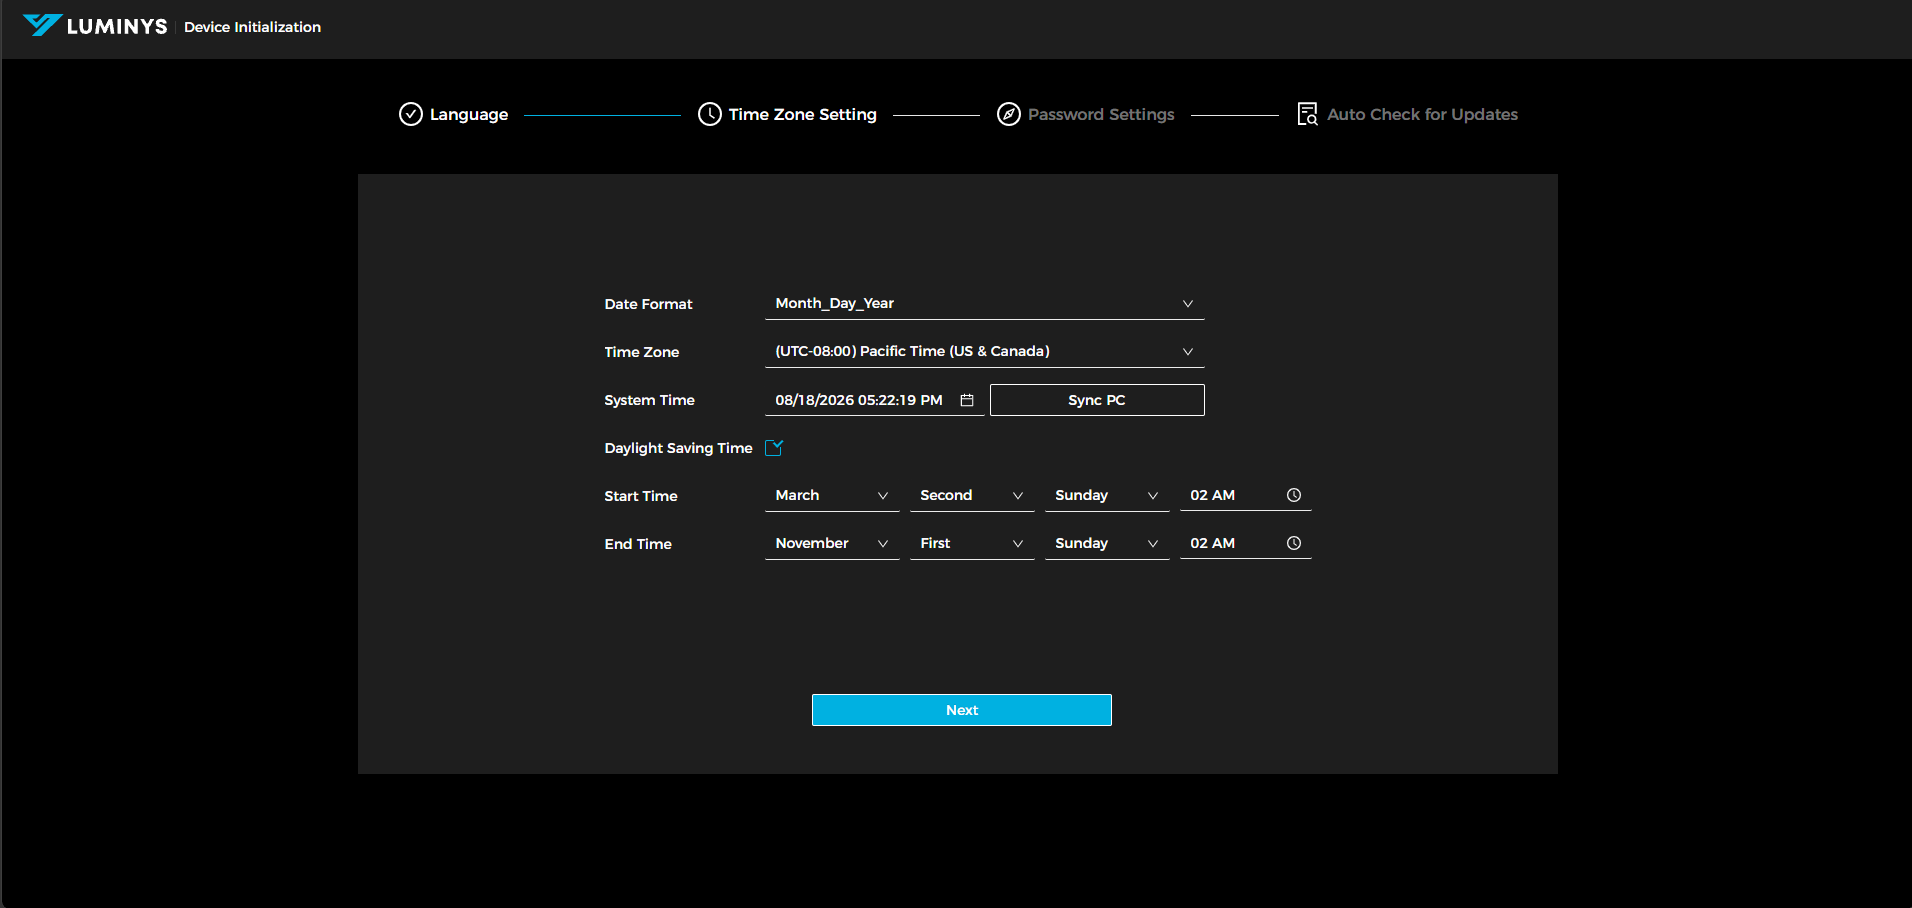
3. Adjust the time zone settings for the access control unit, then click "Next" to continue. | |||
[[File:C-4MA_WebUI_Initialization_3.png|1024px|link=https://wiki.luminyscorp.com/images/2/22/C-4MA_WebUI_Initialization_3.png]] | |||
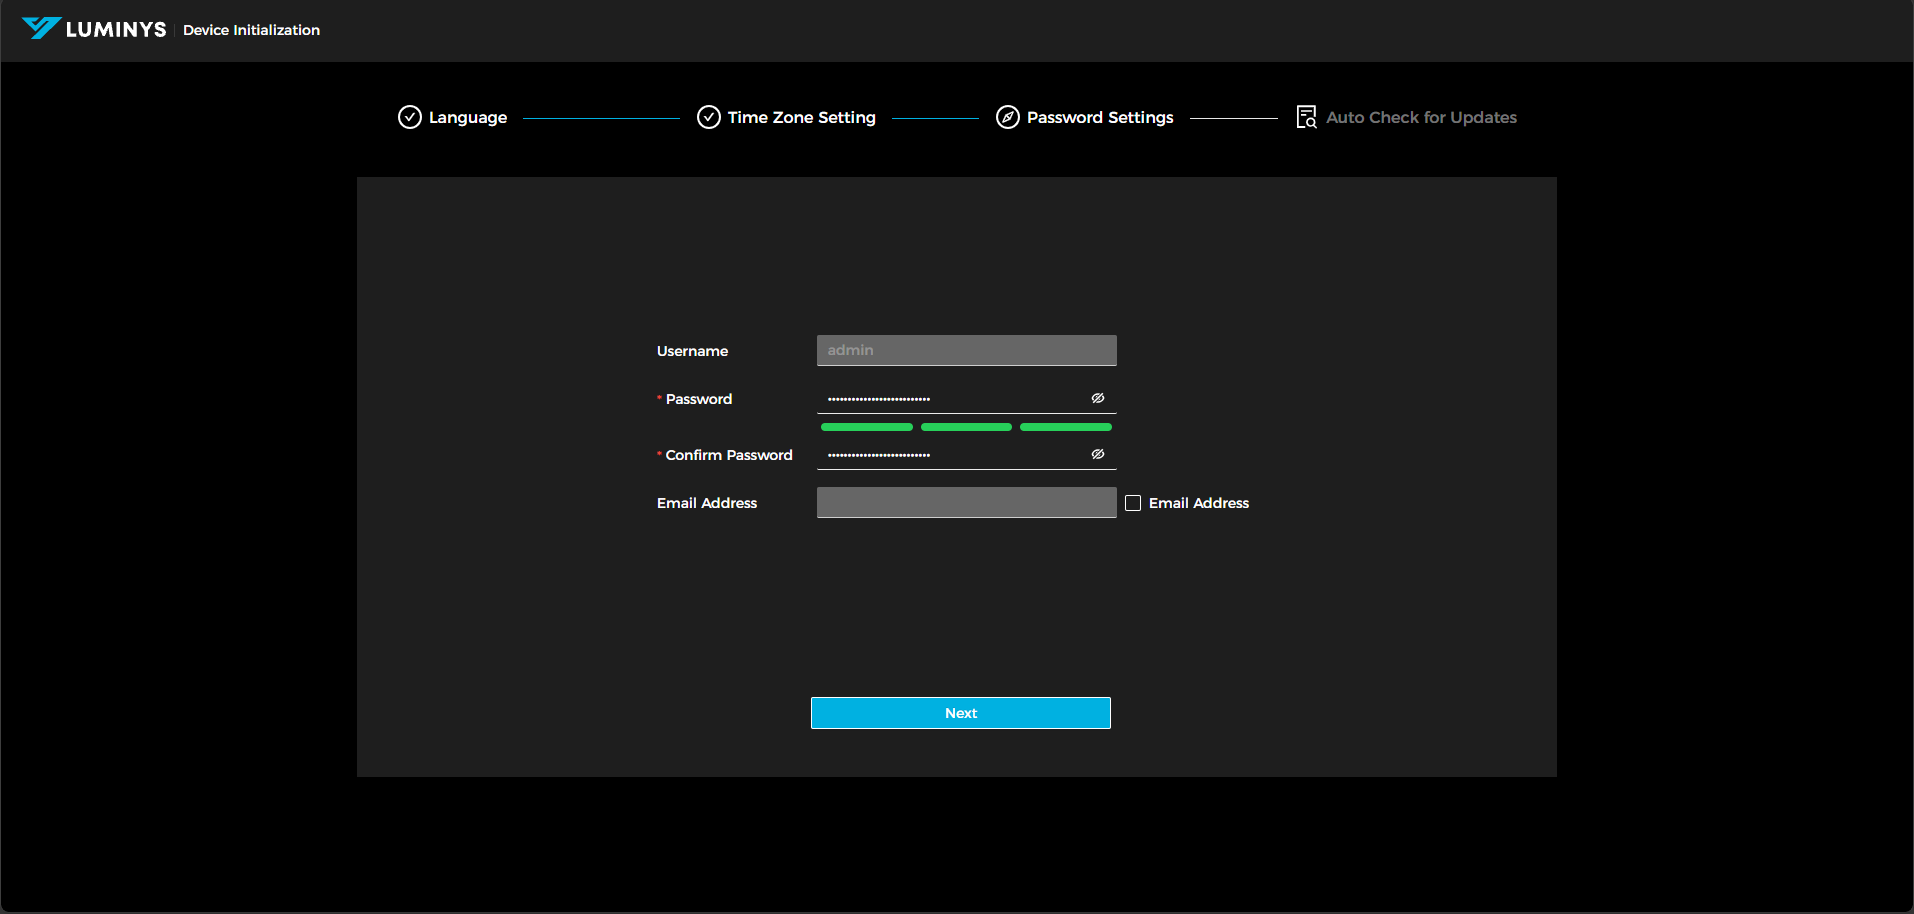
4. Set the administrator password and email address. Providing an email address is optional. | |||
[[File:C-4MA_WebUI_Initialization_4.png|1024px|link=https://wiki.luminyscorp.com/images/5/5a/C-4MA_WebUI_Initialization_4.png]] | |||
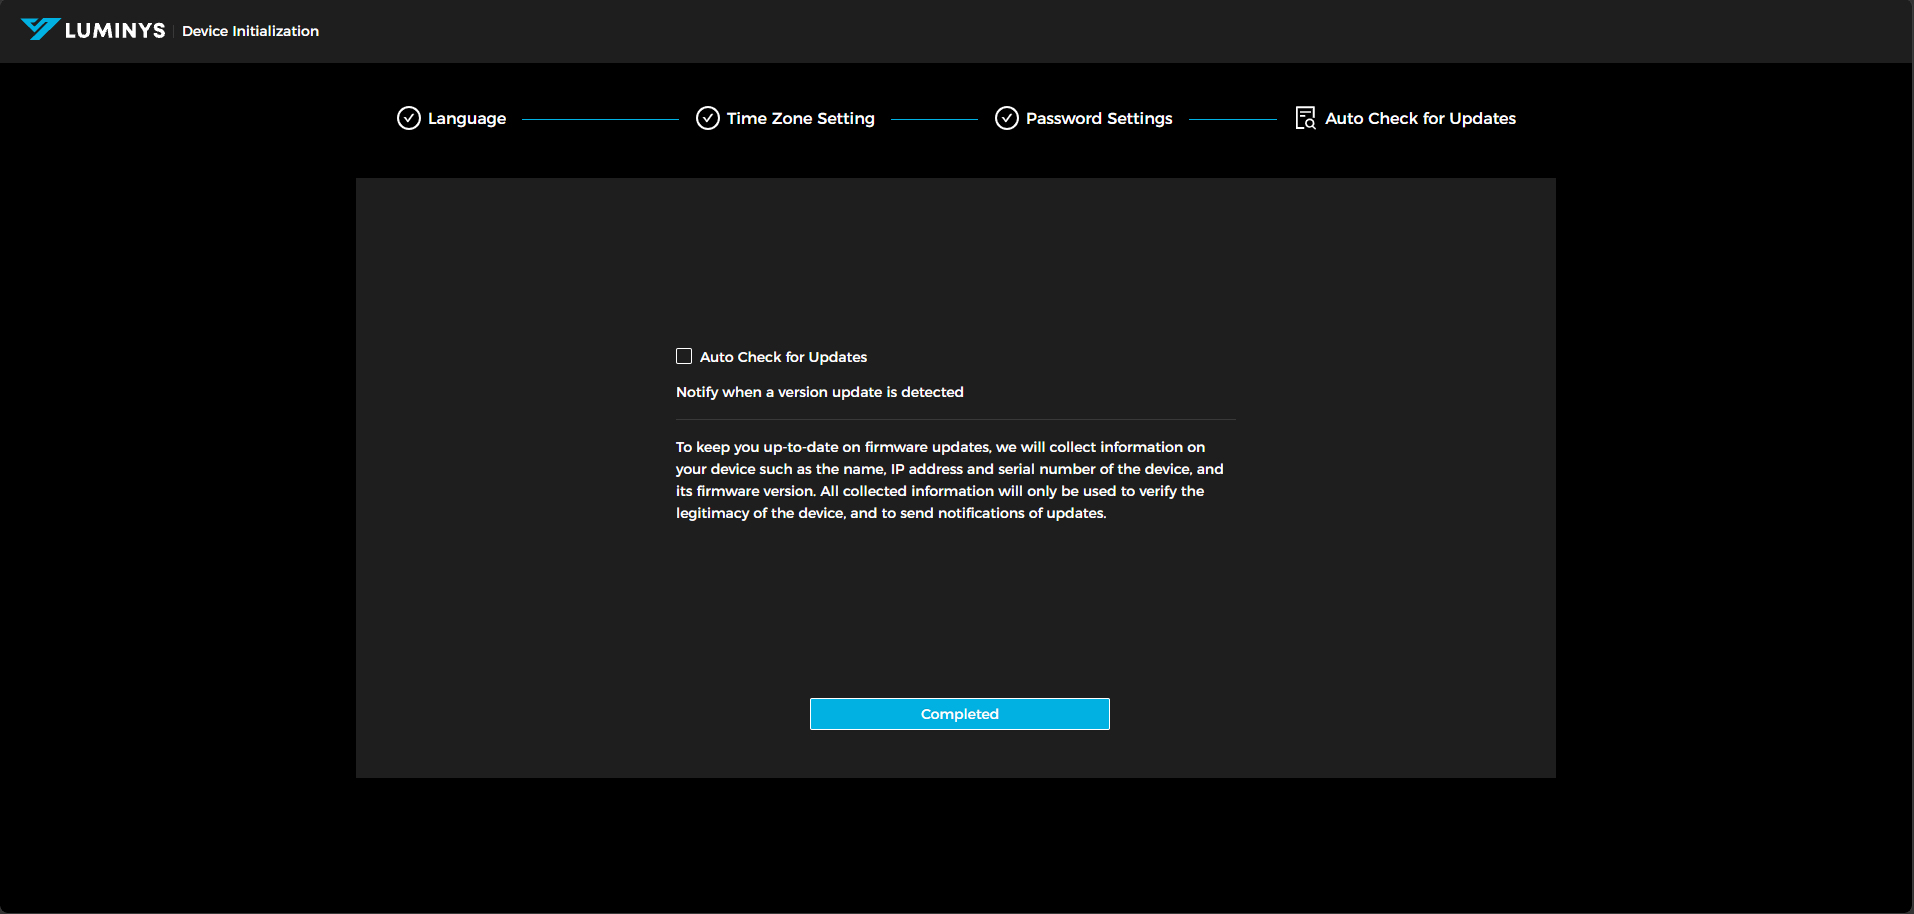
5. Select the checkbox if you want to enable automatic update checks. This is optional. | |||
[[File:C-4MA_WebUI_Initialization_5.png|1024px|link=https://wiki.luminyscorp.com/images/c/c5/C-4MA_WebUI_Initialization_5.png]] | |||
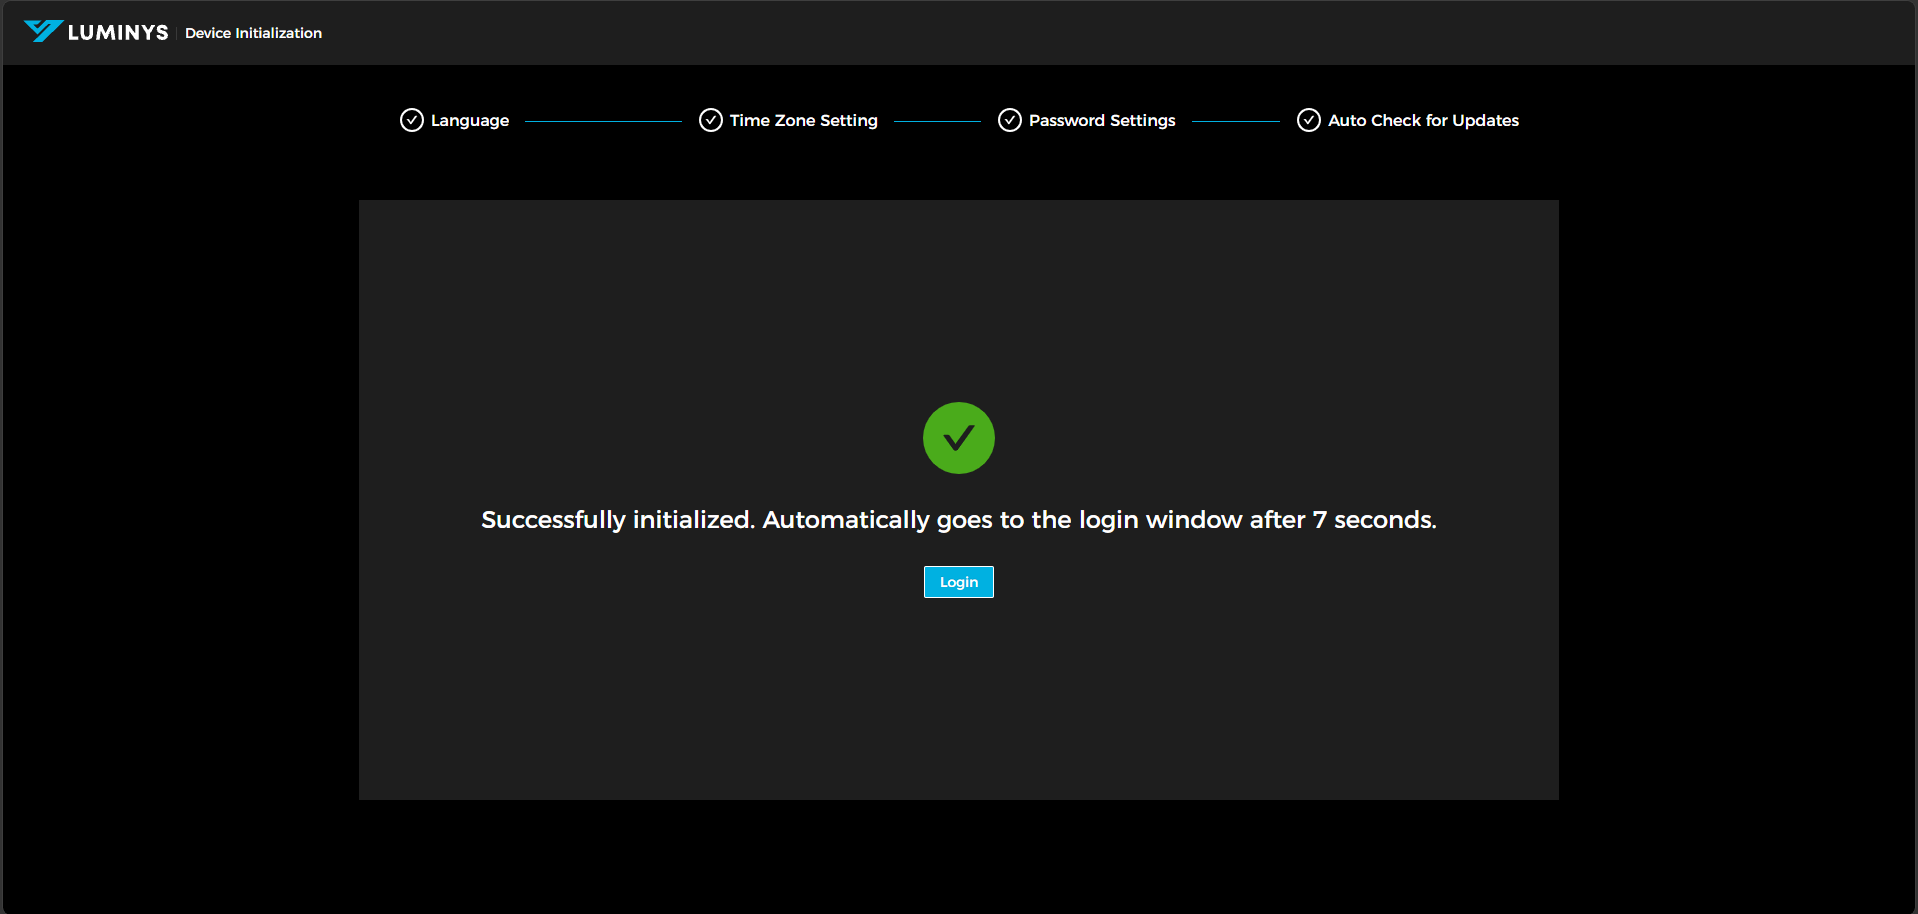
6. After that, you can either wait 10 seconds or click Login to be redirected to the controller's login page. | |||
[[File:C-4MA_WebUI_Initialization_6.png|1024px|link=https://wiki.luminyscorp.com/images/a/ac/C-4MA_WebUI_Initialization_6.png]] | |||
Latest revision as of 15:07, 19 August 2026
☰ Navigation Menu ▾


C-4MA Access Control Initialization and Basic Setup
Description
This tutorial will go over how to initialize access control and some basic setup.
Prerequisites
- Access control powered and connected on local network.
- LumiUtility Installed
Step by Step Instructions
1. Open LumiUtility and locate the local IP address of the access controller. In the example below, the IP address is 192.168.2.49.
2. After entering the local IP address into a web browser, the screen shown below will appear. Select your preferred language, then click "Next."
3. Adjust the time zone settings for the access control unit, then click "Next" to continue.
4. Set the administrator password and email address. Providing an email address is optional.
5. Select the checkbox if you want to enable automatic update checks. This is optional.
6. After that, you can either wait 10 seconds or click Login to be redirected to the controller's login page.