Access Control/User Management C-4MA: Difference between revisions
Techsupport (talk | contribs) |
Techsupport (talk | contribs) |
||
| (5 intermediate revisions by the same user not shown) | |||
| Line 8: | Line 8: | ||
===Prerequisites=== | ===Prerequisites=== | ||
* https://wiki.luminyscorp.com/Access_Control/Initialization_C-4MA Initialization | * [https://wiki.luminyscorp.com/Access_Control/Initialization_C-4MA Initialization] | ||
===Step by Step Instructions=== | ===Step by Step Instructions=== | ||
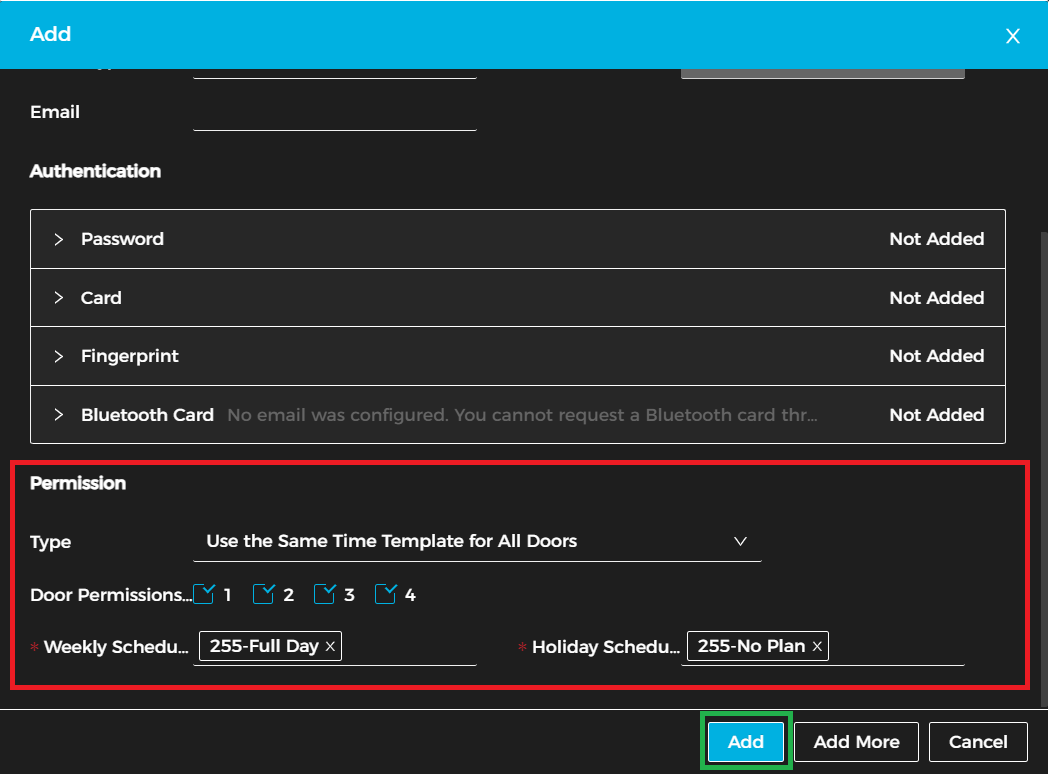
1. After logging in, the following screen will be displayed.<br> | |||
<span style="color:red"><b>(1)</b></span> <b>Add:</b> Add a user to the list.<br> | |||
<span style="color:red"><b>(2)</b></span> <b>Delete:</b> Delete a user from the list.<br> | |||
<span style="color:red"><b>(3)</b></span> <b>Clear:</b> Delete all users from the list.<br> | |||
<span style="color:red"><b>(4)</b></span> <b>Refresh:</b> Refresh the user list.<br> | |||
<span style="color:red"><b>(5)</b></span> <b>Export:</b> Export the current user list to an Excel spreadsheet.<br> | |||
<span style="color:red"><b>(6)</b></span> <b>Import:</b> Import a user list from an Excel spreadsheet using the provided template.<br> | |||
<span style="color:red"><b>(7)</b></span> <b>Search:</b> Search users by user ID or name.<br> | |||
[[File:C-4MA_User_Management_1.png|1024px|link=https://wiki.luminyscorp.com/images/6/60/C-4MA_User_Management_1.png]] | |||
2. After clicking Add, enter the user's basic information.<br> | |||
[[File:C-4MA_User_Management_2.png|1024px|link=https://wiki.luminyscorp.com/images/6/61/C-4MA_User_Management_2.png]] | |||
3. Assign an authentication method to the user. The available options are:<br> | |||
a. Password (requires a keypad)<br> | |||
b. Card (requires a proximity card reader)<br> | |||
c. Fingerprint (requires a fingerprint reader)<br> | |||
d. Bluetooth Card (requires a Lumiviewer mobile account)<br> | |||
[[File:C-4MA_User_Management_3.png|1024px|link=https://wiki.luminyscorp.com/images/d/d1/C-4MA_User_Management_3.png]] | |||
4. Lastly, configure the user's permissions, including:</b> | |||
a. Type: Choose whether to use the same schedule for all doors or different schedules for each door.</b> | |||
b. Door Permissions: Select the doors the user can access.</b> | |||
c. Weekly Schedule: Define the days and times when access is permitted.</b> | |||
d. Holiday Schedule: Specify any holiday access restrictions or exceptions.</b> | |||
After all permissions have been configured, click <span style = "color:green"><b>Add</b></span> to complete the user setup process. | |||
[[File:C-4MA_User_Management_4.png|1024px|link=https://wiki.luminyscorp.com/images/0/0e/C-4MA_User_Management_4.png]] | |||
Latest revision as of 17:40, 21 August 2026
☰ Navigation Menu ▾


User Management
Description
This tutorial provides a brief introduction to user management for the C-4MA 4-door controller.
Prerequisites
Step by Step Instructions
1. After logging in, the following screen will be displayed.
(1) Add: Add a user to the list.
(2) Delete: Delete a user from the list.
(3) Clear: Delete all users from the list.
(4) Refresh: Refresh the user list.
(5) Export: Export the current user list to an Excel spreadsheet.
(6) Import: Import a user list from an Excel spreadsheet using the provided template.
(7) Search: Search users by user ID or name.
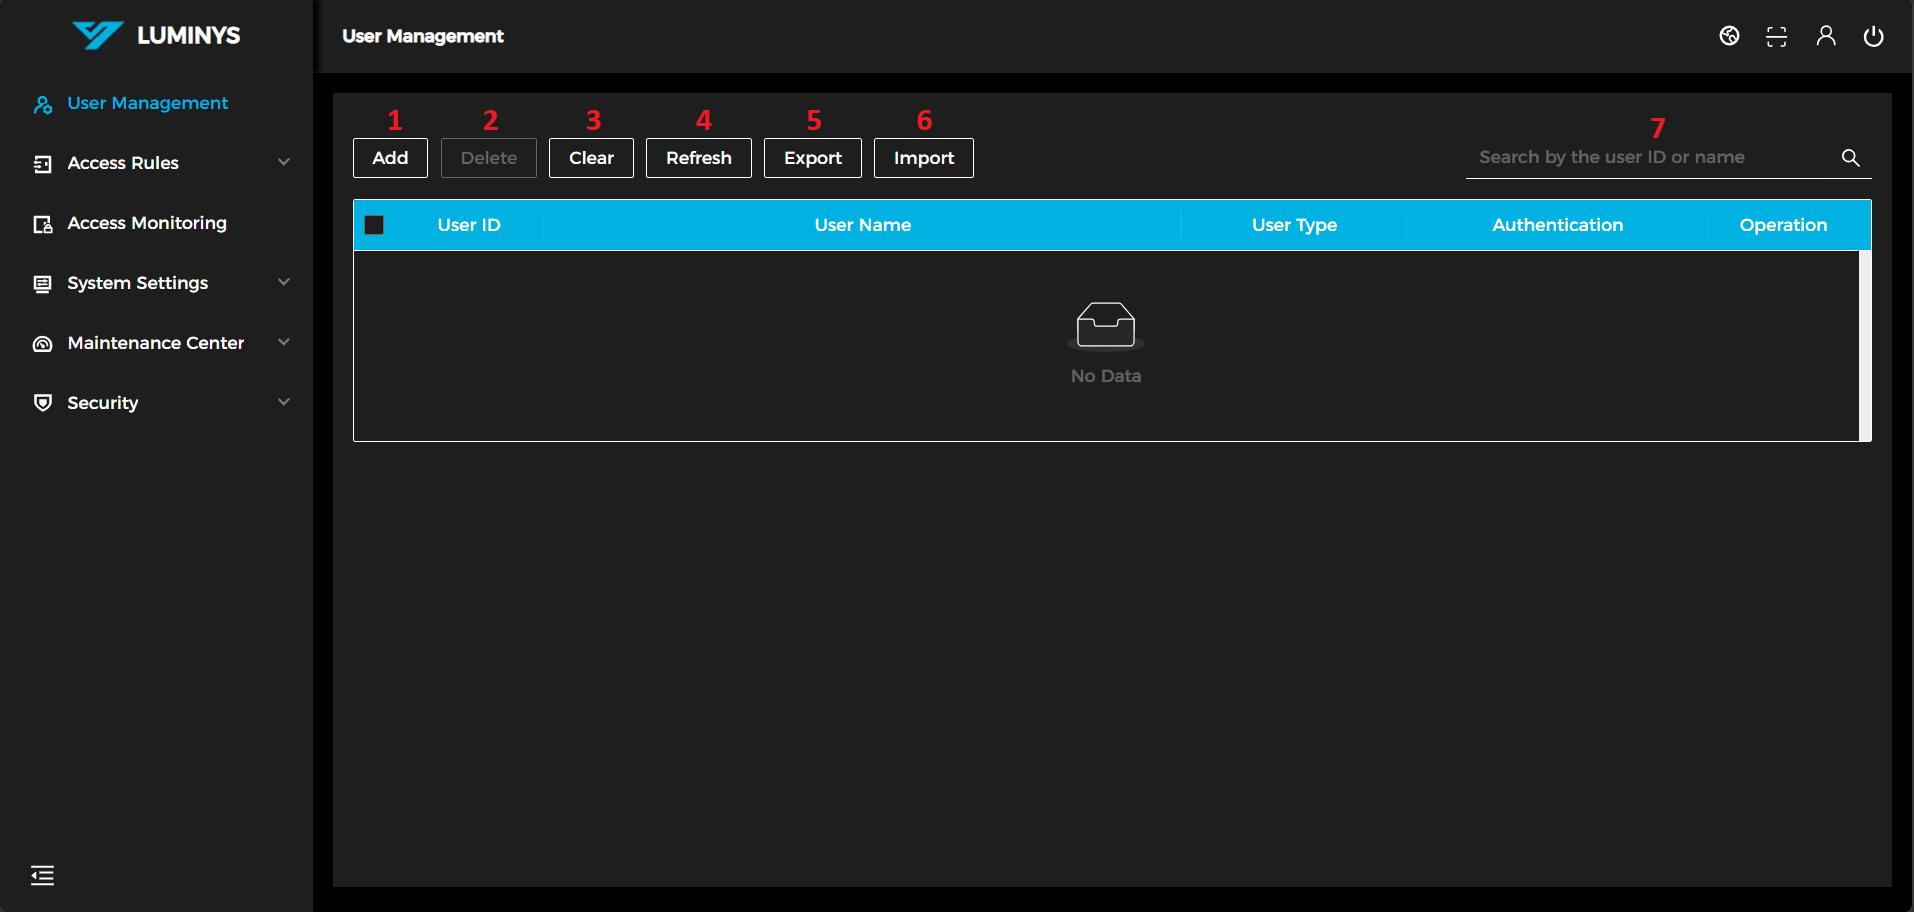
2. After clicking Add, enter the user's basic information.
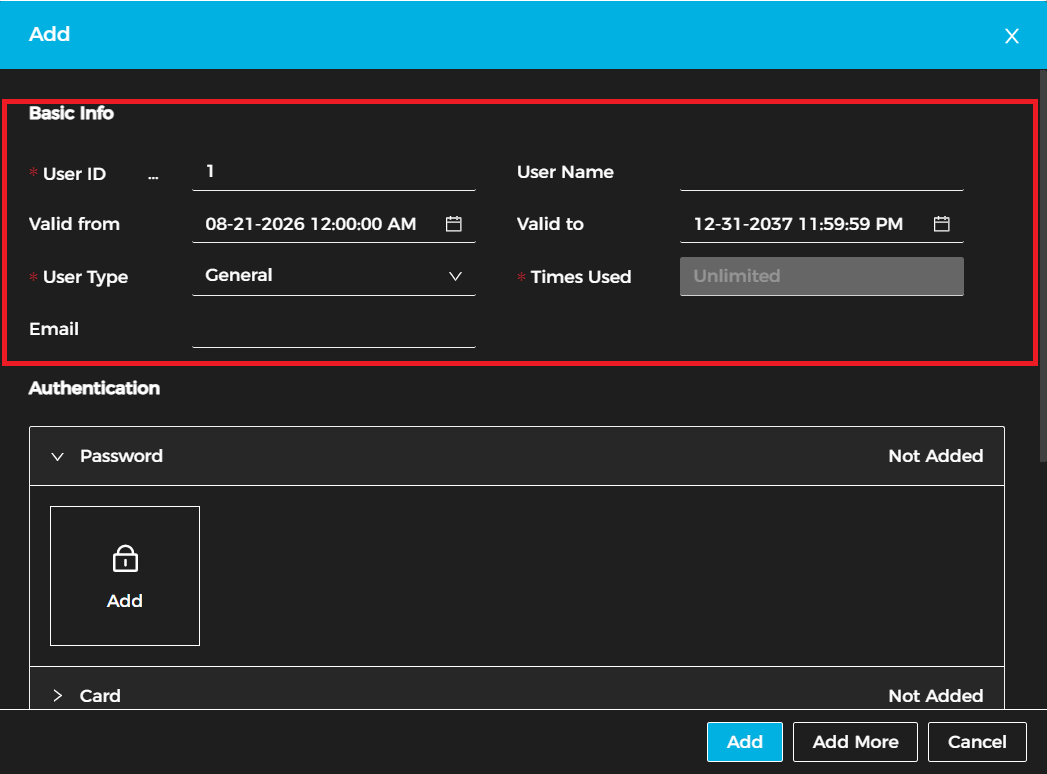
3. Assign an authentication method to the user. The available options are:
a. Password (requires a keypad)
b. Card (requires a proximity card reader)
c. Fingerprint (requires a fingerprint reader)
d. Bluetooth Card (requires a Lumiviewer mobile account)
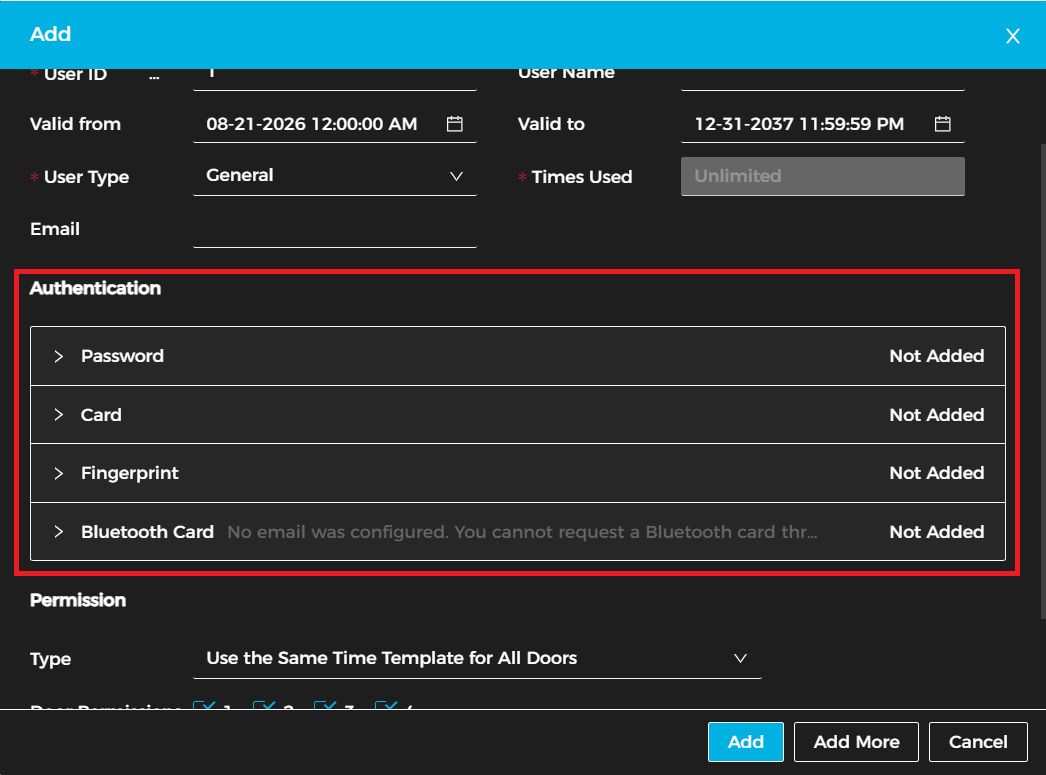
4. Lastly, configure the user's permissions, including: a. Type: Choose whether to use the same schedule for all doors or different schedules for each door. b. Door Permissions: Select the doors the user can access. c. Weekly Schedule: Define the days and times when access is permitted. d. Holiday Schedule: Specify any holiday access restrictions or exceptions.
After all permissions have been configured, click Add to complete the user setup process.